
:max_bytes(150000):strip_icc():format(webp)/CODA-d4dd2a9b6c3d4a008a05c9718c9bce1e.jpg)
2024 Approved Boost Video Clarity Top 10 Free Online Enhancement Tools
Boost Video Clarity: Top 10 Free Online Enhancement Tools
Top 9 Best Online Video Quality Enhancer for FREE

Ollie Mattison
Apr 24, 2024• Proven solutions
In 2024, the average person will watch 17 hours of video content every week. Improving the quality of your videos can make your content more noticeable.
Fortunately, there are many excellent video quality enhancer tools to choose from. These tools can enhance both the visual and audio clarity of your content. Ultimately, this will enhance your professionalism and reputation as a trustworthy creator.
Are you wondering where to start when selecting an effective, user-friendly video enhancer? Here are some of our top recommendations to help you begin.
- Part 2: 5 Free AI Video Enhancers [Software Options]
- Part 3: Top 2 4K Video Enhancer Online Free Options
- Part 4: How to Choose the Best Video Enhancer
- In this article
Why Do You Need an AI Video Enhancer?
AI video enhancers utilize generative AI to remove noise, stabilize shaky videos, upscale, or enhance their overall appearance. These tools employ machine learning and neural network techniques to analyze videos and apply different effects for enhancement. Trained on extensive datasets, most AI video enhancers can understand video content like faces, scenes, and objects, automatically adjusting imperfections.
Using an AI video enhancer is an excellent way to boost video quality quickly. Unlike traditional methods, AI speeds up the enhancement process significantly. There are additional benefits, such as:
- **Enhanced Media Quality:**AI video enhancers enhance videos automatically with advanced algorithms, maintaining quality, clarity, and detail.
- Noise Reduction: Many AI video enhancer tools effectively reduce visual noise in videos, resulting in cleaner and clearer footage.
- **Reviving Old Clip:**AI video enhancers are adept at restoring old video footage to make it appear more vibrant.
5 Free AI Video Enhancers [Software Options]
Are blurry videos on your large screen getting on your nerves? Thanks to advancements in artificial intelligence (AI), you can now enhance your low-resolution videos for a crystal-clear viewing experience.
Whether you’re a video editor, content creator, or streamer, incorporating an AI video upscaler into your toolkit is a wise choice. Here are the top 5 picks for the best free AI video enhancer software to improve your video editing.
1.Wondershare Filmora - AI Video Enhancer

Pricing:Filmora offers a free trial without exporting.
Wondershare Filmora stands out in video editing by combining comprehensive editing features with AI-powered enhancement tools. With 4K editing, Filmora ensures videos are improved and future-proofed.
In addition to enhancement, Filmora offers over 300 unique transitions and effects catering to creative minds. Audio enthusiasts will enjoy advanced audio tools like audio ducking and equalizers.
Filmora’s standout feature is its motion tracking capability, enabling dynamic video compositions. While beginners may find the abundance of features overwhelming, regular updates and an active online community provide ample support.
Features
- Filmora’s advanced AI video-enhancing algorithms let you convert black-and-white footage to colored ones.
- It boosts frame rates up to 240 FPS using AI-enhanced frame interpolation technology and 4x super-resolution algorithms.
- Filmora enhances videos’ clarity and quality through audio ducking, equalizers, and more.
- This AI Video Enhancer tracks and attaches objects in videos.
- The tool preserves details and enhances quality in slow-motion scenes.
- Offers over 300 unique transitions and effects.
Pros
- Versatile editing and enhancement options.
- This AI video enhancer is designed to assist both beginners and professionals.
- It supports batch processing, enhancing 10+ videos simultaneously.
Cons
- The free version adds a watermark.
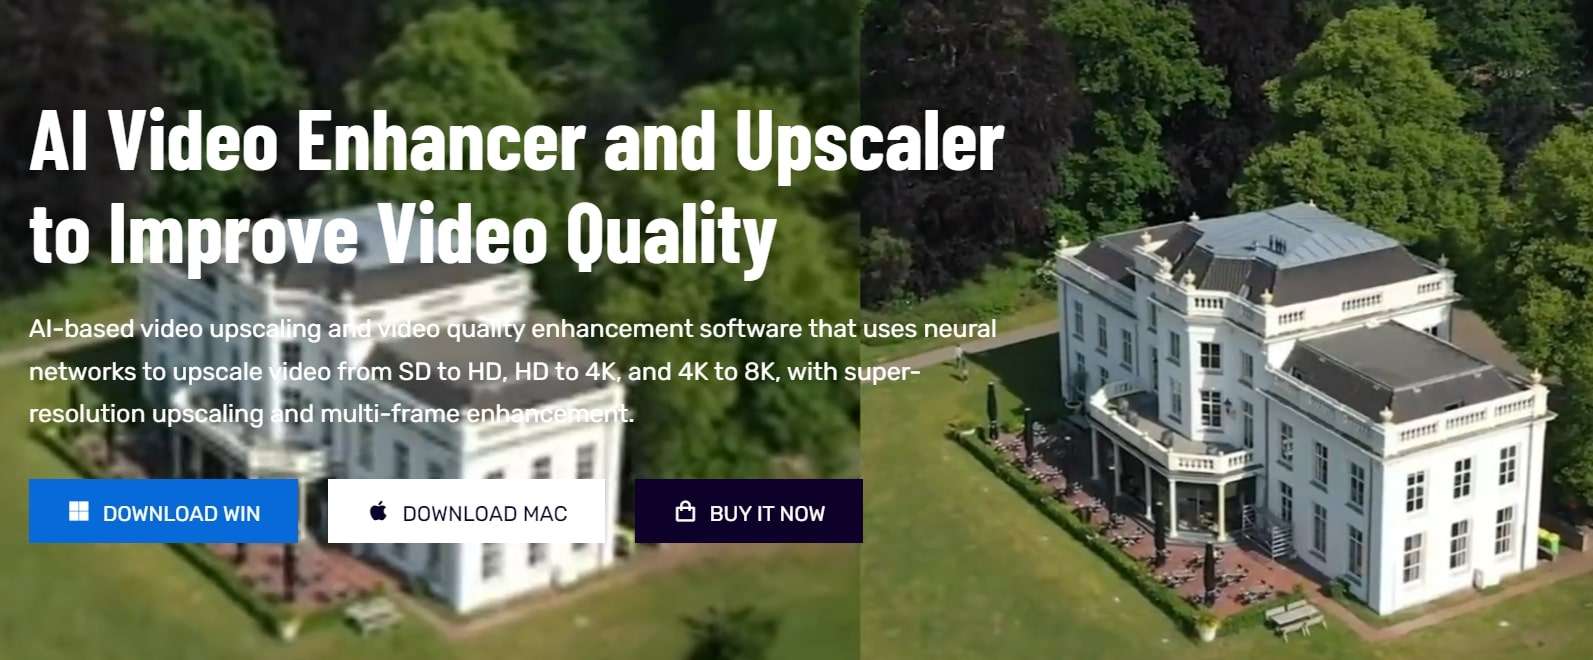
2.AVCLabs Video Enhancer AI
Pricing:AVCLabs offers new users a 7-day free trial.
AVCLabs Video Enhancer AI utilizes a neural network to improve video clip quality. With super-resolution AI video upscaling and multi-frame enhancement, it can easily upscale video from SD to HD (720p or 1080p) to 4K and up to 8K in just one click.
With support for various video and audio formats, users can work seamlessly without compatibility issues. A notable feature is its batch processing capability, enabling users to upscale and enhance multiple videos simultaneously, saving time. The real-time preview feature is invaluable for those who wish to see the software’s results before finalizing their project.
Features
- AVCLabs seamlessly enhances any video footage without quality loss. Whether single or multi-frame, you’ll experience smooth transitions and improved frames.
- With AVCLabs’ color correction feature, you can easily adjust each video frame’s brightness, saturation, and contrast. This tool employs AI video upscaling to create larger, more detailed images without sacrificing quality.
- This video enhancement tool offers automatic face refinement to enhance facial details, which is ideal for improving low-quality videos with excessive noise and blurriness.
- The Super Resolution feature recovers high-resolution videos from low-resolution materials by generating additional pixel data to fill gaps, resulting in enhanced output.
- AVCLabs Video Enhancer AI uses a multi-frame convolutional neural network to stabilize video shakes and remove motion artifacts, overlay noise, and grain, producing natural and enhanced results.
Pros
- AVCLabs features a color calibration algorithm that accurately portrays natural colors.
- It allows you to add color to old black-and-white videos.
- The video processing is fully automatic, requiring no manual fine-tuning.
Cons
- The app demands a significant amount of free space, up to 15 GB.
- It is only compatible with Windows and Mac operating systems.
- The free trial adds a watermark from AVC Labs to the videos.
3.UniFab Video Enhancer
Pricing: UniFab provides a 30-day free trial for new AI users and a 30-day money-back guarantee for paid.
UniFab is a comprehensive AI-powered video enhancer to enhance video quality for all types of videos. Standout features like upscaling video to HDR10/Dolby Vision, denoising, and deinterlacing set this tool apart.
The models are regularly updated with the latest advancements in Deep Learning. Whether you’re a novice or an expert, UniFab offers both automatic and manual modes for video enhancement, making it easy to use without requiring complex settings.
Features
- Upgrade any video to 720p, 1080p, or even 4k resolution with remarkable clarity.
- Convert SDR videos to stunning HDR formats like HDR10+ and Dolby Vision. This feature revitalizes your videos, making them significantly more vibrant and immersive.
- Utilize AI technology to deinterlace your videos, ensuring smooth playback and a pristine viewing experience on modern displays.
- Specifically designed for videos captured in low-light conditions or with high ISO settings, this tool intuitively reduces grain and noise, restoring your footage’s true essence without sacrificing detail.
- Experience unprecedented fluidity as the software boosts your videos to an impressive 120FPS using AI. This transforms your content into a smooth motion stream, ideal for high-definition screens and attentive audiences.
Pros
- It allows audio up-mixing to EAC3 5.1/DTS 7.1 through AI.
- Utilizes GPU-accelerated technology.
- Supports video conversion, compression, and editing.
Cons
- The free trial is limited to 3 videos.
- Does not support Mac systems.
4.Topaz Video Enhance AI
Pricing:Topaz video enhancement tool offers a 30-day no-questions-asked refund policy.
Topaz Video Enhance AI enhances video quality by increasing its resolution. It supports batch upscaling of videos and is compatible with DVD, DSLR, Game, and HD stock footage.
Many notable film studios consider Topaz Video Enhance AI one of the best video editing software tools. It is suitable for various uses, such as commercials, movie content, and YouTube videos.
Features
- This free video upscaling software swiftly analyzes video footage quality using AI tools and recreates it into high-resolution videos.
- Topaz offers Gaia CGI and Theia for enhancing CG and animated videos, along with Proteus and Artemis for noise removal and sharpening.
- Easily recover details from any video footage by injecting original details using adjacent frames’ additional information. It detects and corrects visual artifacts formed during compression.
- Topaz provides an automatic mode for quick video quality enhancement and manual fine-tuning options using available controls.
- With this free video enhancer software, preserve video audio tracks and select from different conversion options for optimal output in the final project.
Pros
- Reduces motion artifacts.
- Adds extra frames for smooth, slow-motion videos.
- Enhances video quality up to 8K.
Cons
- AI processing can be time-consuming, sometimes taking hours.
- Requires a high-quality graphics card.
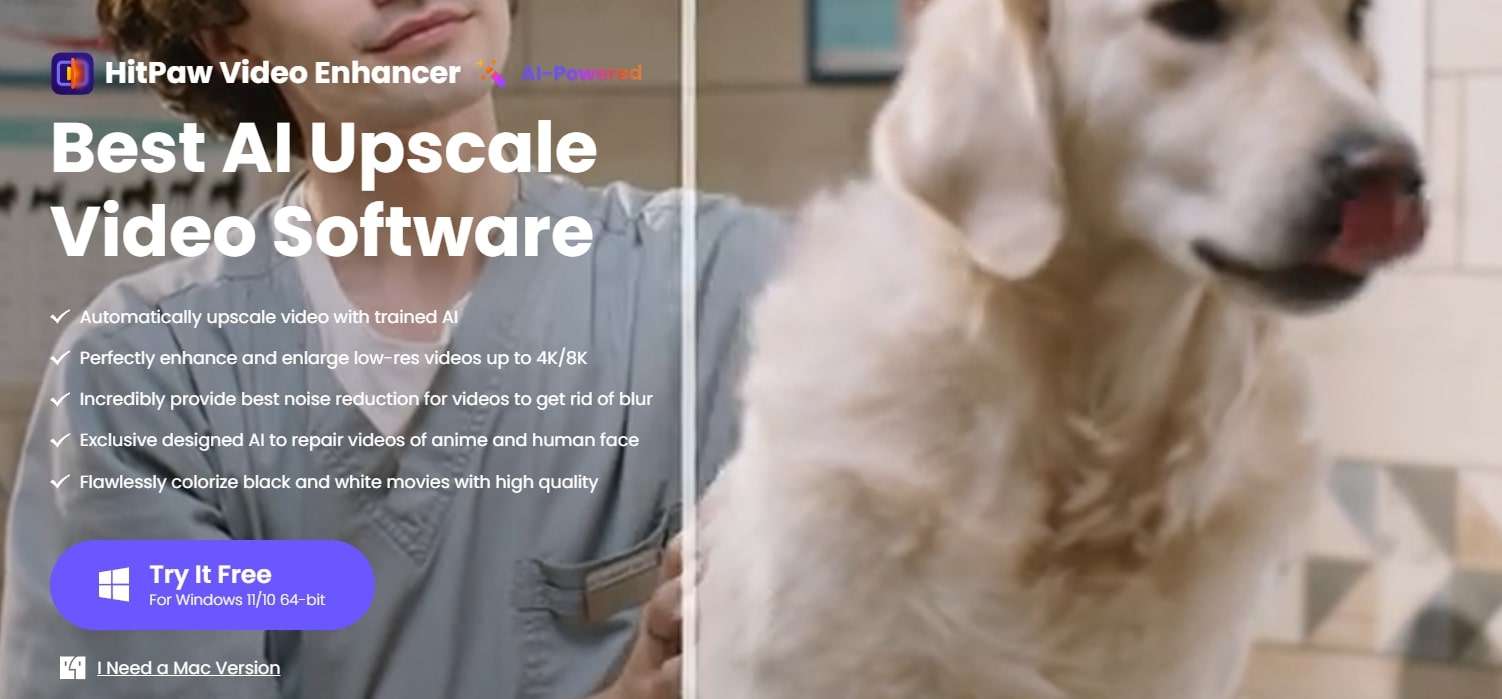
5.HitPaw Video Enhancer
Pricing:HitPaw AI video enhancer offers a 30-day refund guarantee on paid plans.
HitPaw is a user-friendly video enhancer suitable for both beginners and professionals. It features an easy-to-navigate interface, ensuring even those with minimal experience can improve their videos. Despite its simplicity, HitPaw offers robust enhancement tools, including color correction and stabilization. Its extensive support for various video formats eliminates compatibility concerns.
The software prioritizes efficient video enhancement without compromising quality or speed. Comprehensive tutorials help users explore different editing tasks and unlock their content’s full potential.
Features
- Utilize advanced AI algorithms to upscale low-resolution videos for a more appealing look. The AI feature optimizes content for sharper and more vibrant visuals.
- The HitPaw video quality enhancer app uses AI tools to improve detailing on human faces. Apply filters and adjust settings to enhance facial output in videos.
- The app includes a video stabilization feature that eliminates shaky camera movements, producing smoother and clearer videos with a professional touch.
- HitPaw offers an AI video repair option to restore damaged, corrupted, and old videos. It can also use deep learning AI to colorize black-and-white videos.
- Remove noise from videos with the General Denoise feature, making them look sharper, clearer, and newer.
Pros
- Supports various video formats.
- Has a user-friendly and intuitive interface.
- Can repair and enhance animation videos.
Cons
- The free plan has limited editing features.
Top 2 4K Video Enhancer Online Free Options
The AI-enhanced video tools mentioned above excel in their field. However, there are times when you might run out of storage or need a quick fix through your browser. So, here are some online AI tools that can enhance your videos. Unlike offline video enhancer AIs, online tools are easily accessible. While they may offer fewer features than desktop solutions, they are still useful for some editors.
1.Cutout.Pro
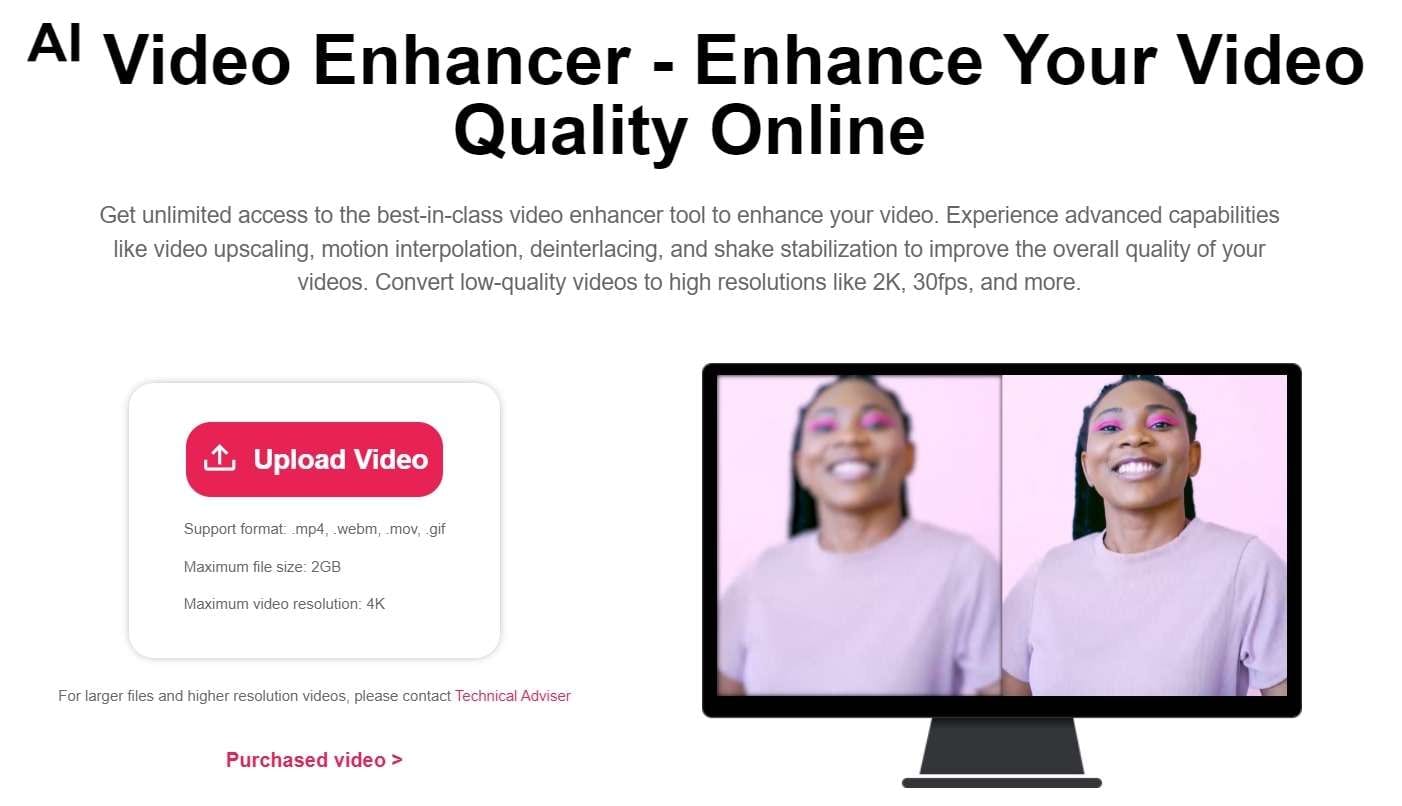
Many editing professionals rely on this free AI video enhancer for unlimited video improvements. Cutout.Pro utilizes advanced features such as video upscaling, motion interpolation, deinterlacing, and shake stabilization to enhance overall quality. This tool converts low-quality videos to higher resolutions like 2K, 30fps, and beyond. Moreover, this online tool swiftly reduces visual noise and other motion artifacts from clips using AI.
Features
- Reduce noise, motion artifacts, and improve video resolution significantly with this powerful online video quality enhancer and upscaler. Perfect for enhancing low-resolution videos like 240p, 360p, 480p, and more.
- Pro increases video frame rates without sacrificing quality. Smooth out shaky footage for better slow-motion effects.
- This tool enhances video resolution up to 2K at a maximum of 30fps effortlessly. It sharpens and defines your videos, bringing your story to life like a professional.
- This is perfect for filmmakers seeking to enhance footage quality and create professional-looking films. Improve video resolution and quality to unblur, upscale, and smooth videos for cinematic results.
- Enhance the quality of personal videos as this tool features shake stabilization for professional results.
- This video enhancer is ideal for professionals creating cinematic frames and restoring old footage. It’s also great for individuals looking to improve the quality of compressed videos downloaded from social media platforms like YouTube, Netflix, and TikTok.
Pros
- It boosts video frame rates and enables HD clip exports.
- Users can upload videos in MP4, MOV, WebM, and GIF formats for processing.
Cons
- It only offers a 5-second preview of the results after enhancement.
2.Clideo Video Enhancer
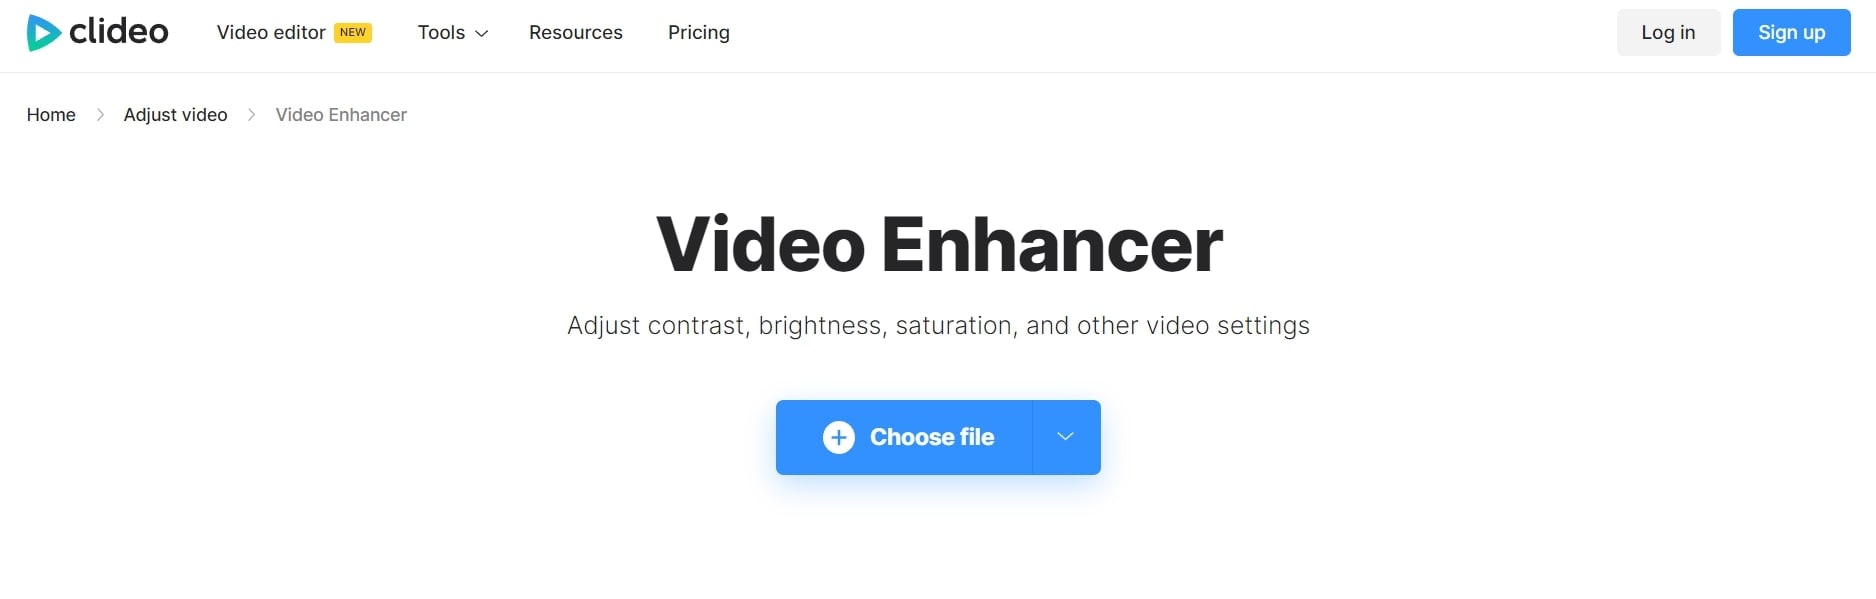
Clideo is an online video-enhancing tool that can completely transform any random video. It lets you add special AI effects and filters to adjust the video’s brightness, saturation, and contrast, making it stunning, vibrant, and attractive. You can enhance any video professionally for social media attention or business branding.
When it comes to video-enhancing tools, users seek maximum customization options. Clideo offers various features, functions, and facilities to transform average-looking videos into 4k video resolutions.
Features
- The interface is intuitive, so you don’t need any video editing experience to use it.
- You can enhance your video regardless of format because Clideo works with MP4, WMV, MOV, VOB, AVI, and other popular formats.
- You don’t need to download and install the video enhancer to your device. It’s not only faster but also more secure.
- Enhance multiple videos or images simultaneously.
- Add subtitles with customizable text fonts.
- Text Overlay feature with support for HD resolution.
- Access a media library with social sharing options.
Pros
- User-friendly tool is ideal for beginners.
- Supports multiple formats.
- As an online tool, it saves device storage space.
- Reasonable pricing.
- Provides uninterrupted video editing with customizable features.
Cons
- A premium subscription is required to remove watermarking.
- No offline app available; internet connection always necessary.
- No dedicated mobile app.
How to Choose the Best Video Enhancer
Consider the following to ensure you select the right video enhancer for your needs and creative vision.
1.Type of Content
Think about the type of content you’re working with. Are you creating short-form clips for social media or longer, more complex videos? Different enhancers may better suit different content types, so consider your file type and potential quality issues.
2.Consider The Features You Need
Consider the tools and features you need from your video quality enhancer software. Each system offers different capabilities, so planning can help you find the option that best fits your requirements.
3.Sharing Formats and Requirements
Determine the purpose of your video project and any specific sharing requirements. Understanding your goals will help you plan accordingly, whether for online sharing or commercial use.
4.Your Budget
Keep your budget in mind. Some enhancers offer free features, while others may require a purchase or subscription fee for full access. Budgeting effectively ensures you get the best value for your money while achieving great video results.
Conclusion
The video enhancement landscape has been transformed by artificial intelligence, providing numerous options to enhance your videos’ quality. Whether a professional filmmaker or a casual content creator, free AI video enhancers offer a chance to take your productions to the next level.
Each software has unique strengths, from Wondershare Filmora’s comprehensive editing features to AVCLabs’ neural network-powered upscaling and UniFab’s HDR conversion capabilities. User-friendly options like HitPaw cater to beginners while providing robust enhancement tools.
Moreover, for quick fixes or limited storage, online options like Cutout.Pro and Clideo offer accessible solutions with impressive results. With these advancements, achieving professional-quality videos is now achievable for everyone.
Ollie Mattison
Ollie Mattison is a writer and a lover of all things video.
Follow @Ollie Mattison
Ollie Mattison
Apr 24, 2024• Proven solutions
In 2024, the average person will watch 17 hours of video content every week. Improving the quality of your videos can make your content more noticeable.
Fortunately, there are many excellent video quality enhancer tools to choose from. These tools can enhance both the visual and audio clarity of your content. Ultimately, this will enhance your professionalism and reputation as a trustworthy creator.
Are you wondering where to start when selecting an effective, user-friendly video enhancer? Here are some of our top recommendations to help you begin.
- Part 2: 5 Free AI Video Enhancers [Software Options]
- Part 3: Top 2 4K Video Enhancer Online Free Options
- Part 4: How to Choose the Best Video Enhancer
- In this article
Why Do You Need an AI Video Enhancer?
AI video enhancers utilize generative AI to remove noise, stabilize shaky videos, upscale, or enhance their overall appearance. These tools employ machine learning and neural network techniques to analyze videos and apply different effects for enhancement. Trained on extensive datasets, most AI video enhancers can understand video content like faces, scenes, and objects, automatically adjusting imperfections.
Using an AI video enhancer is an excellent way to boost video quality quickly. Unlike traditional methods, AI speeds up the enhancement process significantly. There are additional benefits, such as:
- **Enhanced Media Quality:**AI video enhancers enhance videos automatically with advanced algorithms, maintaining quality, clarity, and detail.
- Noise Reduction: Many AI video enhancer tools effectively reduce visual noise in videos, resulting in cleaner and clearer footage.
- **Reviving Old Clip:**AI video enhancers are adept at restoring old video footage to make it appear more vibrant.
5 Free AI Video Enhancers [Software Options]
Are blurry videos on your large screen getting on your nerves? Thanks to advancements in artificial intelligence (AI), you can now enhance your low-resolution videos for a crystal-clear viewing experience.
Whether you’re a video editor, content creator, or streamer, incorporating an AI video upscaler into your toolkit is a wise choice. Here are the top 5 picks for the best free AI video enhancer software to improve your video editing.
1.Wondershare Filmora - AI Video Enhancer
Pricing:Filmora offers a free trial without exporting.
Wondershare Filmora stands out in video editing by combining comprehensive editing features with AI-powered enhancement tools. With 4K editing, Filmora ensures videos are improved and future-proofed.
In addition to enhancement, Filmora offers over 300 unique transitions and effects catering to creative minds. Audio enthusiasts will enjoy advanced audio tools like audio ducking and equalizers.
Filmora’s standout feature is its motion tracking capability, enabling dynamic video compositions. While beginners may find the abundance of features overwhelming, regular updates and an active online community provide ample support.
Features
- Filmora’s advanced AI video-enhancing algorithms let you convert black-and-white footage to colored ones.
- It boosts frame rates up to 240 FPS using AI-enhanced frame interpolation technology and 4x super-resolution algorithms.
- Filmora enhances videos’ clarity and quality through audio ducking, equalizers, and more.
- This AI Video Enhancer tracks and attaches objects in videos.
- The tool preserves details and enhances quality in slow-motion scenes.
- Offers over 300 unique transitions and effects.
Pros
- Versatile editing and enhancement options.
- This AI video enhancer is designed to assist both beginners and professionals.
- It supports batch processing, enhancing 10+ videos simultaneously.
Cons
- The free version adds a watermark.
2.AVCLabs Video Enhancer AI
Pricing:AVCLabs offers new users a 7-day free trial.
AVCLabs Video Enhancer AI utilizes a neural network to improve video clip quality. With super-resolution AI video upscaling and multi-frame enhancement, it can easily upscale video from SD to HD (720p or 1080p) to 4K and up to 8K in just one click.
With support for various video and audio formats, users can work seamlessly without compatibility issues. A notable feature is its batch processing capability, enabling users to upscale and enhance multiple videos simultaneously, saving time. The real-time preview feature is invaluable for those who wish to see the software’s results before finalizing their project.
Features
- AVCLabs seamlessly enhances any video footage without quality loss. Whether single or multi-frame, you’ll experience smooth transitions and improved frames.
- With AVCLabs’ color correction feature, you can easily adjust each video frame’s brightness, saturation, and contrast. This tool employs AI video upscaling to create larger, more detailed images without sacrificing quality.
- This video enhancement tool offers automatic face refinement to enhance facial details, which is ideal for improving low-quality videos with excessive noise and blurriness.
- The Super Resolution feature recovers high-resolution videos from low-resolution materials by generating additional pixel data to fill gaps, resulting in enhanced output.
- AVCLabs Video Enhancer AI uses a multi-frame convolutional neural network to stabilize video shakes and remove motion artifacts, overlay noise, and grain, producing natural and enhanced results.
Pros
- AVCLabs features a color calibration algorithm that accurately portrays natural colors.
- It allows you to add color to old black-and-white videos.
- The video processing is fully automatic, requiring no manual fine-tuning.
Cons
- The app demands a significant amount of free space, up to 15 GB.
- It is only compatible with Windows and Mac operating systems.
- The free trial adds a watermark from AVC Labs to the videos.
3.UniFab Video Enhancer
Pricing: UniFab provides a 30-day free trial for new AI users and a 30-day money-back guarantee for paid.
UniFab is a comprehensive AI-powered video enhancer to enhance video quality for all types of videos. Standout features like upscaling video to HDR10/Dolby Vision, denoising, and deinterlacing set this tool apart.
The models are regularly updated with the latest advancements in Deep Learning. Whether you’re a novice or an expert, UniFab offers both automatic and manual modes for video enhancement, making it easy to use without requiring complex settings.
Features
- Upgrade any video to 720p, 1080p, or even 4k resolution with remarkable clarity.
- Convert SDR videos to stunning HDR formats like HDR10+ and Dolby Vision. This feature revitalizes your videos, making them significantly more vibrant and immersive.
- Utilize AI technology to deinterlace your videos, ensuring smooth playback and a pristine viewing experience on modern displays.
- Specifically designed for videos captured in low-light conditions or with high ISO settings, this tool intuitively reduces grain and noise, restoring your footage’s true essence without sacrificing detail.
- Experience unprecedented fluidity as the software boosts your videos to an impressive 120FPS using AI. This transforms your content into a smooth motion stream, ideal for high-definition screens and attentive audiences.
Pros
- It allows audio up-mixing to EAC3 5.1/DTS 7.1 through AI.
- Utilizes GPU-accelerated technology.
- Supports video conversion, compression, and editing.
Cons
- The free trial is limited to 3 videos.
- Does not support Mac systems.
4.Topaz Video Enhance AI
Pricing:Topaz video enhancement tool offers a 30-day no-questions-asked refund policy.
Topaz Video Enhance AI enhances video quality by increasing its resolution. It supports batch upscaling of videos and is compatible with DVD, DSLR, Game, and HD stock footage.
Many notable film studios consider Topaz Video Enhance AI one of the best video editing software tools. It is suitable for various uses, such as commercials, movie content, and YouTube videos.
Features
- This free video upscaling software swiftly analyzes video footage quality using AI tools and recreates it into high-resolution videos.
- Topaz offers Gaia CGI and Theia for enhancing CG and animated videos, along with Proteus and Artemis for noise removal and sharpening.
- Easily recover details from any video footage by injecting original details using adjacent frames’ additional information. It detects and corrects visual artifacts formed during compression.
- Topaz provides an automatic mode for quick video quality enhancement and manual fine-tuning options using available controls.
- With this free video enhancer software, preserve video audio tracks and select from different conversion options for optimal output in the final project.
Pros
- Reduces motion artifacts.
- Adds extra frames for smooth, slow-motion videos.
- Enhances video quality up to 8K.
Cons
- AI processing can be time-consuming, sometimes taking hours.
- Requires a high-quality graphics card.
5.HitPaw Video Enhancer
Pricing:HitPaw AI video enhancer offers a 30-day refund guarantee on paid plans.
HitPaw is a user-friendly video enhancer suitable for both beginners and professionals. It features an easy-to-navigate interface, ensuring even those with minimal experience can improve their videos. Despite its simplicity, HitPaw offers robust enhancement tools, including color correction and stabilization. Its extensive support for various video formats eliminates compatibility concerns.
The software prioritizes efficient video enhancement without compromising quality or speed. Comprehensive tutorials help users explore different editing tasks and unlock their content’s full potential.
Features
- Utilize advanced AI algorithms to upscale low-resolution videos for a more appealing look. The AI feature optimizes content for sharper and more vibrant visuals.
- The HitPaw video quality enhancer app uses AI tools to improve detailing on human faces. Apply filters and adjust settings to enhance facial output in videos.
- The app includes a video stabilization feature that eliminates shaky camera movements, producing smoother and clearer videos with a professional touch.
- HitPaw offers an AI video repair option to restore damaged, corrupted, and old videos. It can also use deep learning AI to colorize black-and-white videos.
- Remove noise from videos with the General Denoise feature, making them look sharper, clearer, and newer.
Pros
- Supports various video formats.
- Has a user-friendly and intuitive interface.
- Can repair and enhance animation videos.
Cons
- The free plan has limited editing features.
Top 2 4K Video Enhancer Online Free Options
The AI-enhanced video tools mentioned above excel in their field. However, there are times when you might run out of storage or need a quick fix through your browser. So, here are some online AI tools that can enhance your videos. Unlike offline video enhancer AIs, online tools are easily accessible. While they may offer fewer features than desktop solutions, they are still useful for some editors.
1.Cutout.Pro
Many editing professionals rely on this free AI video enhancer for unlimited video improvements. Cutout.Pro utilizes advanced features such as video upscaling, motion interpolation, deinterlacing, and shake stabilization to enhance overall quality. This tool converts low-quality videos to higher resolutions like 2K, 30fps, and beyond. Moreover, this online tool swiftly reduces visual noise and other motion artifacts from clips using AI.
Features
- Reduce noise, motion artifacts, and improve video resolution significantly with this powerful online video quality enhancer and upscaler. Perfect for enhancing low-resolution videos like 240p, 360p, 480p, and more.
- Pro increases video frame rates without sacrificing quality. Smooth out shaky footage for better slow-motion effects.
- This tool enhances video resolution up to 2K at a maximum of 30fps effortlessly. It sharpens and defines your videos, bringing your story to life like a professional.
- This is perfect for filmmakers seeking to enhance footage quality and create professional-looking films. Improve video resolution and quality to unblur, upscale, and smooth videos for cinematic results.
- Enhance the quality of personal videos as this tool features shake stabilization for professional results.
- This video enhancer is ideal for professionals creating cinematic frames and restoring old footage. It’s also great for individuals looking to improve the quality of compressed videos downloaded from social media platforms like YouTube, Netflix, and TikTok.
Pros
- It boosts video frame rates and enables HD clip exports.
- Users can upload videos in MP4, MOV, WebM, and GIF formats for processing.
Cons
- It only offers a 5-second preview of the results after enhancement.
2.Clideo Video Enhancer
Clideo is an online video-enhancing tool that can completely transform any random video. It lets you add special AI effects and filters to adjust the video’s brightness, saturation, and contrast, making it stunning, vibrant, and attractive. You can enhance any video professionally for social media attention or business branding.
When it comes to video-enhancing tools, users seek maximum customization options. Clideo offers various features, functions, and facilities to transform average-looking videos into 4k video resolutions.
Features
- The interface is intuitive, so you don’t need any video editing experience to use it.
- You can enhance your video regardless of format because Clideo works with MP4, WMV, MOV, VOB, AVI, and other popular formats.
- You don’t need to download and install the video enhancer to your device. It’s not only faster but also more secure.
- Enhance multiple videos or images simultaneously.
- Add subtitles with customizable text fonts.
- Text Overlay feature with support for HD resolution.
- Access a media library with social sharing options.
Pros
- User-friendly tool is ideal for beginners.
- Supports multiple formats.
- As an online tool, it saves device storage space.
- Reasonable pricing.
- Provides uninterrupted video editing with customizable features.
Cons
- A premium subscription is required to remove watermarking.
- No offline app available; internet connection always necessary.
- No dedicated mobile app.
How to Choose the Best Video Enhancer
Consider the following to ensure you select the right video enhancer for your needs and creative vision.
1.Type of Content
Think about the type of content you’re working with. Are you creating short-form clips for social media or longer, more complex videos? Different enhancers may better suit different content types, so consider your file type and potential quality issues.
2.Consider The Features You Need
Consider the tools and features you need from your video quality enhancer software. Each system offers different capabilities, so planning can help you find the option that best fits your requirements.
3.Sharing Formats and Requirements
Determine the purpose of your video project and any specific sharing requirements. Understanding your goals will help you plan accordingly, whether for online sharing or commercial use.
4.Your Budget
Keep your budget in mind. Some enhancers offer free features, while others may require a purchase or subscription fee for full access. Budgeting effectively ensures you get the best value for your money while achieving great video results.
Conclusion
The video enhancement landscape has been transformed by artificial intelligence, providing numerous options to enhance your videos’ quality. Whether a professional filmmaker or a casual content creator, free AI video enhancers offer a chance to take your productions to the next level.
Each software has unique strengths, from Wondershare Filmora’s comprehensive editing features to AVCLabs’ neural network-powered upscaling and UniFab’s HDR conversion capabilities. User-friendly options like HitPaw cater to beginners while providing robust enhancement tools.
Moreover, for quick fixes or limited storage, online options like Cutout.Pro and Clideo offer accessible solutions with impressive results. With these advancements, achieving professional-quality videos is now achievable for everyone.
Ollie Mattison
Ollie Mattison is a writer and a lover of all things video.
Follow @Ollie Mattison
How Different YouTube Aspect Ratio Affect Your Video Style
How Different YouTube Aspect Ratio Affect Your Video Style
An easy yet powerful editor
Numerous effects to choose from
Detailed tutorials provided by the official channel
The aspect ratio gets changed for different social media platforms. YouTube aspect ratio is quite different from others and here is all that you must know about it.
In this article
01 [How Different YouTube Aspect Ratio Affect Your Video Style ](#Part 1)
02 [How to Make Your Videos Look Their Best?](#Part 2)
Part 1 Is 18:9 the BEST Aspect Ratio for YouTube?
YouTube is considered to be a wider platform than those others are. Moreover, people get each type of video here and this is the reason why it becomes the best platform to make a reach to massive audience and promote your brand. However, it is worth considering having a proper YouTube video size ratio.

01How to Change Aspect Ratio to 18:9 for BETTER Videos

02What Is the Best Size For a YouTube Video/YouTube Image Sizes?
It is important to know that the YouTube ratio for videos and images may vary. However, the size is not only meant by the dimensions. Resolution and aspect ratio are also equally important for having the perfect size of the video and images. When you talk about the videos, the best dimension and resolution is considered to be 1080 by 1920p. Similarly, the aspect ratio for these videos is 16:When you create short video on YouTube then this youtube shorts aspect ratio remains the same because videos in this resolution and aspect ratio perform the best as they are in full HD.
Talking about videos, YouTube images cannot be neglected. If you will not follow the recommended size of YouTube images then you may have to face issues in posting them. YouTube images are at best when they are posted in the perfect size. Banner images on YouTube must be posted in the size of 2560 by 1440 pixels. Size of images may also change depending on the device that you are using. This can be different on desktops and tablets accordingly. On desktops, the size is 2560 by 423 and on tablets, the size becomes 1855 by 423.

03What Is the Best Frame Rate For a YouTube Video?
Frame rate is another important aspect to focus on when you are taking about posting content on YouTube. This is so important because without frame rate your video will not get the desired quality. It is must to know thing that video which you are posting must be in the actual and same frame rate in which it has been recorded. The most common frame rates for YouTube videos are 24, 48, 30, 25 and 60. However you can post the videos in any other frame rate but these are recommended the most.
It is equally important to deinterlace the content before you are posting it. This means if your video has 1080i60p and you want to convert it into 1080i30p then you will need to change the frame rate first.

Part 2 How to Make Your Videos Look Their Best?
01The Right YouTube Dimensions
You can upload videos of so many different dimensions and sizes. These start from 240P to 2160P. The smallest dimension of YouTube videos is 426 by 240 pixels. However, the largest dimensions may go till 3840 by 2160 pixels. YouTube allows all the video dimensions between these ranges. The most accurate YouTube dimension is 1920 by 1080 pixels. The guidelines that are followed on YouTube videos are pretty clear. You can get the quality of 4K if you go for the highest dimension and the quality decreases as you decrease the dimension of your video.

02Ways to Change YouTube Video Sizes
As a YouTube user, you have the option to change the video sizes and resolution so that you can get a vivid viewing experience of your videos. This may also boost the audience number on your videos. To change the video size of YouTube, you will just need to follow some simple steps that are mentioned here:
Step 1: First of all, you will have to open the video whose size you want to change. After this you will have to open the setting option from the icons that are displayed below the video.
Step 2: After opening the settings icon, you will find the option of quality. Choose that option and there you will see a list of dimensions amongst which you have to choose the one in which you wish to put your video. For example it may be 720p or less and more.
Step 3: As soon you choose the dimension or resolution the next step you have to do is go for it and click on save option and your video size is changed.
03How to Record YouTube Videos with the Right Dimensions
As you know the most familiar YouTube video aspect ratio is 16:9, so the videos cannot be created in the vertical mode. Keep in mind that you create the videos in horizontal mode. This will look professional as well as will boost your video quality too. Also it is worth considering that the video dimensions matter a lot when you are creating the videos. Do consider the device that you are using to create the video as many devices can create the videos in the highest resolution possible.
You must also know that videos with higher dimension and resolution need more space so before making the videos do have a check on your storage space too. It is also a good idea to maintain the balance between high quality videos and your storage space.
04How to Create YouTube Thumbnails That Get More Clicks
Every video creator wishes that his videos get more views. This is only possible when you will have excellent and engaging thumbnails so that they get more clicks. Here are some ideas that you can opt for your video thumbnail in order to get it more audience and views:
● Go for video still: It will be an interesting idea to add video still to your YouTube videos. By doing so you can give your audience an excitement about what they are going to experience. Video still can do the work of giving a glance to your audience and afterwards if they will see the similar things then they will be satisfied about what your deliver to them.
● Boost curiosity: sparking curiosity in your audience is another way to get more clicks on your videos thumbnails. Being curious about a particular topic makes the viewer stay up to the end. Suppose that if you pass the same message that they can easily guess then they will lose interest in your video. Try to have some spark of curiosity in the videos which will make them more engaging.
● Perk of using contrasting colors: As far YouTube videos are concerned using colors is neglected but it can be a perk to your videos and thumbnails. You can use colors to make your videos look notable and eye-catching and also suiting the YouTube platform. Colors are powerful to draw your audience’s attention but for making it hold you will have to add other elements also.
● Using the correct tools: Without proper editing, video creation is of no use. You will need to edit your videos wisely and make sure to add sparking elements to them. You may get many tools like Filmora, which can do the desired work for you. Choosing w**Wondershare Filmora Video Editor ** can be beneficial for you as you will get so many extraordinary features in this tool. Features of Filmora tool are as follows:
● This tool allows you to choose amongst several formats with a number of editing options.
● You can get a proper storage for your videos so that you need not to worry about the storage in your device.
● Videos created by this tool are of high quality and also you can create them in highest resolutions.
● You can use the feature of removing background sound and music to make your videos more appreciable.
● There are 100 layers of media to create amazing videos here.
For Win 7 or later (64-bit)
For macOS 10.12 or later
Key Takeaways from This Episode
● YouTube has the second largest audience when it comes to any social media platform. This is the reason why branding your products here is a worth investing idea.
● As each platform have different technical requirements so as YouTube. There are several things to consider while creating video to upload on YouTube. These things include correct size and dimensions, YouTube video ratio, accuratesounds, etc.
● To boost the brand and market value, these technical requirements play an important role. To meet these requirements, various tools like Filmora, etc. are used. These tools make the videos more engaging and impressive so that it can make a reach to larger audience.
The aspect ratio gets changed for different social media platforms. YouTube aspect ratio is quite different from others and here is all that you must know about it.
In this article
01 [How Different YouTube Aspect Ratio Affect Your Video Style ](#Part 1)
02 [How to Make Your Videos Look Their Best?](#Part 2)
Part 1 Is 18:9 the BEST Aspect Ratio for YouTube?
YouTube is considered to be a wider platform than those others are. Moreover, people get each type of video here and this is the reason why it becomes the best platform to make a reach to massive audience and promote your brand. However, it is worth considering having a proper YouTube video size ratio.
01How to Change Aspect Ratio to 18:9 for BETTER Videos
02What Is the Best Size For a YouTube Video/YouTube Image Sizes?
It is important to know that the YouTube ratio for videos and images may vary. However, the size is not only meant by the dimensions. Resolution and aspect ratio are also equally important for having the perfect size of the video and images. When you talk about the videos, the best dimension and resolution is considered to be 1080 by 1920p. Similarly, the aspect ratio for these videos is 16:When you create short video on YouTube then this youtube shorts aspect ratio remains the same because videos in this resolution and aspect ratio perform the best as they are in full HD.
Talking about videos, YouTube images cannot be neglected. If you will not follow the recommended size of YouTube images then you may have to face issues in posting them. YouTube images are at best when they are posted in the perfect size. Banner images on YouTube must be posted in the size of 2560 by 1440 pixels. Size of images may also change depending on the device that you are using. This can be different on desktops and tablets accordingly. On desktops, the size is 2560 by 423 and on tablets, the size becomes 1855 by 423.
03What Is the Best Frame Rate For a YouTube Video?
Frame rate is another important aspect to focus on when you are taking about posting content on YouTube. This is so important because without frame rate your video will not get the desired quality. It is must to know thing that video which you are posting must be in the actual and same frame rate in which it has been recorded. The most common frame rates for YouTube videos are 24, 48, 30, 25 and 60. However you can post the videos in any other frame rate but these are recommended the most.
It is equally important to deinterlace the content before you are posting it. This means if your video has 1080i60p and you want to convert it into 1080i30p then you will need to change the frame rate first.
Part 2 How to Make Your Videos Look Their Best?
01The Right YouTube Dimensions
You can upload videos of so many different dimensions and sizes. These start from 240P to 2160P. The smallest dimension of YouTube videos is 426 by 240 pixels. However, the largest dimensions may go till 3840 by 2160 pixels. YouTube allows all the video dimensions between these ranges. The most accurate YouTube dimension is 1920 by 1080 pixels. The guidelines that are followed on YouTube videos are pretty clear. You can get the quality of 4K if you go for the highest dimension and the quality decreases as you decrease the dimension of your video.
02Ways to Change YouTube Video Sizes
As a YouTube user, you have the option to change the video sizes and resolution so that you can get a vivid viewing experience of your videos. This may also boost the audience number on your videos. To change the video size of YouTube, you will just need to follow some simple steps that are mentioned here:
Step 1: First of all, you will have to open the video whose size you want to change. After this you will have to open the setting option from the icons that are displayed below the video.
Step 2: After opening the settings icon, you will find the option of quality. Choose that option and there you will see a list of dimensions amongst which you have to choose the one in which you wish to put your video. For example it may be 720p or less and more.
Step 3: As soon you choose the dimension or resolution the next step you have to do is go for it and click on save option and your video size is changed.
03How to Record YouTube Videos with the Right Dimensions
As you know the most familiar YouTube video aspect ratio is 16:9, so the videos cannot be created in the vertical mode. Keep in mind that you create the videos in horizontal mode. This will look professional as well as will boost your video quality too. Also it is worth considering that the video dimensions matter a lot when you are creating the videos. Do consider the device that you are using to create the video as many devices can create the videos in the highest resolution possible.
You must also know that videos with higher dimension and resolution need more space so before making the videos do have a check on your storage space too. It is also a good idea to maintain the balance between high quality videos and your storage space.
04How to Create YouTube Thumbnails That Get More Clicks
Every video creator wishes that his videos get more views. This is only possible when you will have excellent and engaging thumbnails so that they get more clicks. Here are some ideas that you can opt for your video thumbnail in order to get it more audience and views:
● Go for video still: It will be an interesting idea to add video still to your YouTube videos. By doing so you can give your audience an excitement about what they are going to experience. Video still can do the work of giving a glance to your audience and afterwards if they will see the similar things then they will be satisfied about what your deliver to them.
● Boost curiosity: sparking curiosity in your audience is another way to get more clicks on your videos thumbnails. Being curious about a particular topic makes the viewer stay up to the end. Suppose that if you pass the same message that they can easily guess then they will lose interest in your video. Try to have some spark of curiosity in the videos which will make them more engaging.
● Perk of using contrasting colors: As far YouTube videos are concerned using colors is neglected but it can be a perk to your videos and thumbnails. You can use colors to make your videos look notable and eye-catching and also suiting the YouTube platform. Colors are powerful to draw your audience’s attention but for making it hold you will have to add other elements also.
● Using the correct tools: Without proper editing, video creation is of no use. You will need to edit your videos wisely and make sure to add sparking elements to them. You may get many tools like Filmora, which can do the desired work for you. Choosing w**Wondershare Filmora Video Editor ** can be beneficial for you as you will get so many extraordinary features in this tool. Features of Filmora tool are as follows:
● This tool allows you to choose amongst several formats with a number of editing options.
● You can get a proper storage for your videos so that you need not to worry about the storage in your device.
● Videos created by this tool are of high quality and also you can create them in highest resolutions.
● You can use the feature of removing background sound and music to make your videos more appreciable.
● There are 100 layers of media to create amazing videos here.
For Win 7 or later (64-bit)
For macOS 10.12 or later
Key Takeaways from This Episode
● YouTube has the second largest audience when it comes to any social media platform. This is the reason why branding your products here is a worth investing idea.
● As each platform have different technical requirements so as YouTube. There are several things to consider while creating video to upload on YouTube. These things include correct size and dimensions, YouTube video ratio, accuratesounds, etc.
● To boost the brand and market value, these technical requirements play an important role. To meet these requirements, various tools like Filmora, etc. are used. These tools make the videos more engaging and impressive so that it can make a reach to larger audience.
The Best Free Video Cutters for MOV File Editing
Top 5 Best Free MOV Video Cutters
Ollie Mattison
Mar 27, 2024• Proven solutions
The emergence of multimedia technology and its demanding features have made the user think about the best video cutters based on the MOV video format. Finding the amazing video cutter is quite a challenging task and one can attain such a remarkable challenge by just availing some of the free MOV video cutters. However, there are numbers of video cutters used by thousands of people every day and it is quite difficult to narrow down the list of MOV video cutters into the only top 5 video cutters; but some of them are given below:
If you need a more professional MOV video cutter, Wondershare Filmora is highly recommended. The powerful video cutting function allows you to easily cut video files into various fragments. Besides that, the built-in scene detection function can easily cut video even more precisely.
If you want to have an online solution, Filmora video trimmer is a free online tool that can help you trim video instantly. You can upload your video from computer and video link with drag-and-drop. It is easy to use with the slider or just input specific start and end times for precise trim. It also supports various importing and exporting video format, including .mp4, .mov, .wemb, .mpeg, .flv. More importantly, the exported video is free of watermark. It is definitely worth a try!
 Download Mac Version ](https://tools.techidaily.com/wondershare/filmora/download/ )
Top 5 Best Free MOV Video Cutters
1. Avidemux
Avidemux is not served as a video cutter but it is also used to as a video joiner; it’s lightweight and neat utility features enable the users to easily select a portion from any video, cut it and can save it the existing file or the new file as well.

Pros:
- Easily-to-use interface;
- Useful presets for common output tasks.
Cons:
- The performance is not very satisfactory.
2. Free Video Cutter
Free video cutter is one of the most remarkable video cutter tools that enable the users to extract or trim specific part of any video. The file can be saved in the different or same format. Free video cutter support different video formats including MOV, M4V, AVI, WMV and many more. It contains one displaying window along with the preview options.

Pros:
- Supports multiple video formats;
- User friendly interface;
- Multiple output format options .
Cons:
- Lacks in sound quality;
- Fewer sound settings.
3. Video Toolbox
Splitting large MOV files into smaller video files is made easier by the use of Video Toolbox. This is the efficient and user friendly online video editor that allows the user to cut, preview and play the video; it pertains the quality of original vide file and cute the particular part which the user exactly want to trim or extract out form the large video file.

Pros:
- Different video editing functions.
Cons:
- Restricts your file sizes to 600MB.
4. Cute Video Cutter
Cute video cutter is a straightforward solution when the user is in need of cutting or removing a particular segment from the video file; it supports various video formats including AVI, MOV, FLV, WMV and more. It has a user friendly interface that is not required any additional knowledge in order to edit and cut the video.

Pros:
- No need to search for an install any other codec;
- Easy user interface.
Cons:
- No audio cues.
5. VSDC Free Video Editor
VSDC Free Video Editor is a free but quality video editor which comes with variety of features. It supports various types of videos such as MKV, FLV, MPG, MP4, WMV, VOB, DAT, AVI, DIVX,, MOV, etc.. With it, cutting and splitting MOV videos can be easier.

Pros:
- Many useful options provided;
- Can also be used as a video converter.
Cons:
- Computer resources (CPU and RAM) are required at a high level.
Ollie Mattison
Ollie Mattison is a writer and a lover of all things video.
Follow @Ollie Mattison
Ollie Mattison
Mar 27, 2024• Proven solutions
The emergence of multimedia technology and its demanding features have made the user think about the best video cutters based on the MOV video format. Finding the amazing video cutter is quite a challenging task and one can attain such a remarkable challenge by just availing some of the free MOV video cutters. However, there are numbers of video cutters used by thousands of people every day and it is quite difficult to narrow down the list of MOV video cutters into the only top 5 video cutters; but some of them are given below:
If you need a more professional MOV video cutter, Wondershare Filmora is highly recommended. The powerful video cutting function allows you to easily cut video files into various fragments. Besides that, the built-in scene detection function can easily cut video even more precisely.
If you want to have an online solution, Filmora video trimmer is a free online tool that can help you trim video instantly. You can upload your video from computer and video link with drag-and-drop. It is easy to use with the slider or just input specific start and end times for precise trim. It also supports various importing and exporting video format, including .mp4, .mov, .wemb, .mpeg, .flv. More importantly, the exported video is free of watermark. It is definitely worth a try!
Download Mac Version ](https://tools.techidaily.com/wondershare/filmora/download/ )
Top 5 Best Free MOV Video Cutters
1. Avidemux
Avidemux is not served as a video cutter but it is also used to as a video joiner; it’s lightweight and neat utility features enable the users to easily select a portion from any video, cut it and can save it the existing file or the new file as well.
Pros:
- Easily-to-use interface;
- Useful presets for common output tasks.
Cons:
- The performance is not very satisfactory.
2. Free Video Cutter
Free video cutter is one of the most remarkable video cutter tools that enable the users to extract or trim specific part of any video. The file can be saved in the different or same format. Free video cutter support different video formats including MOV, M4V, AVI, WMV and many more. It contains one displaying window along with the preview options.
Pros:
- Supports multiple video formats;
- User friendly interface;
- Multiple output format options .
Cons:
- Lacks in sound quality;
- Fewer sound settings.
3. Video Toolbox
Splitting large MOV files into smaller video files is made easier by the use of Video Toolbox. This is the efficient and user friendly online video editor that allows the user to cut, preview and play the video; it pertains the quality of original vide file and cute the particular part which the user exactly want to trim or extract out form the large video file.
Pros:
- Different video editing functions.
Cons:
- Restricts your file sizes to 600MB.
4. Cute Video Cutter
Cute video cutter is a straightforward solution when the user is in need of cutting or removing a particular segment from the video file; it supports various video formats including AVI, MOV, FLV, WMV and more. It has a user friendly interface that is not required any additional knowledge in order to edit and cut the video.
Pros:
- No need to search for an install any other codec;
- Easy user interface.
Cons:
- No audio cues.
5. VSDC Free Video Editor
VSDC Free Video Editor is a free but quality video editor which comes with variety of features. It supports various types of videos such as MKV, FLV, MPG, MP4, WMV, VOB, DAT, AVI, DIVX,, MOV, etc.. With it, cutting and splitting MOV videos can be easier.
Pros:
- Many useful options provided;
- Can also be used as a video converter.
Cons:
- Computer resources (CPU and RAM) are required at a high level.
Ollie Mattison
Ollie Mattison is a writer and a lover of all things video.
Follow @Ollie Mattison
Elevate Learning with These Top-Rated Animation Software
8 Best Educational Animation Software for School

Shanoon Cox
Mar 27, 2024• Proven solutions
The use of educational animation software in schools is one of the most exciting progressions that have taken place in education technology.
With free to use animation software , helps the students in being creative and allows them to design their own movies, comic strips, and more that is endlessly creative.
Some animation for educational purposes also makes a class lively, lets the students absorb knowledge faster, encourages a child to explore a subject with full enthusiasm.
So in this article, I will walk you through the 8 best educational animation software. I hope it is helpful.
- Part 1: Why You Need to Use Educational Animation
- Part 2: 8 Best Animation for Educational Purposes
- Part 3: FAQ about Education Animation Software
You might also like: 10 Classical Animated Cartoon Types With Examples
Part 1: Why You Need to Use Educational Animation
1. Improve Students’ Presentation Skill
With the use of educational animation, the students are cheered to deliver engaging and interesting presentations. The animation is one of the best ways to encourage the students to put bigger and better efforts into their project works or presentations, slideshow creations, or visual concept explanations. Animation, being visually appealing helps to connect with audiences and helps the students learn a great skill for the future.
2. An Animation Is a Versatile Tool
The term multi-sensory method is often heard in various professional development sessions and meets. It is another strength of educational animation. The use of animation for educational purposes helps the students to witness and hear their favorite characters in difficult situations. They narrate the same story to their teachers and friends. Definitely, writing or reading or doing maths is important but the use of a multi-sensory educational animation tool helps to increase the critical thinking ability of a student and is extremely effective.
3. Teach Students How to Cooperate
Sharing an animated creation with friends across the globe helps the students in learning how to cooperate. There are various websites that allow you to create an animated movie or explanatory lessons and share it with a group of friends, not necessarily someone from your known circle. Anyone using the same tool can view your movie irrespective of language barriers. It gives the student a platform not only to connect and cooperate but also to the exposure.
Part 2: 8 Best Animation for Educational Purposes
1. iKITMovie
Do you love animation and wish to create one? The iKITMovie software is a great educational animation tool for adults as well as children. It helps in creating wonderful animated movies easily and quickly. Whether home or school, iKITMovie animation for educational purposes is used by students all across the globe. The features are-
- Overlay – explosions
- Updated new tutorials and tips and tricks
- 2,200+ Sound F/X
- Compatible with the school network
- Direct animation video upload on YouTube
- Addition of face to your characters
- Smoke or fire addition to your animated clip
- Voiceover, music, or sound addition to the animated scene

2. CLIP STUDIO
ClipStudio is the global leader in comic and manga creation software. It provides great and effective art tools for all comic artists or manga lovers. This educational animation software is perfect for both artists looking forward to paper and pen graphics as well as for artists looking for creating cartoons digitally. The features of ClipStudio includes-
- Supports frame by frame animation
- Amazing control over display and timing adjustments for creating animation
- Offer table light function
- Check several cels at one go with onion skinning technique
- Pencil, pen and advanced brushes tool to create original sketches
- Supports 3D figures and objects

3. Moovly
Moovly is one of the best educational animation tools for creating videos easily by the teachers and the students. Whether delivering presentations or classroom assignments, school marketing, or video journalism, Moovly helps in creating the best animation for educational purposes. The features of this software are-
- Access unlimitedly to over 500,000 illustrations, videos, music, sound, and photos
- Publish unlimitedly to Moovly Gallery
- Personal library storage up to 1GB
- Unlimited access to the Moovly Studio editor
- Free automatic education plan to the users from educational email domains known by Moovly

4. Harmony
This tool is used by users across the globe and lets you create any style of animation quickly. Harmony offers all tools that you require for paperless cut-out and the fusion animation creations. The features of Harmony includes-
- Occlusion and 3D camera moves
- Any style of animation, effects application, and 3D composition
- Blend the 3D imported models with 2D for hybrid productions
- Create art with vector tools
- Use Z-depth for creating multiplane scenes

5. Synfig Studio
A free 2D animation software, Synfig Studio is powerfully designed for creating film-quality animation using a vector and bitmap artwork. You don’t need to create a frame by frame animation with Synfig Studio. With less manpower and resources, create animation for educational purposes easily with the Synfig Studio software. The features are-
- Multiple layer support
- Create cutout animation using bitmap images
- Create smooth motion with automatic animation keyframes
- Greater range of dynamic imaging
- Pressure sensitivity based drawing tools

6. Blender
Blender is a 3D animation tool that can be used to create educational animation presentations or clips quite easily. The features of Blender are-
- Built-in path tracer engine renders stunning animations
- Real-time viewport preview
- High definition range lighting support
- A comprehensive range of modeling tools
- 3D painting with textured brushes and masking

7. GoAnimate
It is a great app that makes classroom studies more interesting where students can learn with the help of fascinating animated instructions. With GoAnimate, you can try your hand at creating animated videos at back-to-school nights, open houses, staff meetings, assemblies, and other various events. The features are-
- Make reports, presentations, and stories with animated videos
- Text-to-speech technology
- Special students engagement with animated videos
- Characters, props, backgrounds, etc. are apt for a K-12 audience
- Great tools at the click of the mouse

8. Animaker
Save your studio expense with Animaker educational animation tool. Now, you can create studio-like animation for educational purposes easily with Animaker. Make your own animated videos at home or in school. The features of Animaker are-
- 6 Popular Video Styles
- 720 different types of animated videos
- Create tutorial or funny videos and share

Part 2: FAQ about Education Animation Software
1. How do you make an educational animation video?
If you have set out to make an animation as a teaching aid, then you need the correct type of educational animation software to get you started. Up there with the greats are Renderforest, who let you make tutorials in child-friendly, fun fashion, and Filmora which features all sorts of other plugins to allow you to tailor the suite that you need.
Using Filmora you can replace After Effects, work with a Mac to edit footage, or create animations. There are limitless possibilities with this program – but it does let you create educational animation software pieces that will satisfy even the perfectionists out there.
2. Why is the animation used in education?
The Institute of Progressive Education estimates several reasons why animation helps children learn better. At an early age, the bright color and bold shapes of cartoons help us develop recognition, understand words, and even tell time.
As we grow up, animation triggers the centers of the brain that work best for visual learning. When we insert a moral into a cartoon, it is also more often remembered because of the visuals. It is like the difference between seeing a film and reading a summary of the film.
Educational Animation Software is the tool we use to help create educational animations. It is playing more and more of a role in the teaching world, the deeper we go into the digital age.
3. What are the benefits of using animation in teaching and learning of science subjects?
Animation allows students to develop their understanding by applying rational thinking to their imagination.
Educational Animation software has an especially important place in the teaching of science because it will enable children to understand what is going on at a microscopic level.
It does this by recreating things that cannot be seen by the naked eye. There was a study into this in the Journal of Life Science Education, which focused on cell biology education.
By showing cell mitosis in a cartoon, the teachers can communicate actions that they would never get to see.
4. What makes a good educational video?
Instructive recordings have become a significant piece of advanced education, giving a significant substance conveyance device in many flipped, mixed, and online classes.
Successful utilization of video as an instructive device is improved when educators think about three components: how to deal with a psychological heap of the video, how to boost understudy commitment with the video, and how to advance dynamic gaining from the video.
This exposition audits writing applicable to every one of these standards and proposes viable ways educators can utilize these standards when using video as an instructive device.
All three components together answer the question of how to make animated educational videos.
5. Which animation software is best for beginners?
Irrespective of whether these are just your initial steps in the field of animation, it is important to experiment.
So, knowing about alternative software or better ones from what you are using now is much required. You can also look for software that may bring in more versatility to your work. There are always different ways of improving what you are already doing.
Some of the best animation software includes Adobe character animator, Cartoon Animator 4, Stop Motion Studio, DigiCel FlipBook, Moho Pro, and Moho Debut, Toon Boom Harmony, Blender, Pencil2D, Synfig Studio, Animaker, Vyond, Moovly, Wideo, and more.
Conclusion
There are a plethora of educational animation apps and sites that help the students to make their video presentations interesting and exciting. They do not just enjoy creating animation for educational purposes but also use it as a tool to enhance their creative ability and share their creations on the global platform.
Shanoon Cox
Shanoon Cox is a writer and a lover of all things video.
Follow @Shanoon Cox
Shanoon Cox
Mar 27, 2024• Proven solutions
The use of educational animation software in schools is one of the most exciting progressions that have taken place in education technology.
With free to use animation software , helps the students in being creative and allows them to design their own movies, comic strips, and more that is endlessly creative.
Some animation for educational purposes also makes a class lively, lets the students absorb knowledge faster, encourages a child to explore a subject with full enthusiasm.
So in this article, I will walk you through the 8 best educational animation software. I hope it is helpful.
- Part 1: Why You Need to Use Educational Animation
- Part 2: 8 Best Animation for Educational Purposes
- Part 3: FAQ about Education Animation Software
You might also like: 10 Classical Animated Cartoon Types With Examples
Part 1: Why You Need to Use Educational Animation
1. Improve Students’ Presentation Skill
With the use of educational animation, the students are cheered to deliver engaging and interesting presentations. The animation is one of the best ways to encourage the students to put bigger and better efforts into their project works or presentations, slideshow creations, or visual concept explanations. Animation, being visually appealing helps to connect with audiences and helps the students learn a great skill for the future.
2. An Animation Is a Versatile Tool
The term multi-sensory method is often heard in various professional development sessions and meets. It is another strength of educational animation. The use of animation for educational purposes helps the students to witness and hear their favorite characters in difficult situations. They narrate the same story to their teachers and friends. Definitely, writing or reading or doing maths is important but the use of a multi-sensory educational animation tool helps to increase the critical thinking ability of a student and is extremely effective.
3. Teach Students How to Cooperate
Sharing an animated creation with friends across the globe helps the students in learning how to cooperate. There are various websites that allow you to create an animated movie or explanatory lessons and share it with a group of friends, not necessarily someone from your known circle. Anyone using the same tool can view your movie irrespective of language barriers. It gives the student a platform not only to connect and cooperate but also to the exposure.
Part 2: 8 Best Animation for Educational Purposes
1. iKITMovie
Do you love animation and wish to create one? The iKITMovie software is a great educational animation tool for adults as well as children. It helps in creating wonderful animated movies easily and quickly. Whether home or school, iKITMovie animation for educational purposes is used by students all across the globe. The features are-
- Overlay – explosions
- Updated new tutorials and tips and tricks
- 2,200+ Sound F/X
- Compatible with the school network
- Direct animation video upload on YouTube
- Addition of face to your characters
- Smoke or fire addition to your animated clip
- Voiceover, music, or sound addition to the animated scene
2. CLIP STUDIO
ClipStudio is the global leader in comic and manga creation software. It provides great and effective art tools for all comic artists or manga lovers. This educational animation software is perfect for both artists looking forward to paper and pen graphics as well as for artists looking for creating cartoons digitally. The features of ClipStudio includes-
- Supports frame by frame animation
- Amazing control over display and timing adjustments for creating animation
- Offer table light function
- Check several cels at one go with onion skinning technique
- Pencil, pen and advanced brushes tool to create original sketches
- Supports 3D figures and objects
3. Moovly
Moovly is one of the best educational animation tools for creating videos easily by the teachers and the students. Whether delivering presentations or classroom assignments, school marketing, or video journalism, Moovly helps in creating the best animation for educational purposes. The features of this software are-
- Access unlimitedly to over 500,000 illustrations, videos, music, sound, and photos
- Publish unlimitedly to Moovly Gallery
- Personal library storage up to 1GB
- Unlimited access to the Moovly Studio editor
- Free automatic education plan to the users from educational email domains known by Moovly
4. Harmony
This tool is used by users across the globe and lets you create any style of animation quickly. Harmony offers all tools that you require for paperless cut-out and the fusion animation creations. The features of Harmony includes-
- Occlusion and 3D camera moves
- Any style of animation, effects application, and 3D composition
- Blend the 3D imported models with 2D for hybrid productions
- Create art with vector tools
- Use Z-depth for creating multiplane scenes
5. Synfig Studio
A free 2D animation software, Synfig Studio is powerfully designed for creating film-quality animation using a vector and bitmap artwork. You don’t need to create a frame by frame animation with Synfig Studio. With less manpower and resources, create animation for educational purposes easily with the Synfig Studio software. The features are-
- Multiple layer support
- Create cutout animation using bitmap images
- Create smooth motion with automatic animation keyframes
- Greater range of dynamic imaging
- Pressure sensitivity based drawing tools
6. Blender
Blender is a 3D animation tool that can be used to create educational animation presentations or clips quite easily. The features of Blender are-
- Built-in path tracer engine renders stunning animations
- Real-time viewport preview
- High definition range lighting support
- A comprehensive range of modeling tools
- 3D painting with textured brushes and masking
7. GoAnimate
It is a great app that makes classroom studies more interesting where students can learn with the help of fascinating animated instructions. With GoAnimate, you can try your hand at creating animated videos at back-to-school nights, open houses, staff meetings, assemblies, and other various events. The features are-
- Make reports, presentations, and stories with animated videos
- Text-to-speech technology
- Special students engagement with animated videos
- Characters, props, backgrounds, etc. are apt for a K-12 audience
- Great tools at the click of the mouse
8. Animaker
Save your studio expense with Animaker educational animation tool. Now, you can create studio-like animation for educational purposes easily with Animaker. Make your own animated videos at home or in school. The features of Animaker are-
- 6 Popular Video Styles
- 720 different types of animated videos
- Create tutorial or funny videos and share
Part 2: FAQ about Education Animation Software
1. How do you make an educational animation video?
If you have set out to make an animation as a teaching aid, then you need the correct type of educational animation software to get you started. Up there with the greats are Renderforest, who let you make tutorials in child-friendly, fun fashion, and Filmora which features all sorts of other plugins to allow you to tailor the suite that you need.
Using Filmora you can replace After Effects, work with a Mac to edit footage, or create animations. There are limitless possibilities with this program – but it does let you create educational animation software pieces that will satisfy even the perfectionists out there.
2. Why is the animation used in education?
The Institute of Progressive Education estimates several reasons why animation helps children learn better. At an early age, the bright color and bold shapes of cartoons help us develop recognition, understand words, and even tell time.
As we grow up, animation triggers the centers of the brain that work best for visual learning. When we insert a moral into a cartoon, it is also more often remembered because of the visuals. It is like the difference between seeing a film and reading a summary of the film.
Educational Animation Software is the tool we use to help create educational animations. It is playing more and more of a role in the teaching world, the deeper we go into the digital age.
3. What are the benefits of using animation in teaching and learning of science subjects?
Animation allows students to develop their understanding by applying rational thinking to their imagination.
Educational Animation software has an especially important place in the teaching of science because it will enable children to understand what is going on at a microscopic level.
It does this by recreating things that cannot be seen by the naked eye. There was a study into this in the Journal of Life Science Education, which focused on cell biology education.
By showing cell mitosis in a cartoon, the teachers can communicate actions that they would never get to see.
4. What makes a good educational video?
Instructive recordings have become a significant piece of advanced education, giving a significant substance conveyance device in many flipped, mixed, and online classes.
Successful utilization of video as an instructive device is improved when educators think about three components: how to deal with a psychological heap of the video, how to boost understudy commitment with the video, and how to advance dynamic gaining from the video.
This exposition audits writing applicable to every one of these standards and proposes viable ways educators can utilize these standards when using video as an instructive device.
All three components together answer the question of how to make animated educational videos.
5. Which animation software is best for beginners?
Irrespective of whether these are just your initial steps in the field of animation, it is important to experiment.
So, knowing about alternative software or better ones from what you are using now is much required. You can also look for software that may bring in more versatility to your work. There are always different ways of improving what you are already doing.
Some of the best animation software includes Adobe character animator, Cartoon Animator 4, Stop Motion Studio, DigiCel FlipBook, Moho Pro, and Moho Debut, Toon Boom Harmony, Blender, Pencil2D, Synfig Studio, Animaker, Vyond, Moovly, Wideo, and more.
Conclusion
There are a plethora of educational animation apps and sites that help the students to make their video presentations interesting and exciting. They do not just enjoy creating animation for educational purposes but also use it as a tool to enhance their creative ability and share their creations on the global platform.
Shanoon Cox
Shanoon Cox is a writer and a lover of all things video.
Follow @Shanoon Cox
Also read:
- New Windows Movie Maker Download and Setup A Simple, Easy-to-Follow Guide for 2024
- 2024 Approved Join Multiple MOV Files Into One Top 5 Free Video Joiners
- No Sound in Avidemux? Dont Panic, Weve Got You Covered for 2024
- Best Video Loopers to Loop Videos for Free on Windows and Mac
- Updated 2024 Approved Final Cut Pro Hacks Create a Vintage VHS Look
- Updated In 2024, No Installation Required 10 Free Online Video Compressors
- 2024 Approved Mastering Filmora Scrn A Beginners Guide to Desktop Recording
- Updated Video Aspect Ratio Conversion Made Easy and Fast
- 2024 Approved The Best Free MPEG Video Splitters for Windows, Mac, and Linux
- New In 2024, In This Article, We Will Share with You some of the Minimum Requirement of Running Premiere Pro CC on Your Computer and How to Check the Specification of Your PC and Mac, and Also How to Set up the Co
- New 2024 Approved Download VLLO for macOS and Explore Other Options
- Get Noticed Best Practices for Instagram Video Dimensions
- Updated Top TikTok Watermark Removal Tools to Use Right Now for 2024
- Updated 2024 Approved Capture the Moment 10 Best Video to Image Converters for PC and Mac
- In 2024, Adobe Premiere Pro for Mac The Ultimate Pro Video Editing Tool
- New 2024 Approved Get Creative with Slow Mo Top Video Editing Software for Filmmakers
- Updated Image Dimension Calculator Finding the Perfect Ratio
- New Create Hollywood-Style Videos with These 8 Mac Apps
- Updated Best Mobile Animation Tools Free 3D Apps for Android and iOS
- Updated From Glitch to Glory How to Reset Final Cut Pro X for Error-Free Video Editing for 2024
- Updated In 2024, The Best Free AVI Video Editor Downloads
- New Unleash Your Creativity Top Online Stop Motion Animation Software for 2024
- New In 2024, Best Free Invitation Video Maker Tools on the Web
- Updated 2024 Approved Best Free and Paid AVI Video Cutters for Windows, MAC, Android, and iPhone
- New Top-Rated Free AVI Video Rotators for Windows, MAC, Android, and iPhone Users
- 2024 Approved Best Free AVI Video Rotation Tools for Any Device
- In 2024, How to Speed Up Videos on QuickTime Player Windows/Mac
- New The Art of Time Control FCPX Freeze Frames and Slow Motion
- FCPX University The Best Online Learning Platforms and Websites
- New In 2024, Get Best Subtitle Edit for Mac Alternatives
- Updated In 2024, How to Play Video in Slow Motion Effects on VLC Desktop/Mobile
- Updated Unleash Your Creativity The Top 5 AVCHD Video Editing Software
- Easy Video Flipping Tips and Tricks for a Pro-Look for 2024
- New Free Video Editing Apps for Windows 10 Trimming Made Easy for 2024
- Best Video Editing Apps for Windows 11 Free, Paid, and Everything in Between for 2024
- New In 2024, Best Video Editors for Windows 11 Free and Paid
- Complete Guide For Apple iPhone 6s Plus Lock Screen | Dr.fone
- In 2024, How to Intercept Text Messages on OnePlus 12R | Dr.fone
- In 2024, 4 solution to get rid of pokemon fail to detect location On Nubia Red Magic 8S Pro | Dr.fone
- In 2024, The Most Useful Tips for Pokemon Go Ultra League On Samsung Galaxy XCover 6 Pro Tactical Edition | Dr.fone
- Recover your pictures after Find N3 Flip has been deleted.
- In 2024, How to Mirror PC Screen to Samsung Galaxy F04 Phones? | Dr.fone
- 15 Best Strongest Pokémon To Use in Pokémon GO PvP Leagues For Nokia XR21 | Dr.fone
- Getting the Pokemon Go GPS Signal Not Found 11 Error in Motorola Edge 40 Neo | Dr.fone
- New Get Closer to the Artistic Marvels of AI Portrait Generator
- In 2024, 10 Easy-to-Use FRP Bypass Tools for Unlocking Google Accounts On Samsung Galaxy M34 5G
- How To Unlock Cricket Apple iPhone 6s Plus for Free
- New Whatre the Best Alternatives to Pexels, In 2024
- In 2024, Complete Fixes To Solve Apple iPhone 13 Pro Max Randomly Asking for Apple ID Password
- 2024 Approved Cartoonify Your Footage The Ultimate Conversion Tutorial
- Title: 2024 Approved Boost Video Clarity Top 10 Free Online Enhancement Tools
- Author: Amelia
- Created at : 2024-05-19 11:47:13
- Updated at : 2024-05-20 11:47:13
- Link: https://ai-driven-video-production.techidaily.com/2024-approved-boost-video-clarity-top-10-free-online-enhancement-tools/
- License: This work is licensed under CC BY-NC-SA 4.0.
