
:max_bytes(150000):strip_icc():format(webp)/kentuckyderby-5c7ed5d646e0fb00011bf3da.jpg)
Make Your Videos Accessible 10 Free Subtitle Makers Online for 2024
Make Your Videos Accessible: 10 Free Subtitle Makers Online
When you watch a video online, it’s usually has a title and description. But what if the viewer doesn’t speak the same language as the speaker? Thankfully, there are subtitle maker online that you can use to create subtitles for any video.
Subtitles are excellent for those who want to learn a new language. It is also suitable for those who have trouble hearing. These subtitles can be added to the video by using subtitle maker online. Many subtitle makers are available, but we will discuss the top 10 subtitle creator online.
Best Free Subtitle Makers to Add Subtitles to Video Online
1. Adobe Creative Cloud Express
Creative Cloud Express is re-branded from Adobe Spark, a web and mobile app for creating multimeadia content. With Creative Cloud Express, you can add subtitles or captions to videos online without downloading any software on your computer. It also provides lots of editing tools such as convert video to GIF, reverse videos, merge videos, resize videos for different social , and change video speed.
You can use Creative Cloud Express for free, which includes most core features, but if you want to upgrade to use all features and assets, you may need to pay $9.99/month for the premium plan.
To add subtitles to video with Creative Cloud Express, follow the steps below:
- Visit https://www.adobe.com/express/feature/video/add-subtitle and click Add subtitles to your videos now to get started. Follow the instruction to sign up and sign in your account.
- Adobe will ask you to pick a story template, but you can always start from scratch. Here I will choose a template.
- Now import video or picture material from your computer, and adjust its position in the timeline.
- Pick from a variety of subtitle layout alternatives and change the text size as necessary.
- After adding titles and subtitles to your video, click the Download button to save your video to local computer.

If you prefer to add subtitles to video on Windows or Mac computer, you can try Filmora video editor . Compared with those online tools, Filmora video editor is undoubtedly a great choice for those who need more customized and stylish subtitles.

For Win 7 or later (64-bit)
 Secure Download
For macOS 10.12 or later
Secure Download
Whether you want to edit home movies to send to family and friends or upload to YouTube and Vimeo for sharing, this video editor from Wondershare Filmora can help take your videos to a higher level effortlessly. Here, let’s take a look at the main features of this video editing software.
Filmora is compatible with the Filmstock effects store, an online stock media including video effects, va library for your video projects,video footage, music, sound effects, and stock images as well.
2. Kapwing
As one of the best online video editors , Kapwing allows you to add subtitles to the video easily. It gives three options for adding subtitles: upload an SRT file, manually add them, or have them auto-generated . It opens the video in the online video editor in either situation.
You can place subtitles anywhere on the screen, and you can relocate them at any time. Apart from that, you can customize the text’s appearance with formatting options, text color, and background color. However, you can export videos up to 30 minutes long for free, and to export longer video, you need to pay $16 per month. And in order to download the edited video without a watermark, you must create an account.
To use Kapwing subtitle creator online, follow these steps:
- Go to https://www.kapwing.com/subtitles , and upload your video file.
- On the Add Subtitles screen, choose the method for adding subtitles: add subtitles manually, or use auto-generated, or upload .SRT file. Here I will try add subtitles manually.
- When adding subtitles, make sure the timestamps are correct on the video. (If required) Set the time for precise sync (if desired).
- Click the “Done” button to return to the main editor. Click Export Video and then download it with embedded subtitles.

3. Clideo
Clideo is a video creation app that lets users add subtitles to their own videos. You can add subtitles in any language from an official list of languages available on the website. After adding the subtitle, you can re-position it anywhere on the screen with a few clicks. For free users, Claudio only allows HD exports, and they cannot download the video without a watermark.
To use this subtitle maker online tool, follow these steps:
- Visit https://clideo.com/add-subtitles-to-video and click Add subtitles to your videos now to get started after you register yourself on Clideo with your email id and password.
- Upload the video file from local storage, Google Drive or Dropbox, and then pick an option for adding captions: manually or using a subtitle file. Select the first instance, click “Add subtitle,” type your text, and set the timings.
You can also add a title, leader lines, and subheadings to your presentation. The font, color, background, size, and slide alignment are adjustable.
4. Veed.io
Veed.io is another easy-to-use web video editing tool with several subtitle options for adding subtitles. You can add subtitles quickly and easily, type them manually or upload them in SRT file format.
Veed is an automated subtitling platform that helps people add subtitles online to their YouTube videos without using off-the-shelf subtitle processing software. It is suitable for individuals who have no time or patience to type out long sentence structures one letter at a time. You can start without an account.
You can choose the color of the text, the background of subtitles, and more, to make your film look more attractive. It allows you to share your movies with friends via social media networks like Twitter and Facebook.
To use Veed subtitle creator online, follow these steps:
- Go to https://www.veed.io/tools/auto-subtitle-generator and click on “Get Started.” You can select a blank project or a template.
- Go to the Project Settings section on the left. Choose any one of them depending on your requirements and click Next.
- While using automated transcription, you have to upload.SRT subtitle file or enter the transcript manually.
- You can also personalize the text, color, size, font, alignment, and anything else you want.Make changes to the timeline and then sync the subtitles.
- After that, go to the Export and save the video.
5. Flixier
Flixier is one of the most accessible tools to add subtitles online. Flixier is an efficient auto subtitle generation and syncing platform. You can add any video file type with auto subtitles in Flixier. You can add auto subtitles to MPEG, MP4, MOV, AVI, or any other file on your system. There is no need to convert the video or do extra work. This automatic subtitle maker takes care of everything.
Flixier allows you to make a video subtitle automatically and manually create one or add a subtitle from your computer. You may submit any type of subtitle file (SRT, VTT, ASS, SSA, TXT).
To use Flixier subtitle maker online, follow these steps:
- Go to https://flixier.com/tools/auto-subtitle-generator and click on “Get Started.”
- You must first upload your videos to the Flixier library to create subtitles automatically.
- You may do so by uploading from your computer, importing from cloud storage services, or straight from YouTube, Zoom, or Twitch.
- After importing them, you may drag and drop your movie clips on the Flixier timeline.
- In the pop-up window that appears, click on one, and a button saying “Generate Auto Subtitle” will appear on the right. After you’ve finished your work, click start to have your subtitling generated and added onto the timeline where you can continue making changes.
- Finally, Flixier’s cloud rendering engine lets you export your film in minutes.
- Now, you may save the video to your computer or send it straight to social media.
6. Subtitle Horse
Subtitle Horse is a browser-based subtitler for online video captioning. There are many features, such as real-time validation, an interactive timeline, and shortcuts. Subtitle horse is highly configurable: Subtitles may be made by both amateurs and experts. Users must create an account to upload videos.
With the free version of subtitle horse, you may add subtitles and captions to your video. You may export your subtitles in the necessary formats (SRT, TimedText, WebVTT, etc.). The video can be accessed online, on a platform like YouTube, Dropbox, or others.
To use Subtitle-Horse subtitle creator online, follow these steps:
- Go to https://subtitle-horse.com/ and click on “Create subtitles with the free version.”
- Upload your video or add a URL by clicking the “Add Project” button
- Click “Next” and select “Frame Rate” and “Waveform.”
- Click “Start Subtitling”
- After adding subtitles, you can download them for free or buy HD-quality MP4 videos.
7. Subtitle Bee
SubtitleBee understands and automatically translates more than 120 languages across the world. Before uploading your video, simply choose your language and let SubtitleBee handle the rest by adding subtitles in your desired language.
The algorithm is about 95% accurate in detecting your voice and adding automated captions based on most languages. AI subtitle translation allows you to translate subtitles into other languages. You can use it for free with limited features and watermarked files. There is a time limit on free trial accounts, so you can add videos shorter than 10 minutes in length.
To use Subtitle-Bee subtitle maker online, follow these steps:
- Go to https://subtitlebee.com/ and click on “Add subtitles now”
- Then select the language of the current media voices.
- Now, Upload your video or paste a URL from Youtube, Vimeo, or self-hosted.
- Make any modifications as needed by editing the subtitles to meet your demands.
- Simply add the text you want and customize it to your own needs.
- Choose the social networking site that you wish to publish on.
- Download and encode your video with the subtitles included.
8. Fastreel

Fastreel allows you to create a video with subs and change the text settings: font, size, color, style, and position. A free membership will allow you to produce and share videos in the format of your choice, as well as access stock media. The cost of a paid subscription is $5.95 per video.
Furthermore, there are several colorful templates for various events — explainer videos, wedding films, YouTube intros, customer testimonials, and so forth. To personalize each template, you may use your own photos, films, music, and text. Plus, every template has its own title and transition style. Fastreel is not made for professional users; it’s a tool for novices and those searching for fast answers.
To use Fastreel subtitle creator online, follow these steps:
- Go to https://www.fastreel.com/add-subtitles-to-video.html and click on “Add subtitles now”
- Click the Add Your File button to upload any MOV, MKV, AVI, WMV, or MP4 content less than 500 MB in size. You can add subtitles only to the first hour of a film; therefore, it’s best to pick one with fewer subtitles.
- To add an SRT file to a video, select Upload SRT. You can modify each caption and its timing.
- You can also alter the text’s font, size, color, style, and position. The button labeled “Download SRT” allows you to save the subtitles file for later use.
- Then, scroll down to the bottom of the page and click Continue.
- After finishing, click the Export button. Choose a name and destination for your video, then choose a format. You’ll see the export window where you can select a save option that is appropriate for you. Subtitles will be permanently added to the video.
9. EZGIF

EZGIF is a well-known website for animated GIFs. EZGIF has several tools for GIFs, Photos, and Videos. It offers an online tool to add subtitles to videos that you may use. It’s pretty simple to utilize and provides two methods for adding subtitles. You can upload a maximum of 100 MB on EZGIF. If your video is larger than 100 MB, you may compress it using EZGIF.
To add subtitles to a video on EZGIF, follow these steps:
- Go to https://ezgif.com/video-subtitles .
- Upload a video file or copy and paste the URL of a video available on the internet.
- To add subtitles, click the “Upload” button. To enter them manually, scroll to the bottom of the screen.
- Simply type the subtitle in the box, then set the time duration for when it should appear in the video. To cover the whole video, you may add more subtitles as well.
- After that, click “Add Subtitles” and then save the output.
10. PROMO

Promo is a website that makes promotion easier. This online tool lets users add basic subtitles to videos with ease as a video creation software. This site is free of charge and does not require registration to use the subtitle function, but it does give you an ad at the beginning of your finished video.
Using Promo, you may add video captions or subtitles from your browser anytime, anytime, anyplace. There’s no need to download anything; it’s as simple as clicking a link. The free version comes with a watermark. For the ad-free version, there is a $99/month fee.
To add subtitles with Promo subtitle maker online, follow the steps below:
- Go to https://promo.com/tools/add-subtitles-to-video .
- Upload the video you wish to caption or subtitle.
- You can use one of the platform’s professionally designed video templates or premium clips to construct a new film from the ground up.
- To add a caption to your video, after uploading it in Promo’s video editor, click the circular pink plus sign to the left of the timeline. Choose “Add Caption” from the dropdown menu.
- After you’ve added and positioned, and designed your subtitles with beautiful text and colors, click Save & Preview to view your creation and publish or download it.
Conclusion
If you need subtitles for your videos, it is important to find the best subtitle maker online that will suit all of your needs. Whether you are looking for a free option or want something with more customization, there are plenty of options available online. Check out our list, and make sure to choose one that suits what you need!
Creative Cloud Express is re-branded from Adobe Spark, a web and mobile app for creating multimeadia content. With Creative Cloud Express, you can add subtitles or captions to videos online without downloading any software on your computer. It also provides lots of editing tools such as convert video to GIF, reverse videos, merge videos, resize videos for different social , and change video speed.
You can use Creative Cloud Express for free, which includes most core features, but if you want to upgrade to use all features and assets, you may need to pay $9.99/month for the premium plan.
To add subtitles to video with Creative Cloud Express, follow the steps below:
- Visit https://www.adobe.com/express/feature/video/add-subtitle and click Add subtitles to your videos now to get started. Follow the instruction to sign up and sign in your account.
- Adobe will ask you to pick a story template, but you can always start from scratch. Here I will choose a template.
- Now import video or picture material from your computer, and adjust its position in the timeline.
- Pick from a variety of subtitle layout alternatives and change the text size as necessary.
- After adding titles and subtitles to your video, click the Download button to save your video to local computer.
If you prefer to add subtitles to video on Windows or Mac computer, you can try Filmora video editor . Compared with those online tools, Filmora video editor is undoubtedly a great choice for those who need more customized and stylish subtitles.
For Win 7 or later (64-bit)
Secure Download
For macOS 10.12 or later
Secure Download
Whether you want to edit home movies to send to family and friends or upload to YouTube and Vimeo for sharing, this video editor from Wondershare Filmora can help take your videos to a higher level effortlessly. Here, let’s take a look at the main features of this video editing software.
Filmora is compatible with the Filmstock effects store, an online stock media including video effects, va library for your video projects,video footage, music, sound effects, and stock images as well.
2. Kapwing
As one of the best online video editors , Kapwing allows you to add subtitles to the video easily. It gives three options for adding subtitles: upload an SRT file, manually add them, or have them auto-generated . It opens the video in the online video editor in either situation.
You can place subtitles anywhere on the screen, and you can relocate them at any time. Apart from that, you can customize the text’s appearance with formatting options, text color, and background color. However, you can export videos up to 30 minutes long for free, and to export longer video, you need to pay $16 per month. And in order to download the edited video without a watermark, you must create an account.
To use Kapwing subtitle creator online, follow these steps:
- Go to https://www.kapwing.com/subtitles , and upload your video file.
- On the Add Subtitles screen, choose the method for adding subtitles: add subtitles manually, or use auto-generated, or upload .SRT file. Here I will try add subtitles manually.
- When adding subtitles, make sure the timestamps are correct on the video. (If required) Set the time for precise sync (if desired).
- Click the “Done” button to return to the main editor. Click Export Video and then download it with embedded subtitles.
3. Clideo
Clideo is a video creation app that lets users add subtitles to their own videos. You can add subtitles in any language from an official list of languages available on the website. After adding the subtitle, you can re-position it anywhere on the screen with a few clicks. For free users, Claudio only allows HD exports, and they cannot download the video without a watermark.
To use this subtitle maker online tool, follow these steps:
- Visit https://clideo.com/add-subtitles-to-video and click Add subtitles to your videos now to get started after you register yourself on Clideo with your email id and password.
- Upload the video file from local storage, Google Drive or Dropbox, and then pick an option for adding captions: manually or using a subtitle file. Select the first instance, click “Add subtitle,” type your text, and set the timings.
You can also add a title, leader lines, and subheadings to your presentation. The font, color, background, size, and slide alignment are adjustable.
4. Veed.io
Veed.io is another easy-to-use web video editing tool with several subtitle options for adding subtitles. You can add subtitles quickly and easily, type them manually or upload them in SRT file format.
Veed is an automated subtitling platform that helps people add subtitles online to their YouTube videos without using off-the-shelf subtitle processing software. It is suitable for individuals who have no time or patience to type out long sentence structures one letter at a time. You can start without an account.
You can choose the color of the text, the background of subtitles, and more, to make your film look more attractive. It allows you to share your movies with friends via social media networks like Twitter and Facebook.
To use Veed subtitle creator online, follow these steps:
- Go to https://www.veed.io/tools/auto-subtitle-generator and click on “Get Started.” You can select a blank project or a template.
- Go to the Project Settings section on the left. Choose any one of them depending on your requirements and click Next.
- While using automated transcription, you have to upload.SRT subtitle file or enter the transcript manually.
- You can also personalize the text, color, size, font, alignment, and anything else you want.Make changes to the timeline and then sync the subtitles.
- After that, go to the Export and save the video.
5. Flixier
Flixier is one of the most accessible tools to add subtitles online. Flixier is an efficient auto subtitle generation and syncing platform. You can add any video file type with auto subtitles in Flixier. You can add auto subtitles to MPEG, MP4, MOV, AVI, or any other file on your system. There is no need to convert the video or do extra work. This automatic subtitle maker takes care of everything.
Flixier allows you to make a video subtitle automatically and manually create one or add a subtitle from your computer. You may submit any type of subtitle file (SRT, VTT, ASS, SSA, TXT).
To use Flixier subtitle maker online, follow these steps:
- Go to https://flixier.com/tools/auto-subtitle-generator and click on “Get Started.”
- You must first upload your videos to the Flixier library to create subtitles automatically.
- You may do so by uploading from your computer, importing from cloud storage services, or straight from YouTube, Zoom, or Twitch.
- After importing them, you may drag and drop your movie clips on the Flixier timeline.
- In the pop-up window that appears, click on one, and a button saying “Generate Auto Subtitle” will appear on the right. After you’ve finished your work, click start to have your subtitling generated and added onto the timeline where you can continue making changes.
- Finally, Flixier’s cloud rendering engine lets you export your film in minutes.
- Now, you may save the video to your computer or send it straight to social media.
6. Subtitle Horse
Subtitle Horse is a browser-based subtitler for online video captioning. There are many features, such as real-time validation, an interactive timeline, and shortcuts. Subtitle horse is highly configurable: Subtitles may be made by both amateurs and experts. Users must create an account to upload videos.
With the free version of subtitle horse, you may add subtitles and captions to your video. You may export your subtitles in the necessary formats (SRT, TimedText, WebVTT, etc.). The video can be accessed online, on a platform like YouTube, Dropbox, or others.
To use Subtitle-Horse subtitle creator online, follow these steps:
- Go to https://subtitle-horse.com/ and click on “Create subtitles with the free version.”
- Upload your video or add a URL by clicking the “Add Project” button
- Click “Next” and select “Frame Rate” and “Waveform.”
- Click “Start Subtitling”
- After adding subtitles, you can download them for free or buy HD-quality MP4 videos.
7. Subtitle Bee
SubtitleBee understands and automatically translates more than 120 languages across the world. Before uploading your video, simply choose your language and let SubtitleBee handle the rest by adding subtitles in your desired language.
The algorithm is about 95% accurate in detecting your voice and adding automated captions based on most languages. AI subtitle translation allows you to translate subtitles into other languages. You can use it for free with limited features and watermarked files. There is a time limit on free trial accounts, so you can add videos shorter than 10 minutes in length.
To use Subtitle-Bee subtitle maker online, follow these steps:
- Go to https://subtitlebee.com/ and click on “Add subtitles now”
- Then select the language of the current media voices.
- Now, Upload your video or paste a URL from Youtube, Vimeo, or self-hosted.
- Make any modifications as needed by editing the subtitles to meet your demands.
- Simply add the text you want and customize it to your own needs.
- Choose the social networking site that you wish to publish on.
- Download and encode your video with the subtitles included.
8. Fastreel
Fastreel allows you to create a video with subs and change the text settings: font, size, color, style, and position. A free membership will allow you to produce and share videos in the format of your choice, as well as access stock media. The cost of a paid subscription is $5.95 per video.
Furthermore, there are several colorful templates for various events — explainer videos, wedding films, YouTube intros, customer testimonials, and so forth. To personalize each template, you may use your own photos, films, music, and text. Plus, every template has its own title and transition style. Fastreel is not made for professional users; it’s a tool for novices and those searching for fast answers.
To use Fastreel subtitle creator online, follow these steps:
- Go to https://www.fastreel.com/add-subtitles-to-video.html and click on “Add subtitles now”
- Click the Add Your File button to upload any MOV, MKV, AVI, WMV, or MP4 content less than 500 MB in size. You can add subtitles only to the first hour of a film; therefore, it’s best to pick one with fewer subtitles.
- To add an SRT file to a video, select Upload SRT. You can modify each caption and its timing.
- You can also alter the text’s font, size, color, style, and position. The button labeled “Download SRT” allows you to save the subtitles file for later use.
- Then, scroll down to the bottom of the page and click Continue.
- After finishing, click the Export button. Choose a name and destination for your video, then choose a format. You’ll see the export window where you can select a save option that is appropriate for you. Subtitles will be permanently added to the video.
9. EZGIF
EZGIF is a well-known website for animated GIFs. EZGIF has several tools for GIFs, Photos, and Videos. It offers an online tool to add subtitles to videos that you may use. It’s pretty simple to utilize and provides two methods for adding subtitles. You can upload a maximum of 100 MB on EZGIF. If your video is larger than 100 MB, you may compress it using EZGIF.
To add subtitles to a video on EZGIF, follow these steps:
- Go to https://ezgif.com/video-subtitles .
- Upload a video file or copy and paste the URL of a video available on the internet.
- To add subtitles, click the “Upload” button. To enter them manually, scroll to the bottom of the screen.
- Simply type the subtitle in the box, then set the time duration for when it should appear in the video. To cover the whole video, you may add more subtitles as well.
- After that, click “Add Subtitles” and then save the output.
10. PROMO
Promo is a website that makes promotion easier. This online tool lets users add basic subtitles to videos with ease as a video creation software. This site is free of charge and does not require registration to use the subtitle function, but it does give you an ad at the beginning of your finished video.
Using Promo, you may add video captions or subtitles from your browser anytime, anytime, anyplace. There’s no need to download anything; it’s as simple as clicking a link. The free version comes with a watermark. For the ad-free version, there is a $99/month fee.
To add subtitles with Promo subtitle maker online, follow the steps below:
- Go to https://promo.com/tools/add-subtitles-to-video .
- Upload the video you wish to caption or subtitle.
- You can use one of the platform’s professionally designed video templates or premium clips to construct a new film from the ground up.
- To add a caption to your video, after uploading it in Promo’s video editor, click the circular pink plus sign to the left of the timeline. Choose “Add Caption” from the dropdown menu.
- After you’ve added and positioned, and designed your subtitles with beautiful text and colors, click Save & Preview to view your creation and publish or download it.
Conclusion
If you need subtitles for your videos, it is important to find the best subtitle maker online that will suit all of your needs. Whether you are looking for a free option or want something with more customization, there are plenty of options available online. Check out our list, and make sure to choose one that suits what you need!
The Ultimate DVD Conversion Guide: From Disc to Digital
Best DVD to Digital Format Converters

Liza Brown
Mar 27, 2024• Proven solutions
DVDs are not as nearly as popular as they were in the 2000s, simply because USB flash drives are much more durable than DVD discs. One of the easiest ways to back up the data stored on DVDs is to convert it to digital video file formats, like MOV or MP4 .
You cannot just copy and paste the data from a DVD or Blu-ray to a computer since you need file conversion software in order to change the format of a video file . Read on if you are looking for a way to convert a DVD to a digital video file format because in this article we are going to take you through some of the best DVD to digital format converters.
How to convert DVDs to Digital Video File Formats?
The process of converting a video file is simple, and anyone can perform it in just a few minutes even if they have never done it before. However, converting DVDs to digital file formats without permission is punishable by the law, so you must make sure that you have the right to use the file you created freely. Let’s take a look at some of the best DVD to digital format converters.
1. Vudu
Price: $2 - $5 per conversion
Compatibility: Android, iOS
Having a source of entertainment in your pocket wherever you go can make dull long journeys much more fun. Vudu allows you to manage your film collection directly from your Smartphone and have access to all your DVD and Blu-ray discs at any moment.

In order to start the conversion process, you just have to scan a disc’s barcode and the app will automatically convert it to a digital video file format. You can choose to convert a Blu-ray to HDX, DVD to SD or DVD to HDX, however, you will have to pay between $2 and $5 plus the tax for each file you convert with Vudu. Furthermore, the app features an impressive movie collection with more than 100,000 titles you can watch anytime and anywhere.
2. HandBrake
Price: Free
Compatibility: Windows
This open-source file converter can help you convert any DVD to a file format you choose effortlessly. PC users that have Windows 7 or later can install HandBrake for free, although the application only works on 64-bit versions of the OS.
You can choose from a variety of device presets that automatically adjust the conversion settings to a device on which the converted DVD video is going to be played. In addition, HandBrake lets you choose the output file format, set the preferred framerate or apply video filters such as Denoise , Grayscale or Deinterlacing. Nonetheless, HandBrake can only convert DVDs to MP4 or MKV file formats, which can considerably limit your conversion options.
3. Wondershare Uniconverter
Price: Freemium, $55.99 for the perpetual plan
Compatibility: Windows, macOS
If you are looking for a software product that enables you to burn DVDs, edit or transfer videos and convert them to more than a thousand video file formats, then Wondershare Unicoverter is undoubtedly one of the best choices you have at your disposal.

This cross-platform app converts files 30 times faster than any of its competitors because it supports GPU acceleration. In addition to excellent DVD file conversion capabilities, Uniconverter also offers VR conversion features and it allows you to combine and merge multiple video clips . Optionally, you can use this cross-platform app to add srt and other subtitle files to the videos you convert with it. You should keep in mind that the free version of Wondershare Uniconverter only lets you convert 1/3 of the output file and prevents recording videos that are longer than one minute.
4. DVDVideoSoft Free Video Converter
Price: Free
Compatibility: Windows
This is a simple tool that makes the process of converting a DVD to a digital video or audio file effortless. You just have to specify the source of the input video, then select the file format of the output video and optimize it for playback on a particular device by choosing one of the available Device presets.
You can easily convert DVDs to AVI, MP4, MKV, iPod, iPhone, Apple TV, Xbox or PS3 files with this video file converter. Extracting audio from DVD is yet another option DVDVideo Soft Free Video Converter provides, which enables you to extract dialogue or narration from video files. Even so, the software can only convert unprotected files, so you must make sure that the DVD you are trying to convert doesn’t have regional protection or any other form of encryption.
5. DVDFab DVD Ripper
Price: Free version available, pricing options start at $69
Compatibility: Windows, macOS
The range of the file conversion options this tool provides depends on the subscription model you’ve selected. In case you choose to convert your DVDs with the free version of the software, the number of discs you can open will not be limited but you won’t have access to all conversion profiles. Furthermore, you won’t have access to 4K and profiles and you will only get a free DVD Ripper account.
Both Full Trial and Paid versions of this DVD converter let you export multichannel audio files, but the free version limits the number of audio channels to just two. The resolution of the output videos cannot be higher than 480p regardless of the subscription model you choose, but you can purchase the Enlarger AI app separately and use it to upscale the videos up to 1080p.
6. WinX DVD Ripper Platinum
Price: $59.95
Compatibility: macOS, Windows
Backing up old DVDs, fixing playback errors on DVDs, or ripping a DVD to MP4 are some of the most common reasons why PC and Mac users choose to convert their DVDs with WinX DVD Ripper Platinum.

You can also convert encrypted or regional DVDs or choose to clone DVD to ISO without any quality losses. This DVD converter also offers simple video editing tools that allow you to trim videos, remove black bars, add subtitles or change the resolution of a video file. WinX DVD Ripper Platinum supports Level-3 Hardware Acceleration for Intel CPU, Nvidia or AMD GPU, so that you can convert an entire DVD into MP4 in just a few minutes.
Conclusion
Even though DVDs are no longer as popular as they once were, movie or music collectors can benefit from converting them to digital formats. Damaging a DVD is relatively easy, and backing up the data from your DVDs is probably the easiest way of ensuring that all your files are safe. Which DVD to digital format converter are you going to choose to convert your DVDs to digital video file format? Leave a comment and let us know.
Liza Brown
Liza Brown is a writer and a lover of all things video.
Follow @Liza Brown
Liza Brown
Mar 27, 2024• Proven solutions
DVDs are not as nearly as popular as they were in the 2000s, simply because USB flash drives are much more durable than DVD discs. One of the easiest ways to back up the data stored on DVDs is to convert it to digital video file formats, like MOV or MP4 .
You cannot just copy and paste the data from a DVD or Blu-ray to a computer since you need file conversion software in order to change the format of a video file . Read on if you are looking for a way to convert a DVD to a digital video file format because in this article we are going to take you through some of the best DVD to digital format converters.
How to convert DVDs to Digital Video File Formats?
The process of converting a video file is simple, and anyone can perform it in just a few minutes even if they have never done it before. However, converting DVDs to digital file formats without permission is punishable by the law, so you must make sure that you have the right to use the file you created freely. Let’s take a look at some of the best DVD to digital format converters.
1. Vudu
Price: $2 - $5 per conversion
Compatibility: Android, iOS
Having a source of entertainment in your pocket wherever you go can make dull long journeys much more fun. Vudu allows you to manage your film collection directly from your Smartphone and have access to all your DVD and Blu-ray discs at any moment.
In order to start the conversion process, you just have to scan a disc’s barcode and the app will automatically convert it to a digital video file format. You can choose to convert a Blu-ray to HDX, DVD to SD or DVD to HDX, however, you will have to pay between $2 and $5 plus the tax for each file you convert with Vudu. Furthermore, the app features an impressive movie collection with more than 100,000 titles you can watch anytime and anywhere.
2. HandBrake
Price: Free
Compatibility: Windows
This open-source file converter can help you convert any DVD to a file format you choose effortlessly. PC users that have Windows 7 or later can install HandBrake for free, although the application only works on 64-bit versions of the OS.
You can choose from a variety of device presets that automatically adjust the conversion settings to a device on which the converted DVD video is going to be played. In addition, HandBrake lets you choose the output file format, set the preferred framerate or apply video filters such as Denoise , Grayscale or Deinterlacing. Nonetheless, HandBrake can only convert DVDs to MP4 or MKV file formats, which can considerably limit your conversion options.
3. Wondershare Uniconverter
Price: Freemium, $55.99 for the perpetual plan
Compatibility: Windows, macOS
If you are looking for a software product that enables you to burn DVDs, edit or transfer videos and convert them to more than a thousand video file formats, then Wondershare Unicoverter is undoubtedly one of the best choices you have at your disposal.
This cross-platform app converts files 30 times faster than any of its competitors because it supports GPU acceleration. In addition to excellent DVD file conversion capabilities, Uniconverter also offers VR conversion features and it allows you to combine and merge multiple video clips . Optionally, you can use this cross-platform app to add srt and other subtitle files to the videos you convert with it. You should keep in mind that the free version of Wondershare Uniconverter only lets you convert 1/3 of the output file and prevents recording videos that are longer than one minute.
4. DVDVideoSoft Free Video Converter
Price: Free
Compatibility: Windows
This is a simple tool that makes the process of converting a DVD to a digital video or audio file effortless. You just have to specify the source of the input video, then select the file format of the output video and optimize it for playback on a particular device by choosing one of the available Device presets.
You can easily convert DVDs to AVI, MP4, MKV, iPod, iPhone, Apple TV, Xbox or PS3 files with this video file converter. Extracting audio from DVD is yet another option DVDVideo Soft Free Video Converter provides, which enables you to extract dialogue or narration from video files. Even so, the software can only convert unprotected files, so you must make sure that the DVD you are trying to convert doesn’t have regional protection or any other form of encryption.
5. DVDFab DVD Ripper
Price: Free version available, pricing options start at $69
Compatibility: Windows, macOS
The range of the file conversion options this tool provides depends on the subscription model you’ve selected. In case you choose to convert your DVDs with the free version of the software, the number of discs you can open will not be limited but you won’t have access to all conversion profiles. Furthermore, you won’t have access to 4K and profiles and you will only get a free DVD Ripper account.
Both Full Trial and Paid versions of this DVD converter let you export multichannel audio files, but the free version limits the number of audio channels to just two. The resolution of the output videos cannot be higher than 480p regardless of the subscription model you choose, but you can purchase the Enlarger AI app separately and use it to upscale the videos up to 1080p.
6. WinX DVD Ripper Platinum
Price: $59.95
Compatibility: macOS, Windows
Backing up old DVDs, fixing playback errors on DVDs, or ripping a DVD to MP4 are some of the most common reasons why PC and Mac users choose to convert their DVDs with WinX DVD Ripper Platinum.
You can also convert encrypted or regional DVDs or choose to clone DVD to ISO without any quality losses. This DVD converter also offers simple video editing tools that allow you to trim videos, remove black bars, add subtitles or change the resolution of a video file. WinX DVD Ripper Platinum supports Level-3 Hardware Acceleration for Intel CPU, Nvidia or AMD GPU, so that you can convert an entire DVD into MP4 in just a few minutes.
Conclusion
Even though DVDs are no longer as popular as they once were, movie or music collectors can benefit from converting them to digital formats. Damaging a DVD is relatively easy, and backing up the data from your DVDs is probably the easiest way of ensuring that all your files are safe. Which DVD to digital format converter are you going to choose to convert your DVDs to digital video file format? Leave a comment and let us know.
Liza Brown
Liza Brown is a writer and a lover of all things video.
Follow @Liza Brown
Maximizing Mobile Engagement: The Power of Vertical Aspect Ratio
Best Practices for Creating Phone Aspect Ratio Vertical on Your Smartphone
An easy yet powerful editor
Numerous effects to choose from
Detailed tutorials provided by the official channel
When you’re taking a snapshot of someone or something and posting it to social media, you’ll need to decide if it’ll be a portrait or a landscape orientation. And that’s where the knowledge regarding the phone aspect ratio vertical comes in!

This post will dive into the rise of the phone aspect ratio vertical, including best practices on using phone ratio calculator and mobile vertical video size based on its final viewing platforms such as YouTube, Instagram, or broadcast.
In this article
01 [Why Vertical Videos Are in the Frame?](#Part 1)
02 [Different Aspect Ratios on Mobile Screens](#Part 2)
03 [Tips to Shoot a Vertical Video](#Part 3)
04 [Top 6 Practices for Creating Phone Aspect Ratio Vertical on Your Smartphone](#Part 4)
Part 1 Why Vertical Videos Are in the Frame?
Did you know that there are six aspect ratios in total for videos and photos that marketers and creators use? These aspect ratios are 9:16, 16:9, 1:1, 4:3, 3:2, 21:9. The first way to choose the right aspect ratio for your video is whether the video needs to be vertical or horizontal.
A video that’s portrait or vertical mode is taller than it is wide. The entire screen is devoted to vertical video capturing while gaining attention.
Smartphones are to be held vertically, and although you can view media always horizontally, it’s far simpler for watchers to consume media while keeping their mobile phones upright.
Vertical videos are available in different sizes, but the most standard instances come in the 9:16 aspect ratio. While the traditional format of watching videos on phones has been horizontal with an aspect ratio of 16:9, vertical videos are taller than more comprehensive, hence the reversed aspect ratio. And, this is the main reason you see vertical videos in the frame, and thus, they need to be fixed or rightly shot in terms of ideal phone aspect ratio vertical.
Part 2 Different Aspect Ratios on Mobile Screens
The aspect ratio also measures how tall or wide a display is. Still, it shouldn’t be mistaken for ‘display/screen size’ calculated by diagonally measuring throughout the screen.
The phone aspect ratio vertical is commonly written in proportions with the more petite figure on the right side and the more prominent figure on the left-hand side. It’s also sometimes called a decimal, the more prominent figure divided by, the more petite figure.
It means that a display aspect ratio of 16:9 can also be called an aspect ratio of 1.78, i.e., 16/9.
Types of Aspect ratio
● 16:9 Aspect Ratio
16:9 is one of the most common aspect ratios used on smartphones. Sometimes showcased as 1.78 or 4²:3², the aspect ratio has become typical for smartphones and other devices since 2010.
It generally means there will be 16 pixels in one direction for every 9 pixels in the other for a device with a 16:9 display.

Devices with a 16:9 aspect ratio are usually broad, and they became the standard aspect ratio for smartphones because most contents are also available in the exact format. So you would enjoy videos and gaming in full widescreen quality on a 16:9 aspect ratio device.
On the other hand, you’ll experience the “Letterboxing effect“ on devices that aren’t available in 16:9 aspect ratios and where black bars/bands appear at the bottom and the top of the content you are wandering.

● 18:9 Aspect ratio
This 18:9 aspect ratio was born out of the need to maximize the size of displays without increasing the dimensions of phone sizes.
The narrow design of 18:9 aspect ratio devices assisted for better one-hand grip, smooth multitasking, enhanced usability, and more screen real estate, etc. Yet, because contents are highly present in the 16:9 aspect ratio, there will be “black bands” at the top, bottom or to your display’s right or left.

The 18:9 aspect ratio allows for convenient usage of smartphones, provided we put the content-cropping and letterboxing aside.
● 19:9 Aspect ratio
19:9 is another smartphone aspect ratio that is becoming increasingly famous and used by top OEMs like Samsung, Huawei, ASUS, and Apple on their flagship devices.
The smartphones with a 19:9 aspect ratio are available with increased height and 19 pixels in single direction for every 9 pixels in the other. Similar to 18:9, devices with a 19:9 aspect ratio generally have pretty non-existent and slimmer bezels, but you’ll enjoy vast screen real estate with the latter.
Understanding iPhone Vertical Video Dimensions
Apple boasts a 16:9 screen for the versions of iPhone 5 onwards. Most Google/Android phones already had a 16:9 screen at that point. Thus, to export a vertical video, you would want it to be 9:16. (16:9 standing up!) and it’s the ideal size for iPhone vertical video dimensions.
The highest quality vertical video’s output is 720 Horizontal by 1280 vertical for 1080p (1080X1920).
The highest quality vertical video’s output is 576 horizontal by 1024 vertical for 720p (720X1280).
Vertical Phone Aspect Ratio for Video
Let’s now understand the mobile vertical video size! Vertical video is pretty higher than it is wide. Instead of being shown in a landscape orientation or widescreen format, the way video has traditionally intended for television and cinema and television, and the vertical video rotated by 90 degrees.

Hold your phone upright and record video in a 9:16 aspect ratio. Hence, the name vertical video is said to be!
It’s because if you horizontally hold your phone, the viewable screen area is 16:9 aspect ratio. The same standard is for most HDTV, video production, and cinema screen sizes.
Part 3 Tips to Shoot a Vertical Video
Besides using the photo ratio calculator, we’d like to enlist some tips on getting started with your phone aspect ratio vertical shooting.
1 – High production quality is not essential
Yes, the content is the king, and people or the end customers may not notice your video quality than the content. So, don’t be afraid when you start and move ahead with your DIY budget.
2 – Use the Ideal Dimensions
Whether it’s iPhone vertical video dimensions or other Android and Windows devices, you need to use the ideal dimensions already discussed above.
3 – Engage your audience better
You can incorporate little details within the video and engage your audience better. You can also add captions and burn them within the video.
4 – Optimize vertical videos
You can optimize vertical videos for viewing without sound. Try watching your videos without audio to see if they still make sense without that context. You likely won’t achieve the same excellent results made possible with good video marketing if they don’t.
5 – Capture Attention
Yes, you need to attract the audience and capture their attention within seconds. And, it’s the only or one of the best tricks t get your audience hooked for the long term. Don’t underestimate the significance of storytelling, and you can thus add them for creative looks.
Part 4 Top 6 Practices for Creating Phone Aspect Ratio Vertical on Your Smartphone
Are you looking to capture the video in the correct phone aspect ratio vertical? In this section, we will discuss a few helpful tips that will assist you in shooting a better vertical video in any condition you want to sort.
1 – Shoot in the desired or ideal aspect ratio
Any video bigger than the aspect ratio of 1:1 is vertical video.
It’s possible to create vertical videos two ways:
● By framing a camera in portrait mode.
● By rendering it vertically by scaling or cutting the video.
2 – Split the screen
You can use the tall height of the vertical frame to stack horizontal clips on top of each other creatively.
Clips can be related in appearance and content or appear to mend into one another. Various music videos have also used this technique.
You can also try merging various diagonal lines or clips for a unique look.
3 - Fill the vertical space
You can quickly fill vacant space in the frame automatically by getting closer to the subject.

When the camera is angled down and raised high, you automatically get a deep frame for filming long shots that fill space.
The above-the-head perspective provides an attractive and latest POV that serves the exact purpose.

4 - Try not to shake (or use a gimbal or a selfie stick)
While watching a video, jerking camera movements are almost always disturbing and distracting. This must be avoided quickly from side to side when creating vertical videos with minimized space on sides.
While a normal 360-degree or pan rotation is outstanding (and even crucial), cameras cannot manage the data amount they must process once they begin to move too quickly.
Slow down when in doubt!

5 - Remember to resize as per the platform
You don’t essentially have to shoot everything at eye level or arm’s length when you shoot videos vertically.
Changing your angles and shot length will assist make your videos more interactive, and you can create something compelling out of them within the video frame.
Screen recordings are usually horizontal, but they will be vertically viewed when you upload them to Instagram. They also make sure the edges did not get cut off while uploading them and the writing is still legible.
6 - Add graphics, fun text, GIFs, or stickers
Use text that complements visuals. Make sure your text isn’t highlighting your subject. Any graphics elements, such as stickers or emojis, should follow this exact approach.
Line them up where they’ll improve your video and scale them up as required.
Pro Tip: Use Wondershare Filmora Video Editor to get your desired phone aspect ratio vertical

Wondershare Filmora - Best Video Editor for Mac/Windows
5,481,435 people have downloaded it.
Build unique custom animations without breaking a sweat.
Focus on creating epic stories and leave the details to Filmora’s auto features.
Start a creative adventure with drag & drop effects and endless possibilities.
Filmora simplifies advanced features to save you time and effort.
Filmora cuts out repetition so you can move on to your next creative breakthrough.
Filmora provides various functions to resize your video, which means you can change video bitrate or directly crop your video when exporting. Despite resizing a video, you can also zoom your video to highlight the best section of your video. Here are certain features or functions of Filmora to resize a video. Download it now and have a try!
● Resize the video size and aspect ratio of video;
● Crop/trim/cut video to highlight an object within the video;
● Add multiple video effects
● Export the edited video portion to a mobile device, DVD, or YouTube;
● Supported OS: Mac OS X (above 10.10) and Windows (Windows 10 included).
Resize Video by Cropping
Step 1: Upload the video to the program
Firstly, upload your media via the “Import” tab or drag and drop it from the Windows File Explorer tab to the User’s Album.
Thereafter, drag videos from the User’s Album to the Timeline.

Step 2: Crop the video
You can aim at a specific part of the video by cropping and resizing your video display dimensions. Hit the added video on Timeline, a “Crop, and Zoom” button to cut the video. It will appear in the options menu.
Hit it to bring up the editing panel and crop videos.

Hit the Crop tab. Just hover the mouse to move and resize the marquee to decide how to crop the original video.
You have five options while video cropping at the bottom to assist you: Custom, 16:9, 4:3, 1:1, and 9:16 aspect radio.
Select Aspect Ratio of Project
After you launch Filmora, you can select the project aspect ratio. There are options among 16:9 (widescreen), 4:3 (standard), 9:16 (portrait), 1:1 (Instagram). Select the one you desire and begin by clicking the New Project.

Key Takeaways from This Episode
● Understanding phone aspect ratio vertical on both the Windows and iPhone.
● Different types of mobile vertical video sizes.
● Best six practices to shoot the video in the proper phone aspect ratio vertical.
When you’re taking a snapshot of someone or something and posting it to social media, you’ll need to decide if it’ll be a portrait or a landscape orientation. And that’s where the knowledge regarding the phone aspect ratio vertical comes in!
This post will dive into the rise of the phone aspect ratio vertical, including best practices on using phone ratio calculator and mobile vertical video size based on its final viewing platforms such as YouTube, Instagram, or broadcast.
In this article
01 [Why Vertical Videos Are in the Frame?](#Part 1)
02 [Different Aspect Ratios on Mobile Screens](#Part 2)
03 [Tips to Shoot a Vertical Video](#Part 3)
04 [Top 6 Practices for Creating Phone Aspect Ratio Vertical on Your Smartphone](#Part 4)
Part 1 Why Vertical Videos Are in the Frame?
Did you know that there are six aspect ratios in total for videos and photos that marketers and creators use? These aspect ratios are 9:16, 16:9, 1:1, 4:3, 3:2, 21:9. The first way to choose the right aspect ratio for your video is whether the video needs to be vertical or horizontal.
A video that’s portrait or vertical mode is taller than it is wide. The entire screen is devoted to vertical video capturing while gaining attention.
Smartphones are to be held vertically, and although you can view media always horizontally, it’s far simpler for watchers to consume media while keeping their mobile phones upright.
Vertical videos are available in different sizes, but the most standard instances come in the 9:16 aspect ratio. While the traditional format of watching videos on phones has been horizontal with an aspect ratio of 16:9, vertical videos are taller than more comprehensive, hence the reversed aspect ratio. And, this is the main reason you see vertical videos in the frame, and thus, they need to be fixed or rightly shot in terms of ideal phone aspect ratio vertical.
Part 2 Different Aspect Ratios on Mobile Screens
The aspect ratio also measures how tall or wide a display is. Still, it shouldn’t be mistaken for ‘display/screen size’ calculated by diagonally measuring throughout the screen.
The phone aspect ratio vertical is commonly written in proportions with the more petite figure on the right side and the more prominent figure on the left-hand side. It’s also sometimes called a decimal, the more prominent figure divided by, the more petite figure.
It means that a display aspect ratio of 16:9 can also be called an aspect ratio of 1.78, i.e., 16/9.
Types of Aspect ratio
● 16:9 Aspect Ratio
16:9 is one of the most common aspect ratios used on smartphones. Sometimes showcased as 1.78 or 4²:3², the aspect ratio has become typical for smartphones and other devices since 2010.
It generally means there will be 16 pixels in one direction for every 9 pixels in the other for a device with a 16:9 display.
Devices with a 16:9 aspect ratio are usually broad, and they became the standard aspect ratio for smartphones because most contents are also available in the exact format. So you would enjoy videos and gaming in full widescreen quality on a 16:9 aspect ratio device.
On the other hand, you’ll experience the “Letterboxing effect“ on devices that aren’t available in 16:9 aspect ratios and where black bars/bands appear at the bottom and the top of the content you are wandering.
● 18:9 Aspect ratio
This 18:9 aspect ratio was born out of the need to maximize the size of displays without increasing the dimensions of phone sizes.
The narrow design of 18:9 aspect ratio devices assisted for better one-hand grip, smooth multitasking, enhanced usability, and more screen real estate, etc. Yet, because contents are highly present in the 16:9 aspect ratio, there will be “black bands” at the top, bottom or to your display’s right or left.
The 18:9 aspect ratio allows for convenient usage of smartphones, provided we put the content-cropping and letterboxing aside.
● 19:9 Aspect ratio
19:9 is another smartphone aspect ratio that is becoming increasingly famous and used by top OEMs like Samsung, Huawei, ASUS, and Apple on their flagship devices.
The smartphones with a 19:9 aspect ratio are available with increased height and 19 pixels in single direction for every 9 pixels in the other. Similar to 18:9, devices with a 19:9 aspect ratio generally have pretty non-existent and slimmer bezels, but you’ll enjoy vast screen real estate with the latter.
Understanding iPhone Vertical Video Dimensions
Apple boasts a 16:9 screen for the versions of iPhone 5 onwards. Most Google/Android phones already had a 16:9 screen at that point. Thus, to export a vertical video, you would want it to be 9:16. (16:9 standing up!) and it’s the ideal size for iPhone vertical video dimensions.
The highest quality vertical video’s output is 720 Horizontal by 1280 vertical for 1080p (1080X1920).
The highest quality vertical video’s output is 576 horizontal by 1024 vertical for 720p (720X1280).
Vertical Phone Aspect Ratio for Video
Let’s now understand the mobile vertical video size! Vertical video is pretty higher than it is wide. Instead of being shown in a landscape orientation or widescreen format, the way video has traditionally intended for television and cinema and television, and the vertical video rotated by 90 degrees.
Hold your phone upright and record video in a 9:16 aspect ratio. Hence, the name vertical video is said to be!
It’s because if you horizontally hold your phone, the viewable screen area is 16:9 aspect ratio. The same standard is for most HDTV, video production, and cinema screen sizes.
Part 3 Tips to Shoot a Vertical Video
Besides using the photo ratio calculator, we’d like to enlist some tips on getting started with your phone aspect ratio vertical shooting.
1 – High production quality is not essential
Yes, the content is the king, and people or the end customers may not notice your video quality than the content. So, don’t be afraid when you start and move ahead with your DIY budget.
2 – Use the Ideal Dimensions
Whether it’s iPhone vertical video dimensions or other Android and Windows devices, you need to use the ideal dimensions already discussed above.
3 – Engage your audience better
You can incorporate little details within the video and engage your audience better. You can also add captions and burn them within the video.
4 – Optimize vertical videos
You can optimize vertical videos for viewing without sound. Try watching your videos without audio to see if they still make sense without that context. You likely won’t achieve the same excellent results made possible with good video marketing if they don’t.
5 – Capture Attention
Yes, you need to attract the audience and capture their attention within seconds. And, it’s the only or one of the best tricks t get your audience hooked for the long term. Don’t underestimate the significance of storytelling, and you can thus add them for creative looks.
Part 4 Top 6 Practices for Creating Phone Aspect Ratio Vertical on Your Smartphone
Are you looking to capture the video in the correct phone aspect ratio vertical? In this section, we will discuss a few helpful tips that will assist you in shooting a better vertical video in any condition you want to sort.
1 – Shoot in the desired or ideal aspect ratio
Any video bigger than the aspect ratio of 1:1 is vertical video.
It’s possible to create vertical videos two ways:
● By framing a camera in portrait mode.
● By rendering it vertically by scaling or cutting the video.
2 – Split the screen
You can use the tall height of the vertical frame to stack horizontal clips on top of each other creatively.
Clips can be related in appearance and content or appear to mend into one another. Various music videos have also used this technique.
You can also try merging various diagonal lines or clips for a unique look.
3 - Fill the vertical space
You can quickly fill vacant space in the frame automatically by getting closer to the subject.
When the camera is angled down and raised high, you automatically get a deep frame for filming long shots that fill space.
The above-the-head perspective provides an attractive and latest POV that serves the exact purpose.
4 - Try not to shake (or use a gimbal or a selfie stick)
While watching a video, jerking camera movements are almost always disturbing and distracting. This must be avoided quickly from side to side when creating vertical videos with minimized space on sides.
While a normal 360-degree or pan rotation is outstanding (and even crucial), cameras cannot manage the data amount they must process once they begin to move too quickly.
Slow down when in doubt!
5 - Remember to resize as per the platform
You don’t essentially have to shoot everything at eye level or arm’s length when you shoot videos vertically.
Changing your angles and shot length will assist make your videos more interactive, and you can create something compelling out of them within the video frame.
Screen recordings are usually horizontal, but they will be vertically viewed when you upload them to Instagram. They also make sure the edges did not get cut off while uploading them and the writing is still legible.
6 - Add graphics, fun text, GIFs, or stickers
Use text that complements visuals. Make sure your text isn’t highlighting your subject. Any graphics elements, such as stickers or emojis, should follow this exact approach.
Line them up where they’ll improve your video and scale them up as required.
Pro Tip: Use Wondershare Filmora Video Editor to get your desired phone aspect ratio vertical
Wondershare Filmora - Best Video Editor for Mac/Windows
5,481,435 people have downloaded it.
Build unique custom animations without breaking a sweat.
Focus on creating epic stories and leave the details to Filmora’s auto features.
Start a creative adventure with drag & drop effects and endless possibilities.
Filmora simplifies advanced features to save you time and effort.
Filmora cuts out repetition so you can move on to your next creative breakthrough.
Filmora provides various functions to resize your video, which means you can change video bitrate or directly crop your video when exporting. Despite resizing a video, you can also zoom your video to highlight the best section of your video. Here are certain features or functions of Filmora to resize a video. Download it now and have a try!
● Resize the video size and aspect ratio of video;
● Crop/trim/cut video to highlight an object within the video;
● Add multiple video effects
● Export the edited video portion to a mobile device, DVD, or YouTube;
● Supported OS: Mac OS X (above 10.10) and Windows (Windows 10 included).
Resize Video by Cropping
Step 1: Upload the video to the program
Firstly, upload your media via the “Import” tab or drag and drop it from the Windows File Explorer tab to the User’s Album.
Thereafter, drag videos from the User’s Album to the Timeline.
Step 2: Crop the video
You can aim at a specific part of the video by cropping and resizing your video display dimensions. Hit the added video on Timeline, a “Crop, and Zoom” button to cut the video. It will appear in the options menu.
Hit it to bring up the editing panel and crop videos.
Hit the Crop tab. Just hover the mouse to move and resize the marquee to decide how to crop the original video.
You have five options while video cropping at the bottom to assist you: Custom, 16:9, 4:3, 1:1, and 9:16 aspect radio.
Select Aspect Ratio of Project
After you launch Filmora, you can select the project aspect ratio. There are options among 16:9 (widescreen), 4:3 (standard), 9:16 (portrait), 1:1 (Instagram). Select the one you desire and begin by clicking the New Project.
Key Takeaways from This Episode
● Understanding phone aspect ratio vertical on both the Windows and iPhone.
● Different types of mobile vertical video sizes.
● Best six practices to shoot the video in the proper phone aspect ratio vertical.
Ultimate Video Editing Software Roundup: Top Picks for All Platforms
Best Video Editors for Windows/Mac/iOS/Android/Linux [All in One]

Ollie Mattison
Mar 27, 2024• Proven solutions
Now, videos are getting increasingly important for you to present your thoughts and feeling on Instagram, YouTube, or Facebook.
But how to make your video looks professional, creative, stunning and deserved to share? A free video editing software can do you a favor.
So, Which is the best video editor available in the market?
If you are not quite certain about the video editing software you should use to edit your videos, you’ve come to the right place. Because we are going to take you through the best video editors including free versions.
Newcomers to the world of the video editing as well as seasoned professionals can use this guide to find the video editing software that will help them produce better visual content.
Let’s dive in and explore all aspects worth considering before you decide which software is best for you. And you can click the Filter button at the left side in this article to find the best video editing software for you.
- Part I: Best Video Editor for PC/Mac/Linux
- Part II: Best Video Editing Software Online
- Part III: Best Video Editor APP for iOS/Android
We spent about a month for researching and testing all popular video making software in the market and now collect 35 best video editors for you. This list of film makers can be used on Windows, Mac OS, iOS, Android, and Linux. Besides, some of them are online video editors you can use directly.
Now, let’s filter through the list to find the best video editor for you. Check it out :
| No. | Product Name | Supported OS | Price | Best for | Overview | Download Link |
|---|---|---|---|---|---|---|
| 1 | Wondershare Filmora | Windows 7/8/10, Mac OS, Android, iOS | Free trial; $79.99 perpetual, $49.99/year | Beginners, Semi-Pros | 4.9 | Download |
| 2 | Windows Movie Maker | Windows7/8/10 | Free | Beginners | 4.1 | Download |
| 3 | iMovie | Mac OS, iOS | Free | Beginners | 4.3 | Download |
| 4 | Final Cut Pro | Mac OS | 30 days free trial; $299.99 | Professionals | 4.4 | Download |
| 5 | Wondershare Filmii | Windows 7/8/10 | Free trial; $9.99 | Beginners | 4.3 | Download |
| 6 | Lightworks | Windows 7/8/10, Mac OS, Linux | Free trial; $437.99 | Professionals | 4.2 | Download |
| 7 | ShotCut | Windows 7/8/10, Mac OS, Linux | Free Open Source Video Editor | Semi-Pros | 3.9 | Download |
| 8 | HitFilm Express | Windows, Mac OS | Free | Semi-Pros | 4.1 | Download |
| 9 | Blender | Windows 7/8/10, Mac OS, Linux | Free; Fund $6/mo for support | Professionals | 3.8 | Download |
| 10 | Avidemux | Windows 7/8/10, Mac OS, Linux | Free | Beginners | 3.5 | Download |
| 11 | VideoPad Video Editor | Windows, Mac OSX, iOS, Kindle | Free | Beginners | 3.9 | Download |
| 12 | OpenShot | Windows 7/8/10, Mac OS, Linux | Free Open Source Video Editor | Beginners | 3.8 | Download |
| 13 | Kdenlive | Windows 7/8/10, Mac OS, Linux | Free | Semi-pros | 4.1 | Download |
| 14 | Adobe Premiere Pro | Windows 7/8/10, Mac OS | 7 days free trial; $20.99/mo; $33.99 /mo | Professionals | 4.5 | Download |
| 15 | Magix Vegas Pro | Windows 7/8/10, Mac OS | $399-$799 | Professionals | 4.2 | Download |
| 16 | Adobe Premiere Elements | Windows 7/8/10, Mac OS | $99.99 | Semi-pros | 4.7 | Download |
| 17 | CyberLink PowerDirector | Windows 7/8/10, Mac OS | $69,99 - $129,99 | Semi-pros | 4.5 | Download |
| 18 | Magix Movie Video Easy | Windows only | Free trial; $49,99 | Semi-pros | 3.6 | Download |
| 19 | Magix Video Pro | Windows 10 | Free trial; $79.99 | Beginners | 4.1 | Download |
| 20 | Media | Online | Free | Beginners | 4.75 | Check |
| 21 | YouTube | Online | Free | Beginners | 4.8 | Check |
| 22 | Online Video Cutter | Online | Free | Beginners | 3.6 | Check |
| 23 | Movie Maker Online | Online | Free | Beginners | 3.7 | Check |
| 24 | ClipChamp | Online | 14 day free trial; $7/mo | Beginners | 4.1 | Check |
| 25 | WeVideo | Online | Free trial; $11.99-$79.99 | Beginners | 4.4 | Check |
| 26 | Kizoa | Online | Freemium | Beginners | 3.8 | Check |
| 27 | Wideo | Online | Freemium | Beginners | 4.3 | Check |
| 28 | Filmora | iOS, Android | Freemium | Beginners | 4.1 | Download |
| 29 | Vlogit | iOS, Android | Free | Beginners | 3.6 | Download |
| 30 | VideoShop | iOS, Android | Freemium | Beginners | 4.8 | Download |
| 31 | Filmmaker Pro | iOS | Freemium; $5.99/mo | Semi-pros | 4.6 | Download |
| 32 | KineMaster | iOS, Android | Freemium | Semi-pros | 4.4 | Download |
| 33 | LumaFusion | iOS | $29.99 | Semi-pros | 4.8 | Download |
| 34 | Vizzywig 2019 | iOS | $79.99 | Semi-pros | 4.1 | Download |
| 35 | PowerDirector | iOS, Android | Freemium | Beginners | 4.5 | Download |
Part I: Best Video Editing Software for Windows/Mac/Linux
1. Wondershare Filmora
Platform: Windows, Mac, Android, iOS
Price: Free trial; $79.99 perpetual, $49.99/year
Level: Beginners
Even though it is widely considered as one of the premium entry-level video editing software options, Wondershare Filmora also offers advanced editing tools. The software product comes with detailed learning resources and provides support to its users who have little editing experience. The wide range of file formats and remarkably diverse Export options make Filmora an interesting choice for those who are just entering the world of video editing, but also for more experienced editors.
Features: Filmora’s rich effect library contains over a thousand modern special effects from niches such as gaming, blockbuster or tutorial, and new effects are added every month. The Action Cam tool is designed to make merging footage shot on action cameras easy and quick. Filmora supports a wide range of file formats including AVI, MP4 or MKV, so you don’t have to worry if your footage was shot in 4K or HD because you can easily edit it with this software.
Advantages:
A large number of professional video editing features Filmora offers as well as its modernly designed interface makes it one of the best options for amateur video creators.
Limitations:
You can use all the features in the free trial version, but have to pay to remove the watermark.
Lear more about Wondershare Filmora here: Filmora Official YouTube Channel
2. Windows Movie Maker
Platform: Windows
Price: Free
Level: Beginners

This is probably one of the oldest if not the oldest video editing software for PCs. Microsoft has announced that Windows Movie Maker will no longer be available for download. This software can still be found online, although not on Microsoft’s website, and currently, there are two different versions of Windows Movie Maker available. Even the least experienced video editors can master each of the Movie Maker versions easily.
Features: The classic video editing software is equipped with all the tools you’ll need for basic editing tasks like trimming, changing the video playback speed or rotating videos. It even features a Video Stabilization option that can be useful if you’d like to stabilize a video and remove the distracting camera shakes. Windows Movie Maker lets you add text effects to your video, insert Transitions between two takes, perform basic audio editing or record a screen.
Advantages:
Free, meets your basic editing demands
Limitations:
Service discontinued
No support for modern file formats
Lacks color correction tools, visual effects or any other advanced video editing options.
Check how to use Windows Movie Maker here: Windows Movie Maker User Guide
3. iMovie
Platform: Mac OS, iOS
Price: Free
Level: Beginners

As the Apple’s version of the Windows Movie Maker, iMovie has a similar status of a classic video editor that is at its best when used for simple video editing tasks. The video editor can also be used on an iPhone or an iPad if you want to edit your videos on the go. Learning your way around iMovie won’t take much of your time since all of its features are easy to use.
Features: Editing 4K videos or making credits or titles are just a few among many options provided by iMovie. Adding transitions, applying split-screen effects or creating PIP videos doesn’t require you to be a skilled video editor, because all of these options are easily accessible and they can be used in any project you are working on.
The iMovie’s audio editing options are equally impressive since the software enables you to add music, use built-in sound effects and record voiceovers. The video editor supports most of the popular file formats.
Advantages:
Free, and comes bundled with your Mac
Intuitive interface
Limitations:
This classic video editor for Apple’s devices doesn’t offer advanced video editing options such as motion tracking or keyframe marking.
Check how to use Windows Movie Maker here: iMovie User Guide
4. Final Cut Pro
Platform: macOS
Price: Paid, $299
Level: Professionals

Final Cut Pro is probably one of the highest praised video editing software ever created. It has been used to edit cinematic masterpieces such as ‘What happened Miss Simone’ or ‘The Girl With a Dragon Tattoo’, which speaks volumes about the software’s capability. Final Cut Pro’s Magnetic Timeline 2 is one of the kind, and it makes organizing large amounts of video and audio files look easy. Although the software’s price may seem discouraging, those who invested in it never had to use another video editor.
Features: A brief look at the list of Final Cut Pro’s video editing tools will leave you wondering if there is anything this software can’t do. Besides basic video editing features, the video editor is also equipped with 360 degrees VR video editing option, Multicam editing, and advanced color grading tools. Final Cut Pro allows its users to add as many audio tracks to the timeline as they want, thus enabling them to create impeccable soundtracks for their videos.
Advantages: Working with large numbers of video files is simplified by the software’s timeline, while options such as 3D titles or VR contribute to the strong impression this editor leaves on all of its users.
Limitations: Final Cut Pro has some lingering glitches that still haven’t been fixed, and its audio editing tool set lacks some important pieces.
If you are new to video editing and you will need a video maker that is tailored for beginners. In such case, you can read this article to get: Best Free Video Editing Software for Beginners >> They are really very easy to use. You can make a stunning video less than an hour.
5. Wondershare Filmii
Platform: Windows
Price: Free, Paid versions
Level: Beginners
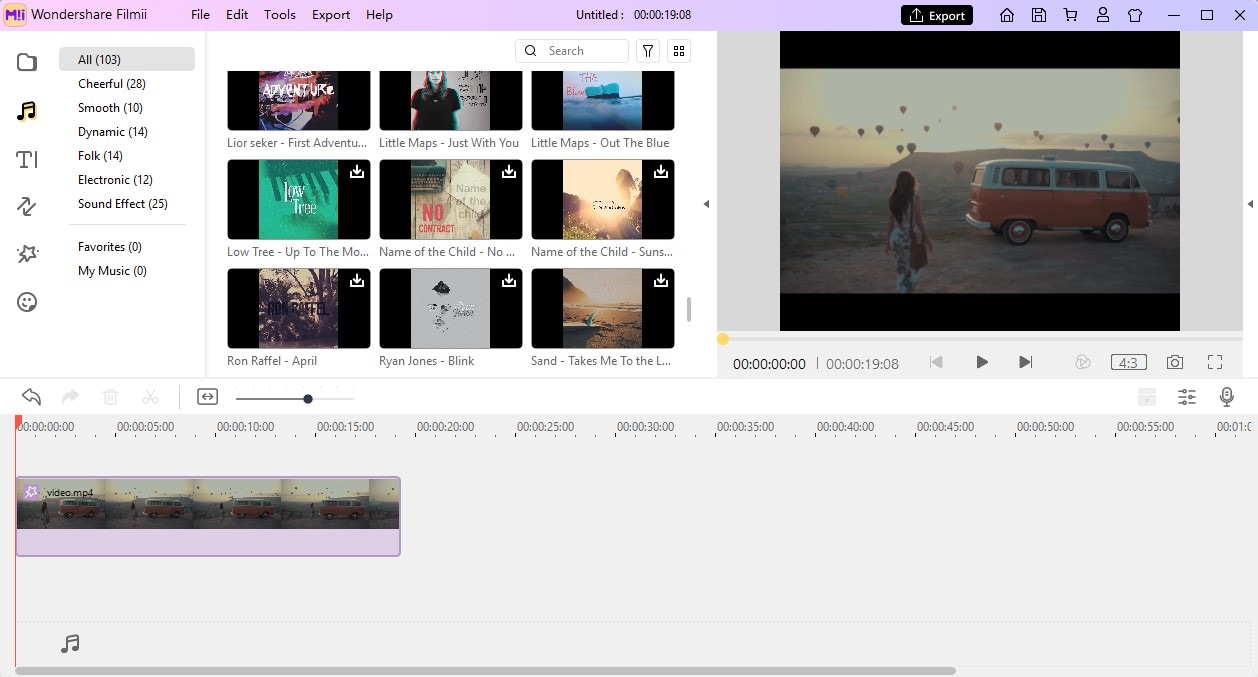
This delicate video editing software is one of the best video editors for newbies. The free version of the software offers a lot of powerful video editing tools, but in order to get rid of the watermnark, you have to pay 9.99$ for its monthly plan. One of the advantages of Filmii is that it has a variety of video templates that can help beginners edit amazing videos with ease due to its auto-create functionality. Besides, its audio editing or creative tools are equally impressive.
6. Lightworks
Platform: Windows, macOS, Linux
Price: Free, Paid versions: $437.99
Level: Professionals

Lightworks is one of the best video editing software on this list with a long history in the movie-making business. The free version of the software is available, but it has limited export options. A $25 monthly subscription is required in order to gain access to all of the software’s features. Although it may be a somewhat pricey option, purchasing Lightworks is a profitable investment that may help you improve the quality of your videos.
Features: Both free and paid versions of this video editing suite offer support for wide range of video file formats. This can be very useful for video editors who often work on projects shot on different cameras. Multi-cam editing feature enables the software’s users to work with footage shot from separate angles, using more than just one camera. The videos edited with the free version of the software can only be exported to an MPEG4 file format with the maximum size of 1280X 790 pixels, and they must be uploaded to YouTube directly from the editor.
Advantages: Royalty-free media and a remarkable VFX panel make Lightworks a tempting option for professional and amateur video editors alike.
Limitations: The export options on the free version of the software are extremely limited and the software doesn’t provide much support for inexperienced users.
7. ShotCut
Platform: Windows, macOS, Linux
Price: Free
Level: Semi-Pros
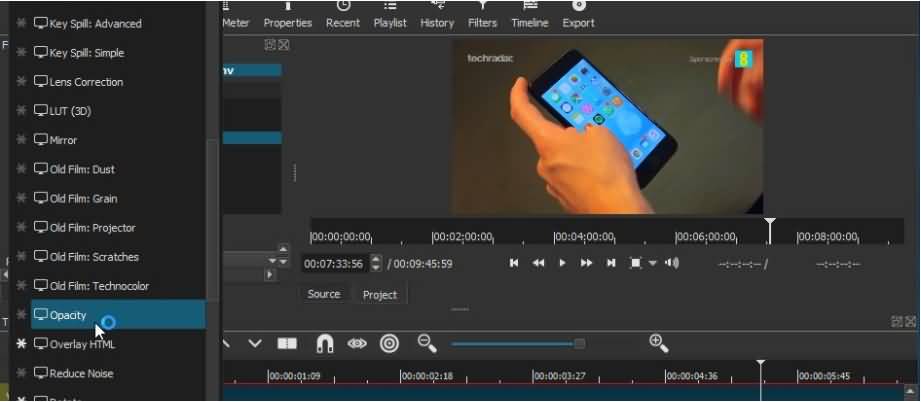
If you need a video editing software just to piece together a few clips you recorded on the family vacation, then ShotCut may be a bit overwhelming choice for such a task. This open-source software is equipped with a rich collection of audio and video editing features, while it also offers support for nearly all video file formats. It is best suited for users in need of powerful video editing software who don’t want to spend a fortune on purchasing a professional editing suite.
Features: Screen capturing, webcam video recording or audio capturing options are all made available by ShotCut. The software’s video and audio editing features surpass all expectations and allow the software’s users to have complete creative control over their projects. Features such as Chroma Key, Crop or Blur are accompanied by a number of amazing video effects that can be used to enhance the colors in a video. Using ShotCut requires you to just download the software and run its executable file, which means that you don’t have to go through the installation process in order to start editing with this software.
Advantages: 4K videos, as well as numerous other video and audio file formats, are supported by this open-source video editing software. To make things even better ShotCut grants you access to fully customizable filters.
Limitations: The software doesn’t feature preset export profiles, and the transitions it offers are a bit scarce.
8. HitFilm Express
Platform: Windows, macOS
Price: Free
Level: Semi-Pros

This cross-platform video editor ranks among best video editing software products currently available on the market. Its secret lies in uniting visual effect compositing and video editing options under the same roof. HitFilm Express is aimed at users with an enviable amount of video editing experience, since inexperienced video editors may find the software’s interface difficult to navigate. This video editing suite offers a lot of video editing tools as well as visual and audio effect, that can be easily used to improve the quality of your videos.
Features: The rare combination of VFX compositing and video editing makes HitFilm Express unique, while its motion design and tracking options offer support for more complex video editing actions. The software supports 2D and 3D effects compositing, as well as 4K and 360-degree videos.
HitFilm Express’ titling options are at the basic level, while its Export options are alarmingly narrow. This free editing software doesn’t provide too many options for color adjustments, but its audio editing features can be used to create a video with a superior soundtrack.
Advantages: The software offers a wide spectrum of transitions and video effects and it supports most popular video file formats. HitFilm Express lets you use semi-professional video editing tools for free.
Limitations: In order to export a video from the software you must share a link on a social media platform and then download the file. People who are not familiar with the video editing process may find using HitFilm Express difficult.
9. Blender
Platform: Windows, macOS, Linux
Price: Free
Level: Professionals

Blender started out as an open-source project and over the years animators, scientists, VFX artists and numerous other people have participated in developing this 3D creation suite. The software can be used for modeling, animation, video editing or compositing, to mention only a few of its many purposes. Editing video footage isn’t Blender’s strong suit, but its video editing features are powerful enough to enable you to perform basic editing tasks. However, this doesn’t mean you can’t use this software to create videos that grab the viewer’s attention.
Features: Cutting or trimming videos, adjusting the video’s playback speed or adding keyframes to a video clip is an easy process in Blender. The software’s true strength lies in its animation, 3D modeling or motion tracking features. The latest version of Blender is equipped with a motion tracking option that allows you to import the footage into the software directly from a camera. You can utilize this feature to mask areas of the shot and see the movement on camera in a 3D environment.
Advantages: Blender’s price and its powerful features make it an interesting choice as your primary video editing software.
Limitations: You must have in-depth knowledge of animation, compositing, and 3D techniques in order to be able to use Blender.
10. Avidemux
Platform: Windows, macOS, Linux
Price: Free
Level: Beginners

This simple video editing software has all the tools you’ll ever need to quickly polish your videos. Its audio and video effects can be utilized to make your videos look and sound professionally, but Avidemux doesn’t offer much more than these basic video editing options.
The software provides support for most of popular video file formats, but its export options are far from perfect. Avidemux doesn’t feature visual effects or transitions, which significantly limits its video editing capabilities.
Features: Newcomers to the video editing world will love the software’s interface, because of its simplicity. The Transform feature allows you to fade in and fade out shots, crop or rotate video clips and even add logos to your videos. Blur or Sharpen effects enable users to enhance their videos, while contrast, brightness, saturation or hue values can be adjusted to make the colors in the video look more vivid. Avidemux also features the Subtitle option, but the software can only add hardcoded subtitles to videos.
Advantages: Solves all your basic video editing problems, and lets you have fun while editing videos. Avidemux also has solid encoding options and its interface is user-friendly.
Limitations: There are no video effects or transitions, which narrows down the software’s video editing options.
11. VideoPad Video Editor
Platform: Windows, macOS
Price: Free
Level: Beginners
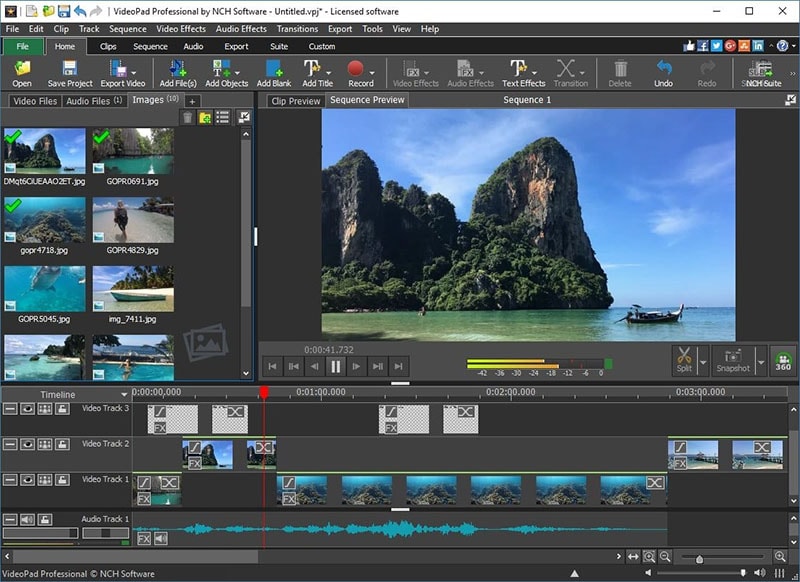
VideoPad is one of the best entry-level cross-platform software products you can use for easy video editing tasks. The free version of the software is available to both Mac and PC users, although the Windows version limits the video exporting options to just two file formats. The VideoPad’s interface doesn’t take much time to get used to, and it perfectly adjusted to the needs of inexperienced video editors. Paid versions of the software are available to advanced editors who want to use VideoPad for more than just basic video editing.
Features: The list of video editing features VideoPad provides includes several pleasant surprises. The 4K video support, as well as 360-video editing features, are aimed at GoPro owners who want a quick and easy way to process their footage. The visual effects this free video editing software provides are impressive, while the Chroma Key option enables its users to create green screen videos. Even though VideoPad allows its users to edit audio files, its audio editing features are fairly modest.
Advantages: Learning how to use VideoPad is simplified by its intuitively designed interface.
Limitations: There are no advanced video editing options like multi-cam editing and motion tracking and certain features become unavailable when using the free version of the software over a longer period of time.
Download link: If you download the trial version instead of the free non-commercial home edition, or do not find a specific link to it on the website, you can trydownloading it from this link , or contact tech support , and they will send you a direct link.
12. OpenShot
Platform: Window, macOS, Linux
Price: Free
Level: Beginners

This award-winning open-source video editor offers a wide range of video editing tools that span from trimming and slicing to Slow Motion and Time effects. OpenShot is an excellent software for training and learning new video editing tricks, but it is best avoided if you are working on a large project. The software’s basic video editing features make it an excellent choice for users who only want to perform simple edits without having to waste too much time.
Features: OpenShot lets you add unlimited video and audio tracks to your projects, but its file management capabilities are far from impressive. The software allows you to trim or arrange the video files in any way you want, and it also provides a lot of different Transitions that can be used to make the videos look smoother. The collection of video and audio effects allows users to try out different solutions for the scenes in their video clips. OpenShot features a Vector Title Editor that can assist you in creating perfect opening titles or end credits.
Advantages: The interface of this open-source video editing software is designed to assist its users through every step of the video editing process. OpenShot is a great choice for all video editors who want to save money and use a powerful video editing software at the same time.
Limitations: More complex video editing options such as Rotoscoping, are not available. You may have to install add-ons if the OS you are using doesn’t meet the software’s system requirements.
13. Kdenlive
Platform: Windows, macOS, Linux
Price: Free
Level: Semi-pros

Almost two decades ago, this open-source project was started by Jason Wood in order to develop a video editing software for Linux OS. Over the years, a small team of developers has created Windows and MacOS versions of the editor that now have a loyal fan base. Even though the software’s features make it a reliable choice for more complex projects, Kdnelive can also be used to perform simple edits. This video editing software combines the simplicity of entry-level video editors with advanced video editing tools frequently used by experienced professionals.
Features: The functionality of this video editor will surprise even the greatest of skeptics. The software’s timeline lets you to add as many videos and audio files to your project as you want, making it a perfect tool for large-scale projects. The visual effects and transitions enable users to manipulate the footage in any way they see fit, while the extremely powerful analysis tools such as histograms, waveforms or vectorscopes enable them to monitor all the adjustments they make on their footage.
Advantages: Kdnlive provides support for nearly all input file formats that can be added easily to the software’s multitrack timeline. The free open-source add-ons can extend the video editor’s capability and thus enable you to perform a wider range of video editing actions.
Limitations: Even though the software provides the screencast recording option, it doesn’t feature the PIP effect. Multi frame-rate editing isn’t possible and software’s updates can last for hours.
14. Adobe Premiere Pro
Platform: Windows, macOS
Price: Paid, $19.99 per month
Level: Professionals

There are very few video editing suites that can offer as much to its users as Adobe Premiere Pro can. It is probably one of the best video editors ever created, as it has been setting the industry standards for a long time. High-end professionals frequently use Adobe Premiere Pro on their projects, while aspiring filmmakers strive to learn every option this unique video editor has to offer. The much-famed software isn’t the best choice for video editors who are just learning the basics of the trade, although it supplies a staggering amount of tutorials and learning materials.
Features: With each new version of Adobe Premiere Pro the list of the software’s features becomes longer. Its timeline is famous for its ease of use because it enables you to add as much new audio or video tracks as your project requires. This is arguably one of the best color correction software packages on the market, while its color grading features are no less impressive. Adobe Premiere Pro provides support for a wide range of video file formats including 4K, HDR, and 360 VR videos.
Advantages: Perfect for collaborative projects that involve large teams of experienced professionals. The software is at its best when used with other Adobe’s products that enable you to develop projects beyond the boundaries set by the Adobe Premiere Pro’s limitations.
Limitations: You cannot purchase the lifetime license to use this video editing software, and paying monthly subscriptions may be hard on the budget of some of its potential users.
15. Magix Vegas Pro
Platform: Windows
**Price:**Paid: $399
Level: Professionals

Successful independent artists, film producers, and all other film and video enthusiasts can only benefit from purchasing this video editing suite. The software belonged to Sony Creative Software for much of its history, but on May 20. 2016 the company sold it to Magix. Previously known as Vegas Pro or just Vegas, this video editing software is widely accepted as one of the best professional video editing tools ever created. There is virtually no video editing task that cannot be completed in Magix Vegas Pro video editing software.
Features: This video editor is designed to provide support to its users from the beginning until the very end of the video editing process. Magix Vegas Pro recognizes almost all video file formats, even those captured with professional RED or ARRI Alexa cameras. You can use this software to edit 3D or 4K videos, while the Multicamera-Editing feature lets you switch between any number of video sources with a single mouse click. Effects such as Automatic Crossfades allow you to create transitions between shots effortlessly.
Advantages: The seemingly unlimited amount of learning resources makes editing with Magix Vegas Pro a lot easier and it enables less experienced video editors to learn new tricks.
Limitations: There aren’t as many visual effects as you would hope for and the software’s interface isn’t aesthetically pleasing, but it is very functional.
16. Adobe Premiere Elements
Platform: Windows, macOS
**Price:**Paid: $99.99
Level: Semi-pros

Although it is often regarded as a simplified version of Premiere Pro, this video editing suite offers enough video editing tools to edit videos at the semi-professional level. Adobe Premiere Elements contains automated versions of Premiere Pro’s features and in this manner it enables its users to utilize professional video editing tools on their prosumer level projects. Even though this Adobe’s software product lacks the power of professional video editing software packages, it still offers enough video editing tools for the production of nicely polished and well-rounded videos.
Features: Adobe Premiere Elements recognizes all popular video file formats, and it offers support for 4K content. In addition to its remarkable file format compatibility, the video editor also features 3D editing and face detection options that can be very useful when working on more complex video projects. The haze-removal effect is extremely efficient at reducing the fog or cigarette smoke in a shot, while the motion titles let you create visually impressive opening titles or end credits. The Adobe Premiere Elements has performed exceptionally well when rendering large video files.
Advantages: The software’s Guided mode provides support to its users and helps them learn how to perform all video editing actions. The asset management tool offers assistance with the organization of large amounts of video and audio files.
Limitations: When compared to other video editors in this guide Adobe Premiere Elements’ device and social media optimization features seem to be in short supply.
17. CyberLink PowerDirector
Platform: Windows, macOS
**Price:**Free trial, Paid version: $69,99 - $129,99
Level: Semi-pros
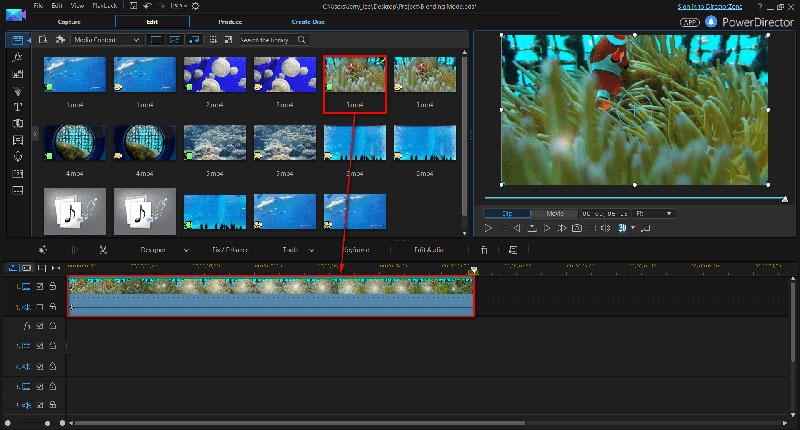
This is probably one of the best and most popular video editing software packages aimed at amateur and semi-professional users. There are several versions of the software available, and each of them contains a different amount of options and video editing tools. Even with somewhat reduced capability, the least expensive version of the editor supports 360-degree as well as VR options for posting on social media such as Vimeo, Facebook or YouTube. CyberLink PowerDirector isn’t a professional video editing software, but it still offers a lot of extraordinary options that can take you a step closer to producing a professional video.
Features: The 360-degree video editing options are probably the first thing that catches the eye when you look at the list of features the software provides, but its true power lies in its color tools. LUTs, HDR effects or Split Toning options are just the tip of the iceberg since PowerDirector offers countless tools for fine-tuning of the colors in your videos. Animated PIP effects and video collages make this video editing software a perfect choice for the production of tutorials and all other types of online videos.
Advantages: The audio editing options provided by CyberLink PowerDirector are nothing short of amazing since they enable the software’s users to manipulate the audio files in any way they see fit.
Limitations: Motion tracking and color lookup features are not always reliable. The software is a bit overpriced when compared with similar video editing suits.
18. Magix Movie Video Easy
Platform: Windows
Price: Free trial, Paid version: $49,99
Level: Semi-pros

This video editor is a great choice for people who have never edited a video before and who want to learn how to perform basic video editing tasks. Video Easy’s intuitive user interface can be mastered by anyone with enough determination to edit videos with this software on a constant basis. Features this editor offers may not be as impressive as to ones provided by professional video editing suites, but they are powerful enough to produce clean edits that give your videos a professional look.
Features: If you choose to make Magix Movie Video Easy your primary video editing software, you will never have to worry about what type of camera you used to record your videos since the software is compatible with all standard camcorders, digital cameras, and Smartphones. The rich collection of transitions and effects, as well as the intro and outro animations, can all be used to create amazing videos. You can export videos to DVDs, Blu-Ray discs or YouTube directly from the software.
Advantages: If you are looking for a video editor that will enable you to add music to your videos, trim or cut videos quickly and choose from hundreds of effects, then you should look no further because Magix Movie Video Easy provides all of these options, and much more.
Limitations: Doesn’t perform well when used for demanding video editing tasks.
19. Magix Video Pro
Platform: Windows, macOS
Price: Free trial, Paid version: $62,99
Level: Beginners

Magix has been the largest European video editing software manufacturer for more than two decades. Its software products may not enjoy the fame of Adobe’s video editing software packages, but this doesn’t mean that a video editor such as Magix Video Pro cannot be used for the production of professional-looking videos. Besides offering basic video editing tools this video editor also features advanced video editing options such as Stop Motion animation or 360-degree video editing. Magix Video Pro is often labeled as ‘one of the best video editing programs out there’.
Features: Audio editing features that come with this video editor include an audio mixer that enables you to reduce noise levels, control the low, mid and high sounds or simply equalize the sound volume across the entire project. The video editing tools supplied by the Magix Video Pro are as impressive as its audio editing options. Lens correction features, Split screen videos or 360-degree video editing options reveal only a fraction of the software’s capabilities. Magix Video Pro delivers professional video editing features to consumer-level users.
Advantages: The software allows you to place any type of media file on its timeline and use it in your project.
Limitations: The effects library installation process can be time-consuming, although it is well worth the wait.
Part II: Best Video Making Editors Online
20. YouTube
Platform: Online
Price: Free
Level: Beginners

The world’s largest video sharing platform also offers basic video editing services. Although Google has discontinued its built-in video editor, it still allows tts users to trim or rotate videos, apply filters or even create time-lapse and slow-motion videos on line. Brightness, contrast or saturation levels can be altered if you want to enhance the colors in your videos. Audio editing features are limited because the platform only allows you to add a single audio file to a project you’re working on. However, some of the most important video editing features like adding the text or creating titles are not available.
Advantages: Allows you to polish your videos before posting them on YouTube for free.
Cons: This online video editor lacks some basic video editing tools such as transitions or audio controls.
21. Online Video Cutter
Platform: Online
Price: Free
Level: Beginners
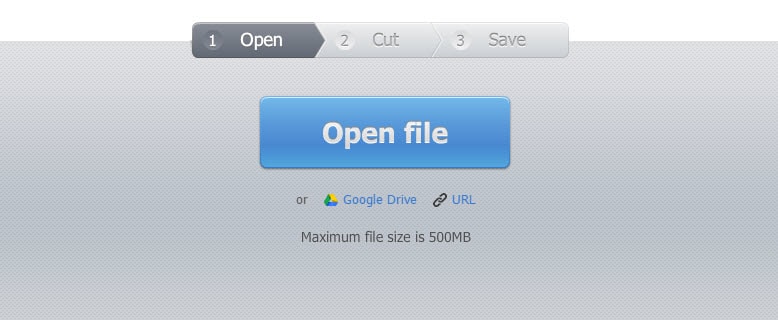
If you were looking for a web app that contains all the tools required to cut a small video file, then Online Video Cutter is one of your best options. You won’t even have to create an account before you start the video editing process. The videos you upload to this online editor can’t exceed the 500 MB size limit. Besides cutting their videos, users of this editor can also rotate or trim their footage for free. Online Video Cutter provides support for nearly all video file formats, so you don’t have to worry about the file format in which your video was captured.
Advantages: Offers a quick way to trim videos online and it is exceptionally easy to use.
Limitations: Lacks even the most basic video editing features other than cutting, trimming and rotating videos.
22. Movie Maker Online
Platform: Online
Price: Free
Level: Beginners

This free online editing tool lets you process videos without even registering or creating an account. You can add videos, photos, text, and music into a single project and mix them together into an awesome video. The platform grants you access to its rich filter library, and it also allows you to add text overlays, fade audio and video files or create smooth transitions between shots. Movie Maker Online features its own collection of royalty free music and photos you can use to make your videos look and sound better. The webpage’s design is a little odd, and it may take some time to get used to it.
Advantages: The app offers a lot of different video editing tools and it allows you to perform all basic video editing actions online.
Limitations: Movie Maker Online is funded by ads, and requires you to disable your AdBlock app before you can start editing a video.
23. ClipChamp
Platform: Online
Price: Free trial, Paid: $7 per month
Level: Beginners

ClipChamp lets you upload videos you already recorded or capture new footage using your computer’s webcam. The free version of this web app allows you to export in 1080p video files, but you can’t produce more than five videos in a single month. Both versions of the online video editor require you to create an account, and the videos exported from the free version of the app don’t have a watermark. ClipChamp provides numerous video editing tools, including transition, color adjustments or cropping. The exporting process doesn’t last too long and you can choose whether you want to share the video on social media or download it to your computer.
Advantages: Makes creating webcam videos as well as editing preexisting footage look easy while providing excellent export options.
Limitations: The free version of ClipChamp allows you export only five videos in a month.
24. WeVideo
Platform: Online
Price: Freemium
Level: Beginners
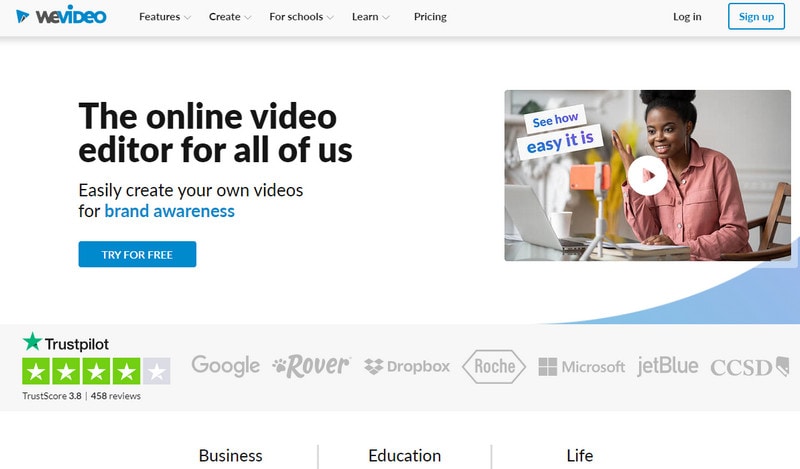
The capabilities of WeVideo online video editor surpass the basic level of video editing. The platform offers support for iOS and Android devices as well as desktop computers. Producing square or horizontal videos, creating motion titles or publishing videos in 720p HD resolution are just a few amazing options this online video editor provides. The paid versions of the web app are best suited for skilled video editing professionals or large teams that are working on demanding projects. WeVideo’s free version doesn’t allow its users to publish more than 30 minutes of video content each month and each exported video contains a watermark.
Advantages: Produces videos with great picture quality and offers tons of advanced video editing options.
Limitations: Creating an account is mandatory even for video editors who want to use the free version of WeVideo.
25. Kizoa
Platform: Online
Price: Freemium
Level: Beginners

Kizoa offers a broad spectrum of transitions, visual effects, animation and text effects to its users for free. The video editing platform is frequently used to create goofy short videos that can be easily shared on Facebook or Twitter. The app allows you to add photos to your video projects and it grants you access to an incredibly rich royalty free music collection. However, you will have to create an account on Kizoa in order to be able to export the videos you created. The editor’s timeline is rudimentary, but still functional enough to enable users to combine audio, video, and photo files.
Advantages: Kizoa is a powerful tool for the creation of entertaining social media videos.
Limitations: You must create an account in order to be able to export your projects, and the online video editor doesn’t feature any advanced video editing options.
26. Wideo
Platform: Online
Price: Freemium
Level: Beginners
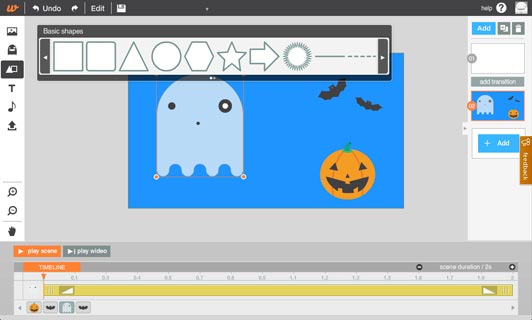
All video enthusiasts can use Wideo platform to edit their videos, regardless of their skill level. In addition to amazing video editing options, this online video editor also features animations that can be used to create professional presentations. All video content uploaded to Wideo is stored on the cloud, and pricing plans for professionals include unlimited storage space. The Basic version of the editor allows for just ten downloads in a month and it doesn’t let its users upload videos to YouTube. Even though this video editor is easy to use, it is better suited for skilled professionals than it is for inexperienced video editors.
Advantages: Even the Basic pricing plan enables users to export HD videos, while Professional and Enterprise pricing plans include the Full HD export option.
Limitations: Limited audio editing options significantly reduce the capabilities of this online video editing platform.
Read More to Get: 10 Best Free Online Video Editors With No Watermark >>
Part III: Best Video APP for iOS/Android
27. Filmora
Platform: iOS, Andoird
Price: Freemium
Level: Beginners
You can edit your videos with Filmora in just three simple steps. All you have to do is choose the videos and photos from your phone’s gallery, Instagram or Facebook account, select a theme, insert transitions or add a song and share the video directly from the app on social media or to your email address. Besides the powerful video editing features, this app for iOS and Android devices also allows you to set your video’s aspect ratio to Square 1:1 if you would like to share the clip on Instagram or Cinema 16:9 if the video is shared to YouTube.
Advantages: Supports HD export options and provides a diverse set of video editing options.
Limitations: The app can’t perform advanced video editing tasks.
28. Vlogit
Platform: iOS, Android
Price: Free
Level: Beginners
The Wondershare’s video editing app for Android and iOS devices is designed to offer assistance to YouTubers and Vloggers who want to edit their videos directly from their Smartphones. Vlogit is equipped with video editing tools that enable you to cut, trim or rotate videos, while its sound editing features include recording voiceovers, adding sound effects or choosing the music you want to use as a soundtrack to your video. The app lets you combine photos and videos within the same project, and it also enables you to create customized openers from animated templates. The videos created and exported with the Vlogit app don’t contain watermarks.
Advantages: Offers powerful video editing features to YouTubers and Vloggers who want to edit their videos from their Smartphones for free.
Limitations: The list of visual effects the app provides could be longer.
29. VideoShop
Platform: iOS, Android
Price: Freemium
Level: Beginners

The extensive list of features VideoShop app offers makes it one of the best options for novice video editors who want to quickly create visually impressive videos. This video editing app allows you to work with multiple video files or merge them into a single video. The animated titles enable users of the VideoShop app to create professional-looking intros for their videos, while the transitions feature allows them to seamlessly piece together all shots featured in a project. Tilt-Shift and Stop Motion options are also available to video editors who want to make their videos look more professional.
Advantages: Fun and easy to use video editing app that lets you manipulate footage in any way you want.
Limitations: VideoShop contains ads, and the app’s version for iOS devices only supports videos recorded with iPhones and iPads.
30. Filmmaker Pro
Platform: iOS
Price: Freemium, $5,99 monthly subscription
Level: Semi-pros

iPhone videographers who need access to semi-professional video editing tools will certainly enjoy using this app. Filmmaker Pro offers support for 4K footage filmed on the latest models of iPhone and it enables its users to add an unlimited number of text overlays, video clips, voiceovers or audio tracks to the app’s timeline. The video editor grants you access to over 30 filters, video grading features, as well as Chroma Key and Ken Burns effects. In addition to impressive video and audio editing features, Filmmaker Pro’s users can also record videos with a camera that lets them adjust settings manually directly from the app, although this option must be paid for.
Advantages: Text overlays, audio editing features and the ability to select the aspect ratio for each video you edit with this app, make it one of the best video editing options for iOS devices.
Limitations: Nearly all of the app’s best features must be purchased.
31. KineMaster
Platform: iOS, Android
Price: Freemium, contains adds
Level: Semi-pros
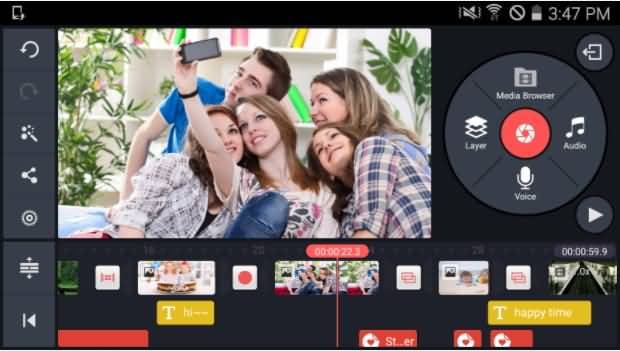
This cross-platform video editor is one of the premier options for mobile video editing on both iOS and Android devices. KineMaster is currently the only app that enables Android Smartphone owners to add as many layers of videos, photos, and text to their projects as they want. However, it only supports a limited number of video file formats, which means that the app shouldn’t be used to edit videos that weren’t recorded on an iPhone or Android phone. KineMaster provides a wide range of video exporting options and allows you to share videos on popular social media networks.
Pros: Above average video and audio editing features.
Limitations: Offers a lot of options mobile video editors seldom use.
32. LumaFusion
Platform: iOS
Price: Paid, $29.99
Level: Semi-pros
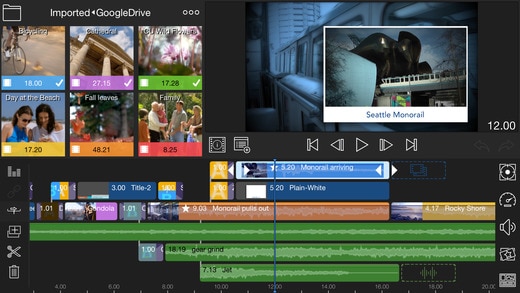
Creating neatly organized projects with LumaFusion is a simple task because the app features a powerful Project Manager that lets you sort files or select aspect ratios for your videos. In addition, the Media Library lets you import all types of files from a cloud storage or drag and drop media from other apps. Producing slow-motion videos that have 120 or 240fps or creating green screen videos using the Chroma Key effect is easy with LumaFusion. The app’s audio editing features are as impressive as its video editing tools since they provide the complete control over the audio files to the video editor’s users.
Advantages: Color correction options, LUTs or numerous visual effects are all part of the reason why LumaFusion is one of the best apps for mobile video editing.
Limitations: Only available for iOS devices.
33. Vizzywig 2019 4K Video Editor
Platform: iOS
Price: Paid, $79.99
Level: Semi-pros

This award-winning app for iOS devices provides all the tools a skilled video editor could desire. Its features include support for 4K videos, wide selection of aspect ratios as well as stylish intros, end credits, and titles. Besides offering professional video editing tools, Vizzywig also features Multi-Camera recording options that can capture videos in 8K resolution. In addition, the app is capable of producing videos that have eight times more pixels than the Apple’s Facetime HD Camera. The non-linear timeline lets you arrange video clips in any way you see fit, and allows you to add multiple media files to each project you are working on.
Advantages: Lets you control the focus and exposure manually and produce videos with stunning picture quality.
Limitations: Single platform compatibility and a high price narrow down the number of the app’s potential users.
34. PowerDirector
Platform: Android
Price: Freemium, contains ads and in-app purchases
Level: Beginners
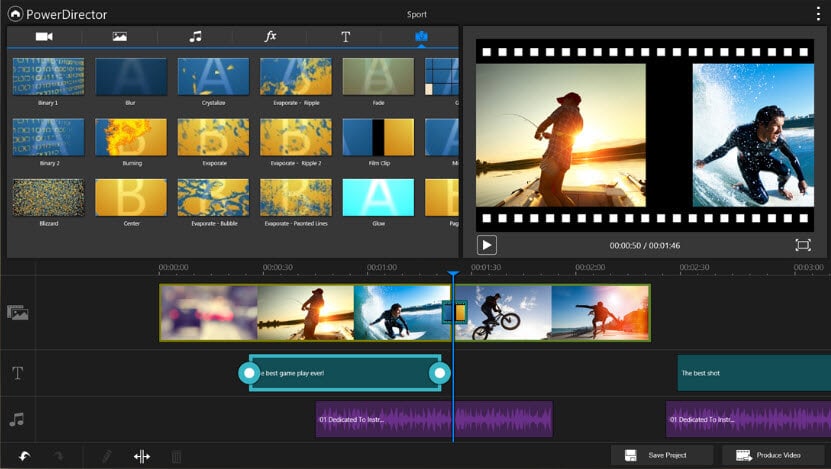
Unlike the Adobe’s app for mobile video editing, PowerDirector lives up to all expectations. This user-friendly app lets you create reverse, 4K, or green screen videos. To make things even better, you can easily apply visual and audio effects or add voiceovers to your projects. In addition to the video editor, the PowerDirector app is also equipped with a powerful photo editor that lets you manipulate images in a professional manner. You can use almost any type of video or audio file in this app because it provides support for all commonly used file formats.
Advantages: PowerDirector is designed to help its users polish their video quickly and effortlessly.
Limitations: Videos in 1080p and 4K resolutions can only be exported after you’ve made an in-app purchase.
Ooops…It looks like there isn’t any tool that matches your demand. Please give it another try.
Which Video Editor Do You Think Is Best for You?
Thank you to read this so far. It’s a long but the most comprehensive reviews ever for all hot video editing software compatible with Windows, Mac, iOS, Android and Linux, as well as online video editors. I hope you find the tools that you like.
If you want to get quick selections without too much reading, here is my recommendation:
- Best video editor for Windows and Mac to download: Filmora
- Best video editing software for Linux to download: Lightworks
- Best video editor for Android, iOS to download: Filmora , VideoShop
- Best online video editor to use: WeVideo
If you still can’t find a one Or we missed one of the tools you think which deserves to be listed above?
Either way, let us know by leaving a comment below.
Ollie Mattison
Ollie Mattison is a writer and a lover of all things video.
Follow @Ollie Mattison
Ollie Mattison
Mar 27, 2024• Proven solutions
Now, videos are getting increasingly important for you to present your thoughts and feeling on Instagram, YouTube, or Facebook.
But how to make your video looks professional, creative, stunning and deserved to share? A free video editing software can do you a favor.
So, Which is the best video editor available in the market?
If you are not quite certain about the video editing software you should use to edit your videos, you’ve come to the right place. Because we are going to take you through the best video editors including free versions.
Newcomers to the world of the video editing as well as seasoned professionals can use this guide to find the video editing software that will help them produce better visual content.
Let’s dive in and explore all aspects worth considering before you decide which software is best for you. And you can click the Filter button at the left side in this article to find the best video editing software for you.
- Part I: Best Video Editor for PC/Mac/Linux
- Part II: Best Video Editing Software Online
- Part III: Best Video Editor APP for iOS/Android
We spent about a month for researching and testing all popular video making software in the market and now collect 35 best video editors for you. This list of film makers can be used on Windows, Mac OS, iOS, Android, and Linux. Besides, some of them are online video editors you can use directly.
Now, let’s filter through the list to find the best video editor for you. Check it out :
| No. | Product Name | Supported OS | Price | Best for | Overview | Download Link |
|---|---|---|---|---|---|---|
| 1 | Wondershare Filmora | Windows 7/8/10, Mac OS, Android, iOS | Free trial; $79.99 perpetual, $49.99/year | Beginners, Semi-Pros | 4.9 | Download |
| 2 | Windows Movie Maker | Windows7/8/10 | Free | Beginners | 4.1 | Download |
| 3 | iMovie | Mac OS, iOS | Free | Beginners | 4.3 | Download |
| 4 | Final Cut Pro | Mac OS | 30 days free trial; $299.99 | Professionals | 4.4 | Download |
| 5 | Wondershare Filmii | Windows 7/8/10 | Free trial; $9.99 | Beginners | 4.3 | Download |
| 6 | Lightworks | Windows 7/8/10, Mac OS, Linux | Free trial; $437.99 | Professionals | 4.2 | Download |
| 7 | ShotCut | Windows 7/8/10, Mac OS, Linux | Free Open Source Video Editor | Semi-Pros | 3.9 | Download |
| 8 | HitFilm Express | Windows, Mac OS | Free | Semi-Pros | 4.1 | Download |
| 9 | Blender | Windows 7/8/10, Mac OS, Linux | Free; Fund $6/mo for support | Professionals | 3.8 | Download |
| 10 | Avidemux | Windows 7/8/10, Mac OS, Linux | Free | Beginners | 3.5 | Download |
| 11 | VideoPad Video Editor | Windows, Mac OSX, iOS, Kindle | Free | Beginners | 3.9 | Download |
| 12 | OpenShot | Windows 7/8/10, Mac OS, Linux | Free Open Source Video Editor | Beginners | 3.8 | Download |
| 13 | Kdenlive | Windows 7/8/10, Mac OS, Linux | Free | Semi-pros | 4.1 | Download |
| 14 | Adobe Premiere Pro | Windows 7/8/10, Mac OS | 7 days free trial; $20.99/mo; $33.99 /mo | Professionals | 4.5 | Download |
| 15 | Magix Vegas Pro | Windows 7/8/10, Mac OS | $399-$799 | Professionals | 4.2 | Download |
| 16 | Adobe Premiere Elements | Windows 7/8/10, Mac OS | $99.99 | Semi-pros | 4.7 | Download |
| 17 | CyberLink PowerDirector | Windows 7/8/10, Mac OS | $69,99 - $129,99 | Semi-pros | 4.5 | Download |
| 18 | Magix Movie Video Easy | Windows only | Free trial; $49,99 | Semi-pros | 3.6 | Download |
| 19 | Magix Video Pro | Windows 10 | Free trial; $79.99 | Beginners | 4.1 | Download |
| 20 | Media | Online | Free | Beginners | 4.75 | Check |
| 21 | YouTube | Online | Free | Beginners | 4.8 | Check |
| 22 | Online Video Cutter | Online | Free | Beginners | 3.6 | Check |
| 23 | Movie Maker Online | Online | Free | Beginners | 3.7 | Check |
| 24 | ClipChamp | Online | 14 day free trial; $7/mo | Beginners | 4.1 | Check |
| 25 | WeVideo | Online | Free trial; $11.99-$79.99 | Beginners | 4.4 | Check |
| 26 | Kizoa | Online | Freemium | Beginners | 3.8 | Check |
| 27 | Wideo | Online | Freemium | Beginners | 4.3 | Check |
| 28 | Filmora | iOS, Android | Freemium | Beginners | 4.1 | Download |
| 29 | Vlogit | iOS, Android | Free | Beginners | 3.6 | Download |
| 30 | VideoShop | iOS, Android | Freemium | Beginners | 4.8 | Download |
| 31 | Filmmaker Pro | iOS | Freemium; $5.99/mo | Semi-pros | 4.6 | Download |
| 32 | KineMaster | iOS, Android | Freemium | Semi-pros | 4.4 | Download |
| 33 | LumaFusion | iOS | $29.99 | Semi-pros | 4.8 | Download |
| 34 | Vizzywig 2019 | iOS | $79.99 | Semi-pros | 4.1 | Download |
| 35 | PowerDirector | iOS, Android | Freemium | Beginners | 4.5 | Download |
Part I: Best Video Editing Software for Windows/Mac/Linux
1. Wondershare Filmora
Platform: Windows, Mac, Android, iOS
Price: Free trial; $79.99 perpetual, $49.99/year
Level: Beginners
Even though it is widely considered as one of the premium entry-level video editing software options, Wondershare Filmora also offers advanced editing tools. The software product comes with detailed learning resources and provides support to its users who have little editing experience. The wide range of file formats and remarkably diverse Export options make Filmora an interesting choice for those who are just entering the world of video editing, but also for more experienced editors.
Features: Filmora’s rich effect library contains over a thousand modern special effects from niches such as gaming, blockbuster or tutorial, and new effects are added every month. The Action Cam tool is designed to make merging footage shot on action cameras easy and quick. Filmora supports a wide range of file formats including AVI, MP4 or MKV, so you don’t have to worry if your footage was shot in 4K or HD because you can easily edit it with this software.
Advantages:
A large number of professional video editing features Filmora offers as well as its modernly designed interface makes it one of the best options for amateur video creators.
Limitations:
You can use all the features in the free trial version, but have to pay to remove the watermark.
Lear more about Wondershare Filmora here: Filmora Official YouTube Channel
2. Windows Movie Maker
Platform: Windows
Price: Free
Level: Beginners
This is probably one of the oldest if not the oldest video editing software for PCs. Microsoft has announced that Windows Movie Maker will no longer be available for download. This software can still be found online, although not on Microsoft’s website, and currently, there are two different versions of Windows Movie Maker available. Even the least experienced video editors can master each of the Movie Maker versions easily.
Features: The classic video editing software is equipped with all the tools you’ll need for basic editing tasks like trimming, changing the video playback speed or rotating videos. It even features a Video Stabilization option that can be useful if you’d like to stabilize a video and remove the distracting camera shakes. Windows Movie Maker lets you add text effects to your video, insert Transitions between two takes, perform basic audio editing or record a screen.
Advantages:
Free, meets your basic editing demands
Limitations:
Service discontinued
No support for modern file formats
Lacks color correction tools, visual effects or any other advanced video editing options.
Check how to use Windows Movie Maker here: Windows Movie Maker User Guide
3. iMovie
Platform: Mac OS, iOS
Price: Free
Level: Beginners
As the Apple’s version of the Windows Movie Maker, iMovie has a similar status of a classic video editor that is at its best when used for simple video editing tasks. The video editor can also be used on an iPhone or an iPad if you want to edit your videos on the go. Learning your way around iMovie won’t take much of your time since all of its features are easy to use.
Features: Editing 4K videos or making credits or titles are just a few among many options provided by iMovie. Adding transitions, applying split-screen effects or creating PIP videos doesn’t require you to be a skilled video editor, because all of these options are easily accessible and they can be used in any project you are working on.
The iMovie’s audio editing options are equally impressive since the software enables you to add music, use built-in sound effects and record voiceovers. The video editor supports most of the popular file formats.
Advantages:
Free, and comes bundled with your Mac
Intuitive interface
Limitations:
This classic video editor for Apple’s devices doesn’t offer advanced video editing options such as motion tracking or keyframe marking.
Check how to use Windows Movie Maker here: iMovie User Guide
4. Final Cut Pro
Platform: macOS
Price: Paid, $299
Level: Professionals
Final Cut Pro is probably one of the highest praised video editing software ever created. It has been used to edit cinematic masterpieces such as ‘What happened Miss Simone’ or ‘The Girl With a Dragon Tattoo’, which speaks volumes about the software’s capability. Final Cut Pro’s Magnetic Timeline 2 is one of the kind, and it makes organizing large amounts of video and audio files look easy. Although the software’s price may seem discouraging, those who invested in it never had to use another video editor.
Features: A brief look at the list of Final Cut Pro’s video editing tools will leave you wondering if there is anything this software can’t do. Besides basic video editing features, the video editor is also equipped with 360 degrees VR video editing option, Multicam editing, and advanced color grading tools. Final Cut Pro allows its users to add as many audio tracks to the timeline as they want, thus enabling them to create impeccable soundtracks for their videos.
Advantages: Working with large numbers of video files is simplified by the software’s timeline, while options such as 3D titles or VR contribute to the strong impression this editor leaves on all of its users.
Limitations: Final Cut Pro has some lingering glitches that still haven’t been fixed, and its audio editing tool set lacks some important pieces.
If you are new to video editing and you will need a video maker that is tailored for beginners. In such case, you can read this article to get: Best Free Video Editing Software for Beginners >> They are really very easy to use. You can make a stunning video less than an hour.
5. Wondershare Filmii
Platform: Windows
Price: Free, Paid versions
Level: Beginners
This delicate video editing software is one of the best video editors for newbies. The free version of the software offers a lot of powerful video editing tools, but in order to get rid of the watermnark, you have to pay 9.99$ for its monthly plan. One of the advantages of Filmii is that it has a variety of video templates that can help beginners edit amazing videos with ease due to its auto-create functionality. Besides, its audio editing or creative tools are equally impressive.
6. Lightworks
Platform: Windows, macOS, Linux
Price: Free, Paid versions: $437.99
Level: Professionals
Lightworks is one of the best video editing software on this list with a long history in the movie-making business. The free version of the software is available, but it has limited export options. A $25 monthly subscription is required in order to gain access to all of the software’s features. Although it may be a somewhat pricey option, purchasing Lightworks is a profitable investment that may help you improve the quality of your videos.
Features: Both free and paid versions of this video editing suite offer support for wide range of video file formats. This can be very useful for video editors who often work on projects shot on different cameras. Multi-cam editing feature enables the software’s users to work with footage shot from separate angles, using more than just one camera. The videos edited with the free version of the software can only be exported to an MPEG4 file format with the maximum size of 1280X 790 pixels, and they must be uploaded to YouTube directly from the editor.
Advantages: Royalty-free media and a remarkable VFX panel make Lightworks a tempting option for professional and amateur video editors alike.
Limitations: The export options on the free version of the software are extremely limited and the software doesn’t provide much support for inexperienced users.
7. ShotCut
Platform: Windows, macOS, Linux
Price: Free
Level: Semi-Pros
If you need a video editing software just to piece together a few clips you recorded on the family vacation, then ShotCut may be a bit overwhelming choice for such a task. This open-source software is equipped with a rich collection of audio and video editing features, while it also offers support for nearly all video file formats. It is best suited for users in need of powerful video editing software who don’t want to spend a fortune on purchasing a professional editing suite.
Features: Screen capturing, webcam video recording or audio capturing options are all made available by ShotCut. The software’s video and audio editing features surpass all expectations and allow the software’s users to have complete creative control over their projects. Features such as Chroma Key, Crop or Blur are accompanied by a number of amazing video effects that can be used to enhance the colors in a video. Using ShotCut requires you to just download the software and run its executable file, which means that you don’t have to go through the installation process in order to start editing with this software.
Advantages: 4K videos, as well as numerous other video and audio file formats, are supported by this open-source video editing software. To make things even better ShotCut grants you access to fully customizable filters.
Limitations: The software doesn’t feature preset export profiles, and the transitions it offers are a bit scarce.
8. HitFilm Express
Platform: Windows, macOS
Price: Free
Level: Semi-Pros
This cross-platform video editor ranks among best video editing software products currently available on the market. Its secret lies in uniting visual effect compositing and video editing options under the same roof. HitFilm Express is aimed at users with an enviable amount of video editing experience, since inexperienced video editors may find the software’s interface difficult to navigate. This video editing suite offers a lot of video editing tools as well as visual and audio effect, that can be easily used to improve the quality of your videos.
Features: The rare combination of VFX compositing and video editing makes HitFilm Express unique, while its motion design and tracking options offer support for more complex video editing actions. The software supports 2D and 3D effects compositing, as well as 4K and 360-degree videos.
HitFilm Express’ titling options are at the basic level, while its Export options are alarmingly narrow. This free editing software doesn’t provide too many options for color adjustments, but its audio editing features can be used to create a video with a superior soundtrack.
Advantages: The software offers a wide spectrum of transitions and video effects and it supports most popular video file formats. HitFilm Express lets you use semi-professional video editing tools for free.
Limitations: In order to export a video from the software you must share a link on a social media platform and then download the file. People who are not familiar with the video editing process may find using HitFilm Express difficult.
9. Blender
Platform: Windows, macOS, Linux
Price: Free
Level: Professionals
Blender started out as an open-source project and over the years animators, scientists, VFX artists and numerous other people have participated in developing this 3D creation suite. The software can be used for modeling, animation, video editing or compositing, to mention only a few of its many purposes. Editing video footage isn’t Blender’s strong suit, but its video editing features are powerful enough to enable you to perform basic editing tasks. However, this doesn’t mean you can’t use this software to create videos that grab the viewer’s attention.
Features: Cutting or trimming videos, adjusting the video’s playback speed or adding keyframes to a video clip is an easy process in Blender. The software’s true strength lies in its animation, 3D modeling or motion tracking features. The latest version of Blender is equipped with a motion tracking option that allows you to import the footage into the software directly from a camera. You can utilize this feature to mask areas of the shot and see the movement on camera in a 3D environment.
Advantages: Blender’s price and its powerful features make it an interesting choice as your primary video editing software.
Limitations: You must have in-depth knowledge of animation, compositing, and 3D techniques in order to be able to use Blender.
10. Avidemux
Platform: Windows, macOS, Linux
Price: Free
Level: Beginners
This simple video editing software has all the tools you’ll ever need to quickly polish your videos. Its audio and video effects can be utilized to make your videos look and sound professionally, but Avidemux doesn’t offer much more than these basic video editing options.
The software provides support for most of popular video file formats, but its export options are far from perfect. Avidemux doesn’t feature visual effects or transitions, which significantly limits its video editing capabilities.
Features: Newcomers to the video editing world will love the software’s interface, because of its simplicity. The Transform feature allows you to fade in and fade out shots, crop or rotate video clips and even add logos to your videos. Blur or Sharpen effects enable users to enhance their videos, while contrast, brightness, saturation or hue values can be adjusted to make the colors in the video look more vivid. Avidemux also features the Subtitle option, but the software can only add hardcoded subtitles to videos.
Advantages: Solves all your basic video editing problems, and lets you have fun while editing videos. Avidemux also has solid encoding options and its interface is user-friendly.
Limitations: There are no video effects or transitions, which narrows down the software’s video editing options.
11. VideoPad Video Editor
Platform: Windows, macOS
Price: Free
Level: Beginners
VideoPad is one of the best entry-level cross-platform software products you can use for easy video editing tasks. The free version of the software is available to both Mac and PC users, although the Windows version limits the video exporting options to just two file formats. The VideoPad’s interface doesn’t take much time to get used to, and it perfectly adjusted to the needs of inexperienced video editors. Paid versions of the software are available to advanced editors who want to use VideoPad for more than just basic video editing.
Features: The list of video editing features VideoPad provides includes several pleasant surprises. The 4K video support, as well as 360-video editing features, are aimed at GoPro owners who want a quick and easy way to process their footage. The visual effects this free video editing software provides are impressive, while the Chroma Key option enables its users to create green screen videos. Even though VideoPad allows its users to edit audio files, its audio editing features are fairly modest.
Advantages: Learning how to use VideoPad is simplified by its intuitively designed interface.
Limitations: There are no advanced video editing options like multi-cam editing and motion tracking and certain features become unavailable when using the free version of the software over a longer period of time.
Download link: If you download the trial version instead of the free non-commercial home edition, or do not find a specific link to it on the website, you can trydownloading it from this link , or contact tech support , and they will send you a direct link.
12. OpenShot
Platform: Window, macOS, Linux
Price: Free
Level: Beginners
This award-winning open-source video editor offers a wide range of video editing tools that span from trimming and slicing to Slow Motion and Time effects. OpenShot is an excellent software for training and learning new video editing tricks, but it is best avoided if you are working on a large project. The software’s basic video editing features make it an excellent choice for users who only want to perform simple edits without having to waste too much time.
Features: OpenShot lets you add unlimited video and audio tracks to your projects, but its file management capabilities are far from impressive. The software allows you to trim or arrange the video files in any way you want, and it also provides a lot of different Transitions that can be used to make the videos look smoother. The collection of video and audio effects allows users to try out different solutions for the scenes in their video clips. OpenShot features a Vector Title Editor that can assist you in creating perfect opening titles or end credits.
Advantages: The interface of this open-source video editing software is designed to assist its users through every step of the video editing process. OpenShot is a great choice for all video editors who want to save money and use a powerful video editing software at the same time.
Limitations: More complex video editing options such as Rotoscoping, are not available. You may have to install add-ons if the OS you are using doesn’t meet the software’s system requirements.
13. Kdenlive
Platform: Windows, macOS, Linux
Price: Free
Level: Semi-pros
Almost two decades ago, this open-source project was started by Jason Wood in order to develop a video editing software for Linux OS. Over the years, a small team of developers has created Windows and MacOS versions of the editor that now have a loyal fan base. Even though the software’s features make it a reliable choice for more complex projects, Kdnelive can also be used to perform simple edits. This video editing software combines the simplicity of entry-level video editors with advanced video editing tools frequently used by experienced professionals.
Features: The functionality of this video editor will surprise even the greatest of skeptics. The software’s timeline lets you to add as many videos and audio files to your project as you want, making it a perfect tool for large-scale projects. The visual effects and transitions enable users to manipulate the footage in any way they see fit, while the extremely powerful analysis tools such as histograms, waveforms or vectorscopes enable them to monitor all the adjustments they make on their footage.
Advantages: Kdnlive provides support for nearly all input file formats that can be added easily to the software’s multitrack timeline. The free open-source add-ons can extend the video editor’s capability and thus enable you to perform a wider range of video editing actions.
Limitations: Even though the software provides the screencast recording option, it doesn’t feature the PIP effect. Multi frame-rate editing isn’t possible and software’s updates can last for hours.
14. Adobe Premiere Pro
Platform: Windows, macOS
Price: Paid, $19.99 per month
Level: Professionals
There are very few video editing suites that can offer as much to its users as Adobe Premiere Pro can. It is probably one of the best video editors ever created, as it has been setting the industry standards for a long time. High-end professionals frequently use Adobe Premiere Pro on their projects, while aspiring filmmakers strive to learn every option this unique video editor has to offer. The much-famed software isn’t the best choice for video editors who are just learning the basics of the trade, although it supplies a staggering amount of tutorials and learning materials.
Features: With each new version of Adobe Premiere Pro the list of the software’s features becomes longer. Its timeline is famous for its ease of use because it enables you to add as much new audio or video tracks as your project requires. This is arguably one of the best color correction software packages on the market, while its color grading features are no less impressive. Adobe Premiere Pro provides support for a wide range of video file formats including 4K, HDR, and 360 VR videos.
Advantages: Perfect for collaborative projects that involve large teams of experienced professionals. The software is at its best when used with other Adobe’s products that enable you to develop projects beyond the boundaries set by the Adobe Premiere Pro’s limitations.
Limitations: You cannot purchase the lifetime license to use this video editing software, and paying monthly subscriptions may be hard on the budget of some of its potential users.
15. Magix Vegas Pro
Platform: Windows
**Price:**Paid: $399
Level: Professionals
Successful independent artists, film producers, and all other film and video enthusiasts can only benefit from purchasing this video editing suite. The software belonged to Sony Creative Software for much of its history, but on May 20. 2016 the company sold it to Magix. Previously known as Vegas Pro or just Vegas, this video editing software is widely accepted as one of the best professional video editing tools ever created. There is virtually no video editing task that cannot be completed in Magix Vegas Pro video editing software.
Features: This video editor is designed to provide support to its users from the beginning until the very end of the video editing process. Magix Vegas Pro recognizes almost all video file formats, even those captured with professional RED or ARRI Alexa cameras. You can use this software to edit 3D or 4K videos, while the Multicamera-Editing feature lets you switch between any number of video sources with a single mouse click. Effects such as Automatic Crossfades allow you to create transitions between shots effortlessly.
Advantages: The seemingly unlimited amount of learning resources makes editing with Magix Vegas Pro a lot easier and it enables less experienced video editors to learn new tricks.
Limitations: There aren’t as many visual effects as you would hope for and the software’s interface isn’t aesthetically pleasing, but it is very functional.
16. Adobe Premiere Elements
Platform: Windows, macOS
**Price:**Paid: $99.99
Level: Semi-pros
Although it is often regarded as a simplified version of Premiere Pro, this video editing suite offers enough video editing tools to edit videos at the semi-professional level. Adobe Premiere Elements contains automated versions of Premiere Pro’s features and in this manner it enables its users to utilize professional video editing tools on their prosumer level projects. Even though this Adobe’s software product lacks the power of professional video editing software packages, it still offers enough video editing tools for the production of nicely polished and well-rounded videos.
Features: Adobe Premiere Elements recognizes all popular video file formats, and it offers support for 4K content. In addition to its remarkable file format compatibility, the video editor also features 3D editing and face detection options that can be very useful when working on more complex video projects. The haze-removal effect is extremely efficient at reducing the fog or cigarette smoke in a shot, while the motion titles let you create visually impressive opening titles or end credits. The Adobe Premiere Elements has performed exceptionally well when rendering large video files.
Advantages: The software’s Guided mode provides support to its users and helps them learn how to perform all video editing actions. The asset management tool offers assistance with the organization of large amounts of video and audio files.
Limitations: When compared to other video editors in this guide Adobe Premiere Elements’ device and social media optimization features seem to be in short supply.
17. CyberLink PowerDirector
Platform: Windows, macOS
**Price:**Free trial, Paid version: $69,99 - $129,99
Level: Semi-pros
This is probably one of the best and most popular video editing software packages aimed at amateur and semi-professional users. There are several versions of the software available, and each of them contains a different amount of options and video editing tools. Even with somewhat reduced capability, the least expensive version of the editor supports 360-degree as well as VR options for posting on social media such as Vimeo, Facebook or YouTube. CyberLink PowerDirector isn’t a professional video editing software, but it still offers a lot of extraordinary options that can take you a step closer to producing a professional video.
Features: The 360-degree video editing options are probably the first thing that catches the eye when you look at the list of features the software provides, but its true power lies in its color tools. LUTs, HDR effects or Split Toning options are just the tip of the iceberg since PowerDirector offers countless tools for fine-tuning of the colors in your videos. Animated PIP effects and video collages make this video editing software a perfect choice for the production of tutorials and all other types of online videos.
Advantages: The audio editing options provided by CyberLink PowerDirector are nothing short of amazing since they enable the software’s users to manipulate the audio files in any way they see fit.
Limitations: Motion tracking and color lookup features are not always reliable. The software is a bit overpriced when compared with similar video editing suits.
18. Magix Movie Video Easy
Platform: Windows
Price: Free trial, Paid version: $49,99
Level: Semi-pros
This video editor is a great choice for people who have never edited a video before and who want to learn how to perform basic video editing tasks. Video Easy’s intuitive user interface can be mastered by anyone with enough determination to edit videos with this software on a constant basis. Features this editor offers may not be as impressive as to ones provided by professional video editing suites, but they are powerful enough to produce clean edits that give your videos a professional look.
Features: If you choose to make Magix Movie Video Easy your primary video editing software, you will never have to worry about what type of camera you used to record your videos since the software is compatible with all standard camcorders, digital cameras, and Smartphones. The rich collection of transitions and effects, as well as the intro and outro animations, can all be used to create amazing videos. You can export videos to DVDs, Blu-Ray discs or YouTube directly from the software.
Advantages: If you are looking for a video editor that will enable you to add music to your videos, trim or cut videos quickly and choose from hundreds of effects, then you should look no further because Magix Movie Video Easy provides all of these options, and much more.
Limitations: Doesn’t perform well when used for demanding video editing tasks.
19. Magix Video Pro
Platform: Windows, macOS
Price: Free trial, Paid version: $62,99
Level: Beginners
Magix has been the largest European video editing software manufacturer for more than two decades. Its software products may not enjoy the fame of Adobe’s video editing software packages, but this doesn’t mean that a video editor such as Magix Video Pro cannot be used for the production of professional-looking videos. Besides offering basic video editing tools this video editor also features advanced video editing options such as Stop Motion animation or 360-degree video editing. Magix Video Pro is often labeled as ‘one of the best video editing programs out there’.
Features: Audio editing features that come with this video editor include an audio mixer that enables you to reduce noise levels, control the low, mid and high sounds or simply equalize the sound volume across the entire project. The video editing tools supplied by the Magix Video Pro are as impressive as its audio editing options. Lens correction features, Split screen videos or 360-degree video editing options reveal only a fraction of the software’s capabilities. Magix Video Pro delivers professional video editing features to consumer-level users.
Advantages: The software allows you to place any type of media file on its timeline and use it in your project.
Limitations: The effects library installation process can be time-consuming, although it is well worth the wait.
Part II: Best Video Making Editors Online
20. YouTube
Platform: Online
Price: Free
Level: Beginners
The world’s largest video sharing platform also offers basic video editing services. Although Google has discontinued its built-in video editor, it still allows tts users to trim or rotate videos, apply filters or even create time-lapse and slow-motion videos on line. Brightness, contrast or saturation levels can be altered if you want to enhance the colors in your videos. Audio editing features are limited because the platform only allows you to add a single audio file to a project you’re working on. However, some of the most important video editing features like adding the text or creating titles are not available.
Advantages: Allows you to polish your videos before posting them on YouTube for free.
Cons: This online video editor lacks some basic video editing tools such as transitions or audio controls.
21. Online Video Cutter
Platform: Online
Price: Free
Level: Beginners
If you were looking for a web app that contains all the tools required to cut a small video file, then Online Video Cutter is one of your best options. You won’t even have to create an account before you start the video editing process. The videos you upload to this online editor can’t exceed the 500 MB size limit. Besides cutting their videos, users of this editor can also rotate or trim their footage for free. Online Video Cutter provides support for nearly all video file formats, so you don’t have to worry about the file format in which your video was captured.
Advantages: Offers a quick way to trim videos online and it is exceptionally easy to use.
Limitations: Lacks even the most basic video editing features other than cutting, trimming and rotating videos.
22. Movie Maker Online
Platform: Online
Price: Free
Level: Beginners
This free online editing tool lets you process videos without even registering or creating an account. You can add videos, photos, text, and music into a single project and mix them together into an awesome video. The platform grants you access to its rich filter library, and it also allows you to add text overlays, fade audio and video files or create smooth transitions between shots. Movie Maker Online features its own collection of royalty free music and photos you can use to make your videos look and sound better. The webpage’s design is a little odd, and it may take some time to get used to it.
Advantages: The app offers a lot of different video editing tools and it allows you to perform all basic video editing actions online.
Limitations: Movie Maker Online is funded by ads, and requires you to disable your AdBlock app before you can start editing a video.
23. ClipChamp
Platform: Online
Price: Free trial, Paid: $7 per month
Level: Beginners
ClipChamp lets you upload videos you already recorded or capture new footage using your computer’s webcam. The free version of this web app allows you to export in 1080p video files, but you can’t produce more than five videos in a single month. Both versions of the online video editor require you to create an account, and the videos exported from the free version of the app don’t have a watermark. ClipChamp provides numerous video editing tools, including transition, color adjustments or cropping. The exporting process doesn’t last too long and you can choose whether you want to share the video on social media or download it to your computer.
Advantages: Makes creating webcam videos as well as editing preexisting footage look easy while providing excellent export options.
Limitations: The free version of ClipChamp allows you export only five videos in a month.
24. WeVideo
Platform: Online
Price: Freemium
Level: Beginners
The capabilities of WeVideo online video editor surpass the basic level of video editing. The platform offers support for iOS and Android devices as well as desktop computers. Producing square or horizontal videos, creating motion titles or publishing videos in 720p HD resolution are just a few amazing options this online video editor provides. The paid versions of the web app are best suited for skilled video editing professionals or large teams that are working on demanding projects. WeVideo’s free version doesn’t allow its users to publish more than 30 minutes of video content each month and each exported video contains a watermark.
Advantages: Produces videos with great picture quality and offers tons of advanced video editing options.
Limitations: Creating an account is mandatory even for video editors who want to use the free version of WeVideo.
25. Kizoa
Platform: Online
Price: Freemium
Level: Beginners
Kizoa offers a broad spectrum of transitions, visual effects, animation and text effects to its users for free. The video editing platform is frequently used to create goofy short videos that can be easily shared on Facebook or Twitter. The app allows you to add photos to your video projects and it grants you access to an incredibly rich royalty free music collection. However, you will have to create an account on Kizoa in order to be able to export the videos you created. The editor’s timeline is rudimentary, but still functional enough to enable users to combine audio, video, and photo files.
Advantages: Kizoa is a powerful tool for the creation of entertaining social media videos.
Limitations: You must create an account in order to be able to export your projects, and the online video editor doesn’t feature any advanced video editing options.
26. Wideo
Platform: Online
Price: Freemium
Level: Beginners
All video enthusiasts can use Wideo platform to edit their videos, regardless of their skill level. In addition to amazing video editing options, this online video editor also features animations that can be used to create professional presentations. All video content uploaded to Wideo is stored on the cloud, and pricing plans for professionals include unlimited storage space. The Basic version of the editor allows for just ten downloads in a month and it doesn’t let its users upload videos to YouTube. Even though this video editor is easy to use, it is better suited for skilled professionals than it is for inexperienced video editors.
Advantages: Even the Basic pricing plan enables users to export HD videos, while Professional and Enterprise pricing plans include the Full HD export option.
Limitations: Limited audio editing options significantly reduce the capabilities of this online video editing platform.
Read More to Get: 10 Best Free Online Video Editors With No Watermark >>
Part III: Best Video APP for iOS/Android
27. Filmora
Platform: iOS, Andoird
Price: Freemium
Level: Beginners
You can edit your videos with Filmora in just three simple steps. All you have to do is choose the videos and photos from your phone’s gallery, Instagram or Facebook account, select a theme, insert transitions or add a song and share the video directly from the app on social media or to your email address. Besides the powerful video editing features, this app for iOS and Android devices also allows you to set your video’s aspect ratio to Square 1:1 if you would like to share the clip on Instagram or Cinema 16:9 if the video is shared to YouTube.
Advantages: Supports HD export options and provides a diverse set of video editing options.
Limitations: The app can’t perform advanced video editing tasks.
28. Vlogit
Platform: iOS, Android
Price: Free
Level: Beginners
The Wondershare’s video editing app for Android and iOS devices is designed to offer assistance to YouTubers and Vloggers who want to edit their videos directly from their Smartphones. Vlogit is equipped with video editing tools that enable you to cut, trim or rotate videos, while its sound editing features include recording voiceovers, adding sound effects or choosing the music you want to use as a soundtrack to your video. The app lets you combine photos and videos within the same project, and it also enables you to create customized openers from animated templates. The videos created and exported with the Vlogit app don’t contain watermarks.
Advantages: Offers powerful video editing features to YouTubers and Vloggers who want to edit their videos from their Smartphones for free.
Limitations: The list of visual effects the app provides could be longer.
29. VideoShop
Platform: iOS, Android
Price: Freemium
Level: Beginners
The extensive list of features VideoShop app offers makes it one of the best options for novice video editors who want to quickly create visually impressive videos. This video editing app allows you to work with multiple video files or merge them into a single video. The animated titles enable users of the VideoShop app to create professional-looking intros for their videos, while the transitions feature allows them to seamlessly piece together all shots featured in a project. Tilt-Shift and Stop Motion options are also available to video editors who want to make their videos look more professional.
Advantages: Fun and easy to use video editing app that lets you manipulate footage in any way you want.
Limitations: VideoShop contains ads, and the app’s version for iOS devices only supports videos recorded with iPhones and iPads.
30. Filmmaker Pro
Platform: iOS
Price: Freemium, $5,99 monthly subscription
Level: Semi-pros
iPhone videographers who need access to semi-professional video editing tools will certainly enjoy using this app. Filmmaker Pro offers support for 4K footage filmed on the latest models of iPhone and it enables its users to add an unlimited number of text overlays, video clips, voiceovers or audio tracks to the app’s timeline. The video editor grants you access to over 30 filters, video grading features, as well as Chroma Key and Ken Burns effects. In addition to impressive video and audio editing features, Filmmaker Pro’s users can also record videos with a camera that lets them adjust settings manually directly from the app, although this option must be paid for.
Advantages: Text overlays, audio editing features and the ability to select the aspect ratio for each video you edit with this app, make it one of the best video editing options for iOS devices.
Limitations: Nearly all of the app’s best features must be purchased.
31. KineMaster
Platform: iOS, Android
Price: Freemium, contains adds
Level: Semi-pros
This cross-platform video editor is one of the premier options for mobile video editing on both iOS and Android devices. KineMaster is currently the only app that enables Android Smartphone owners to add as many layers of videos, photos, and text to their projects as they want. However, it only supports a limited number of video file formats, which means that the app shouldn’t be used to edit videos that weren’t recorded on an iPhone or Android phone. KineMaster provides a wide range of video exporting options and allows you to share videos on popular social media networks.
Pros: Above average video and audio editing features.
Limitations: Offers a lot of options mobile video editors seldom use.
32. LumaFusion
Platform: iOS
Price: Paid, $29.99
Level: Semi-pros
Creating neatly organized projects with LumaFusion is a simple task because the app features a powerful Project Manager that lets you sort files or select aspect ratios for your videos. In addition, the Media Library lets you import all types of files from a cloud storage or drag and drop media from other apps. Producing slow-motion videos that have 120 or 240fps or creating green screen videos using the Chroma Key effect is easy with LumaFusion. The app’s audio editing features are as impressive as its video editing tools since they provide the complete control over the audio files to the video editor’s users.
Advantages: Color correction options, LUTs or numerous visual effects are all part of the reason why LumaFusion is one of the best apps for mobile video editing.
Limitations: Only available for iOS devices.
33. Vizzywig 2019 4K Video Editor
Platform: iOS
Price: Paid, $79.99
Level: Semi-pros
This award-winning app for iOS devices provides all the tools a skilled video editor could desire. Its features include support for 4K videos, wide selection of aspect ratios as well as stylish intros, end credits, and titles. Besides offering professional video editing tools, Vizzywig also features Multi-Camera recording options that can capture videos in 8K resolution. In addition, the app is capable of producing videos that have eight times more pixels than the Apple’s Facetime HD Camera. The non-linear timeline lets you arrange video clips in any way you see fit, and allows you to add multiple media files to each project you are working on.
Advantages: Lets you control the focus and exposure manually and produce videos with stunning picture quality.
Limitations: Single platform compatibility and a high price narrow down the number of the app’s potential users.
34. PowerDirector
Platform: Android
Price: Freemium, contains ads and in-app purchases
Level: Beginners
Unlike the Adobe’s app for mobile video editing, PowerDirector lives up to all expectations. This user-friendly app lets you create reverse, 4K, or green screen videos. To make things even better, you can easily apply visual and audio effects or add voiceovers to your projects. In addition to the video editor, the PowerDirector app is also equipped with a powerful photo editor that lets you manipulate images in a professional manner. You can use almost any type of video or audio file in this app because it provides support for all commonly used file formats.
Advantages: PowerDirector is designed to help its users polish their video quickly and effortlessly.
Limitations: Videos in 1080p and 4K resolutions can only be exported after you’ve made an in-app purchase.
Ooops…It looks like there isn’t any tool that matches your demand. Please give it another try.
Which Video Editor Do You Think Is Best for You?
Thank you to read this so far. It’s a long but the most comprehensive reviews ever for all hot video editing software compatible with Windows, Mac, iOS, Android and Linux, as well as online video editors. I hope you find the tools that you like.
If you want to get quick selections without too much reading, here is my recommendation:
- Best video editor for Windows and Mac to download: Filmora
- Best video editing software for Linux to download: Lightworks
- Best video editor for Android, iOS to download: Filmora , VideoShop
- Best online video editor to use: WeVideo
If you still can’t find a one Or we missed one of the tools you think which deserves to be listed above?
Either way, let us know by leaving a comment below.
Ollie Mattison
Ollie Mattison is a writer and a lover of all things video.
Follow @Ollie Mattison
Also read:
- New 2024 Approved FREE Top10 Best Whiteboard Animation Software
- New In 2024, Unbiased Reviews Finding the Perfect YouTube to MP3 Converter
- New 3 Steps to Add a Countdown Timer in Final Cut Pro X for 2024
- Updated 2024 Approved Free Divx Video Trimming Tools Top Picks
- Free M4A Editing Solutions Top 5 Software
- New The Ultimate Guide to Converting Videos for VR Headsets for 2024
- New 2024 Approved Video Reversal Made Simple A Beginners Guide to Final Cut Pro
- New 2024 Approved Neon Typography Made Easy 9 Best Online Text Generator Tools
- Updated FCP Like a Pro Top 5 Editing Techniques to Take Your Videos to the Next Level for 2024
- The Power of Vertical How to Resize Your Videos for Maximum Impact on Social Media for 2024
- 2024 Approved The Top 4K Video Editing Solutions for Professionals
- Updated 2024 Approved Top 10 Free Online Video Loopers
- 2024 Approved Chromebook Video Editing Top Picks for Free Software
- New The Ultimate Canon Video Editing Handbook Software, Tips, and Trends
- 2024 Approved The Ultimate List of Free MP4 Video Cutter Tools
- Updated The Ultimate List of Android Apps Everyone Loves for 2024
- Updated Top-Rated Video Creators for Photos and Music for 2024
- The 6 Most Popular Video Editors for Windows for 2024
- Updated Final Cut Pro on a Budget Get 90 Days of Free Access Now
- 2024 Approved Designing for Mobile Essential Tips for Vertical Aspect Ratios
- New In 2024, Blur Out Distractions Best Free Online Photo Editors
- The Best Free Video Editing Programs for Learners for 2024
- New In 2024, Video Vibes The Best Mobile Editing Apps for iPhone and Android
- New Premiere Pro 2023 Mastering Video Stabilization for Pro Results
- New 2024 Approved Looking for iMovie on Windows 10? Try These Excellent Alternatives
- New In 2024, S Best Video Editing Software for HD Videos
- Updated New to Video Editing? Find the Best Mac Movie Maker Software for You for 2024
- Updated In 2024, Free Video Editing for Beginners A Step-by-Step Guide to Getting Started
- New 2024 Approved Split Your Screen, Double the Fun Top Video Apps for Mobile
- New Steady Shots Ahead The Best Free Online Video Stabilizers
- In 2024, PC Video Editing Made Easy GoPro Quik and Similar Tools
- New Get the Concept of the Splice Editing App and the Things You Can Utilize It For. Also, Find the Best Alternative to the Splice Desktop Version for 2024
- New 2024 Approved Add Emotional Depth Learn to Create a Ken Burns Effect in Minutes
- New Discover and Fine-Tune Image Scale for 2024
- Relive the Good Old Days Top Apps for Adding Retro VHS Flair to Your Videos
- New In 2024, Looking for iMovie on Windows? Here Are 10+ Great Alternatives
- 2024 Approved Avidemux No Sound Error How to Fix It
- New S Best Video Merging and Collage Apps for iPhone and iPad Users
- 2024 Approved Why Bother with Reddit? Get the Best Filmora Deals Right Here
- Updated Transforming Your Canon Footage Advanced Video Editing Techniques
- Quik, But Not Quick Enough? A Review & PC Alternatives for Faster Video Editing
- Updated 2024 Approved Final Cut Pro X Not for You? Try These 10 Alternatives Instead
- New Split 3GP Files Into Multiple Segments Easy Guide 2023 for 2024
- New Elevate Your Brand Top Movie Intro Creation Tools and Software for 2024
- How to Unlock Apple iPhone 15 Pro Max With an Apple Watch & What to Do if It Doesnt Work | Dr.fone
- Recover your messages after Infinix Zero 30 5G has been deleted
- Reasons why Pokémon GPS does not Work On Motorola Razr 40? | Dr.fone
- In 2024, How to Change Location on TikTok to See More Content On your Nokia C22 | Dr.fone
- New How To Quick Guide for Making Google Slideshows for 2024
- In 2024, Full Guide to Fix iToolab AnyGO Not Working On Tecno Pop 7 Pro | Dr.fone
- Top Apps and Online Tools To Track Motorola Moto G04 Phone With/Without IMEI Number
- In 2024, Full Guide to Fix iToolab AnyGO Not Working On Oppo Reno 8T | Dr.fone
- In 2024, Bypass iCloud Activation Lock with IMEI Code On Apple iPhone 12 mini
- For People Wanting to Mock GPS on Samsung Galaxy A54 5G Devices | Dr.fone
- How to recover lost data from Realme C55?
- How to Fix Unfortunately, Contacts Has Stopped Error on Tecno Camon 20 Premier 5G | Dr.fone
- How to Unlock the Lock Screen on my Asus ROG Phone 7 Ultimate
- In 2024, How Can I Catch the Regional Pokémon without Traveling On Nubia Red Magic 8S Pro | Dr.fone
- Updated Adobe Animate Riggings Tutorial for You
- How Can I Use a Fake GPS Without Mock Location On Apple iPhone 13 mini? | Dr.fone
- In 2024, A Guide Realme Narzo 60x 5G Wireless and Wired Screen Mirroring | Dr.fone
- How to Remove an AirTag from Your Apple ID Account From iPhone XS?
- 5 Solutions For Oppo A78 Unlock Without Password
- How to Reset a Vivo S17e Phone That Is Locked | Dr.fone
- In 2024, Its Always a Cool Thing to Use a 3D Intro Maker to Create Intro Videos for Your Clips. This Post Will Introduce You 4 of the Best Intro Video Makers to Help You Improve Your Video
- In 2024, Everything You Need to Know about Lock Screen Settings on your Samsung Galaxy F14 5G
- In 2024, How to Unlock Realme Narzo 60 5G Phone without Any Data Loss
- In 2024, How To Change Country on App Store for iPhone XS With 7 Methods | Dr.fone
- How to Speed up a Video on Splice
- In 2024, For People Wanting to Mock GPS on Tecno Spark 20C Devices | Dr.fone
- 3 Facts You Need to Know about Screen Mirroring OnePlus Ace 2 | Dr.fone
- In 2024, How to Change Location on TikTok to See More Content On your Samsung Galaxy M34 | Dr.fone
- 2024 Approved Adobe Rigger Is AWESOME
- In 2024, How to Remove Apple ID from Apple iPhone XR without Password?
- Fix App Not Available in Your Country Play Store Problem on Samsung Galaxy F04 | Dr.fone
- How to get back lost photos from Realme .
- Hassle-Free Ways to Remove FRP Lock on Vivo V30 Phones with/without a PC
- In 2024, How to Change OnePlus Ace 2V Location on Skout | Dr.fone
- New 2024 Approved Unveiling the Secrets of Shopee Livestream Selling System
- How to Quickly Fix Bluetooth Not Working on Asus ROG Phone 8 Pro | Dr.fone
- 6 Solutions to Fix Error 505 in Google Play Store on Itel P40+ | Dr.fone
- How To Unlock SIM Cards Of Samsung Galaxy S23+ Without PUK Codes
- How To Fix Unresponsive Phone Touchscreen Of Realme 11 Pro+ | Dr.fone
- In 2024, Catch or Beat Sleeping Snorlax on Pokemon Go For Samsung Galaxy F54 5G | Dr.fone
- Updated Compute and Correct Image Dimensions
- 5 Ways to Track Oppo Reno 8T without App | Dr.fone
- Title: Make Your Videos Accessible 10 Free Subtitle Makers Online for 2024
- Author: Amelia
- Created at : 2024-05-19 11:47:38
- Updated at : 2024-05-20 11:47:38
- Link: https://ai-driven-video-production.techidaily.com/make-your-videos-accessible-10-free-subtitle-makers-online-for-2024/
- License: This work is licensed under CC BY-NC-SA 4.0.
