
:max_bytes(150000):strip_icc():format(webp)/how-to-fix-a-critical-process-dies-windows-11-error-952a1ad6325f455aaef36516fb3f7120.jpg)
New Free and Fantastic The Best 4K Video Editing Software for Everyone for 2024
Free and Fantastic: The Best 4K Video Editing Software for Everyone
The Ultra HD video, also known as 4K video , defines 3840 2160 pixels. It became popular in 2016 and has overtaken both HD and ultra-HD to become the video with the highest resolution. Most videos are shot in HD, but as camera technology improves, 4K video seems to have become increasingly common. Because of the additional level of detail that the camera acquires, 4K videos are large files that allow you more editing possibilities.
Several free 4K video editing software has been developed to make video editing relatively easy in recent times. These free 4K video editors allow you to import, edit, and export videos easily. This article will provide you with some of the best free 4K video editors you should try in 2022.
In this article
01 Best Free 4K Video Editing Software for Windows and Mac
02 Things You Need to Pay Attention to Run Free 4K Video Editors
03 Tips for Editing 4K Videos Smoothly
Part 1: Top 5 Best Free 4K Video Editing Software for Windows and Mac
1. iMovie
Supported OS: iPhone, iPad, and Mac
iMovie is one of the most popular free 4K Video editing software. Using iMovie, you can create a professional-looking video even without any editing experience. You can import 4K images and 4K videos to iMovie, and then trim, split and add titles, transitions, filters or effects to the video by dragging and dropping. What’s more, you can import and export 60 frames per second video in iMovie.
iMovie is a video editing software that imports video footage from digital video cameras that use the MiniDV format. It can play DV, HDV, AVCHD, iFrame, Animation Codec, and other video formats. You can import 4K videos directly to iMovie and export them as 4K videos at 24fps/30fps/60fps. You can also share the 4K video to YouTube from iMovie directly.
Pros:
1. Switching across different devices:
This free 4K video editor is designed to work together using different devices (iPhone, iPad & Mac). You can begin a project on your iPhone, then transfer it to your iPad using AirDrop or iCloud Drive. It allows you to share what you have worked on to different devices, and you can also send projects from your iPad to your MacBook or iMac.
2. Advanced editing features:
What makes this free 4K video editor special is the ability to add some innovative editing functions when creating and editing your videos. Understandably, any video editor should offer basic editing features; however, iMovie allows you to work with more advanced functions like split-screen , picture-in-picture , and green-screen effects .
3. Saving all the original files
An advantage of working with different devices provides an opportunity to save all original files. It saves you time since you can import any media you need to get your project started in the video editor without losing the original files.
Cons:
- Distorted files: If you don’t follow the importing and exporting process, the files might get distorted, resulting in fuzzy images.
- Only available on iOS/macOS/iPad devices
2. VSDC
Supported OS: Windows 2000/XP/2003/Vista/7/8/10
VSDC is a free 4K video editor that allows for beginner-level editing. It supports recording voice-over, capturing the desktop screen, editing the video and audio files. With VSDC, you can blend multiple footage layers into a single composition. You can easily apply a picture-in-picture effect and make things change their appearance or position.
VSDC allows you to import 4K video, audio, and image files. To successfully import these files; Click ‘Shift + I’ to add an image, ‘Shift A’ to add an audio file, and ‘Shift V’ to add a video file. VSDC allows you to export 4K videos to PC or share to web platforms like YouTube. To export these files, go to the export project tab at the top, and then set the profile to the highest quality. Click the Edit profile button and then select the 4K preset from the list. Choose the video and audio quality size, and then save the video as 4K.
Pros:
- Every tool for video editing is available
- Amazing Visual Effects
- Efficient Text Processing
- Lots of Blending modes
Cons:
- Pro editing features are missing
- Available for Windows only
- Audio waveform and hardware acceleration features are not available
3. ShotCut
Supported OS: Windows, Mac, and Linux.
Shotcut is another free 4K video editor made for Linux, Macintosh, and Windows gadgets. It has wide arranged support that features its astounding usefulness. This 4K video editing software may not be the most alluring programming you see, yet it can assist with making the process of editing smooth and straightforward.
This professional video editing software support almost all the latest audio and video formats, including ProRes, DNxHD, and 4K, and it allows you to trim, cut, insert, and overwrite the video and audio. With its video effects, you can do color correction and grading, add fade-in and fade-out effects, reverse the clip, and even edit the 360° videos.
Here is a completed video tutorial from YouTuber Kevin Stratvert, which provides almost all information about how to use Shotcut, including how to create a project, add media, edit clips and export.
Pros:
- Easy Access: The 4K video editor is open source. Users can easily alter the source codes, enabling the process of editing simple and clear.
- Shotcut has every one of the required instruments to give excellent outcomes to clients. It has all elements of good video editing software and a bunch of other supportive and current choices.
- Shotcut offers an easy-to-use interface that allows you to finish a project quickly while having it examined by multiple members of your team. Its preview panel gives users access to a quick start menu, and its view menu lets them decide which features appear on the screen. The software’s video and audio filters are the most amazing of all its features. These filters can be customized, and they can be combined and layered in a variety of ways. Adjusting is now easier thanks to the easy checkbox and slider systems. Shotcut is so good that it makes even the most complicated effects understandable to the average user.
Cons:
- The platform might be a bit confusing when using the software for the first time because the interface isn’t intuitive.
4. LightWorks
Supported OS: Windows, Linux, and macOS
Lightworks is another video editor that can edit 4K videos from EditShare for people who have video editing experience. It has a simple and intuitive user interface, and you will find LOG, EDIT, VFX, and AUDIO tabs at the top of the interface. It integrates some paid royalty-free audio files, so you don’t need to find the background music from somewhere else. This software has some advanced editing features such as Multicam editing and batch export. It even supports third-party plugins, such as Boris FX, Boris Graffiti, and GenArts Sapphire. It enables its users to freely edit videos, even to the extent of trimming a video down to the size you desire.
However, if you want to export the videos in 4K, you need to pay, since it is limited to Lightworks Pro users.
Pros:
- The software allows clips to be easily imported and provides a platform where these clips can be played. This is made possible because this 4K video editor provides an interface made of panels such as bins, timeline, and edit review.
- Lightworks provides an easy way of applying varieties of effects from different clips in a coordinated manner. The software utilizes the hub-based framework to put together clips and recordings, which is needed for clips with numerous effects and tracks.
- Navigating this software, a right-click menu allows the user to export videos directly to YouTube. Also, the software automatically saves your work, so you don’t lose the files you’ve worked on.
Cons:
- Poor quality exporting options when making use of the free version (720p only)
- You need to register first to use it
5. Filmora Instant Cutter Tool
Supporting OS: Windows and Mac
For Win 7 or later (64-bit)
For macOS 10.12 or later
Filmora is one of the best video editors for beginners to create professional-looking videos in a modern way. One of the biggest advantages of using Filmora is its resources. You can now search the resources in the search bar and drag and drop them to the timeline to preview the result without paying first.
Some of you may say, Filmora is not a free video editor since there will be a watermark at the export video. But here, I will introduce the Instant Cutter Tool which is a perfect tool to trim and merge large 4K videos and action camera videos. This free 4k tool provides a proper way of instantly trimming or merging videos without de-coding, which means the video resolution will not be changed. Using the instant cutter tool, you can upload or merge files of huge sizes in different formats, such as MP4/MOV or MTS/M2TS.

Note: You can try some legal ways to remove the Filmora watermark without paying .
Pros:
- Clean and Intuitive User Interface
- 4K Video Support
- Trim and merge large videos quickly
Cons:
- Limited video formats supported when using Instant Cutter Tool
Part 2: Things You Need to Pay Attention to Run Free 4K Video Editors
While the general features of the best free 4K video editors have been discussed, it’s important you are aware of some specific requirements your system must possess to edit your videos successfully. Irrespective of the kind of device you’re using to edit your videos, you need to pay attention to some features your device must have. However, these requirements depend on the 4K video editing software free.
- Central Processing Unit (CPU): The Processor of the software being used must be Intel Core i7, 2.3Ghz four-core; this is applicable if you will be editing your videos offline. Then, Dual Intel Xeon 2Ghz six-core is applicable if you will be editing your videos online.
- Random Access Memory (RAM): Preferably an 8GB Memory if you’re editing offline, and 32GB Memory if you’re editing online.
- Internal storage: The required storage must be sufficient because 4K videos are huge files.
Note: Offline editing refers to editing a proxy file of the original source material ; online editing is the editing of the original material.
Part 3: Tips for Editing 4K Videos Smoothly
- Choose the software based on your hardware: To choose the best 4K video editing software free, you must not opt for an editing software with higher requirements than your hardware; such software won’t work well on your device. You should instead select an editing software with lower requirements.
- Split large 4K videos into several parts: It has been reiterated that 4K videos are huge files; to edit your videos smoothly, it is recommended to split up the videos and edit one after the other. This will save you from heavy data loss.
- Enable graphics accelerator: A graphic accelerator is used in video editing to turbocharge your video exporting. It’s usually clung to a video board of your system. It makes the editing easier and faster by preventing a heavy workload.
02 Things You Need to Pay Attention to Run Free 4K Video Editors
03 Tips for Editing 4K Videos Smoothly
Part 1: Top 5 Best Free 4K Video Editing Software for Windows and Mac
1. iMovie
Supported OS: iPhone, iPad, and Mac
iMovie is one of the most popular free 4K Video editing software. Using iMovie, you can create a professional-looking video even without any editing experience. You can import 4K images and 4K videos to iMovie, and then trim, split and add titles, transitions, filters or effects to the video by dragging and dropping. What’s more, you can import and export 60 frames per second video in iMovie.
iMovie is a video editing software that imports video footage from digital video cameras that use the MiniDV format. It can play DV, HDV, AVCHD, iFrame, Animation Codec, and other video formats. You can import 4K videos directly to iMovie and export them as 4K videos at 24fps/30fps/60fps. You can also share the 4K video to YouTube from iMovie directly.
Pros:
1. Switching across different devices:
This free 4K video editor is designed to work together using different devices (iPhone, iPad & Mac). You can begin a project on your iPhone, then transfer it to your iPad using AirDrop or iCloud Drive. It allows you to share what you have worked on to different devices, and you can also send projects from your iPad to your MacBook or iMac.
2. Advanced editing features:
What makes this free 4K video editor special is the ability to add some innovative editing functions when creating and editing your videos. Understandably, any video editor should offer basic editing features; however, iMovie allows you to work with more advanced functions like split-screen , picture-in-picture , and green-screen effects .
3. Saving all the original files
An advantage of working with different devices provides an opportunity to save all original files. It saves you time since you can import any media you need to get your project started in the video editor without losing the original files.
Cons:
- Distorted files: If you don’t follow the importing and exporting process, the files might get distorted, resulting in fuzzy images.
- Only available on iOS/macOS/iPad devices
2. VSDC
Supported OS: Windows 2000/XP/2003/Vista/7/8/10
VSDC is a free 4K video editor that allows for beginner-level editing. It supports recording voice-over, capturing the desktop screen, editing the video and audio files. With VSDC, you can blend multiple footage layers into a single composition. You can easily apply a picture-in-picture effect and make things change their appearance or position.
VSDC allows you to import 4K video, audio, and image files. To successfully import these files; Click ‘Shift + I’ to add an image, ‘Shift A’ to add an audio file, and ‘Shift V’ to add a video file. VSDC allows you to export 4K videos to PC or share to web platforms like YouTube. To export these files, go to the export project tab at the top, and then set the profile to the highest quality. Click the Edit profile button and then select the 4K preset from the list. Choose the video and audio quality size, and then save the video as 4K.
Pros:
- Every tool for video editing is available
- Amazing Visual Effects
- Efficient Text Processing
- Lots of Blending modes
Cons:
- Pro editing features are missing
- Available for Windows only
- Audio waveform and hardware acceleration features are not available
3. ShotCut
Supported OS: Windows, Mac, and Linux.
Shotcut is another free 4K video editor made for Linux, Macintosh, and Windows gadgets. It has wide arranged support that features its astounding usefulness. This 4K video editing software may not be the most alluring programming you see, yet it can assist with making the process of editing smooth and straightforward.
This professional video editing software support almost all the latest audio and video formats, including ProRes, DNxHD, and 4K, and it allows you to trim, cut, insert, and overwrite the video and audio. With its video effects, you can do color correction and grading, add fade-in and fade-out effects, reverse the clip, and even edit the 360° videos.
Here is a completed video tutorial from YouTuber Kevin Stratvert, which provides almost all information about how to use Shotcut, including how to create a project, add media, edit clips and export.
Pros:
- Easy Access: The 4K video editor is open source. Users can easily alter the source codes, enabling the process of editing simple and clear.
- Shotcut has every one of the required instruments to give excellent outcomes to clients. It has all elements of good video editing software and a bunch of other supportive and current choices.
- Shotcut offers an easy-to-use interface that allows you to finish a project quickly while having it examined by multiple members of your team. Its preview panel gives users access to a quick start menu, and its view menu lets them decide which features appear on the screen. The software’s video and audio filters are the most amazing of all its features. These filters can be customized, and they can be combined and layered in a variety of ways. Adjusting is now easier thanks to the easy checkbox and slider systems. Shotcut is so good that it makes even the most complicated effects understandable to the average user.
Cons:
- The platform might be a bit confusing when using the software for the first time because the interface isn’t intuitive.
4. LightWorks
Supported OS: Windows, Linux, and macOS
Lightworks is another video editor that can edit 4K videos from EditShare for people who have video editing experience. It has a simple and intuitive user interface, and you will find LOG, EDIT, VFX, and AUDIO tabs at the top of the interface. It integrates some paid royalty-free audio files, so you don’t need to find the background music from somewhere else. This software has some advanced editing features such as Multicam editing and batch export. It even supports third-party plugins, such as Boris FX, Boris Graffiti, and GenArts Sapphire. It enables its users to freely edit videos, even to the extent of trimming a video down to the size you desire.
However, if you want to export the videos in 4K, you need to pay, since it is limited to Lightworks Pro users.
Pros:
- The software allows clips to be easily imported and provides a platform where these clips can be played. This is made possible because this 4K video editor provides an interface made of panels such as bins, timeline, and edit review.
- Lightworks provides an easy way of applying varieties of effects from different clips in a coordinated manner. The software utilizes the hub-based framework to put together clips and recordings, which is needed for clips with numerous effects and tracks.
- Navigating this software, a right-click menu allows the user to export videos directly to YouTube. Also, the software automatically saves your work, so you don’t lose the files you’ve worked on.
Cons:
- Poor quality exporting options when making use of the free version (720p only)
- You need to register first to use it
5. Filmora Instant Cutter Tool
Supporting OS: Windows and Mac
For Win 7 or later (64-bit)
For macOS 10.12 or later
Filmora is one of the best video editors for beginners to create professional-looking videos in a modern way. One of the biggest advantages of using Filmora is its resources. You can now search the resources in the search bar and drag and drop them to the timeline to preview the result without paying first.
Some of you may say, Filmora is not a free video editor since there will be a watermark at the export video. But here, I will introduce the Instant Cutter Tool which is a perfect tool to trim and merge large 4K videos and action camera videos. This free 4k tool provides a proper way of instantly trimming or merging videos without de-coding, which means the video resolution will not be changed. Using the instant cutter tool, you can upload or merge files of huge sizes in different formats, such as MP4/MOV or MTS/M2TS.
Note: You can try some legal ways to remove the Filmora watermark without paying .
Pros:
- Clean and Intuitive User Interface
- 4K Video Support
- Trim and merge large videos quickly
Cons:
- Limited video formats supported when using Instant Cutter Tool
Part 2: Things You Need to Pay Attention to Run Free 4K Video Editors
While the general features of the best free 4K video editors have been discussed, it’s important you are aware of some specific requirements your system must possess to edit your videos successfully. Irrespective of the kind of device you’re using to edit your videos, you need to pay attention to some features your device must have. However, these requirements depend on the 4K video editing software free.
- Central Processing Unit (CPU): The Processor of the software being used must be Intel Core i7, 2.3Ghz four-core; this is applicable if you will be editing your videos offline. Then, Dual Intel Xeon 2Ghz six-core is applicable if you will be editing your videos online.
- Random Access Memory (RAM): Preferably an 8GB Memory if you’re editing offline, and 32GB Memory if you’re editing online.
- Internal storage: The required storage must be sufficient because 4K videos are huge files.
Note: Offline editing refers to editing a proxy file of the original source material ; online editing is the editing of the original material.
Part 3: Tips for Editing 4K Videos Smoothly
- Choose the software based on your hardware: To choose the best 4K video editing software free, you must not opt for an editing software with higher requirements than your hardware; such software won’t work well on your device. You should instead select an editing software with lower requirements.
- Split large 4K videos into several parts: It has been reiterated that 4K videos are huge files; to edit your videos smoothly, it is recommended to split up the videos and edit one after the other. This will save you from heavy data loss.
- Enable graphics accelerator: A graphic accelerator is used in video editing to turbocharge your video exporting. It’s usually clung to a video board of your system. It makes the editing easier and faster by preventing a heavy workload.
Watermark-Free Video Editing: The Top 7 Merging Solutions
Sometimes, when delving into the vast space of internet and trying to find the perfect online platforms or software in order to edit some videos, it might get frustrating to find only the ones with watermark. But of course, the resources are endless and in case we have some information, we can easily access the free video editing platforms which give us the opportunity to edit our videos without undesired logos on them. In this case, we will be discussing 6 video mergers without watermark, and the way we can use them – the tools and features they offer, and how we can get the best out of them.
- Photos by Microsoft
If you are too lazy to get high-quality results using popular video editors, like Filmora, try Photos App. It is a built-in program that usually opens your images on Windows 10, but you can also use it for merging your videos. And guess what? Since it comes within the system, all the features, although limited, are absolutely free.
How to Merge Videos on Windows using Photos App?

These are the steps to combine multiple clips in Windows 10 with Photos App.
Step 1: Open Photos App
Go to the ‘Start’ menu, find Photos App, and click to open it.
Step 2: Make a New Project
Click the ‘New video project’ (big blue box) under the ‘Video Projects’ tab. Alternatively, you can click the ‘New video’ button and select the ‘New video project’ option from the dropdown menu.
Step 3: Add Clips
Look for the text ‘Project library.’ Then click the ‘+ Add’ button. This will open a new window so you can select the clips you want to combine. Also, import videos one by one in a proper sequence because you cannot arrange them later.
Step 4: Make a Storyboard
After importing all the shots, you want to merge, click the ‘Place in storyboard’ button. This option will add all the chosen clips to your project’s storyboard.
- Fastreel by Movavi
Fastreel is a free online video editor. It is extremely easy to use right away, without installing anything. So, on Fastreel, one can edit videos or use online templates in the browser itself. Actually, the first tool we see in the list of Fastreel tools is to merge a video; then, it can be used in order to compress, make, cut, and create a video. On fastreel, you can add a watermark to a video, if wanted - so, it is very voluntary. As for the merging of a video, when this tool is chosen, it’s pretty simple to understand the steps – you can just drop/add multiple files right away.

The format must be either of the listed: MP4, MOV, MKV, AVI, and WMV, and the total size mustn’t exceed 500 MB. Then, in order to add some transitions, a style can be chosen from the drop-down menu, and after that, you should hit on Continue button to stitch the videos together. For the last step, you can export the result by selecting Download option.

- Free Video Cutter Joiner
Free Video Cutter Joiner – the name already explains it all by itself! This is a free video merger which will not add watermark on your video. The software needs to be downloaded, and contributes to quickly cutting and joining videos. Free Video Cutter Joiner has no size limits – it can cut and merge videos with large file sizes without any trouble, and speed of it to do so is quite fast. It supports several file formats, such as AVI, MPEG, WMV, 3GP FLV, MP4, WMV, MOV, VOB, etc.
So, once downloaded, you will see how user-friendly and straightforward the software is: it shows two of its features right away – video cutter and video joiner. You choose which one you are about to use – so, in our case, video joiner.

Then, you should click the the “+” icon, which lets you add files from your PC.

Then, hit on the Join button, and choose Indirect Join. Hitting on Start Join will start merging all the uploaded videos, and, wait a little until the process has been completed.

- Clideo
Clideo is the online platform that declares that it makes it super easy to edit all your video files, images and GIFs, and is totally free. It gives us the opportunities to: merge, compress, resize, cut, make, crop, speed, rotate, add music to, loop, flip, reverse, mute, filter, and adjust the videos. Add subtitles, make memes, create slideshows, etc. Therefore, it’s pretty rich in its tools and features.
As for merging videos, much like Fastreel, Clideo is pretty straightforward. You just click on the mentioned tool, and then easily choose files you would like to combine – you can merge any amount of video clips there. Several files can be chosen at the same time, or they can be added one by one.

Then it will take you to the editor, where you can join the videos. It’s possible to rearrange the files, by using drag-and-drop until they’re in the desired order. You can also add images and set duration from them, add audio, change its length and volume. The last step is choosing the aspect ratio and clicking the Export button. You can watch the preview of your result and then click on Download if you are satisfied with the merged file.

- Typito
Typito is a platform to merge videos online, as well as Fastreel and Clideo. It is free, and mostly aims to create combinations one can use to post on social network such as Instagram, Facebook, and Youtube. Typito supports a great many formats, some of them being MP4, AVI, FLV and WMV. You can edit your videos before merging them by trimming, cropping and resizing, and also add transition effects and music. It quickly combines footage, doesn’t watermark the videos, has brand kit of colors, fonts and style. It can also create collection of images, which is used for making Youtube compilation at most times.
To merge videos, you should choose the tool, then Get Started, and register and sign in first.

Then click on New Project, choose a video format (the platform offers you the list of the most popular ones), and it will take you to the editor, where you start off by adding media.

Drag and drop images or videos that you want to combine into a single video. You can also click to upload media files from your system or browse our Stock Media library for high-quality stock photos and video. Then, you can put your video clips in order, and work on it, if you want to use different tools, such as: edit, crop, trim, or resize them, as well as add text captions, images, and transitions. After you have previewed your video, you can click on the export button in the top right corner, and then, your merged video will be ready to be shared.
- Online UniConverter
Online UniConverter is the next online platform giving us the chance to merge our videos without watermark. It is an online analogue of Wondershare UniConverter, and is a very powerful platform, where you can trim, split, rotate, adjust, and download videos in HD quality. UniConverter supports numerous video formats, including MP4, AVI, MOV, MP3, WEBM. Online UniConverter offers various transitions and aspect ratios to fit the screen.

The web-site has lots of tools and features to offer: in the description of it, it reads: video converter, video compressor, video editor, audio converter, audio compressor, audio cutter, GIF maker, YouTube thumbnail, and image resizer. Importing media to the online UniConverter is extremely easy, and combining videos turns out to be a quick process, too.

Anyway, if you want to combine a lot of files and the size of them all exceeds 100 MB, you will not be able to use Online Uniconverter for that. It supports the video no more than 100 MB and suggests using Wondershare UniConverter (originally Wondershare Video Converter Ultimate) for Desktop.
- Wondershare Filmora
Last but not least – Filmora Video Editor ! Even it differs from other abovementioned video mergers, as in it is not totally free and adds a Filmora logo on exported project, it’s a great suggestion for people who want to make their videos look great with the help of various tools. When a user is ready to pay, Filmora offers a subscription model, and for a bit more, one can get a permanent license. The software costs $51.99 per year or $79.99 for an outright purchase (prices are regularly discounted).
Wondershare Filmora has a clear and pleasing interface, offers trimming, transitions, overlays, several effects, as well as some more advanced and modern features, such as motion tracking. For this one particular software, we will be offering a step by step guide about how to merge videos there.
For Win 7 or later (64-bit)
For macOS 10.14 or later
- Open the program.
- Choose Import Media Files Here.

- Choose your

- We can click and drag, essentially, “insert” a video in a sequence below. The Linear Timeline allows us to understand exactly when a video clip ends and when a new one starts.

- Accordingly, we can make one video “sit” next to another. If we want or need it, we will add the third video clip, fourth, and so on.

- We can view the entire video and save the video afterwards.
- Start to save video - we make sure the result is exactly what we wanted, find the Export button above the timeline and click on it.

- In the opened window, on the left side, to be precise, if we observe well, we can already choose in which format we want to save our clip. On the right we can indicate what name we want to give to our video; The location where we want to store it; Also, we see the resolution (which we can modify freely after clicking on Settings); Size; Duration.

- In Settings, we can decide how much quality the video should have, how many kbps will be the Bit Rate, how many fps the Frame Rate should be, etc., but most likely, beginners will not need to change all this.

- After selecting everything, right-click on the Export button in the lower right corner of the window and the program will start saving the material.


So, in this article, we introduced some online platforms and software for you to use if you would like to merge videos and combine them into one. These are: Fastreel, Free Video Cutter Joiner, Clideo, Typito, Online UniConverter, Wondershare Filmora. It’s up to you which one you would like to choose to merge your videos or edit them in any other way, but you can try either of them and choose to your own liking – even so, of course, there are some other video mergers worth considering, that we might mention in the coming articles. Before then, enjoy with free video editors, without watermark!
If you are too lazy to get high-quality results using popular video editors, like Filmora, try Photos App. It is a built-in program that usually opens your images on Windows 10, but you can also use it for merging your videos. And guess what? Since it comes within the system, all the features, although limited, are absolutely free.
How to Merge Videos on Windows using Photos App?
These are the steps to combine multiple clips in Windows 10 with Photos App.
Step 1: Open Photos App
Go to the ‘Start’ menu, find Photos App, and click to open it.
Step 2: Make a New Project
Click the ‘New video project’ (big blue box) under the ‘Video Projects’ tab. Alternatively, you can click the ‘New video’ button and select the ‘New video project’ option from the dropdown menu.
Step 3: Add Clips
Look for the text ‘Project library.’ Then click the ‘+ Add’ button. This will open a new window so you can select the clips you want to combine. Also, import videos one by one in a proper sequence because you cannot arrange them later.
Step 4: Make a Storyboard
After importing all the shots, you want to merge, click the ‘Place in storyboard’ button. This option will add all the chosen clips to your project’s storyboard.
- Fastreel by Movavi
Fastreel is a free online video editor. It is extremely easy to use right away, without installing anything. So, on Fastreel, one can edit videos or use online templates in the browser itself. Actually, the first tool we see in the list of Fastreel tools is to merge a video; then, it can be used in order to compress, make, cut, and create a video. On fastreel, you can add a watermark to a video, if wanted - so, it is very voluntary. As for the merging of a video, when this tool is chosen, it’s pretty simple to understand the steps – you can just drop/add multiple files right away.
The format must be either of the listed: MP4, MOV, MKV, AVI, and WMV, and the total size mustn’t exceed 500 MB. Then, in order to add some transitions, a style can be chosen from the drop-down menu, and after that, you should hit on Continue button to stitch the videos together. For the last step, you can export the result by selecting Download option.
- Free Video Cutter Joiner
Free Video Cutter Joiner – the name already explains it all by itself! This is a free video merger which will not add watermark on your video. The software needs to be downloaded, and contributes to quickly cutting and joining videos. Free Video Cutter Joiner has no size limits – it can cut and merge videos with large file sizes without any trouble, and speed of it to do so is quite fast. It supports several file formats, such as AVI, MPEG, WMV, 3GP FLV, MP4, WMV, MOV, VOB, etc.
So, once downloaded, you will see how user-friendly and straightforward the software is: it shows two of its features right away – video cutter and video joiner. You choose which one you are about to use – so, in our case, video joiner.
Then, you should click the the “+” icon, which lets you add files from your PC.
Then, hit on the Join button, and choose Indirect Join. Hitting on Start Join will start merging all the uploaded videos, and, wait a little until the process has been completed.
- Clideo
Clideo is the online platform that declares that it makes it super easy to edit all your video files, images and GIFs, and is totally free. It gives us the opportunities to: merge, compress, resize, cut, make, crop, speed, rotate, add music to, loop, flip, reverse, mute, filter, and adjust the videos. Add subtitles, make memes, create slideshows, etc. Therefore, it’s pretty rich in its tools and features.
As for merging videos, much like Fastreel, Clideo is pretty straightforward. You just click on the mentioned tool, and then easily choose files you would like to combine – you can merge any amount of video clips there. Several files can be chosen at the same time, or they can be added one by one.
Then it will take you to the editor, where you can join the videos. It’s possible to rearrange the files, by using drag-and-drop until they’re in the desired order. You can also add images and set duration from them, add audio, change its length and volume. The last step is choosing the aspect ratio and clicking the Export button. You can watch the preview of your result and then click on Download if you are satisfied with the merged file.
- Typito
Typito is a platform to merge videos online, as well as Fastreel and Clideo. It is free, and mostly aims to create combinations one can use to post on social network such as Instagram, Facebook, and Youtube. Typito supports a great many formats, some of them being MP4, AVI, FLV and WMV. You can edit your videos before merging them by trimming, cropping and resizing, and also add transition effects and music. It quickly combines footage, doesn’t watermark the videos, has brand kit of colors, fonts and style. It can also create collection of images, which is used for making Youtube compilation at most times.
To merge videos, you should choose the tool, then Get Started, and register and sign in first.
Then click on New Project, choose a video format (the platform offers you the list of the most popular ones), and it will take you to the editor, where you start off by adding media.
Drag and drop images or videos that you want to combine into a single video. You can also click to upload media files from your system or browse our Stock Media library for high-quality stock photos and video. Then, you can put your video clips in order, and work on it, if you want to use different tools, such as: edit, crop, trim, or resize them, as well as add text captions, images, and transitions. After you have previewed your video, you can click on the export button in the top right corner, and then, your merged video will be ready to be shared.
- Online UniConverter
Online UniConverter is the next online platform giving us the chance to merge our videos without watermark. It is an online analogue of Wondershare UniConverter, and is a very powerful platform, where you can trim, split, rotate, adjust, and download videos in HD quality. UniConverter supports numerous video formats, including MP4, AVI, MOV, MP3, WEBM. Online UniConverter offers various transitions and aspect ratios to fit the screen.
The web-site has lots of tools and features to offer: in the description of it, it reads: video converter, video compressor, video editor, audio converter, audio compressor, audio cutter, GIF maker, YouTube thumbnail, and image resizer. Importing media to the online UniConverter is extremely easy, and combining videos turns out to be a quick process, too.
Anyway, if you want to combine a lot of files and the size of them all exceeds 100 MB, you will not be able to use Online Uniconverter for that. It supports the video no more than 100 MB and suggests using Wondershare UniConverter (originally Wondershare Video Converter Ultimate) for Desktop.
- Wondershare Filmora
Last but not least – Filmora Video Editor ! Even it differs from other abovementioned video mergers, as in it is not totally free and adds a Filmora logo on exported project, it’s a great suggestion for people who want to make their videos look great with the help of various tools. When a user is ready to pay, Filmora offers a subscription model, and for a bit more, one can get a permanent license. The software costs $51.99 per year or $79.99 for an outright purchase (prices are regularly discounted).
Wondershare Filmora has a clear and pleasing interface, offers trimming, transitions, overlays, several effects, as well as some more advanced and modern features, such as motion tracking. For this one particular software, we will be offering a step by step guide about how to merge videos there.
For Win 7 or later (64-bit)
For macOS 10.14 or later
- Open the program.
- Choose Import Media Files Here.
- Choose your
- We can click and drag, essentially, “insert” a video in a sequence below. The Linear Timeline allows us to understand exactly when a video clip ends and when a new one starts.
- Accordingly, we can make one video “sit” next to another. If we want or need it, we will add the third video clip, fourth, and so on.
- We can view the entire video and save the video afterwards.
- Start to save video - we make sure the result is exactly what we wanted, find the Export button above the timeline and click on it.
- In the opened window, on the left side, to be precise, if we observe well, we can already choose in which format we want to save our clip. On the right we can indicate what name we want to give to our video; The location where we want to store it; Also, we see the resolution (which we can modify freely after clicking on Settings); Size; Duration.
- In Settings, we can decide how much quality the video should have, how many kbps will be the Bit Rate, how many fps the Frame Rate should be, etc., but most likely, beginners will not need to change all this.
- After selecting everything, right-click on the Export button in the lower right corner of the window and the program will start saving the material.
So, in this article, we introduced some online platforms and software for you to use if you would like to merge videos and combine them into one. These are: Fastreel, Free Video Cutter Joiner, Clideo, Typito, Online UniConverter, Wondershare Filmora. It’s up to you which one you would like to choose to merge your videos or edit them in any other way, but you can try either of them and choose to your own liking – even so, of course, there are some other video mergers worth considering, that we might mention in the coming articles. Before then, enjoy with free video editors, without watermark!
Capture Your Best Self: 10 Top-Rated Webcam Software for Windows 10
10 Best Webcam Recording Software for Windows 10

Richard Bennett
Mar 27, 2024• Proven solutions
Which webcam softwarehave you installed on your laptop or desktop? Using the right webcam software to live stream videos, screen record videos, or chat on Skype results in high-quality images, smooth streaming, and high-quality images and videos.
There is a huge number of free webcam software with advanced features yet free for you to download, and use on your PC.
But how would you determine the best webcam software to use?
Before you mounted that webcam on your desktop or laptop, you had a reason. It’s your webcam features and purpose that should guide you to select the right software for the webcam camera.
In this article, we will show you 10 webcam software for Windows in this guide. Included are the most useful factors to consider as you make your choice – complexity of use, free/paid, integrations, editing tools, and more. You will learn:
- Part 1: The Best Webcam & Screen Recorder for Windows and Mac [Video Tutorial]
- Part 2: Top 10 Best Free Webcam Software for Windows
First take a quick look of the 10 best webcam software that is available on your Windows from a video:
For Win 7 or later (64-bit)
 Secure Download
For macOS 10.14 or later
Secure Download
Part 1: The Best Webcam & Screen Recorder for Computer
You need a sound and webcam recorder to record your video tutorials, streaming videos, presentations, or any other type of video. Wondershare Filmora is the software to use. Other than its most admired friendly intuitive interface, it’s simple and easy to use-suitable for both beginners and professionals.
For Win 7 or later (64-bit)
Secure Download
For macOS 10.14 or later
Secure Download
Among the outstanding features, you’ll find in Filmora include,
- Fast-paced recording speed of up to 120 fps
- Adverse professional editing tools that are easy to use
- Simultaneous recording from both webcam and computer screen
- Compatible with 50+ different file formats
- Rich title text and tutorial features
It’s free to download. Have a try now! Join in the Wondershare Video Community and get some inspiration from other Filomora users.
Part 2: Top 10 Best Free Webcam Software for Windows
To help you evaluate which webcam software best suits your needs, I’ve featured the strengths, shortcomings, and support services in each software review.
This is the list of the best free webcam software for Windows 10.
| 1 - Logitech Capture | 2 - CyberLink Youcam |
|---|---|
| 3 - ManyCam | 4 - SplitCam |
| 5 - Bandicam | 6 - NCH - Video Capture Software |
| 7 - YAWCAM | 8 - Windows Camera |
| 9 - Fake Webcam | 10 - IP Camera Viewer |
1. Logitech Capture
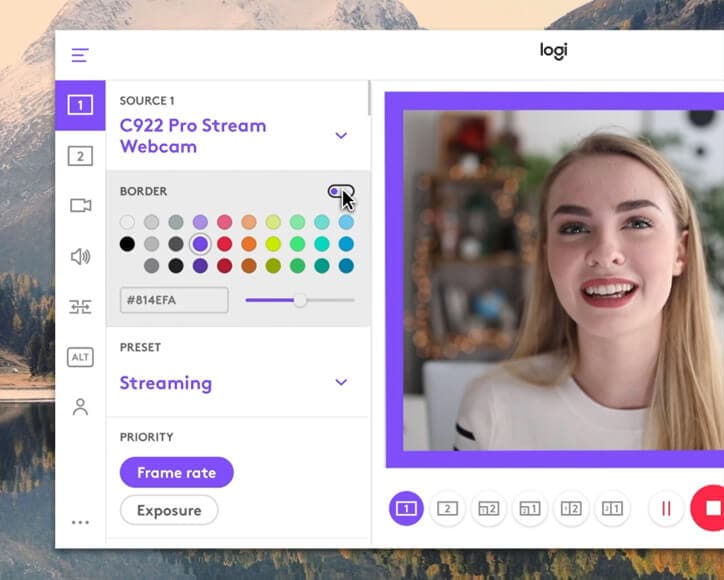
The multiple source recording feature and direct streaming app are the key strengths of this software. According to its mission statement- All-In-One Content Creation- you can use this software to record, edit, customize, and stream to your favorite channel.
Operating systems: Windows 10/8/7
Price: Free
Supported webcams: 1080P PRO STREAM, BRIO STREAM, C920s HD PRO, C922 PRO STREAM
Logitech Capture is among the few free webcam recording software for Windows 10 with studio controls applicable during recording. You can use this feature to adjust your image, create frames, adjust focus and transitions, and enable ChromaKey as you record.
In case you want to create a picture-in-picture presentation, this software allows you to use two webcams simultaneously. With the source switching and the auto-focus features, you can record the best tutorials or guides that show all dimensions and your image.
Pros
- Rich in transitions and effects
- Portrait optimization for mobile devices
- Its Capture app offers direct streaming to YouTube
- You can take passports or still images
Cons
- Limited to YouTube channel
- Account registration is mandatory
2. CyberLink Youcam
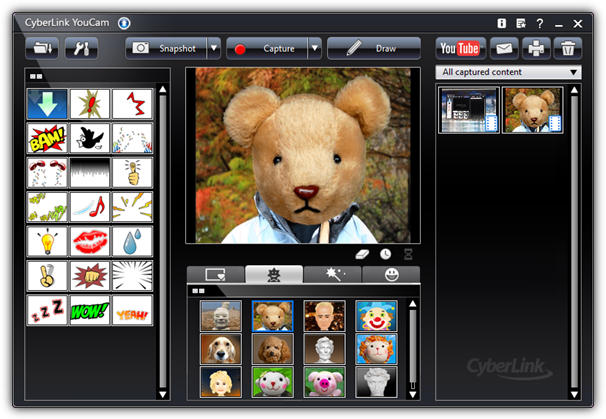
If you are used to video chatting and video recording, then, you’ll have 200+ fun effects to make your real-time videos as interesting as possible. In fact, the seamless app integration feature will keep your live streaming chats without buffering for long.
Operating systems: Windows 10/8/1.8/7
Price: Free/ Paid
Supported file formats: WMV, MP4, AVI
YouCam is the best free webcam software Windows 10 for YouTubers, business professionals, Streamers, home users, and Vloggers. It seamlessly integrates with live streaming media channels like Twitch, Wirecast, OBS Studio, Facebook Live, Xsplit, and YouTube Live.
The YouCam’s AR technology is one of its hidden treasures that will lighten up your skin by applying a natural-looking makeup. If your room is badly light, use the Live Skin Smoothing feature. Just below it is the TrueTheater Enhancement option to help you automatically adjust your facial sharpness and lighting.
Pros
- Hundreds of animated emojis
- Suitable for video conferencing services
- Plenty of interactive colorful particles and distortions
- Availability of face beautification tool
Cons
- Only limited to the Windows operating system
- Very few features for the free plan
3. ManyCam
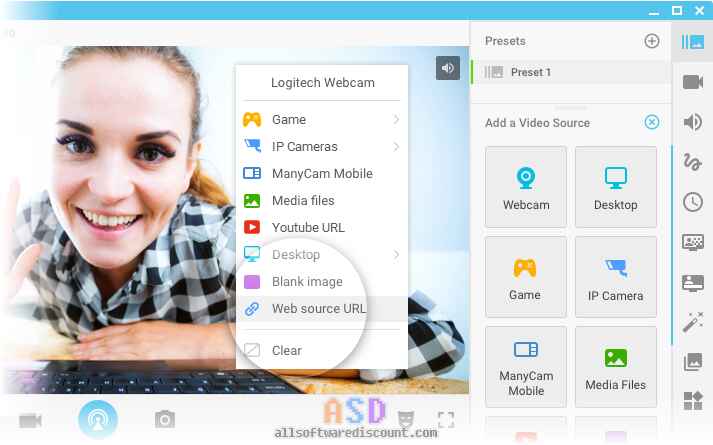
Downloading this webcam software guarantees you smooth streaming and effortless recording of videos. Also, this software will help you during game steaming, online education, mobile live streaming, and live telehealth communication.
Operating systems: Windows 10/8/7 and macOS X
Price: Free /Paid
Supported file formats: MJPEG, IP, MP4, AVI, MPEG, MOV
ManyCam is a free webcam recording software for windows 10 . It’s among the most widely used software internationally-not for many reasons, but because of its friendly intuitive user interface and live streaming tools for lessons and lecturers.
So, if you are a lecturer/teacher, you can use the Software Development Kit (SDK) to integrate the webcam with any online teaching platform. Among the features designed to facilitate better online teaching include the picture in picture, Chroma Key, multiple video sources, and screen sharing.
Pro
- Ability to stream 4K videos
- Real-time camera control settings
- No watermark even on the free plan
- Screencasting and screen recording feature
- Real-time drop and drag effects
Cons
- Expensive business subscription plans
- No Light enhancement features
- Most features are manual as opposed to being automatic

Filmora WebCame & Screen Recorder
Filmora - WebCame & Screen Recorder
• No-time delay to record webcam and screen while live streaming or gaming
• Edit recording video for marketing replay or adding game commentary
• Cross-platform supported - (Windows, Mac, iOS, Android)
Start Webcam & Screen Record Start Webcam & Screen Record Start Webcam & Screen Record Learn More >
4. SplitCam
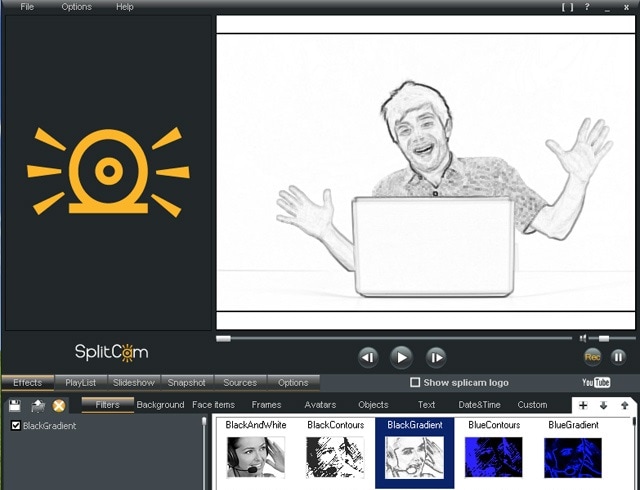
To stream your desktop/laptop screen SplitCam is the most appropriate software. With only the inbuilt virtual webcam, you can share your screen videos to media channels and IMS. Other uses of this software are recording webcam chatting , streaming live videos, and messaging.
Operating systems: Windows 10/8/7
Price: Free
SplitCam is not as popular as the other free webcam software windows 10 like ManyCam and YouCam. This is because it doesn’t integrate with some of the world’s renowned social media platforms- Facebook and Instagram. However, you can use this software to stream, take snapshots, and record videos for YouTube, Skype, Justin.tv, Gtalk, and Windows Live Messenger.
SplitCam is rich in fantastic webcam effects. Haven’t you been surprised to see someone appear to be streaming from the ocean or the Amazon Mountain? This is what you can do with SplitCam. Other cool effects are frames, texts on videos, filters, and facial items like masks and fake face glasses.
Pros
- Open and simple interface
- Integratable with the messaging apps
- Supports a wide range of resolutions ( between 320x180 and 2048x1536)
Cons
- Applicable to a small number of channels
- Supported file formats not defined
5. Bandicam
Do you want a recorder for screen recording, recording your gameplay, or capturing videos from devices like smartphones and PlayStation? Look for no other software but BandiCam. You can also merge two or more video files, remove unwanted parts, and select the only part to screen record.
Operating systems: Windows Vista, 10/8/7
Price: Free/paid
Supported file format: AVI, MP4, JPEG, TIF, GIF, PNG
Supported graphics cards: Nvidia NVENC, Nvidia NVENC (),
BandiCam is another HD webcam software Windows 10 with the capability of capturing high compression videos and games on your PC screen videos without compromising the video quality. Don’t forget to record all webinars aired in your niche.
Netflix is becoming more popular each day due to the thrilling videos. With the BandiCam screen recorder, you can record live-streamed videos on Netflix for over 24hrs. These are the tools to edit your recorded video: real-time drawing tool, webcam overlay, sound mixer, and Chroma Key.
Pros
- No hidden features
- Widescreen capture
- Can record 2D/3D videos in HD mode
- Can capture fast-paced videos of up to 144 FPS
Cons
- Not suitable for beginners
- Cannot be used to live stream videos
6. NCH - Video Capture Software

Of all the listed webcam software in this review, this software has the most diverse functions. You can record streaming videos, record your computer screen, record from external devices, and record from a webcam. It’s also perfect for recording audios and simultaneous recording from screen and webcam.
Operating systems: Windows 10, 8, 8.1, 7, XP, Vista 64 bit and Mac OS X 10.5 and above
Price: Free/paid
Supported file formats: MP4, WMV, AVI, MPG, FLV, MOV
Debut Video Capture is the only free webcam recording software for Windows 10 believed to capture or record videos from any external source. It has also preset settings for HD and TV with pre-production enhancement features like color adjustment settings, overlay buttons and frame rate, aspect ratio, and resolution settings.
If you always think of becoming rich, the Express Burn Disc Burner is the tool that will help you make money. Record the most trending videos and use this tool to burn DVDs and CDs.
Pros
- Can record videos for any social media platform
- Supports a wide range of audio and video file formats
- All features are open and easy to use
- Availability of video editing software
Cons
- Only monthly subscriptions for paid plans
- Watermark for the free download
- Difficult to record a full-screen movie
Try Filmora to Smoothly Record WebCame and Screen!
Filmora Web Camera & Screen Recorder can capture any area of the PC screen and webcam. It’s perfect to capture and record while making a live gaming match, marketing promotion, guiding a tour, and more. Plus, you can edit the recording video files in Filmora directly! Worth to have a try!
Start Webcam & Screen Recording Start Webcam & Screen Recording Start Webcam & Screen Recording Learn More >
7. YAWCAM
This webcam software can be referred to as the simplest for all beginners with the will to start streaming and recording videos for personal or home use.
Supported file formats: PNG, JPG, MJPEG, GIF, JavaScript
Price: Free
Supported operating systems: Windows 2000/10/8/7/ Vista and XP
YAWCAM is an absolutely free webcam software windows 10. Why is it the simplest software to use? Just download and you will find all features on one page. Simple language commands aligned in a drop-down menu ready to be used with only one click.
Some of the best features include overlay texts and images, scheduler, motion detection, and an inbuilt webserver. For you to use this webcam software, use these supported devices; DirectX compatible webcams, DV-camera, or video capture devices.
Pros
- No watermark
- Easy to use
- Friendly user interface
Cons
- Few transitions and effects
8. Windows Camera
We all trust any app or software by Microsoft over others! If you also do, then you can download Windows Camera and use it to record videos, take snapshots and shoot videos.
Operating system: Windows 10
Price: Free
Supported devices: Xbox One, Windows, mobile
Windows Camera is among the best free webcam software for Windows 10. This is because of the software’s few but easy-to-use and effective features that are expertly designed for PCs and tablets installed with Windows 10.
The automatic photo back combined with the photo-shoot timer makes it perfect for taking selfies and passports. Using the panorama feature, you can take photos of the best scenes and share them on media platforms.
Pros
- Simplicity is its main strength
- Supports resolutions above 1080p
- Good for photographers
Cons
- Has no built-in virtual webcam
- Requires a camera to support 4K videos
9. Fake Webcam

Supported file formats: AVI, MPEG, DVD, VCD, WMV, 3GP, MP4, SVCD, MOV, ASF,
Price: Free /paid
Operating systems: Windows 7/8/10 (32/64 bit)
Fake Webcam is a free webcam software Windows 10 whose name is creatively used to suggest it almost functions like a webcam. This doesn’t fall far from the truth! You can truly use this software to broadcast, add effects and filters, record on full screen, and fake your voice.
To share or stream your photos and videos on Skype, YIM, or Gtalk, using the screen recorder would give the best results. What makes Fake Webcam stand out is the free video converter and the free video toolkit.
Pros
- Free support tools
- Supports all video and audio formats
- Can convert file formats and stream to any channel
- Availability of the screen recorder
- Integratable with almost all instant messengers
Cons
- Major tools not free(Fake Webcam and Screen recorder)
10. IP Camera Viewer
Do you run a supermarket store, mall or you’ve installed security surveillance cameras in your compound? IP Camera Viewer is the most effective webcam software for video monitoring systems.
Supported file formats: JPEG, MPEG-4, MJPEG, and
Price: Free
Operating systems: Windows 10 / 8 / 7 /2012 /Vista and XP
IP Camera Viewer is the most used free webcam recording software for windows 10 as its compatible with almost all IP camera models like Panasonic, Toshiba, Canon, D-Link, Sony, and more the 2000 others. With the capability of viewing and controlling 4 camera feeds at once, you can use this software to monitor your entire compound.
Some of the important advanced IP Camera Viewer functions include listening to webcam audios, adjust image settings, zoom or tilt images, schedule monitoring times, and detect motions.
Pros
- Automatically uploads recorded videos and photos to a server
- Compatible with almost all IP camera models
- Simple and easy to use
Cons
- No inbuilt media player
- Cannot adjust the image or video quality
You may also want to read >>> 10 Best Webcams | A Buyer’s Guide
![]()
A cross-platform for making videos anywhere for all creators

Why your video editing isn’t good enough? How about some creative inspo?
- 100 Million+ Users
- 150+ Countries and Regions
- 4 Million+ Social Media Followers
- 5 Million+ Stock Media for Use
* Secure Download

FAQs about Webcam Software for Windows
1. What is Webcam Software?
A webcam is a video camera that feeds or streams images or video in real-time to or over a computer network. And webcam software enables users to record video or stream video over the Internet.
Webcam software is an application that allows you to capture video from your laptop/desktop webcam and record or stream video over the Internet. You can use them to deliver professional videos, streaming, and online courses easily.
2. Does Windows have built-in webcam software?
Windows 10 has an in-built webcam app called Camera that lets you record videos and take pictures with your webcam. This is definitely better than downloading 3rd party webcam recording software where spyware/malware is rampant.
3. Does a webcam need software?
Yes, if the camera hardware offers depth, low-light support, night vision, etc. If you use any software on the camera, these functions are only available if the driver is installed.
Conclusion
After a keen of all the webcam software above, it’s evident that every developer had an intended purpose. You cannot therefore just randomly wake up and download any without considering its functions, supported devices, file formats, and the auxiliary apps available. All this information is contained herein.
According to some users, there are free webcam software Windows 10 that more often would not show any video images but the audio is absolutely clear. To help your fellow user, what bad experience have you ever had after recording a game using webcam software ? Kindly share your comment or suggestion on our social media platforms.


Richard Bennett
Richard Bennett is a writer and a lover of all things video.
Follow @Richard Bennett
Richard Bennett
Mar 27, 2024• Proven solutions
Which webcam softwarehave you installed on your laptop or desktop? Using the right webcam software to live stream videos, screen record videos, or chat on Skype results in high-quality images, smooth streaming, and high-quality images and videos.
There is a huge number of free webcam software with advanced features yet free for you to download, and use on your PC.
But how would you determine the best webcam software to use?
Before you mounted that webcam on your desktop or laptop, you had a reason. It’s your webcam features and purpose that should guide you to select the right software for the webcam camera.
In this article, we will show you 10 webcam software for Windows in this guide. Included are the most useful factors to consider as you make your choice – complexity of use, free/paid, integrations, editing tools, and more. You will learn:
- Part 1: The Best Webcam & Screen Recorder for Windows and Mac [Video Tutorial]
- Part 2: Top 10 Best Free Webcam Software for Windows
First take a quick look of the 10 best webcam software that is available on your Windows from a video:
For Win 7 or later (64-bit)
Secure Download
For macOS 10.14 or later
Secure Download
Part 1: The Best Webcam & Screen Recorder for Computer
You need a sound and webcam recorder to record your video tutorials, streaming videos, presentations, or any other type of video. Wondershare Filmora is the software to use. Other than its most admired friendly intuitive interface, it’s simple and easy to use-suitable for both beginners and professionals.
For Win 7 or later (64-bit)
Secure Download
For macOS 10.14 or later
Secure Download
Among the outstanding features, you’ll find in Filmora include,
- Fast-paced recording speed of up to 120 fps
- Adverse professional editing tools that are easy to use
- Simultaneous recording from both webcam and computer screen
- Compatible with 50+ different file formats
- Rich title text and tutorial features
It’s free to download. Have a try now! Join in the Wondershare Video Community and get some inspiration from other Filomora users.
Part 2: Top 10 Best Free Webcam Software for Windows
To help you evaluate which webcam software best suits your needs, I’ve featured the strengths, shortcomings, and support services in each software review.
This is the list of the best free webcam software for Windows 10.
| 1 - Logitech Capture | 2 - CyberLink Youcam |
|---|---|
| 3 - ManyCam | 4 - SplitCam |
| 5 - Bandicam | 6 - NCH - Video Capture Software |
| 7 - YAWCAM | 8 - Windows Camera |
| 9 - Fake Webcam | 10 - IP Camera Viewer |
1. Logitech Capture
The multiple source recording feature and direct streaming app are the key strengths of this software. According to its mission statement- All-In-One Content Creation- you can use this software to record, edit, customize, and stream to your favorite channel.
Operating systems: Windows 10/8/7
Price: Free
Supported webcams: 1080P PRO STREAM, BRIO STREAM, C920s HD PRO, C922 PRO STREAM
Logitech Capture is among the few free webcam recording software for Windows 10 with studio controls applicable during recording. You can use this feature to adjust your image, create frames, adjust focus and transitions, and enable ChromaKey as you record.
In case you want to create a picture-in-picture presentation, this software allows you to use two webcams simultaneously. With the source switching and the auto-focus features, you can record the best tutorials or guides that show all dimensions and your image.
Pros
- Rich in transitions and effects
- Portrait optimization for mobile devices
- Its Capture app offers direct streaming to YouTube
- You can take passports or still images
Cons
- Limited to YouTube channel
- Account registration is mandatory
2. CyberLink Youcam
If you are used to video chatting and video recording, then, you’ll have 200+ fun effects to make your real-time videos as interesting as possible. In fact, the seamless app integration feature will keep your live streaming chats without buffering for long.
Operating systems: Windows 10/8/1.8/7
Price: Free/ Paid
Supported file formats: WMV, MP4, AVI
YouCam is the best free webcam software Windows 10 for YouTubers, business professionals, Streamers, home users, and Vloggers. It seamlessly integrates with live streaming media channels like Twitch, Wirecast, OBS Studio, Facebook Live, Xsplit, and YouTube Live.
The YouCam’s AR technology is one of its hidden treasures that will lighten up your skin by applying a natural-looking makeup. If your room is badly light, use the Live Skin Smoothing feature. Just below it is the TrueTheater Enhancement option to help you automatically adjust your facial sharpness and lighting.
Pros
- Hundreds of animated emojis
- Suitable for video conferencing services
- Plenty of interactive colorful particles and distortions
- Availability of face beautification tool
Cons
- Only limited to the Windows operating system
- Very few features for the free plan
3. ManyCam
Downloading this webcam software guarantees you smooth streaming and effortless recording of videos. Also, this software will help you during game steaming, online education, mobile live streaming, and live telehealth communication.
Operating systems: Windows 10/8/7 and macOS X
Price: Free /Paid
Supported file formats: MJPEG, IP, MP4, AVI, MPEG, MOV
ManyCam is a free webcam recording software for windows 10 . It’s among the most widely used software internationally-not for many reasons, but because of its friendly intuitive user interface and live streaming tools for lessons and lecturers.
So, if you are a lecturer/teacher, you can use the Software Development Kit (SDK) to integrate the webcam with any online teaching platform. Among the features designed to facilitate better online teaching include the picture in picture, Chroma Key, multiple video sources, and screen sharing.
Pro
- Ability to stream 4K videos
- Real-time camera control settings
- No watermark even on the free plan
- Screencasting and screen recording feature
- Real-time drop and drag effects
Cons
- Expensive business subscription plans
- No Light enhancement features
- Most features are manual as opposed to being automatic
Filmora WebCame & Screen Recorder
Filmora - WebCame & Screen Recorder
• No-time delay to record webcam and screen while live streaming or gaming
• Edit recording video for marketing replay or adding game commentary
• Cross-platform supported - (Windows, Mac, iOS, Android)
Start Webcam & Screen Record Start Webcam & Screen Record Start Webcam & Screen Record Learn More >
4. SplitCam
To stream your desktop/laptop screen SplitCam is the most appropriate software. With only the inbuilt virtual webcam, you can share your screen videos to media channels and IMS. Other uses of this software are recording webcam chatting , streaming live videos, and messaging.
Operating systems: Windows 10/8/7
Price: Free
SplitCam is not as popular as the other free webcam software windows 10 like ManyCam and YouCam. This is because it doesn’t integrate with some of the world’s renowned social media platforms- Facebook and Instagram. However, you can use this software to stream, take snapshots, and record videos for YouTube, Skype, Justin.tv, Gtalk, and Windows Live Messenger.
SplitCam is rich in fantastic webcam effects. Haven’t you been surprised to see someone appear to be streaming from the ocean or the Amazon Mountain? This is what you can do with SplitCam. Other cool effects are frames, texts on videos, filters, and facial items like masks and fake face glasses.
Pros
- Open and simple interface
- Integratable with the messaging apps
- Supports a wide range of resolutions ( between 320x180 and 2048x1536)
Cons
- Applicable to a small number of channels
- Supported file formats not defined
5. Bandicam
Do you want a recorder for screen recording, recording your gameplay, or capturing videos from devices like smartphones and PlayStation? Look for no other software but BandiCam. You can also merge two or more video files, remove unwanted parts, and select the only part to screen record.
Operating systems: Windows Vista, 10/8/7
Price: Free/paid
Supported file format: AVI, MP4, JPEG, TIF, GIF, PNG
Supported graphics cards: Nvidia NVENC, Nvidia NVENC (),
BandiCam is another HD webcam software Windows 10 with the capability of capturing high compression videos and games on your PC screen videos without compromising the video quality. Don’t forget to record all webinars aired in your niche.
Netflix is becoming more popular each day due to the thrilling videos. With the BandiCam screen recorder, you can record live-streamed videos on Netflix for over 24hrs. These are the tools to edit your recorded video: real-time drawing tool, webcam overlay, sound mixer, and Chroma Key.
Pros
- No hidden features
- Widescreen capture
- Can record 2D/3D videos in HD mode
- Can capture fast-paced videos of up to 144 FPS
Cons
- Not suitable for beginners
- Cannot be used to live stream videos
6. NCH - Video Capture Software
Of all the listed webcam software in this review, this software has the most diverse functions. You can record streaming videos, record your computer screen, record from external devices, and record from a webcam. It’s also perfect for recording audios and simultaneous recording from screen and webcam.
Operating systems: Windows 10, 8, 8.1, 7, XP, Vista 64 bit and Mac OS X 10.5 and above
Price: Free/paid
Supported file formats: MP4, WMV, AVI, MPG, FLV, MOV
Debut Video Capture is the only free webcam recording software for Windows 10 believed to capture or record videos from any external source. It has also preset settings for HD and TV with pre-production enhancement features like color adjustment settings, overlay buttons and frame rate, aspect ratio, and resolution settings.
If you always think of becoming rich, the Express Burn Disc Burner is the tool that will help you make money. Record the most trending videos and use this tool to burn DVDs and CDs.
Pros
- Can record videos for any social media platform
- Supports a wide range of audio and video file formats
- All features are open and easy to use
- Availability of video editing software
Cons
- Only monthly subscriptions for paid plans
- Watermark for the free download
- Difficult to record a full-screen movie
Try Filmora to Smoothly Record WebCame and Screen!
Filmora Web Camera & Screen Recorder can capture any area of the PC screen and webcam. It’s perfect to capture and record while making a live gaming match, marketing promotion, guiding a tour, and more. Plus, you can edit the recording video files in Filmora directly! Worth to have a try!
Start Webcam & Screen Recording Start Webcam & Screen Recording Start Webcam & Screen Recording Learn More >
7. YAWCAM
This webcam software can be referred to as the simplest for all beginners with the will to start streaming and recording videos for personal or home use.
Supported file formats: PNG, JPG, MJPEG, GIF, JavaScript
Price: Free
Supported operating systems: Windows 2000/10/8/7/ Vista and XP
YAWCAM is an absolutely free webcam software windows 10. Why is it the simplest software to use? Just download and you will find all features on one page. Simple language commands aligned in a drop-down menu ready to be used with only one click.
Some of the best features include overlay texts and images, scheduler, motion detection, and an inbuilt webserver. For you to use this webcam software, use these supported devices; DirectX compatible webcams, DV-camera, or video capture devices.
Pros
- No watermark
- Easy to use
- Friendly user interface
Cons
- Few transitions and effects
8. Windows Camera
We all trust any app or software by Microsoft over others! If you also do, then you can download Windows Camera and use it to record videos, take snapshots and shoot videos.
Operating system: Windows 10
Price: Free
Supported devices: Xbox One, Windows, mobile
Windows Camera is among the best free webcam software for Windows 10. This is because of the software’s few but easy-to-use and effective features that are expertly designed for PCs and tablets installed with Windows 10.
The automatic photo back combined with the photo-shoot timer makes it perfect for taking selfies and passports. Using the panorama feature, you can take photos of the best scenes and share them on media platforms.
Pros
- Simplicity is its main strength
- Supports resolutions above 1080p
- Good for photographers
Cons
- Has no built-in virtual webcam
- Requires a camera to support 4K videos
9. Fake Webcam
Supported file formats: AVI, MPEG, DVD, VCD, WMV, 3GP, MP4, SVCD, MOV, ASF,
Price: Free /paid
Operating systems: Windows 7/8/10 (32/64 bit)
Fake Webcam is a free webcam software Windows 10 whose name is creatively used to suggest it almost functions like a webcam. This doesn’t fall far from the truth! You can truly use this software to broadcast, add effects and filters, record on full screen, and fake your voice.
To share or stream your photos and videos on Skype, YIM, or Gtalk, using the screen recorder would give the best results. What makes Fake Webcam stand out is the free video converter and the free video toolkit.
Pros
- Free support tools
- Supports all video and audio formats
- Can convert file formats and stream to any channel
- Availability of the screen recorder
- Integratable with almost all instant messengers
Cons
- Major tools not free(Fake Webcam and Screen recorder)
10. IP Camera Viewer
Do you run a supermarket store, mall or you’ve installed security surveillance cameras in your compound? IP Camera Viewer is the most effective webcam software for video monitoring systems.
Supported file formats: JPEG, MPEG-4, MJPEG, and
Price: Free
Operating systems: Windows 10 / 8 / 7 /2012 /Vista and XP
IP Camera Viewer is the most used free webcam recording software for windows 10 as its compatible with almost all IP camera models like Panasonic, Toshiba, Canon, D-Link, Sony, and more the 2000 others. With the capability of viewing and controlling 4 camera feeds at once, you can use this software to monitor your entire compound.
Some of the important advanced IP Camera Viewer functions include listening to webcam audios, adjust image settings, zoom or tilt images, schedule monitoring times, and detect motions.
Pros
- Automatically uploads recorded videos and photos to a server
- Compatible with almost all IP camera models
- Simple and easy to use
Cons
- No inbuilt media player
- Cannot adjust the image or video quality
You may also want to read >>> 10 Best Webcams | A Buyer’s Guide
![]()
A cross-platform for making videos anywhere for all creators
Why your video editing isn’t good enough? How about some creative inspo?
- 100 Million+ Users
- 150+ Countries and Regions
- 4 Million+ Social Media Followers
- 5 Million+ Stock Media for Use
* Secure Download
FAQs about Webcam Software for Windows
1. What is Webcam Software?
A webcam is a video camera that feeds or streams images or video in real-time to or over a computer network. And webcam software enables users to record video or stream video over the Internet.
Webcam software is an application that allows you to capture video from your laptop/desktop webcam and record or stream video over the Internet. You can use them to deliver professional videos, streaming, and online courses easily.
2. Does Windows have built-in webcam software?
Windows 10 has an in-built webcam app called Camera that lets you record videos and take pictures with your webcam. This is definitely better than downloading 3rd party webcam recording software where spyware/malware is rampant.
3. Does a webcam need software?
Yes, if the camera hardware offers depth, low-light support, night vision, etc. If you use any software on the camera, these functions are only available if the driver is installed.
Conclusion
After a keen of all the webcam software above, it’s evident that every developer had an intended purpose. You cannot therefore just randomly wake up and download any without considering its functions, supported devices, file formats, and the auxiliary apps available. All this information is contained herein.
According to some users, there are free webcam software Windows 10 that more often would not show any video images but the audio is absolutely clear. To help your fellow user, what bad experience have you ever had after recording a game using webcam software ? Kindly share your comment or suggestion on our social media platforms.
Richard Bennett
Richard Bennett is a writer and a lover of all things video.
Follow @Richard Bennett
Windows Video Editing: How to Create Stunning 3D Effects in Minutes
You may want to add 3D effects to a video to make something in it appear realistic. For example, you can have balloons moving in a circle around a person’s head, make a building hit by a thunderstorm, etc. However, adding such properties to a footage requires a lot of focus and precision that comes with in-depth learning and a lot of practice.
That said, here you will learn how to add 3D effects to a video using Windows’s free built-in Photos app. In addition, you will also see how easy the process becomes if you use a dedicated third-party software that has been specifically designed for the purpose.
In this article
01 How to Add 3D Effects in Windows 11 Photos App for Free
02 How to Add 3D Effects to Video with Filmora
Part 1: How to Add 3D Effects in Windows 11 Photos App for Free
To add 3D effects to a video with the Photos app, you must right-click the media file, go to ‘Open with’, and click to select ‘Photos’ from the submenu. Once this is done, you can follow the steps that are given below to complete the remaining procedure:
Step 1: Open the 3D Effects Panel
In the Photos app, pause the video to avoid any distractions. Click the See more icon (with three horizontal dots) from the top-center, hover mouse to Edit more, and click Add 3D effects.

Step 2: Add a 3D Effect and Customize
Make sure that the Effects tab is selected from the top of the right pane, scroll through the available effects, and click the one that you want to add to the video. Once added, in the preview window, use the scaling handles and rotation tools to resize the effect and change its orientation respectively.

Optionally use the Volume slider from the right pane to increase or decrease the sound volume of the effect to blend it in with the audio of the footage. If required, drag the side handles of the effect in the progress bar at the bottom to increase or decrease the duration of the effect in the video.

Step 3: Use Anchor Point
Drag and place the 3D effect to the location you want it to appear at, turn on the Attach to a point button from the right pane, and drag the anchor point to the object where you want it to stick even if the camera moves.

Step 4: Export the Video
Click the Play button from the bottom to preview the video with the 3D effect, and if everything looks fine, click Save a copy from the bottom-right area.

When the Finish your video box appears, choose your preferred resolution from the Video quality drop-down list, and click Export.

Next, choose your preferred destination folder in the Save As box that opens up next, specify the name of the output file in the File name field, and click Export to export the modified clip in MP4 format.
Note: Videos that you export from the Photos app are by default saved in MP4 format.
As one of the best basic video editing software for beginners , the Microsoft Photos app allows you trim video, add text to video and much more. For details, check how to edit videos with the Microsoft Photos app on Windows 10 and Windows 11.
Part 2: How to Add 3D Effects to Video with Filmora
Although Photos is a free app in Windows 11, it has certain limitations. This is where Filmora video editor , a product by Wondershare, comes into play. Wondershare Filmora is a post-production application for both Windows and Mac computers, and is considered a good competitor of some of the industry-standard video editing applications like Adobe Premiere Pro, Final Cut Pro X, DaVinci Resolve, etc.
While the Photos app can add 3D effects to the videos quickly, Filmora gives more control by offering a plethora of editing tools, options, and presets. In addition, Filmora is a timeline-oriented tool that allows you to add effects, filters, and/or elements in their corresponding layers without making any changes to the original footage.
For Win 7 or later (64-bit)
For macOS 10.12 or later
You can follow the step-by-step instructions that are given below to learn how to add 3D effects to a video with Wondershare Filmora:
Step 1: Import Source Video and Add It to the Timeline
After installing Wondershare Filmora on Windows 10 or Windows 11, launch the program, click anywhere inside the Media box present at the upper-left section of the interface, and locate and import the source video to the program. Next, hover the mouse over the thumbnail of the video, click the + icon from the bottom-right corner.
When the confirmation box appears, either click Match to Media or Keep Project Settings to adjust the project settings according to the media clip or modify the media clip according to the project preferences while adding the footage to the Timeline respectively.
Step 2: Add 3D Titles and Transitions
Click Titles from the toolbox at the top, type 3D Titles in the Search titles field present at the upper section of the upper-left box, and click 3D titles from the suggestions list.

From all the available 3D title presets that appear next, drag the one you like to the Timeline, and place it above the video track.

After this, double-click the placeholder text in the Preview window, and replace it with your caption. You can customize the font, color, and alignment of the text from the options that appear on left. Click OK from the lower-left area of the left pane to exit the editing mode. Repeat the process for all the texts that the preset has. Optionally, drag the sides of the 3D title in the Timeline to specify its duration of visibility on the screen.

To add the transitions, click Media from the toolbox at the top, click Import Media from the Media box, and repeat the process explained earlier to add a new video clip to the Timeline. Make sure that both the clips are on the same track, and are placed next to each other. Now, go to Transitions from the toolbox, and drag and place your preferred transition effect between the two media clips in the Timeline. Optionally you can drag the sides of the transition inwards or outwards to increase or decrease the speed of the effect respectively.

After this, move the Playhead (Skimmer) to the beginning of the Timeline, and press the Spacebar on your keyboard to preview the video.
Note: It is a good practice to preview your video several times during the entire editing process. This will help you identify the error sooner, and you will be able to address the issue with fewer hassles.
Step 3: Add Elements and Effects
Go to Elements from the toolbox, drag your preferred element from the upper-left box to the Timeline, and place it on a new track. You can drag the sides of the element in the Timeline to increase or decrease its visibility during video playback.

To add effects, go to Effects from the toolbox, drag your preferred effect from the upper-left box, and place it on a new layer in the Timeline. As it is with other entities, you can drag the sides of the effect to increase or decrease the duration of its impact on the video. Next, double-click the Effects layer in the Timeline, and use the available options in the box to make further adjustments.
Note: The options that you get by double-clicking the effect in the Timeline may vary according to the adjustments it allows you to make.

Once this is done, preview the video, click Export from the top-center, and use the tabs and options on the Export box to export the modified video in your preferred format.
Conclusion
If you are new to the VFX and video editing industry, trying hands with the Photos app would give you a fair idea about how things work. Once you are well-versed or if you are already a post-production professional, you can and you must go for a dedicated program like Wondershare Filmora that not only has an intuitive interface, it is also equipped with a plethora of presets to add 3D titles, elements, transitions, and effects to the videos without much hassle.
02 How to Add 3D Effects to Video with Filmora
Part 1: How to Add 3D Effects in Windows 11 Photos App for Free
To add 3D effects to a video with the Photos app, you must right-click the media file, go to ‘Open with’, and click to select ‘Photos’ from the submenu. Once this is done, you can follow the steps that are given below to complete the remaining procedure:
Step 1: Open the 3D Effects Panel
In the Photos app, pause the video to avoid any distractions. Click the See more icon (with three horizontal dots) from the top-center, hover mouse to Edit more, and click Add 3D effects.
Step 2: Add a 3D Effect and Customize
Make sure that the Effects tab is selected from the top of the right pane, scroll through the available effects, and click the one that you want to add to the video. Once added, in the preview window, use the scaling handles and rotation tools to resize the effect and change its orientation respectively.
Optionally use the Volume slider from the right pane to increase or decrease the sound volume of the effect to blend it in with the audio of the footage. If required, drag the side handles of the effect in the progress bar at the bottom to increase or decrease the duration of the effect in the video.
Step 3: Use Anchor Point
Drag and place the 3D effect to the location you want it to appear at, turn on the Attach to a point button from the right pane, and drag the anchor point to the object where you want it to stick even if the camera moves.
Step 4: Export the Video
Click the Play button from the bottom to preview the video with the 3D effect, and if everything looks fine, click Save a copy from the bottom-right area.
When the Finish your video box appears, choose your preferred resolution from the Video quality drop-down list, and click Export.
Next, choose your preferred destination folder in the Save As box that opens up next, specify the name of the output file in the File name field, and click Export to export the modified clip in MP4 format.
Note: Videos that you export from the Photos app are by default saved in MP4 format.
As one of the best basic video editing software for beginners , the Microsoft Photos app allows you trim video, add text to video and much more. For details, check how to edit videos with the Microsoft Photos app on Windows 10 and Windows 11.
Part 2: How to Add 3D Effects to Video with Filmora
Although Photos is a free app in Windows 11, it has certain limitations. This is where Filmora video editor , a product by Wondershare, comes into play. Wondershare Filmora is a post-production application for both Windows and Mac computers, and is considered a good competitor of some of the industry-standard video editing applications like Adobe Premiere Pro, Final Cut Pro X, DaVinci Resolve, etc.
While the Photos app can add 3D effects to the videos quickly, Filmora gives more control by offering a plethora of editing tools, options, and presets. In addition, Filmora is a timeline-oriented tool that allows you to add effects, filters, and/or elements in their corresponding layers without making any changes to the original footage.
For Win 7 or later (64-bit)
For macOS 10.12 or later
You can follow the step-by-step instructions that are given below to learn how to add 3D effects to a video with Wondershare Filmora:
Step 1: Import Source Video and Add It to the Timeline
After installing Wondershare Filmora on Windows 10 or Windows 11, launch the program, click anywhere inside the Media box present at the upper-left section of the interface, and locate and import the source video to the program. Next, hover the mouse over the thumbnail of the video, click the + icon from the bottom-right corner.
When the confirmation box appears, either click Match to Media or Keep Project Settings to adjust the project settings according to the media clip or modify the media clip according to the project preferences while adding the footage to the Timeline respectively.
Step 2: Add 3D Titles and Transitions
Click Titles from the toolbox at the top, type 3D Titles in the Search titles field present at the upper section of the upper-left box, and click 3D titles from the suggestions list.
From all the available 3D title presets that appear next, drag the one you like to the Timeline, and place it above the video track.
After this, double-click the placeholder text in the Preview window, and replace it with your caption. You can customize the font, color, and alignment of the text from the options that appear on left. Click OK from the lower-left area of the left pane to exit the editing mode. Repeat the process for all the texts that the preset has. Optionally, drag the sides of the 3D title in the Timeline to specify its duration of visibility on the screen.
To add the transitions, click Media from the toolbox at the top, click Import Media from the Media box, and repeat the process explained earlier to add a new video clip to the Timeline. Make sure that both the clips are on the same track, and are placed next to each other. Now, go to Transitions from the toolbox, and drag and place your preferred transition effect between the two media clips in the Timeline. Optionally you can drag the sides of the transition inwards or outwards to increase or decrease the speed of the effect respectively.
After this, move the Playhead (Skimmer) to the beginning of the Timeline, and press the Spacebar on your keyboard to preview the video.
Note: It is a good practice to preview your video several times during the entire editing process. This will help you identify the error sooner, and you will be able to address the issue with fewer hassles.
Step 3: Add Elements and Effects
Go to Elements from the toolbox, drag your preferred element from the upper-left box to the Timeline, and place it on a new track. You can drag the sides of the element in the Timeline to increase or decrease its visibility during video playback.
To add effects, go to Effects from the toolbox, drag your preferred effect from the upper-left box, and place it on a new layer in the Timeline. As it is with other entities, you can drag the sides of the effect to increase or decrease the duration of its impact on the video. Next, double-click the Effects layer in the Timeline, and use the available options in the box to make further adjustments.
Note: The options that you get by double-clicking the effect in the Timeline may vary according to the adjustments it allows you to make.
Once this is done, preview the video, click Export from the top-center, and use the tabs and options on the Export box to export the modified video in your preferred format.
Conclusion
If you are new to the VFX and video editing industry, trying hands with the Photos app would give you a fair idea about how things work. Once you are well-versed or if you are already a post-production professional, you can and you must go for a dedicated program like Wondershare Filmora that not only has an intuitive interface, it is also equipped with a plethora of presets to add 3D titles, elements, transitions, and effects to the videos without much hassle.
Also read:
- New Top-Rated Free Video Editing Apps with Special Effects for Mobile
- New Aspect Ratio Alert How It Impacts Your YouTube Videos Look and Feel for 2024
- Updated In 2024, Top Video Editing Software with Music Libraries
- New In 2024, Top Video Trailer Creation Tools
- New In 2024, VN Video Editor for Mac A Comprehensive Guide and Alternative Options
- In 2024, How to Edit GoPro Video on Mac
- 2024 Approved AVS Video Editor Review Does It Live Up to Expectations?
- New The Ultimate Guide to Free 4K Video Editing
- Updated In 2024, Flip and Rotate AVI Videos for Free Top 5 Software Options
- Bringing Your Videos to Life in VR The Ultimate Converter Guide for 2024
- New The Best Free Video Editors for Windows (Beyond Movie Maker)
- Updated The Ultimate Guide to Converting Audio Recordings to Text for 2024
- Updated A Beginners Guide to Creating Custom LinkedIn Video Thumbnails That Convert for 2024
- New 2024 Approved Unleash the Power of Transitions 3 FCP Editing Essentials
- New From Still to Motion Mastering Time Lapse Video Creation with Software for 2024
- Updated 2024 Approved Home Video Pro on Mac Simplified Slideshow Creation for Everyone
- Updated Get Started with Windows Movie Maker Download and Installation Tutorial
- New In 2024, WhatsApp Status Makers Best Video and Photo Editing Apps
- Updated 2024 Approved Bring Your Ideas to Life Top Animation Software for Beginners and Pros
- Updated In 2024, Unleash the Power of Slow Mo Top Video Editing Software Revealed
- 2024 Approved Transcribe Talk A Step-by-Step Guide
- The Ultimate Guide to Choosing an OGG Converter for 2024
- Updated VN Video Editor PC Edition A Compact Review for 2024
- New Best Video Editing Software for Windows Beyond Sony Vegas for 2024
- New The Ultimate List of Free Online Face Creators
- Final Cut Pro Color Correction From Basics to Advanced
- New Video Editing Mastery on Mac OS X Mavericks Edition
- Bricked Your Honor X9a? Heres A Full Solution | Dr.fone
- How do i add my signature to .xltm files
- New In 2024, Free AVI Video Editing Solutions A Top 5 Roundup
- Updated In 2024, How to Delete White Background in Photoshop. How to Create a Transparent Background in Photoshop? Steps to Get Rid of White Background in Photoshop
- New Guide To Scaling and Setting Videos in Filmora | Tutorial for 2024
- How to Screen Mirroring Motorola Moto G23 to PC? | Dr.fone
- Top 10 AirPlay Apps in Honor Magic 5 Lite for Streaming | Dr.fone
- In 2024, FREE Top 21 Best Anime Websites to Watch Anime Online
- 10 Best Fake GPS Location Spoofers for Realme C67 4G | Dr.fone
- In 2024, Latest Guide How To Bypass Oppo Reno 11F 5G FRP Without Computer
- How to Fix Apple iPhone 15 Plus Passcode not Working? | Dr.fone
- All You Need To Know About Mega Greninja For Infinix Hot 40i | Dr.fone
- In 2024, How To Unlock iPhone 8 Without Passcode? 4 Easy Methods | Dr.fone
- In 2024, How To Remove Passcode From iPhone 15 Pro? Complete Guide
- In 2024, 3 Ways for Android Pokemon Go Spoofing On Oppo Find N3 | Dr.fone
- Updated Top List Best VHS Sound Effect That You Can Use in Video Making for 2024
- How To Fix OEM Unlock Missing on Samsung?
- In 2024, Full Guide on Mirroring Your Tecno Spark 20 Pro+ to Your PC/Mac | Dr.fone
- 9 Best Phone Monitoring Apps for Motorola Edge 40 Pro | Dr.fone
- In 2024, 6 Ways To Transfer Contacts From Honor Magic V2 to iPhone | Dr.fone
- In 2024, Forgotten The Voicemail Password Of Infinix Smart 7 HD? Try These Fixes
- In 2024, Unlock Your Apple iPhone 13 Pro Max in Minutes with ICCID Code Everything You Need to Know
- In 2024, Steps to Make a Neon Dance Effect With Filmora
- How to Fix Life360 Shows Wrong Location On Honor Play 7T? | Dr.fone
- Rootjunky APK To Bypass Google FRP Lock For Vivo
- In 2024, How to Transfer Data from Poco F5 Pro 5G to Other Android Devices? | Dr.fone
- Title: New Free and Fantastic The Best 4K Video Editing Software for Everyone for 2024
- Author: Amelia
- Created at : 2024-04-29 19:45:34
- Updated at : 2024-04-30 19:45:34
- Link: https://ai-driven-video-production.techidaily.com/new-free-and-fantastic-the-best-4k-video-editing-software-for-everyone-for-2024/
- License: This work is licensed under CC BY-NC-SA 4.0.
