
:max_bytes(150000):strip_icc():format(webp)/GettyImages-820926684-5c7747ebc45847708ac311b709bdc1f2.jpg)
New In 2024, Top 10 Famous Movies Made By Final Cut Pro
Final Cut Pro’s Greatest Hits: 10 Memorable Movies
Top 10 Famous Movies Made By Final Cut Pro

Benjamin Arango
Mar 27, 2024• Proven solutions
Developed as video editing software that has been developed by Apple, Final Cut Pro began life as software designed to made simple video editing accessible for video hobbyists and independent filmmakers. However, in recent years the capabilities of Final Cut Pro have evolved significantly and we are now seeing major Hollywood movies also being edited with this software.
Do you want to turn your own video into a Hollywood film-like video? Check this guide on How to make big-budget cinematic look video with Final Cut Pro.
You may also like: 8 Best Movie Trailer Template for After Effects
Top 10 Movies Made by Final Cut Pro
Let’s take a look at ten major movies that have been edited using Final Cut Pro.

1. The Social Network (2010)
Based on the rise of the phenomenon that we now know as Facebook, The Social Network starred Jesse Eisenberg, Andrew Garfield and Justin Timberlake. The movie performed well at the box office and was also positively received by movie critics.
The film won an Academy Award for Best Editing, collected by Kirk Baxter and Angus Wall. They used Final Cut Pro to edit the film, and one of the things they really like about the software is the ability to do multiple timelines. Final Cut Pro was also used in this movie to enable face replacement in a number of scenes. Two of the key characters in the movie are twins, and so the scenes were filmed with actors (who weren’t twins) and then the editing software was used to create the illusion that they were twins. Digital matte paintings was another feature of this movie that relied on the functionality of Final Cut Pro.

2. The Girl with the Dragon Tattoo (2011)
This was the US adaptation of the earlier Swedish film of the same name - based on the novel by Stieg Larsson. Starring Daniel Craig and Rooney Mara, the story is a crime thriller trying to uncover the secrets surrounding the disappearance of a young girl from a wealthy family.
One of the challenges with this movie was that there were a lot of invisible effects throughout the film. Final Cut Pro was used to achieve the shot stabilization and the visual enhancements - everything from matte painting to creating seasonal elements such as snow.

3. John Carter (2011)
A science fiction adventure, this film performed so badly at the box office that it caused major financial problems for its studio Disney.
The editing of the John Carter movie was a particular challenge as a lot of the action was shot twice during the troubled production. The editor Eric Zumbrunnen used Final Cut Pro to piece the various elements together. With a huge range of CGI and creature effects to deal with, the editing process on this movie was extremely complex. Final Cut Pro was used to create a lot of the background detail need to bring the green screen scenes to life.

4. 500 Days of Summer (2009)
This was a cute, quirky romantic comedy starring Joseph Gordon-Levitt and Zooey Deschanel.
Editing on the movie was by Alan Edward Bell in DVCPro HD format on Final Cut Pro. Because the storyline of the movie unfolds in a non-linear timeline, the workflow feature of Final Cut Pro made it easier to manage the sequencing of the different scenes. There were also 250 invisible effects which were created using Final Cut Pro’s editing features.

5. X-Men Origins: Wolverine (2009)
Continuing the X-Men franchise, this installment traces Wolverine’s childhood and the relationship with his brother. It didn’t really appeal to X-Men fans or movie critics.
Editing on the movie was by Nicolas De Toth and Megan Gill. There were a number of continuity glitches identified during the production of this movie but De Toth and Gill used Final Pro Cut to keep a consistent flow to the narrative. What is interesting about the editing on this movie is that all the cutting of the scenes required was done on Final Cut Pro 5, taking advantage of the software’s HD abilities and also the multi-clip features.

6. Burn After Reading (2008)
A black comedy from the talented brothers Joel and Ethan Coen, they wrote, produced, edited, and directed the movie.
The Coen brothers used Final Cut Pro on this movie because it was simple and easy to use - they were blocking together the rough cuts as the scenes were being shot, and Final Cut Pro gave them the flexibility that they needed to edit quickly. On this movie most of the action was shot using Sony cameras but there were several scenes on which a RED camera was added when an additional camera was needed. Even though there is a significantly different workflow between the two types of camera, the RED material was able to be integrated smoothly with the Sony footage.

7. No Country for Old Men (2007)
A neo-Western thriller from Coen brothers. They directed, wrote, and edited this production.
The movie was also nominated for an Academy Award for Best Editing for editor Roderick Jaynes (a pseudonym for Joel and Ethan Coen).
Directing and editing a movie brings the two processes a lot closer together for the Coen brothers. An easy to use product such as Final Cut Pro ensures that they can construct the movie’s narrative using the timeline features of the product. This movie marked a chance in approach for the Coen brothers, who took advantage of the better resolution DVCPRO HD for their cutting process compared to earlier films that were cut at DV resolution.

8. 300 (2007)
Based on a graphic novel by Frank Miller, this is the fictionalized retelling of the Battle Termopylae - part of the Persian Wars. Directed by Zack Snyder, the movie was filmed with a super-imposition chroma key technique to help replicate the imagery of the original comic book. Editing on the movie was by William Hoy.
To capture the graphic novel look and feel of the film’s images, editor Hoy used a number of the key Final Cut Pro features such as the adjustment layer and blending modes to create depth and mood. With the look and feel of this movie so dependent on the effects created, editor Hoy spent a lot of time debating what was being added visually to each shot and how this would impact the length and continuity of each scene.

9. Sky Captain and the World of Tomorrow (2004)
With big name stars (Gwyneth Paltrow and Jude Law), this was an unusual film that used digital artists to build multi-layered 2D and 3D backgrounds for live action footage, with hand-drawn storyboards recreated as computer-generated 3D animatics. Critically it was well received but didn’t set the box office alight.
Editing on the movie was by Sabrina Plisco.
Final Cut Pro was particularly critical to create a scene between two characters that was shot in a physical set (unlike the digital soundstage that was used for the rest of the movie). Final Cut Pro allowed the filmmakers to line up the animatics with the live onstage footage. One of the challenges with this movie is that the editors had to manually assign time-codes to each take - the clips were then rendered out and sorted so that they could be used on a Final Cut Pro SD workstation. This approach was also used to create the master off-line cut. Batch lists of the cuts were then imported into Final Cut Pro.

10. Cold Mountain (2003)
This is an epic Civil War drama based on the novel by Charles Frazier. Starring Jude Law, Nicole Kidman, and Renee Zellweger this was critically acclaimed and performed reasonably well at the box office.
The movie was also nominated for an Academy Award for Best Editing let by editor Walter Murch.
This was really seen as the breakthrough movie for the use of Final Cut Pro in Hollywood Movies. An entire book has been produced analysing how editor Murch used Final Cut Pro to edit the movie and analysis its impact on future cinema productions. Editor Murch believes that the use of Final Cut Pro on this movie indirected affected the ultimate creative outcome. In particular, the use of the DVD authoring capabilities on Final Cut Pro meant that the editing team was able to look at the material more often, sharing it with more people, and changing the way that they looked at certain scenes.
While Hollywood movies require editing tools of the highest order, the range of effects that you can achieve using Final Cut Pro is impressive - as well as the standard ripple, roll, slip, slide, scrub, razor blade and time remapping edit functions, Final Cut Pro also comes with a range of video transitions and a range of video and audio filters that will take your film project to the next level.
It is clear that Final Cut Pro is definitely now a star in the editing of Hollywood movies, it is time to make it a star in editing your movies as well.
Benjamin Arango
Benjamin Arango is a writer and a lover of all things video.
Follow @Benjamin Arango
Benjamin Arango
Mar 27, 2024• Proven solutions
Developed as video editing software that has been developed by Apple, Final Cut Pro began life as software designed to made simple video editing accessible for video hobbyists and independent filmmakers. However, in recent years the capabilities of Final Cut Pro have evolved significantly and we are now seeing major Hollywood movies also being edited with this software.
Do you want to turn your own video into a Hollywood film-like video? Check this guide on How to make big-budget cinematic look video with Final Cut Pro.
You may also like: 8 Best Movie Trailer Template for After Effects
Top 10 Movies Made by Final Cut Pro
Let’s take a look at ten major movies that have been edited using Final Cut Pro.
1. The Social Network (2010)
Based on the rise of the phenomenon that we now know as Facebook, The Social Network starred Jesse Eisenberg, Andrew Garfield and Justin Timberlake. The movie performed well at the box office and was also positively received by movie critics.
The film won an Academy Award for Best Editing, collected by Kirk Baxter and Angus Wall. They used Final Cut Pro to edit the film, and one of the things they really like about the software is the ability to do multiple timelines. Final Cut Pro was also used in this movie to enable face replacement in a number of scenes. Two of the key characters in the movie are twins, and so the scenes were filmed with actors (who weren’t twins) and then the editing software was used to create the illusion that they were twins. Digital matte paintings was another feature of this movie that relied on the functionality of Final Cut Pro.
2. The Girl with the Dragon Tattoo (2011)
This was the US adaptation of the earlier Swedish film of the same name - based on the novel by Stieg Larsson. Starring Daniel Craig and Rooney Mara, the story is a crime thriller trying to uncover the secrets surrounding the disappearance of a young girl from a wealthy family.
One of the challenges with this movie was that there were a lot of invisible effects throughout the film. Final Cut Pro was used to achieve the shot stabilization and the visual enhancements - everything from matte painting to creating seasonal elements such as snow.
3. John Carter (2011)
A science fiction adventure, this film performed so badly at the box office that it caused major financial problems for its studio Disney.
The editing of the John Carter movie was a particular challenge as a lot of the action was shot twice during the troubled production. The editor Eric Zumbrunnen used Final Cut Pro to piece the various elements together. With a huge range of CGI and creature effects to deal with, the editing process on this movie was extremely complex. Final Cut Pro was used to create a lot of the background detail need to bring the green screen scenes to life.
4. 500 Days of Summer (2009)
This was a cute, quirky romantic comedy starring Joseph Gordon-Levitt and Zooey Deschanel.
Editing on the movie was by Alan Edward Bell in DVCPro HD format on Final Cut Pro. Because the storyline of the movie unfolds in a non-linear timeline, the workflow feature of Final Cut Pro made it easier to manage the sequencing of the different scenes. There were also 250 invisible effects which were created using Final Cut Pro’s editing features.
5. X-Men Origins: Wolverine (2009)
Continuing the X-Men franchise, this installment traces Wolverine’s childhood and the relationship with his brother. It didn’t really appeal to X-Men fans or movie critics.
Editing on the movie was by Nicolas De Toth and Megan Gill. There were a number of continuity glitches identified during the production of this movie but De Toth and Gill used Final Pro Cut to keep a consistent flow to the narrative. What is interesting about the editing on this movie is that all the cutting of the scenes required was done on Final Cut Pro 5, taking advantage of the software’s HD abilities and also the multi-clip features.
6. Burn After Reading (2008)
A black comedy from the talented brothers Joel and Ethan Coen, they wrote, produced, edited, and directed the movie.
The Coen brothers used Final Cut Pro on this movie because it was simple and easy to use - they were blocking together the rough cuts as the scenes were being shot, and Final Cut Pro gave them the flexibility that they needed to edit quickly. On this movie most of the action was shot using Sony cameras but there were several scenes on which a RED camera was added when an additional camera was needed. Even though there is a significantly different workflow between the two types of camera, the RED material was able to be integrated smoothly with the Sony footage.
7. No Country for Old Men (2007)
A neo-Western thriller from Coen brothers. They directed, wrote, and edited this production.
The movie was also nominated for an Academy Award for Best Editing for editor Roderick Jaynes (a pseudonym for Joel and Ethan Coen).
Directing and editing a movie brings the two processes a lot closer together for the Coen brothers. An easy to use product such as Final Cut Pro ensures that they can construct the movie’s narrative using the timeline features of the product. This movie marked a chance in approach for the Coen brothers, who took advantage of the better resolution DVCPRO HD for their cutting process compared to earlier films that were cut at DV resolution.
8. 300 (2007)
Based on a graphic novel by Frank Miller, this is the fictionalized retelling of the Battle Termopylae - part of the Persian Wars. Directed by Zack Snyder, the movie was filmed with a super-imposition chroma key technique to help replicate the imagery of the original comic book. Editing on the movie was by William Hoy.
To capture the graphic novel look and feel of the film’s images, editor Hoy used a number of the key Final Cut Pro features such as the adjustment layer and blending modes to create depth and mood. With the look and feel of this movie so dependent on the effects created, editor Hoy spent a lot of time debating what was being added visually to each shot and how this would impact the length and continuity of each scene.
9. Sky Captain and the World of Tomorrow (2004)
With big name stars (Gwyneth Paltrow and Jude Law), this was an unusual film that used digital artists to build multi-layered 2D and 3D backgrounds for live action footage, with hand-drawn storyboards recreated as computer-generated 3D animatics. Critically it was well received but didn’t set the box office alight.
Editing on the movie was by Sabrina Plisco.
Final Cut Pro was particularly critical to create a scene between two characters that was shot in a physical set (unlike the digital soundstage that was used for the rest of the movie). Final Cut Pro allowed the filmmakers to line up the animatics with the live onstage footage. One of the challenges with this movie is that the editors had to manually assign time-codes to each take - the clips were then rendered out and sorted so that they could be used on a Final Cut Pro SD workstation. This approach was also used to create the master off-line cut. Batch lists of the cuts were then imported into Final Cut Pro.
10. Cold Mountain (2003)
This is an epic Civil War drama based on the novel by Charles Frazier. Starring Jude Law, Nicole Kidman, and Renee Zellweger this was critically acclaimed and performed reasonably well at the box office.
The movie was also nominated for an Academy Award for Best Editing let by editor Walter Murch.
This was really seen as the breakthrough movie for the use of Final Cut Pro in Hollywood Movies. An entire book has been produced analysing how editor Murch used Final Cut Pro to edit the movie and analysis its impact on future cinema productions. Editor Murch believes that the use of Final Cut Pro on this movie indirected affected the ultimate creative outcome. In particular, the use of the DVD authoring capabilities on Final Cut Pro meant that the editing team was able to look at the material more often, sharing it with more people, and changing the way that they looked at certain scenes.
While Hollywood movies require editing tools of the highest order, the range of effects that you can achieve using Final Cut Pro is impressive - as well as the standard ripple, roll, slip, slide, scrub, razor blade and time remapping edit functions, Final Cut Pro also comes with a range of video transitions and a range of video and audio filters that will take your film project to the next level.
It is clear that Final Cut Pro is definitely now a star in the editing of Hollywood movies, it is time to make it a star in editing your movies as well.
Benjamin Arango
Benjamin Arango is a writer and a lover of all things video.
Follow @Benjamin Arango
5 Popular Photo Movie Maker to Create Impressive Slideshow Videos
Pictures and videos are captured to relive a moment and recall a memory. The real joy is always in the unpredicted moment. Something that happens suddenly, out of nowhere, makes you smile and laugh is natural happiness. It is hard to capture those natural moments of joy because they are not pre-planned.
An event that is planned properly is always captured properly through videos and in photos, but there are occasions in our life that are not planned either captured. From this article, you will learn to make your slideshow from photos. Stay with us because we will talk about the 5 best photo movie makers.
Part 1. 5 Best Photo to Movie Maker to Help Create Unique Videos
Suppose you went to a party and didn’t get the time to record or film anything. It doesn’t mean that you can’t do anything now. If you have cool and aesthetic images, let us tell you how to make a slideshow out of those images.
This section of the article will talk about the 5 best images to video moviemakers that will change your life. With these brilliant tools, you will be able to create stunning slideshows.
1. Wondershare Filmora
The first photo movie creator that we will talk about is Wondershare Filmora. Filmora is a very strong editor. You can create a stunning slideshow with Filmora, a slideshow movie maker. Filmora is the best software one will ever find to edit their images and make a slideshow. It has numerous features like:
- Wondershare Filmora has a very intuitive interface.
- Beginners can easily use the software. Whereas the features it offers allow editing at a professional level.
- Using Filmora, you can do mind-blowing editing by using the effects, transitions, filters, and elements it has.
- You can also create expressive and interactive material from Filmora using its text and title templates.
Wondershare Filmora gives voice to your aesthetic editing skills. You can also create a slideshow with Filmora. The software is very easy to use and understand. The steps to make a slideshow are also very simple. Let us guide you more about Filmora as Movie Maker with Pictures and share the steps to make a slideshow with photos.
Step 1: Download Wondershare Filmora
The first step for making a slideshow is downloading the correct software. Download Wondershare Filmora from its official website if you haven’t already.

For Win 7 or later (64-bit)
For macOS 10.12 or later
Step 2: Importing Media
Next, you need to import the media to Filmora that you want to use in your slideshow. After you have imported the images, select your favorite images and drag them to the timeline. This will create the base for your slideshow.

Step 3: Add Text and Titles
Now it’s time to do fancy things with your slideshow. You can add text to it. For that, head over to the Titles tab, and from Filmora’s titles templates, select your favorite. You can double-click on the Text Title to adjust and change it.

Step 4: Add Background Music
Filmora has a huge asset library full of images, music, and whatnot. You can add background music to your slideshow to make it attractive. Select a piece of suitable music that matches the vibe of your slideshow, or else you can also import music to Filmora.

Step 5: Add Transitions and Effects
As mentioned earlier that Filmora has a lot to offer. So, by moving to the Transitions tab, you can select a suitable transition and drag it to the timeline. In the same way, you can also add various effects and filters to your slideshow from the Effects section to make it classy.

Step 6: Export the Slideshow
Once you are satisfied with all the edits and adjustments, you can export the slideshow and enjoy sharing it with your loved ones.

2. Icecream Slideshow Maker

The next picture movie creator in line that we will talk about is Icecream Slideshow Maker. With this slideshow maker, you can create a professional-looking slideshow of your favorite pictures with just a few clicks. Icecream slideshow maker is a brilliant image to video movie maker.
The slideshow is famous because of its features. Icecream slideshow maker supports all popular photo formats. You can add any multimedia content to your slideshow. Let us share some more features of the Icecream Slideshow maker.
- The slideshow maker is supported by Windows 10, 8.1, 8, 7, Vista, and XP.
- With this slideshow movie maker, you can create up to 3840x2160 resolution slideshows.
- Icecream slideshow maker allows you to save slideshow in MP4, AVI, MOV, or WEMB format.
- The amazing slideshow maker also lets you add background music, text, and transition effects to your slideshow.
3. Movavi Slideshow Maker

Movavi is another amazing movie maker with pictures. This slideshow maker is very easy to use, and it helps you create a slideshow with images very fast. You can follow its 3-step process that will lead you to create a stunning slideshow.
Movavi Slideshow makers have a lot of different filters, effects, and transitions that could be used in your slideshow. It also has cute stickers and ready-to-use templates. There are many captivating features that Movavi Slideshow maker offers. A few of its features are:
- One of the best features of Movavi photo movie makers is that it supports animated objects.
- It has a music library to use free music and add it to your slideshow.
- The slideshow maker is available for both Windows and Mac.
- Movavi Slideshow maker has over 165 visual effects, 100+ titles, and more.
4. Freemake Video Converter

Next comes the turn of Freemake Video Converter. When you are talking about slideshows, then Freemake Video Convertor is a well-known movie maker with pictures. The tool is very simple and easy to use. It has a self-explanatory interface that guides the user about the next step.
The free software is reliable, and it promises to safeguard your data. There are many unmatchable features of Freemake Video Converter. Let’s discuss them with you.
- For Freemake Video Converter, you don’t have to sign up. The software is free.
- With this classic photo movie creator,you can upload directly to YouTube.
- This slideshow maker supports several output formats.
- Another amazing thing about Freemake Video Converter is that the slideshow can be transferred directly to DVDs.
5. Ashampoo Slideshow Studio

Last but not least, we will talk about Ashampoo Slideshow Studio. This movie maker with pictures can make a slideshow almost on its own. This is the biggest advantage of using this slideshow maker.
Ashampoo Slideshow Studio is very popular software with mind-blowing features and capabilities. The slideshow maker has various templates, transitions, and sound effects that can help you create something crazy and equally classy. Some of its features are.
- The most captivating thing about Ashampoo Slideshow Studio is its built-in wizard. With these wizards, you can create a slideshow with great ease and blazing fast action.
- The new format support of this slideshow movie makeris for iPads, gaming consoles, and cellphones.
- Ashampoo Slideshow Studio supports MKV, VP9, and MP4 formats with resolutions up to 4K.
- The interface of this slideshow maker is logically structured. Everyone can easily understand it and work with it.
Final Words
This article is everything you need in today’s world where you like to share your life on social media. After reading this article, you will be able to create impressive and stunning photo slideshows. We have discussed in detail regarding 5 top photos to movie maker software. All the discussed software are amazing and popular because of the services and quality.
Versatile Video Editor - Wondershare Filmora
An easy yet powerful editor
Numerous effects to choose from
Detailed tutorials provided by the official channel
Wondershare Filmora gives voice to your aesthetic editing skills. You can also create a slideshow with Filmora. The software is very easy to use and understand. The steps to make a slideshow are also very simple. Let us guide you more about Filmora as Movie Maker with Pictures and share the steps to make a slideshow with photos.
Step 1: Download Wondershare Filmora
The first step for making a slideshow is downloading the correct software. Download Wondershare Filmora from its official website if you haven’t already.
For Win 7 or later (64-bit)
For macOS 10.12 or later
Step 2: Importing Media
Next, you need to import the media to Filmora that you want to use in your slideshow. After you have imported the images, select your favorite images and drag them to the timeline. This will create the base for your slideshow.
Step 3: Add Text and Titles
Now it’s time to do fancy things with your slideshow. You can add text to it. For that, head over to the Titles tab, and from Filmora’s titles templates, select your favorite. You can double-click on the Text Title to adjust and change it.
Step 4: Add Background Music
Filmora has a huge asset library full of images, music, and whatnot. You can add background music to your slideshow to make it attractive. Select a piece of suitable music that matches the vibe of your slideshow, or else you can also import music to Filmora.
Step 5: Add Transitions and Effects
As mentioned earlier that Filmora has a lot to offer. So, by moving to the Transitions tab, you can select a suitable transition and drag it to the timeline. In the same way, you can also add various effects and filters to your slideshow from the Effects section to make it classy.
Step 6: Export the Slideshow
Once you are satisfied with all the edits and adjustments, you can export the slideshow and enjoy sharing it with your loved ones.
2. Icecream Slideshow Maker
The next picture movie creator in line that we will talk about is Icecream Slideshow Maker. With this slideshow maker, you can create a professional-looking slideshow of your favorite pictures with just a few clicks. Icecream slideshow maker is a brilliant image to video movie maker.
The slideshow is famous because of its features. Icecream slideshow maker supports all popular photo formats. You can add any multimedia content to your slideshow. Let us share some more features of the Icecream Slideshow maker.
- The slideshow maker is supported by Windows 10, 8.1, 8, 7, Vista, and XP.
- With this slideshow movie maker, you can create up to 3840x2160 resolution slideshows.
- Icecream slideshow maker allows you to save slideshow in MP4, AVI, MOV, or WEMB format.
- The amazing slideshow maker also lets you add background music, text, and transition effects to your slideshow.
3. Movavi Slideshow Maker
Movavi is another amazing movie maker with pictures. This slideshow maker is very easy to use, and it helps you create a slideshow with images very fast. You can follow its 3-step process that will lead you to create a stunning slideshow.
Movavi Slideshow makers have a lot of different filters, effects, and transitions that could be used in your slideshow. It also has cute stickers and ready-to-use templates. There are many captivating features that Movavi Slideshow maker offers. A few of its features are:
- One of the best features of Movavi photo movie makers is that it supports animated objects.
- It has a music library to use free music and add it to your slideshow.
- The slideshow maker is available for both Windows and Mac.
- Movavi Slideshow maker has over 165 visual effects, 100+ titles, and more.
4. Freemake Video Converter
Next comes the turn of Freemake Video Converter. When you are talking about slideshows, then Freemake Video Convertor is a well-known movie maker with pictures. The tool is very simple and easy to use. It has a self-explanatory interface that guides the user about the next step.
The free software is reliable, and it promises to safeguard your data. There are many unmatchable features of Freemake Video Converter. Let’s discuss them with you.
- For Freemake Video Converter, you don’t have to sign up. The software is free.
- With this classic photo movie creator,you can upload directly to YouTube.
- This slideshow maker supports several output formats.
- Another amazing thing about Freemake Video Converter is that the slideshow can be transferred directly to DVDs.
5. Ashampoo Slideshow Studio
Last but not least, we will talk about Ashampoo Slideshow Studio. This movie maker with pictures can make a slideshow almost on its own. This is the biggest advantage of using this slideshow maker.
Ashampoo Slideshow Studio is very popular software with mind-blowing features and capabilities. The slideshow maker has various templates, transitions, and sound effects that can help you create something crazy and equally classy. Some of its features are.
- The most captivating thing about Ashampoo Slideshow Studio is its built-in wizard. With these wizards, you can create a slideshow with great ease and blazing fast action.
- The new format support of this slideshow movie makeris for iPads, gaming consoles, and cellphones.
- Ashampoo Slideshow Studio supports MKV, VP9, and MP4 formats with resolutions up to 4K.
- The interface of this slideshow maker is logically structured. Everyone can easily understand it and work with it.
Final Words
This article is everything you need in today’s world where you like to share your life on social media. After reading this article, you will be able to create impressive and stunning photo slideshows. We have discussed in detail regarding 5 top photos to movie maker software. All the discussed software are amazing and popular because of the services and quality.
Versatile Video Editor - Wondershare Filmora
An easy yet powerful editor
Numerous effects to choose from
Detailed tutorials provided by the official channel
From Fast to Slow: How to Use VLC’s Slow Motion Feature Like a Pro
While the files of the most common formats like MP4, WAV, etc. may look identical, they might be compiled using varied codecs which may or may not support any random player that you install on your PC. The reason why VLC media player is used by the majority of users worldwide is the versatility in the codecs that it supports natively.
Furthermore, the app is available for almost every platform, i.e., Windows, Mac, Linux, iOS, and Android, and is absolutely free to download and use.
With that said, the following sections explain how to manage the playback speed of a video while using VLC media player to add a slow motion effect to video. Here you will learn how to play slow motion on VLC on Windows, Mac, and iOS/Android, and also how to set the default speed for the app so that every time a video is played, the speed remains according to your preference.
In this article
01 How to Play Video in Slow Motion Effects on Windows with VLC?
02 How to Play Slow Motion Effects on Mac with VLC?
03 How to Control Playback Speed in VLC Media Player on Android and iOS?
04 How to Set up the Default Playback Speed on VLC?
Part 1: How to Play Video in Slow Motion Effects on Windows with VLC?
VLC is one of the best media players to play videos in slow motion . You can follow the instructions that are given below to learn how to play a video in slow motion in VLC on a Windows PC:
Step 1: Start Video Playback
Launch VLC on your Windows computer (a Windows 11 PC is used here for illustrations), click Media from the menu bar at the top, click Open File from the menu, and locate and open a video that you want to watch in slow motion. If VLC is your default media player, simply double-clicking the clip automatically opens the file in the app.

Step 2: Reduce the Playback Speed (In Decrements of 0.10x)
Once the playback begins, press the Spacebar on the keyboard to pause the video. Next, go to the Playback menu from the top, go to Speed, and click Slower (fine) once. This will reduce the speed to 0.90x. Clicking Slower (fine) again will further slow down the video to 0.80x speed. You can repeat this process until you reduce the speed to your desired level. Press Spacebar again to resume the playback in slow motion.
Note: The lowest speed that you can go to using this process is 0.03x.

Step 3: Reduce the Playback Speed (In Decrements in Percentage)
Pause the playback and go to Playback > Speed as explained in the previous step. From the list that comes up, click Slower (the last option). This will reduce the speed to 0.67x. Click Slower again and the speed will further go down to 0.50x. You can repeat this process until you reach your desired playback speed. Press Spacebar to resume the playback in slow motion. With this method, you can reduce the speed to as low as 0.02x.
Note: You can click Normal from the Speed submenu to play the video at normal speed.

Step 4: Using the Shortcut Keys (Optional)
You can press the left square bracket ‘[‘ on your keyboard to reduce the speed in decrements of 0.10x. To get back to the normal speed, press the equals to ‘=’ key. Likewise, pressing the right square bracket ‘]’ increases the speed by 0.10x.
Note: As it is with the Slower (fine) and Slower options, you can use Faster (fine) to add 0.10x increments to the speed, and Faster to increase percentage-wise. Also, if Faster (fine) is clicked repeatedly or its shortcut key is used multiple times, the speed can be increased up to 31.25x. On the other hand, by using the Faster option repeatedly, the speed can be increased to more than 100x.
Part 2: How to Play Slow Motion Effects on Mac with VLC?
The process of slowing down the video playback in VLC on a Mac computer is almost identical to that in Windows. You can learn how to get this done by following the steps that are given below:
Step 1: Open and Pause the Video
Locate and right-click the video that you want to play in slow motion, go to Open With from the context menu, and click VLC from the submenu. Once the clip opens, click the Pause button from the bottom as explained in the previous section.
Step 2: Reduce the Playback Speed
Click Playback from the menu bar at the top, and drag the Playback Speed slider to the left to reduce the speed of the video.

Step 3: Resume the Playback
Click anywhere on the screen to close the Playback menu, and then click the Play button from the bottom to resume the video playback in slow motion.
Part 3: How to Control Playback Speed in VLC Media Player on Android and iOS?
Although the playback speed of a video on both Android and iOS devices can be controlled with a slider, the location where the controller is placed on the two platforms varies, and so does the process of reaching there. Both the methods are explained below for your convenience:
Play Video in Slow Motion on Android with VLC
Step 1: Pause the Playback
Launch VLC on your Android phone (Samsung Galaxy Note 10+ is used here for illustrations), locate and open the video in VLC, tap anywhere on the screen, and tap the Pause button from the bottom to pause the playback.
Step 2: Set a Slower Playback Speed
Tap the More icon from the bottom-right corner, tap Playback speed from the menu that appears, and drag the slider that is present at the bottom to the left to reduce the speed. Alternatively, you can also repeatedly tap the down arrow that is present at the right of the slider to slow down the speed in the decrements of 0.05x.

Step 3: Resume the Playback
Tap anywhere on the screen, and when the Playback speed slider disappears, tap the screen one more time. Now, tap the Play icon from the bottom to resume the video playback.
Play Video in Slow Motion on iPhone with VLC
Step 1: Pause the Playback
Assuming that you have already added the video to the VLC library by connecting it to iTunes, launch the app on your iOS device (iPhone 13 Pro Max is used here for illustrations). Tap the video that you want to play in slow motion, and then tap the Pause icon from the bottom.
Step 2: Reduce the Playback Speed
Tap anywhere on the screen, and tap the Clock icon from the lower-left corner. Next, drag the Playback speed slider to the left to reduce the playback speed.

Step 3: Resume the Playback
Right after decreasing the speed, tap the Play icon from the bottom to resume the playback. If the controllers disappear, you can tap anywhere on the screen again, and then tap the Play icon.
Part 4: How to Set up the Default Playback Speed on VLC?
The processes of setting up default playback speed on different platforms and devices vary. For your convenience, all of them are explained below:
Set up Default Playback Speed in VLC on Windows
- Go to Tools > Preferences in VLC media player, and then click the All button from the Show settings section at the bottom.
- Select Input / Codecs from the left pane of the Advanced Preferences box, and then specify your preferred speed in the Playback speed field that is present under the Playback control section on the right window
- Click Save to save the changes

Set up Default Playback Speed in VLC on Mac
- Launch VLC, and go to VLC media player from the menu bar, and then click Preferences; and then click Show All from the bottom of the Preferences box to display all preferences setting options;

- Click the Input / Codecs from the left pane, and then define your preferred speed in the Playback speed field under the Playback control section in the right window, and then click Save to save the changes.

How to Change VLC Media Player Default Speed on Android
Note: At the time of this writing, the Android version of VLC doesn’t allow you to set a global default playback speed. However, you can set it on a per video basis. This means that every time that video is played, the playback speed will remain what you set for it. You must do this for each video in your VLC library individually.
- Launch VLC, and then tap More from the bottom-right corner; next, tap SETTINGS from the upper-left area;
- Tap Video from the Extra settings section, and then check the Save Playback Speed box

How to Change VLC Media Player Default Speed on iOS and iPhone
- Tap Settings from the Home screen, and then scroll down and tap VLC
- Tap Default playback speed from the GENERIC section, and then tap to select a playback speed from the available list to set it as the default.

Conclusion
It is pretty convenient to reduce the playback speed in VLC media player regardless of the platform or device you are using. While the processes of getting the job might be different, the principle behind it remains the same. When on Windows, the playback speed can be decreased to 0.02x and can be increased to more than 100x. This facility is not available on Mac, iOS, or Android platforms. Also, if you want, you can set the default playback speed for the videos so that every time a clip is played, the pace remains what you specified as default.
02 How to Play Slow Motion Effects on Mac with VLC?
03 How to Control Playback Speed in VLC Media Player on Android and iOS?
04 How to Set up the Default Playback Speed on VLC?
Part 1: How to Play Video in Slow Motion Effects on Windows with VLC?
VLC is one of the best media players to play videos in slow motion . You can follow the instructions that are given below to learn how to play a video in slow motion in VLC on a Windows PC:
Step 1: Start Video Playback
Launch VLC on your Windows computer (a Windows 11 PC is used here for illustrations), click Media from the menu bar at the top, click Open File from the menu, and locate and open a video that you want to watch in slow motion. If VLC is your default media player, simply double-clicking the clip automatically opens the file in the app.
Step 2: Reduce the Playback Speed (In Decrements of 0.10x)
Once the playback begins, press the Spacebar on the keyboard to pause the video. Next, go to the Playback menu from the top, go to Speed, and click Slower (fine) once. This will reduce the speed to 0.90x. Clicking Slower (fine) again will further slow down the video to 0.80x speed. You can repeat this process until you reduce the speed to your desired level. Press Spacebar again to resume the playback in slow motion.
Note: The lowest speed that you can go to using this process is 0.03x.
Step 3: Reduce the Playback Speed (In Decrements in Percentage)
Pause the playback and go to Playback > Speed as explained in the previous step. From the list that comes up, click Slower (the last option). This will reduce the speed to 0.67x. Click Slower again and the speed will further go down to 0.50x. You can repeat this process until you reach your desired playback speed. Press Spacebar to resume the playback in slow motion. With this method, you can reduce the speed to as low as 0.02x.
Note: You can click Normal from the Speed submenu to play the video at normal speed.
Step 4: Using the Shortcut Keys (Optional)
You can press the left square bracket ‘[‘ on your keyboard to reduce the speed in decrements of 0.10x. To get back to the normal speed, press the equals to ‘=’ key. Likewise, pressing the right square bracket ‘]’ increases the speed by 0.10x.
Note: As it is with the Slower (fine) and Slower options, you can use Faster (fine) to add 0.10x increments to the speed, and Faster to increase percentage-wise. Also, if Faster (fine) is clicked repeatedly or its shortcut key is used multiple times, the speed can be increased up to 31.25x. On the other hand, by using the Faster option repeatedly, the speed can be increased to more than 100x.
Part 2: How to Play Slow Motion Effects on Mac with VLC?
The process of slowing down the video playback in VLC on a Mac computer is almost identical to that in Windows. You can learn how to get this done by following the steps that are given below:
Step 1: Open and Pause the Video
Locate and right-click the video that you want to play in slow motion, go to Open With from the context menu, and click VLC from the submenu. Once the clip opens, click the Pause button from the bottom as explained in the previous section.
Step 2: Reduce the Playback Speed
Click Playback from the menu bar at the top, and drag the Playback Speed slider to the left to reduce the speed of the video.
Step 3: Resume the Playback
Click anywhere on the screen to close the Playback menu, and then click the Play button from the bottom to resume the video playback in slow motion.
Part 3: How to Control Playback Speed in VLC Media Player on Android and iOS?
Although the playback speed of a video on both Android and iOS devices can be controlled with a slider, the location where the controller is placed on the two platforms varies, and so does the process of reaching there. Both the methods are explained below for your convenience:
Play Video in Slow Motion on Android with VLC
Step 1: Pause the Playback
Launch VLC on your Android phone (Samsung Galaxy Note 10+ is used here for illustrations), locate and open the video in VLC, tap anywhere on the screen, and tap the Pause button from the bottom to pause the playback.
Step 2: Set a Slower Playback Speed
Tap the More icon from the bottom-right corner, tap Playback speed from the menu that appears, and drag the slider that is present at the bottom to the left to reduce the speed. Alternatively, you can also repeatedly tap the down arrow that is present at the right of the slider to slow down the speed in the decrements of 0.05x.
Step 3: Resume the Playback
Tap anywhere on the screen, and when the Playback speed slider disappears, tap the screen one more time. Now, tap the Play icon from the bottom to resume the video playback.
Play Video in Slow Motion on iPhone with VLC
Step 1: Pause the Playback
Assuming that you have already added the video to the VLC library by connecting it to iTunes, launch the app on your iOS device (iPhone 13 Pro Max is used here for illustrations). Tap the video that you want to play in slow motion, and then tap the Pause icon from the bottom.
Step 2: Reduce the Playback Speed
Tap anywhere on the screen, and tap the Clock icon from the lower-left corner. Next, drag the Playback speed slider to the left to reduce the playback speed.
Step 3: Resume the Playback
Right after decreasing the speed, tap the Play icon from the bottom to resume the playback. If the controllers disappear, you can tap anywhere on the screen again, and then tap the Play icon.
Part 4: How to Set up the Default Playback Speed on VLC?
The processes of setting up default playback speed on different platforms and devices vary. For your convenience, all of them are explained below:
Set up Default Playback Speed in VLC on Windows
- Go to Tools > Preferences in VLC media player, and then click the All button from the Show settings section at the bottom.
- Select Input / Codecs from the left pane of the Advanced Preferences box, and then specify your preferred speed in the Playback speed field that is present under the Playback control section on the right window
- Click Save to save the changes
Set up Default Playback Speed in VLC on Mac
- Launch VLC, and go to VLC media player from the menu bar, and then click Preferences; and then click Show All from the bottom of the Preferences box to display all preferences setting options;
- Click the Input / Codecs from the left pane, and then define your preferred speed in the Playback speed field under the Playback control section in the right window, and then click Save to save the changes.
How to Change VLC Media Player Default Speed on Android
Note: At the time of this writing, the Android version of VLC doesn’t allow you to set a global default playback speed. However, you can set it on a per video basis. This means that every time that video is played, the playback speed will remain what you set for it. You must do this for each video in your VLC library individually.
- Launch VLC, and then tap More from the bottom-right corner; next, tap SETTINGS from the upper-left area;
- Tap Video from the Extra settings section, and then check the Save Playback Speed box
How to Change VLC Media Player Default Speed on iOS and iPhone
- Tap Settings from the Home screen, and then scroll down and tap VLC
- Tap Default playback speed from the GENERIC section, and then tap to select a playback speed from the available list to set it as the default.
Conclusion
It is pretty convenient to reduce the playback speed in VLC media player regardless of the platform or device you are using. While the processes of getting the job might be different, the principle behind it remains the same. When on Windows, the playback speed can be decreased to 0.02x and can be increased to more than 100x. This facility is not available on Mac, iOS, or Android platforms. Also, if you want, you can set the default playback speed for the videos so that every time a clip is played, the pace remains what you specified as default.
No Budget? No Problem! Free Animation Software for Windows and Mac
Best 12 Free Download Animation Software for Windows and Mac

Shanoon Cox
Mar 27, 2024• Proven solutions
In your search for quality animation software, you may have found that many of the programs cost a lot of money no matter it is 2D animation software or 3D animation editor. The good news is that you can choose free animation tools to make different animation types easily.
That is why we created a list of the best animation software on both Mac and Windows. Whether you are a professional editor or just a beginner to start making animation, you will find the tools listed below are easy to use without watermark and won’t cost money to improve your skills.
The best part is you will find these free animation programs are also very useful for content creation on Mac and Windows. Besides, we have listed the pros and cons of each software. Keep reading!
- Part 1: Best Free Animation Software for Mac
- Part 2: Best Free Animation Software for Windows
- Part 3: FAQ about Animation Software for Windows and Mac
Here we have made a table of 12 free animation software without watermark on Windows and macOS. Take a look.
6 Free Animation Software for macOS
5K-3DMiddleIt is a great tool for 3D artists6KritaDifficultPerfect software for 2D animation
| Number | Software | Difficulty Level | Highlight |
|---|---|---|---|
| 1 | Synfig Studio | Easy | Calculate vector shape to animation automatically |
| 2 | Pencil2D Animation | Easiest | Straightforward interface for beginners |
| 3 | Tupi | Middle | Its community is active to offer solutions |
| 4 | Blender | Difficult | It is a powerful animation tool to render and make modeling |
6 Free Animation Software for Windows
| Number | Software | Difficulty Level | Highlight |
|---|---|---|---|
| 1 | DAZ Studio | Difficult | For professional users with the fast animation process |
| 2 | Terragen | Middle | It can make realistic CG environments |
| 3 | Anim8or | Difficult | 3D animation is Anim8or’s main function |
| 4 | Seamless3d | Easy | It has many features for 3d modeling |
| 5 | OpenToonz | Middle | Make cartoon animation with plugins |
| 6 | Stykz | Easy | Quickly make animation if you have used Pivot StickFigure Animator |
Best Animation Software on Windows and Mac - Filmora
Looking for a simple while powerful Mac video editing tool ? We recommend using Wondershare Filmora. You can use it to create 2D/3D animated texts, shapes, or anything you like for YouTube videos.
The keyframing features will help you make animation effects smooth and precise. When exporting, you can also make it transparent.
Besides, various title templates and transitions are also available for you. Download it now to have a try! Or learn more from Wondershare Video Community .
Key features
- Create various shapes that you like
- Add keyframing to make it move
- Fine-tuning to make it smooth
- Add visual effects/text/color before export it


You can even create photo cut animation which has been very trendy on Tiktok and Instagram. Here is a video to present you how you can do it in Filmora.
Part 1 Best Free Animation Software for Mac
Listed below is free animation software on Mac. Take a look.
01 Synfig Studio - Mac Software to Animate Video
Difficulty Level: Easy
Pro: You can create many layers once a time and sync audio for your animation.
Con: This one needs much time to learn, especially for beginners.
An open-source 2D animation software that works on Macs, Synfig Studio delivers multiple players while you are creating content. Whether you want to add geometric, filters, distortions, or transformations, it is all possible! And thanks to the high-end bone system, you can create cut-out videos using bitmap images!
The thoughtful part is there are two download versions on the homepage: the stable version and the development version. If you want to enjoy a stable and smooth animation editing experience, choose the stable one. However, the development package gives you access to the use of the latest features.
For a novice, you can learn Synfig from step by step guide in Wikipedia and video tutorials. Four languages are available including English, Russian, Dutch, and French for a video course.
You can free download its latest version 1.3.11. The upcoming version is 1.4.
Features:
- It offers support for many layers within the animation.
- The program’s bone system means that you can easily create animations with bitmap images or vector artwork.
- It allows you to sync your creative work with any sound that you want. Has a full-featured audio editor.
02 Pencil2D Animation - Animation Program for 2D Pencil Lover
Difficulty Level: Easiest
Pro: Easy to start and make animation as the interface is user-friendly for many people.
Con: You need to set your preference every time to open it up, so it takes up some time
Pencil2D Animation is one of the simplest 2D hand-drawn tools available. It will work flawlessly on Mac computers. It is ideal for beginners, as the commands and interface are very easy to understand.
Whether you want to create a simple one, or you want something with many layers for videos on YouTube, you can use Pencil2D animation to get it done. Its timeline is easy to use at first glance. You can add and duplicate different frames on a different track.
The frequency of releasing the new version is very fast as Pencil2D is committed to bringing the lasted features to each user. The newest version is v0.6.4 (as of August 2019). Its user guide is informative with video tutorials, FAQs, and manual material.
Features:
- Lightweight and minimalistic design that makes it very easy for beginners.
- Features raster and vector workflows, with easy switching between them. You can paint and sketch as you want!
- Will run on all platforms - Mac, Windows, and Linux.
- Completely free and open source.
03 TupiTube - Free Animation Application for Mac Users
Difficulty Level: Middle
Pro: It supports vector illustrations. Besides, various formats are available.
Con: If you want to make 3D animation, it will fail. You can only make 2D effects.
A free software application for YouTube, Tupi will allow you to create 2D animations to your heart’s content. The tool was started by animators who wanted to create something that others could use.
It is an open-source tool, which means that users can make tweaks to the program if they have some interesting ideas. The program works on both Windows and Mac. You need to use Tupi and Papagayo to make lip-sync animation with different mouth shapes.
It also offers a solution for schools with related features including academic license, technical support, and ads-free, so many schools choose to use this one to teach kids how to make an animation video.
Features:
- Support for vector illustrations. You can add rectangles, lines, polygons, and other shapes as you please. To fill areas, just use the paint bucket.
- You can import raster images using this program.
- You can export all your finished images into different file formats.
- Support for tweeting positions, scale, shear, and rotations.

04 Blender - Need Some Time to Learn This Animation Tool
Difficulty Level: Difficult
Pro: Really powerful software that you can make for professional users.
Con: It is not easy to make image animation as it focuses on 3D.
Blender is an open-source 3D animation creation suite without a watermark. If you find that 2D is a little bit limiting, we think that you will be very happy with what this free program offers. You can take your projects to a whole new level when you can use this program on your Mac.
You can use Blender to make a video game, modeling, and high-quality animation. However, it involves a steep learning curve. Luckily, there are many tutorials to guide you through the journey. You can also ask for help in the Blender community that millions of talented people like you are there.
Features:
- Creating renders is no problem with this program.
- Modeling, such as sculpting, retopology, and creating curves is not an issue either.
- VFX and animation features are better than any option on the market.
- It offers powerful simulation tools.
- Integration with pipeline tools is easy.
05 K-3D - Best for Animation and Modeling in 3D
Difficulty Level: Middle
Pro: Ideal for designing simple 3D animations and models.
Con: It has an old-fashioned interface. Also, the built-render (RenderMan) feature is difficult to use by beginners.
K-3D is an animation and 3D modeling software. You can download this tool for free on your Mac. Besides, you can also install and run it on your Windows and Linux systems. If you look at the design, you will find that the software is quite old. But don’t judge a book by its cover. Why so? It is because K-3D is one of the strongest and most versatile tools for 3D artists with many options.
For example, K-3D offers extremely systematic and methodological workflows. You can easily adjust the properties of the features in real-time and get instant results. It has a node-oriented visualization pipeline to enjoy more freedom. That means you can create animation using a variety of combinations.
One of the best things about K-3D is that it has three subdivisions of animation. You can work on your model on one side while showing the other side in a mirrored form. Then, experience the final result combined together. And in case you need to make the changes to the end results, you can simply work on the first subdivision and savor automatic changes to the results.
K-3D has an advanced redo and undo mechanism to ensure you can go back or move forward to make corrections or amendments without limits. Additionally, the tool is developed keeping in mind all the industrial standards. For instance, it has complete support and integration of native RenderMan™ to its user interface. This is an excellent feature because most free animation software for Mac requires third-party render plugins.
Features:
- Parametric workflow.
- 2D and 3D animation tools.
- Allows Python and K3DScript scripting.
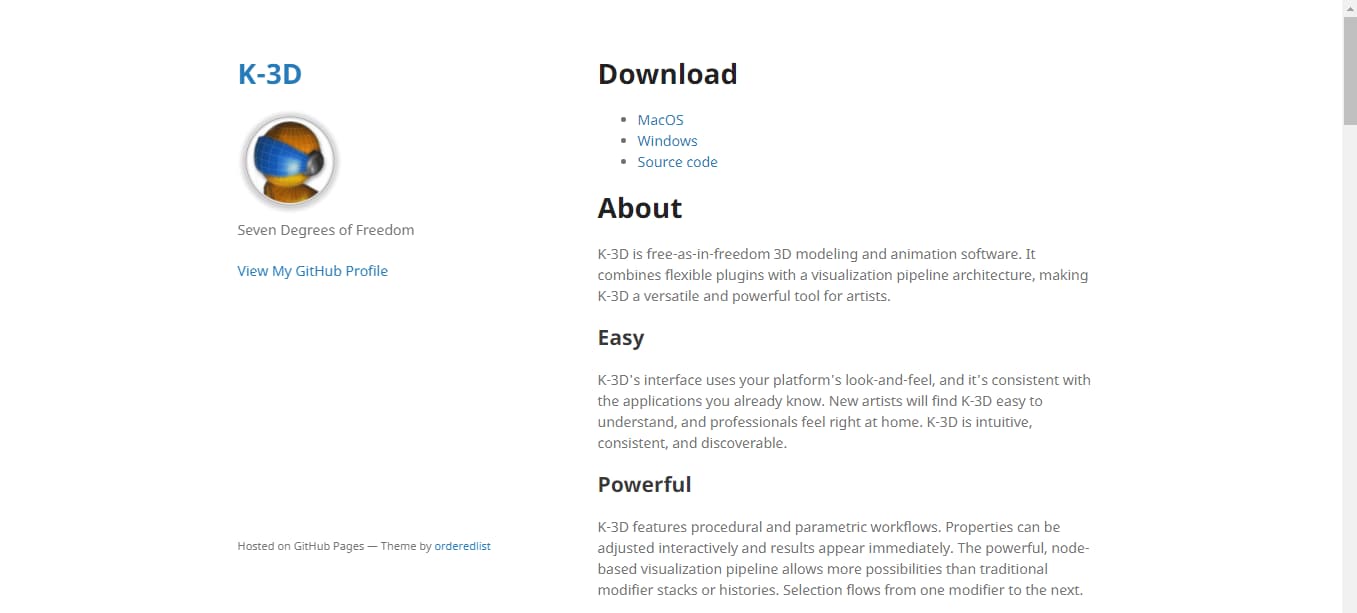
06 Krita - For Professional 2D Animators
Difficulty Level: Difficult
Pro: Advanced tools with numerous animation options and online training material.
Con: Not suitable for beginners.
If you love 2D animation, then you’ll surely love Krita. It is entirely free software available on Mac, Windows, and Linux. Also, it offers a full platform for drawing and frame-by-frame animation.
The number one reason for adoring Krita is its brush library. There are more than 100 professional brushes to give you a wide range of effects. Moreover, the strokes are pretty amazing and similar to Adobe Photoshop or Adobe Illustrator.
Another great thing about Krita is the brush stabilization feature designed for shaky hands. You can add a stabilizer to your chosen brush to smoothen its flow. Besides, there’s a special Dynamic Brush tool to make animation more fun. At the same time, you can also customize your brushes through different brush engines, including filter engines, color smudge engines, and many more.
Apart from the basic brush options, the preloaded vector tools are next to admire. These tools help you make great comic panels. All you need to do is choose and drag the word bubble template on your canvas. Then, make changes with the anchor point to make new shapes. At the same time, you can also add text to your animation by using the text tool.
Last but not least, there’s a wrap-around mode to create seamless patterns and textures. That means the image or drawing makes its own references along the x-axis and y-axis. This gives you the freedom to continue painting and enjoy updates to your animation instantly.
Features:
- HDR painting.
- PSD support.
- Python scripting.
- Selection and transformation tools.
- Proper group, filter, vector, and file layer management.
- Complete color management for extraordinary results.
- Drawing assistant to help you with straight lines and vanishing points.
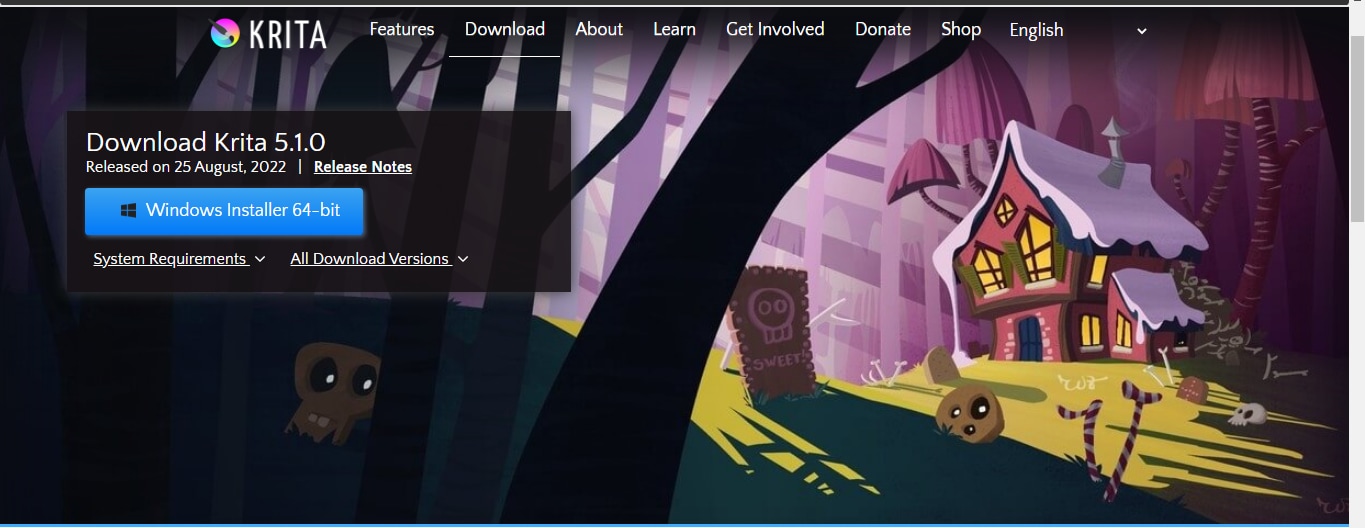
Part 2 Best Free Animation Software for Windows
Below is free animation software on Windows. Keep reading.
01 Anireel - Easy to Use Animation Software
Difficulty Level: Easy
Anireel is a simple yet powerful Video Creativity tool used to make 2D animated explainer videos. Developed by Wondershare, one of the most popular Windows software and tool developers, Anireel uses rich, ready-to-use, and diverse assets to help one effortlessly make animated videos.
Features:
- There are tons of drag and drop characters, actions, props, text, and audio assets.
- Easy Text-to-Speech conversion via deep studying technology.
- Animate integrated and imported assets.
- Tons of templates that match many script types.

02 DAZ Studio - Free Software for 3D Lovers
Difficulty Level: Difficult
Pro: You can make game animation for fun. It also supports GPU accelerated real-time rendering.
Con: It has a high demand for the device, but owns a steep learning curve.
Daz 3d is a powerful and completely free 3D creation tool that will let you create the short videos that you want. Whether you are using this for business or pleasure, you will find the program is very easy to understand. Within a day, you will be completely used to its interface.
3D effects are the core focus of DAZ Studio. You can build a model, render, and pose animation within the skin texture level. It has a high requirement for the device. For Windows 64 bits, its recommended RAM is 3G.
Features:
- Options for 3D morphing, animation, and rendering.
- GPU accelerated real-time rendering, which delivers the best results.
- Interactive tutorials to help you become a better 3D artist.
- Everything you make is yours, royalty-free!
03 Terragen - Use It to Make CG Animation
Difficulty Level: Middle
Pro: The recently updated version is the best one. Ray-traced preview is a great function to help us make animation.
Con: The interface looks complicated, but it gets easy to know after you are familiar with it.
A completely free program that you can download and install on all Windows computers and tablets, Terragen is the ideal program for you to create the 3D animations and environments that you want. If you want a photo-realistic CG environment, using Terragen is the best way to do it!
Releasing imagination instantly, Terragen Creative is the one tool you’d like to consider. You can use it to make beautiful scenery.
For advanced tools, you can choose FBX to make animation quickly. The featured image gallery on its homepage will give you a deep understanding of the final outcome you can achieve with Terragen.
Features:
- Ray-traced preview. Without watermark after exporting
- Photo-realistic clouds and ozone simulation
- Rendering is twice as fast as the previous version of the program.
- Adding terrain, objects, and shader to your final product is very easy with the intuitive interface.
04 Anim8or - Free Tool to Make 3D Modeling
Difficulty Level: Difficult
Pro: Anim8or supports 3D modeler and TrueType fonts to meet advanced needs.
Con: Beginners will find it difficult to learn.
Anim8or is a free 3D modeling program that will let you create the unique work that you want. It is a personal project from an animator, but the program does get regular updates and troubleshooting.
It is not going to give you the same features as something like Studio Max or Maya, but you will get the basics. Beginners who are getting into animations will love this program.
Anim8or is a great tool to step into 3D animation ff you think other software is too different to start. In some way, it means you need to give up some advanced features. But all in all, it’s still recommended for you.
Features:
- A full 3D modeler that allows you to create spheres, cylinders, platonic solids, and any other objects that you want.
- Features support for TrueType fonts.
- Easy to create 3D scenes and output them as video files or images.
05 Seamless3d - Open-source Free Software
Difficulty Level: Easy
Pro: It is an open-source 3D modeling package. The good thing is the handy infinite Undo/Redo operation.
Con: Some advanced features are missing like drawing.
Seamless3d, an open-source 3D modeling software that you can download, is among the best animation worktables if you want to create specialized images, animated videos, or 3D characters.
It supports FFmpeg video format, so you can use AVI, MP4, and more. Besides, the forum is not active compared with before, but you still can find answers from many tutorials .
Features:
- It comes with infinite undo and redo options for complete flexibility to correct mistakes.
- It allows for partitioned and seamless texture mapping for YouTube videos.
- Has a specialized tree view interface.

06 OpenToonz - Support Plug in to Make Animation Freely
Difficulty Level: Middle
Pro: It is open-source software, so you can change the code freely.
Con: The plug-in effects are limited.
This animation program is made for beginners on Windows. It is among the best 2D animation software in the market. You can use plug-in effects to change image style, add lights, and distort details. It supports Windows 7/8/10 only for 64 bit.
Features:
- You can add provisional colors to make your animation more colorful.
- Smooth correction without frame losing.
- Compatible with black-and-white, colored, or without binarization scanning.
7 Stykz - Simple to Use Animation Program for Beginners
Difficulty Level: Easy
Pro: It is the best stick figure animation if you want to make this kind of video.
Con: The UI is not modern to use and needs time to adapt to using it.
Stykz is completely free to use and without a watermark. If you have used Pivot StickFigure Animator, then you will find Stykz is similar to it, but you can import the previous .stk files to animate it again. You can use it to make animation smooth frame by frame.
With its frame-based feature, Stykz is easy to customize each frame. You can change previous and current frames to get what you want. You can download it to have a try considering its easy-to-use features.
Features:
- There is some animes file on this website, so you can have a reference.
- Edit animation in the software without using another editing window.
- You can share the final work with others including information.
Part 3 FAQ about Animation Software for Windows and Mac
01 Are Macs good for animation?
To be frank, Mac is a better choice to make animation if you want to have a smooth animation experience. For example, screen resolution is a crucial factor to make excellent animation. The good is Mac’s screen will never let you disappointed.
02 What is the best animation software for Mac?
The best animation software on mac includes Synfig Studio, Pencil2D Animation, Tupi, Blender, and more. Mentioned are free-to-use. Maya is also worth considering animation software if you are a professional user. Maya offers a 1-month free trial. After it is ended, the paid plans are month, 1-year, and 3-year.
03 Can you animate in Photoshop?
Yes, you can make basic animation in Photoshop. However, it only supports frame-based animation making. In this case, you need to use other professional software to make animation. But, you still can use Photoshop to meet your needs if you are a beginner.
Conclusion
With any of these free animation maker programs on Mac and Windows, you will have an easy time creating your next 2D or 3D video. Ensure you choose the program that has the features and compatibility that you desire. Then it is up to your creative mind to come up with stunning animations! If you want to make animation easily, you can also find inspiration through classical animated cartoon types with examples .
Shanoon Cox
Shanoon Cox is a writer and a lover of all things video.
Follow @Shanoon Cox
Shanoon Cox
Mar 27, 2024• Proven solutions
In your search for quality animation software, you may have found that many of the programs cost a lot of money no matter it is 2D animation software or 3D animation editor. The good news is that you can choose free animation tools to make different animation types easily.
That is why we created a list of the best animation software on both Mac and Windows. Whether you are a professional editor or just a beginner to start making animation, you will find the tools listed below are easy to use without watermark and won’t cost money to improve your skills.
The best part is you will find these free animation programs are also very useful for content creation on Mac and Windows. Besides, we have listed the pros and cons of each software. Keep reading!
- Part 1: Best Free Animation Software for Mac
- Part 2: Best Free Animation Software for Windows
- Part 3: FAQ about Animation Software for Windows and Mac
Here we have made a table of 12 free animation software without watermark on Windows and macOS. Take a look.
6 Free Animation Software for macOS
5K-3DMiddleIt is a great tool for 3D artists6KritaDifficultPerfect software for 2D animation
| Number | Software | Difficulty Level | Highlight |
|---|---|---|---|
| 1 | Synfig Studio | Easy | Calculate vector shape to animation automatically |
| 2 | Pencil2D Animation | Easiest | Straightforward interface for beginners |
| 3 | Tupi | Middle | Its community is active to offer solutions |
| 4 | Blender | Difficult | It is a powerful animation tool to render and make modeling |
6 Free Animation Software for Windows
| Number | Software | Difficulty Level | Highlight |
|---|---|---|---|
| 1 | DAZ Studio | Difficult | For professional users with the fast animation process |
| 2 | Terragen | Middle | It can make realistic CG environments |
| 3 | Anim8or | Difficult | 3D animation is Anim8or’s main function |
| 4 | Seamless3d | Easy | It has many features for 3d modeling |
| 5 | OpenToonz | Middle | Make cartoon animation with plugins |
| 6 | Stykz | Easy | Quickly make animation if you have used Pivot StickFigure Animator |
Best Animation Software on Windows and Mac - Filmora
Looking for a simple while powerful Mac video editing tool ? We recommend using Wondershare Filmora. You can use it to create 2D/3D animated texts, shapes, or anything you like for YouTube videos.
The keyframing features will help you make animation effects smooth and precise. When exporting, you can also make it transparent.
Besides, various title templates and transitions are also available for you. Download it now to have a try! Or learn more from Wondershare Video Community .
Key features
- Create various shapes that you like
- Add keyframing to make it move
- Fine-tuning to make it smooth
- Add visual effects/text/color before export it
You can even create photo cut animation which has been very trendy on Tiktok and Instagram. Here is a video to present you how you can do it in Filmora.
Part 1 Best Free Animation Software for Mac
Listed below is free animation software on Mac. Take a look.
01 Synfig Studio - Mac Software to Animate Video
Difficulty Level: Easy
Pro: You can create many layers once a time and sync audio for your animation.
Con: This one needs much time to learn, especially for beginners.
An open-source 2D animation software that works on Macs, Synfig Studio delivers multiple players while you are creating content. Whether you want to add geometric, filters, distortions, or transformations, it is all possible! And thanks to the high-end bone system, you can create cut-out videos using bitmap images!
The thoughtful part is there are two download versions on the homepage: the stable version and the development version. If you want to enjoy a stable and smooth animation editing experience, choose the stable one. However, the development package gives you access to the use of the latest features.
For a novice, you can learn Synfig from step by step guide in Wikipedia and video tutorials. Four languages are available including English, Russian, Dutch, and French for a video course.
You can free download its latest version 1.3.11. The upcoming version is 1.4.
Features:
- It offers support for many layers within the animation.
- The program’s bone system means that you can easily create animations with bitmap images or vector artwork.
- It allows you to sync your creative work with any sound that you want. Has a full-featured audio editor.
02 Pencil2D Animation - Animation Program for 2D Pencil Lover
Difficulty Level: Easiest
Pro: Easy to start and make animation as the interface is user-friendly for many people.
Con: You need to set your preference every time to open it up, so it takes up some time
Pencil2D Animation is one of the simplest 2D hand-drawn tools available. It will work flawlessly on Mac computers. It is ideal for beginners, as the commands and interface are very easy to understand.
Whether you want to create a simple one, or you want something with many layers for videos on YouTube, you can use Pencil2D animation to get it done. Its timeline is easy to use at first glance. You can add and duplicate different frames on a different track.
The frequency of releasing the new version is very fast as Pencil2D is committed to bringing the lasted features to each user. The newest version is v0.6.4 (as of August 2019). Its user guide is informative with video tutorials, FAQs, and manual material.
Features:
- Lightweight and minimalistic design that makes it very easy for beginners.
- Features raster and vector workflows, with easy switching between them. You can paint and sketch as you want!
- Will run on all platforms - Mac, Windows, and Linux.
- Completely free and open source.
03 TupiTube - Free Animation Application for Mac Users
Difficulty Level: Middle
Pro: It supports vector illustrations. Besides, various formats are available.
Con: If you want to make 3D animation, it will fail. You can only make 2D effects.
A free software application for YouTube, Tupi will allow you to create 2D animations to your heart’s content. The tool was started by animators who wanted to create something that others could use.
It is an open-source tool, which means that users can make tweaks to the program if they have some interesting ideas. The program works on both Windows and Mac. You need to use Tupi and Papagayo to make lip-sync animation with different mouth shapes.
It also offers a solution for schools with related features including academic license, technical support, and ads-free, so many schools choose to use this one to teach kids how to make an animation video.
Features:
- Support for vector illustrations. You can add rectangles, lines, polygons, and other shapes as you please. To fill areas, just use the paint bucket.
- You can import raster images using this program.
- You can export all your finished images into different file formats.
- Support for tweeting positions, scale, shear, and rotations.
04 Blender - Need Some Time to Learn This Animation Tool
Difficulty Level: Difficult
Pro: Really powerful software that you can make for professional users.
Con: It is not easy to make image animation as it focuses on 3D.
Blender is an open-source 3D animation creation suite without a watermark. If you find that 2D is a little bit limiting, we think that you will be very happy with what this free program offers. You can take your projects to a whole new level when you can use this program on your Mac.
You can use Blender to make a video game, modeling, and high-quality animation. However, it involves a steep learning curve. Luckily, there are many tutorials to guide you through the journey. You can also ask for help in the Blender community that millions of talented people like you are there.
Features:
- Creating renders is no problem with this program.
- Modeling, such as sculpting, retopology, and creating curves is not an issue either.
- VFX and animation features are better than any option on the market.
- It offers powerful simulation tools.
- Integration with pipeline tools is easy.
05 K-3D - Best for Animation and Modeling in 3D
Difficulty Level: Middle
Pro: Ideal for designing simple 3D animations and models.
Con: It has an old-fashioned interface. Also, the built-render (RenderMan) feature is difficult to use by beginners.
K-3D is an animation and 3D modeling software. You can download this tool for free on your Mac. Besides, you can also install and run it on your Windows and Linux systems. If you look at the design, you will find that the software is quite old. But don’t judge a book by its cover. Why so? It is because K-3D is one of the strongest and most versatile tools for 3D artists with many options.
For example, K-3D offers extremely systematic and methodological workflows. You can easily adjust the properties of the features in real-time and get instant results. It has a node-oriented visualization pipeline to enjoy more freedom. That means you can create animation using a variety of combinations.
One of the best things about K-3D is that it has three subdivisions of animation. You can work on your model on one side while showing the other side in a mirrored form. Then, experience the final result combined together. And in case you need to make the changes to the end results, you can simply work on the first subdivision and savor automatic changes to the results.
K-3D has an advanced redo and undo mechanism to ensure you can go back or move forward to make corrections or amendments without limits. Additionally, the tool is developed keeping in mind all the industrial standards. For instance, it has complete support and integration of native RenderMan™ to its user interface. This is an excellent feature because most free animation software for Mac requires third-party render plugins.
Features:
- Parametric workflow.
- 2D and 3D animation tools.
- Allows Python and K3DScript scripting.
06 Krita - For Professional 2D Animators
Difficulty Level: Difficult
Pro: Advanced tools with numerous animation options and online training material.
Con: Not suitable for beginners.
If you love 2D animation, then you’ll surely love Krita. It is entirely free software available on Mac, Windows, and Linux. Also, it offers a full platform for drawing and frame-by-frame animation.
The number one reason for adoring Krita is its brush library. There are more than 100 professional brushes to give you a wide range of effects. Moreover, the strokes are pretty amazing and similar to Adobe Photoshop or Adobe Illustrator.
Another great thing about Krita is the brush stabilization feature designed for shaky hands. You can add a stabilizer to your chosen brush to smoothen its flow. Besides, there’s a special Dynamic Brush tool to make animation more fun. At the same time, you can also customize your brushes through different brush engines, including filter engines, color smudge engines, and many more.
Apart from the basic brush options, the preloaded vector tools are next to admire. These tools help you make great comic panels. All you need to do is choose and drag the word bubble template on your canvas. Then, make changes with the anchor point to make new shapes. At the same time, you can also add text to your animation by using the text tool.
Last but not least, there’s a wrap-around mode to create seamless patterns and textures. That means the image or drawing makes its own references along the x-axis and y-axis. This gives you the freedom to continue painting and enjoy updates to your animation instantly.
Features:
- HDR painting.
- PSD support.
- Python scripting.
- Selection and transformation tools.
- Proper group, filter, vector, and file layer management.
- Complete color management for extraordinary results.
- Drawing assistant to help you with straight lines and vanishing points.
Part 2 Best Free Animation Software for Windows
Below is free animation software on Windows. Keep reading.
01 Anireel - Easy to Use Animation Software
Difficulty Level: Easy
Anireel is a simple yet powerful Video Creativity tool used to make 2D animated explainer videos. Developed by Wondershare, one of the most popular Windows software and tool developers, Anireel uses rich, ready-to-use, and diverse assets to help one effortlessly make animated videos.
Features:
- There are tons of drag and drop characters, actions, props, text, and audio assets.
- Easy Text-to-Speech conversion via deep studying technology.
- Animate integrated and imported assets.
- Tons of templates that match many script types.
02 DAZ Studio - Free Software for 3D Lovers
Difficulty Level: Difficult
Pro: You can make game animation for fun. It also supports GPU accelerated real-time rendering.
Con: It has a high demand for the device, but owns a steep learning curve.
Daz 3d is a powerful and completely free 3D creation tool that will let you create the short videos that you want. Whether you are using this for business or pleasure, you will find the program is very easy to understand. Within a day, you will be completely used to its interface.
3D effects are the core focus of DAZ Studio. You can build a model, render, and pose animation within the skin texture level. It has a high requirement for the device. For Windows 64 bits, its recommended RAM is 3G.
Features:
- Options for 3D morphing, animation, and rendering.
- GPU accelerated real-time rendering, which delivers the best results.
- Interactive tutorials to help you become a better 3D artist.
- Everything you make is yours, royalty-free!
03 Terragen - Use It to Make CG Animation
Difficulty Level: Middle
Pro: The recently updated version is the best one. Ray-traced preview is a great function to help us make animation.
Con: The interface looks complicated, but it gets easy to know after you are familiar with it.
A completely free program that you can download and install on all Windows computers and tablets, Terragen is the ideal program for you to create the 3D animations and environments that you want. If you want a photo-realistic CG environment, using Terragen is the best way to do it!
Releasing imagination instantly, Terragen Creative is the one tool you’d like to consider. You can use it to make beautiful scenery.
For advanced tools, you can choose FBX to make animation quickly. The featured image gallery on its homepage will give you a deep understanding of the final outcome you can achieve with Terragen.
Features:
- Ray-traced preview. Without watermark after exporting
- Photo-realistic clouds and ozone simulation
- Rendering is twice as fast as the previous version of the program.
- Adding terrain, objects, and shader to your final product is very easy with the intuitive interface.
04 Anim8or - Free Tool to Make 3D Modeling
Difficulty Level: Difficult
Pro: Anim8or supports 3D modeler and TrueType fonts to meet advanced needs.
Con: Beginners will find it difficult to learn.
Anim8or is a free 3D modeling program that will let you create the unique work that you want. It is a personal project from an animator, but the program does get regular updates and troubleshooting.
It is not going to give you the same features as something like Studio Max or Maya, but you will get the basics. Beginners who are getting into animations will love this program.
Anim8or is a great tool to step into 3D animation ff you think other software is too different to start. In some way, it means you need to give up some advanced features. But all in all, it’s still recommended for you.
Features:
- A full 3D modeler that allows you to create spheres, cylinders, platonic solids, and any other objects that you want.
- Features support for TrueType fonts.
- Easy to create 3D scenes and output them as video files or images.
05 Seamless3d - Open-source Free Software
Difficulty Level: Easy
Pro: It is an open-source 3D modeling package. The good thing is the handy infinite Undo/Redo operation.
Con: Some advanced features are missing like drawing.
Seamless3d, an open-source 3D modeling software that you can download, is among the best animation worktables if you want to create specialized images, animated videos, or 3D characters.
It supports FFmpeg video format, so you can use AVI, MP4, and more. Besides, the forum is not active compared with before, but you still can find answers from many tutorials .
Features:
- It comes with infinite undo and redo options for complete flexibility to correct mistakes.
- It allows for partitioned and seamless texture mapping for YouTube videos.
- Has a specialized tree view interface.
06 OpenToonz - Support Plug in to Make Animation Freely
Difficulty Level: Middle
Pro: It is open-source software, so you can change the code freely.
Con: The plug-in effects are limited.
This animation program is made for beginners on Windows. It is among the best 2D animation software in the market. You can use plug-in effects to change image style, add lights, and distort details. It supports Windows 7/8/10 only for 64 bit.
Features:
- You can add provisional colors to make your animation more colorful.
- Smooth correction without frame losing.
- Compatible with black-and-white, colored, or without binarization scanning.
7 Stykz - Simple to Use Animation Program for Beginners
Difficulty Level: Easy
Pro: It is the best stick figure animation if you want to make this kind of video.
Con: The UI is not modern to use and needs time to adapt to using it.
Stykz is completely free to use and without a watermark. If you have used Pivot StickFigure Animator, then you will find Stykz is similar to it, but you can import the previous .stk files to animate it again. You can use it to make animation smooth frame by frame.
With its frame-based feature, Stykz is easy to customize each frame. You can change previous and current frames to get what you want. You can download it to have a try considering its easy-to-use features.
Features:
- There is some animes file on this website, so you can have a reference.
- Edit animation in the software without using another editing window.
- You can share the final work with others including information.
Part 3 FAQ about Animation Software for Windows and Mac
01 Are Macs good for animation?
To be frank, Mac is a better choice to make animation if you want to have a smooth animation experience. For example, screen resolution is a crucial factor to make excellent animation. The good is Mac’s screen will never let you disappointed.
02 What is the best animation software for Mac?
The best animation software on mac includes Synfig Studio, Pencil2D Animation, Tupi, Blender, and more. Mentioned are free-to-use. Maya is also worth considering animation software if you are a professional user. Maya offers a 1-month free trial. After it is ended, the paid plans are month, 1-year, and 3-year.
03 Can you animate in Photoshop?
Yes, you can make basic animation in Photoshop. However, it only supports frame-based animation making. In this case, you need to use other professional software to make animation. But, you still can use Photoshop to meet your needs if you are a beginner.
Conclusion
With any of these free animation maker programs on Mac and Windows, you will have an easy time creating your next 2D or 3D video. Ensure you choose the program that has the features and compatibility that you desire. Then it is up to your creative mind to come up with stunning animations! If you want to make animation easily, you can also find inspiration through classical animated cartoon types with examples .
Shanoon Cox
Shanoon Cox is a writer and a lover of all things video.
Follow @Shanoon Cox
Also read:
- Unbiased Review Does Splice Video Editor Live Up to the Hype, In 2024
- Updated Best Free DVD Playback Options for Windows 10 Users Updated 2023 for 2024
- Updated Online Video Editing Made Easy A Practical Guide for Beginners and Pros for 2024
- In 2024, The Ultimate Guide to Creating a Ken Burns Effect in Software
- Updated In 2024, The Fastest Way to Get Twitter Video Dimension Insights
- Cutting It Up A Beginners Guide to Splitting Videos in Windows Live Movie Maker for 2024
- Updated Reverse, Rewind, Repeat A Beginners Guide to TikTok Video Editing for 2024
- TikTok Video Dimensions 2024 The Ultimate Aspect Ratio Guide
- Updated Top Android Movie Makers A Comprehensive Selection Guide for 2024
- Updated The Ultimate List of Facebook MP3 Converters Online for 2024
- New Ditch Easy Video Joiner Discover the Top 10 Video Combining Alternatives
- In 2024, Cut, Trim, and Polish The Best Free Online Video Editors
- New The Best Way to Convert YouTube Videos to MP4 A Step-by-Step Guide
- Updated 2024 Approved How to Get Filmora Torrent for FREE? No Virus
- Updated In 2024, VN Video Editor on PC Features, Pros, and Cons
- Get Instant Fake Faces Top Free Online Generators
- Updated 2024 Approved Pro-Grade Animation Top Software Picks for Mac and Windows Users
- New 2024 Approved From Snap to Story Mastering the Art of Vertical Mobile Video
- Top Meme Maker Apps for Android & iOS Devices (2023 Update) for 2024
- New S Best Movie Making Software for Windows PCs for 2024
- Find the Perfect Aiff Converter Expert Recommendations for 2024
- Updated Video Vibes The Best Mobile Editing Apps for iPhone and Android
- New 2024 Approved Free Sound Effects for Final Cut Pro A Step-by-Step Guide
- Updated Top 5 Best Windows Movie Maker Mac Equivalents for 2024
- New The Ultimate Guide to Changing Video Dimensions
- New Here Are some Useful Tips to Help You Get the Most Out of VirtualDub for 2024
- 5 Excellent Free Options to Rotate MOV Files
- Download Filmora 13 Video Editor Free No Watermark
- Updated 2024 Approved The Ultimate Video Editor Resource Top Picks for Every Device and Platform
- Updated AVS Video Editor Review Update Whats New , In 2024
- New In 2024, Discover Free Sound FX Websites and Integrate with Final Cut Pro
- Top 10 Waveform Generator Tools to Elevate Your Audio Game
- New In 2024, Best iPhone and iPad Apps for Movie Trailers
- New In 2024, Best VLC Trimming Software for Mac No Quality Loss Guaranteed
- New From Basic to Brilliant Mastering Video Editing Effects for Beginners
- Updated Create Viral Reaction Videos with These Mobile Apps
- Updated The Ultimate Guide to Online Stop Motion Software 5 Top Picks for 2024
- Updated 2024 Approved Make Them Laugh Best Video Dubbing Apps for Comedy and Entertainment
- New Want to Learn More About the AIFF File Format? Read This Article, Where We Tell You Everything You Need to Know
- New 2024 Approved Get Lumafusion for Mac OS Explore Alternative Video Editors
- With the Help of FCP You Can Easily Create Various Changes to Audio File with Time, One Can Adjust Volume Fading and Apply Audio Enhancement as per Need
- 2024 Approved Unlock New Possibilities Filmora X Adds ARM Support
- New The Ultimate Viewing Guide Amazon Prime Video Aspect Ratio and More
- New In 2024, Top-Rated Online Aspect Ratio Calculators
- 2024 Approved From Written to Spoken Effective Text-to-MP3 Conversion Methods
- New Watermark Your Videos for Free Best Software Options
- Updated In 2024, The Ultimate Guide to Downloading KineMaster on Mac
- In 2024, What Pokémon Evolve with A Dawn Stone For Samsung Galaxy F04? | Dr.fone
- Full Guide to Unlock Your Realme Note 50
- 3 Best Tools to Hard Reset Vivo Y78 5G | Dr.fone
- In 2024, Best Pokemons for PVP Matches in Pokemon Go For Motorola Moto G84 5G | Dr.fone
- In 2024, Top IMEI Unlokers for Your Vivo T2 Pro 5G Phone
- 2024 Approved Best Top Android Video Editing Apps for Free and Paid Users
- How does the stardust trade cost In pokemon go On Apple iPhone 15 Pro? | Dr.fone
- 2024 Approved Top 5 AI Movie Script Generators
- Fix Unfortunately Settings Has Stopped on Xiaomi Redmi 12 5G Quickly | Dr.fone
- Prevent Cross-Site Tracking on Realme GT 3 and Browser | Dr.fone
- In 2024, How to Fake GPS on Android without Mock Location For your Lava Agni 2 5G | Dr.fone
- How to Detect and Stop mSpy from Spying on Your Motorola Moto G04 | Dr.fone
- How To Transfer WhatsApp From Apple iPhone 6s Plus to other iPhone 12 Pro devices? | Dr.fone
- In 2024, How to Use Google Assistant on Your Lock Screen Of Vivo S18 Pro Phone
- Three Solutions to Hard Reset Oppo Find X7 Ultra? | Dr.fone
- In 2024, How to Bypass FRP on Samsung Galaxy S23 FE?
- How to Turn Off Google Location to Stop Tracking You on Samsung Galaxy A24 | Dr.fone
- In 2024, Reasons why Pokémon GPS does not Work On Motorola Moto G24? | Dr.fone
- New There Are Several Video Players that You Can Use to Watch Videos on Your PC. To Have a Better Experience Viewing Videos and Enhancing Them Across a Similar Platform, You Can Try Out VLC Media Player for PC for 2024
- 4 Ways to Transfer Music from Apple iPhone SE to iPod touch | Dr.fone
- In 2024, Disabled Apple iPhone 12 Pro Max How to Unlock a Disabled Apple iPhone 12 Pro Max? | Dr.fone
- How to Come up With the Best Pokemon Team On Samsung Galaxy M34? | Dr.fone
- 2024 Approved Top Picks Simple Video Editors for Beginners
- In 2024, Preparation to Beat Giovani in Pokemon Go For Oppo K11x | Dr.fone
- How to Restore Deleted Asus ROG Phone 7 Ultimate Photos An Easy Method Explained.
- How to unlock Itel S23+
- Best Pokemons for PVP Matches in Pokemon Go For Xiaomi 13 Ultra | Dr.fone
- New Introduction to LUTs Their Overview and Benefits
- How To Transfer Data From iPhone 15 Pro To Other iPhone 14 Pro devices? | Dr.fone
- Updated Want to Make a Fun and Cinematic Video with an Introductory Text Title? Learn the Stages of Editing with Filmora for This Effect Here
- Is Your Apple iPhone 11 Pro in Security Lockout? Proper Ways To Unlock
- Fake the Location to Get Around the MLB Blackouts on Honor V Purse | Dr.fone
- In 2024, Does Life360 Notify When You Log Out On Xiaomi Redmi 13C? | Dr.fone
- Top 4 Ways to Trace Vivo S18e Location | Dr.fone
- Title: New In 2024, Top 10 Famous Movies Made By Final Cut Pro
- Author: Amelia
- Created at : 2024-04-29 19:39:48
- Updated at : 2024-04-30 19:39:48
- Link: https://ai-driven-video-production.techidaily.com/new-in-2024-top-10-famous-movies-made-by-final-cut-pro/
- License: This work is licensed under CC BY-NC-SA 4.0.
