
:max_bytes(150000):strip_icc():format(webp)/GettyImages-1369568023-c596ac8d6b5a4f3682bda2fa0feb12bd.jpg)
New Smoother Skin in Minutes A Plugin-Free FCPX Editing Technique
Smoother Skin in Minutes: A Plugin-Free FCPX Editing Technique
Full Guide: How to Add a Skin Smoother Effect with Final Cut Pro

Liza Brown
Mar 27, 2024• Proven solutions
It’s quite common for vloggers to try to show the best of their states. However, makeup, weather, and the shooting equipment may disagree. So, how to tackle this problem?

Fortunately, we have the best solutions to fix the skin tone issue by using FCPX’s built-in tools or smooth skin plugins. You will learn how to strategically adjust your footage’s look for stylistic purposes and impress your audience with your video-editing skills. Now, let’s understand what a skin smoother effect is before learning how to add it in FCPX.
Part 1: How to Add a Skin Smoother Effect without Plugins in Final Cut Pro?
Smoothening the skin in Final Cut Pro is very simple. Simply select the video, choose Video effects to be applied, and adjust the percentages from the Inspector pane. You will get wrinkle-free skin with an astonishing look. While multiple plugins are also available to apply a skin smoother effect, you can use the built-in features of Final Cut Pro to smoothen the skin and decrease the amount of contrast.
Here’s how you can do this:
step1Choose the starting image and edit the clip into the timeline. Press Option and make a connected copy of the clip by dragging it up. The start and end points should match for syncing. In the Effects Browser, drag Blur > Gaussian Blur to apply the blur effect on the upper clip.

step2Open the Inspector pan and select Compositing from its bottom. Switch the Blend Mode to Lighten and adjust the Opacity slider as per your desired glow. Usually, 40 to 45% is ideal.

step3Now, go to the top of the Inspector and turn on the blue checkbox next to Gaussian. Adjust the blurring effect until you achieve your desired level of skin softening. It is highly recommended to blur using the horizontal setting to soften the skin while keeping the eyes sharp. Here, the glow is controlled by Opacity while skin softening is controlled by the Blue Amount.

For better results, add a Vignette by selecting and combining the two clips into a Compound Clip. From the Effects Browser, select Stylize > Vignette and adjust drag the vignette. Now, customize the compound clip settings in the Inspector pane until you achieve your desired look. Compare the results between two images before and after editing
Part 2: Where to Find Good Skin Smoother Plugins?
Plugins make it easy for beginners and users with limited expertise to add a skin smoother effect in Final Cut Pro X. You can find both free and paid skin smoother plugins for FCPX online. Given below are some popular skin smoothening plugins for Final Cut Pro X.
- Skin Smoother 2
Skin Smoother 2 is a powerful and easy-to-use plugin that allows you to smooth out unwanted skin details and enhance your facial appearance.
Price: $19.99 (One-time Charges)
Software Requirements: FCP 10.2 or later
Features:
- Enhanced control over facial adjustments with fine-tuning giving more natural results;
- Precise color sampling without a need to match up with present skin tones; and
- 3 to 5 times faster rendering.
- Color Finale
Color Finale is a user-friendly, fine-tuned, and fully-featured professional skin smoother plugin purpose bit for FCP.

Price: $152
Software Requirements: FCP 10.4.8 - 10.5.1
Features:
- Color wheels, curves, and LUT utilities;
- A complete professional color toolset for videographers, colorists, and editors; and
- Allows personal preference on the interface.
- Universe
A comprehensive FCP tool with 89 individual plugins to apply the next-generation skin smoothening and facial improvement effects.
Price: $199/year
Software Requirements: FCPX 10.5 or later
Features:
- Advanced transitions and effects and motion graphics tools;
- A variety of cool presents and text generators; and
- Number counters, chromatic aberration, VHS looks, camera shake, glitch effects.
Part 3: How to adopt Skin Smoothing Plugins into FCPX?
Follow these steps to use the Skin Smooth 2 Plugin for Final Cut Pro X:
- Purchase and download the Skin Smoother 2 plugin. Go to downloads, unzip the folder containing the plugin and install it on your computer.
- Open the FCPX, go to Effects, and click on Skin Smoother 2. A list of options will appear. Import the image or video you want to edit.

- To apply the skin-smoothing effect, click on Add Color Mask, and select the areas of the face where the color mask has to be added.
- Adjust the Skin Smoothing, Smoothing Mix, and the Softness of the color mask as per your requirements.
- Finally, click on Add Shape Mask, two circles will appear on the image. Adjust the covering area of both circles for Shape Mask 1 to add a smiling face.


Part 4: How to Smooth Skin in Filmora?
Wondershare Filmora features advanced tuning tools and a variety of video filters and overlays. Learn how to smooth skin or beautify your face in the video with this advanced video-editing software.


- Open Filmora, open New Project and click Import to load your videos to the timeline.
- Double click on the video to open the editing window. Open the Color panel and adjust parameters according to your preference such as white balance, tone, and 3D LUT, etc.
- Open the toolbar, click the Advanced Color Tuning icon, go to the advanced color tuning window, and adjust the white balance, color tint and temperature, HSL, 3D LUT, Vignette, and Light. If you are a beginner, try applying the present templates.
- To set a specific tone or beautify your video, open the Tools tab and click the Color Correction option to change the color tones.
- Open Effects and Transitions and select the skin smooth filter. Hover the cursor over the filter and click the plus icon in the middle to add that effect. You can also apply the effect to the whole clip by dragging and dropping it directly onto the video clip.
Part 5: How to smooth skin in Adobe Pro?
Given below are simple steps to create a face matter, control the skin smoothing, adjust color correction, and correct the skin glow in Adobe Pro by using the Beauty Studio Effect:
- Applying the Beauty Studio effect smoothens all parts of the image including the background. However, it will make your footage look artificial, which is not desired. Hence, turn on the Pixel Chooser, pick two colors with the eye dropper tool. Color A for the darker area and Color B for the lighter area.
- Underneath the Mocha Matte, use the eyedropper tool to select colors on the skin of the subject in your footage.
- Now, click on View Matte/Mask to visualize the image areas where you are applying the skin smoothing effect. The Beauty Studio will affect the smoothing effect in the white area while the black area will remain unsmoothed.
- Adjust the Saturation, Hue, and Luma softness to enhance the appearance of the skin, eyes, and mouth.
- To prevent the rest of the image from getting affected, create a Mocha mask around the face by clicking on the Mocha logo and drawing a mask with the X-Spline tool. Make sure the mask moves as the subject is moved after your track forward and back.
- Beauty Studio offers four levels of skin smoothing. You can adjust these levels as per your situation by lowering the smoothing amount for each level. For better results, adjust the levels at 70 or below.
- For the final touch, adjust the sharpening between 10-20 points, add saturation between 3 to 8 points for color correction, and add 5 to 10 points of glow. Your image is ready, compare the results before and after applying the effect.
Conclusion
Smooth skin with clear facial expressions attracts everyone. You can apply a skin smooth effect in your video by using advanced video editing tools like Final Cut Pro, Adobe Premium, and Wondershare Filmora.
There are two methods to add a skin smooth effect with FCPX: By using in-built software settings, or by using plugins like Skin Smoother 2, Color Finale, and Universe. Use Beauty Studio Effect in Adobe Pro to smooth skin and improve facial appearance. Finally, you can beautify the face in your video by adding transitions, making color adjustments, and applying different effects with Wondershare Filmora.
Liza Brown
Liza Brown is a writer and a lover of all things video.
Follow @Liza Brown
Liza Brown
Mar 27, 2024• Proven solutions
It’s quite common for vloggers to try to show the best of their states. However, makeup, weather, and the shooting equipment may disagree. So, how to tackle this problem?
Fortunately, we have the best solutions to fix the skin tone issue by using FCPX’s built-in tools or smooth skin plugins. You will learn how to strategically adjust your footage’s look for stylistic purposes and impress your audience with your video-editing skills. Now, let’s understand what a skin smoother effect is before learning how to add it in FCPX.
Part 1: How to Add a Skin Smoother Effect without Plugins in Final Cut Pro?
Smoothening the skin in Final Cut Pro is very simple. Simply select the video, choose Video effects to be applied, and adjust the percentages from the Inspector pane. You will get wrinkle-free skin with an astonishing look. While multiple plugins are also available to apply a skin smoother effect, you can use the built-in features of Final Cut Pro to smoothen the skin and decrease the amount of contrast.
Here’s how you can do this:
step1Choose the starting image and edit the clip into the timeline. Press Option and make a connected copy of the clip by dragging it up. The start and end points should match for syncing. In the Effects Browser, drag Blur > Gaussian Blur to apply the blur effect on the upper clip.
step2Open the Inspector pan and select Compositing from its bottom. Switch the Blend Mode to Lighten and adjust the Opacity slider as per your desired glow. Usually, 40 to 45% is ideal.
step3Now, go to the top of the Inspector and turn on the blue checkbox next to Gaussian. Adjust the blurring effect until you achieve your desired level of skin softening. It is highly recommended to blur using the horizontal setting to soften the skin while keeping the eyes sharp. Here, the glow is controlled by Opacity while skin softening is controlled by the Blue Amount.
For better results, add a Vignette by selecting and combining the two clips into a Compound Clip. From the Effects Browser, select Stylize > Vignette and adjust drag the vignette. Now, customize the compound clip settings in the Inspector pane until you achieve your desired look. Compare the results between two images before and after editing
Part 2: Where to Find Good Skin Smoother Plugins?
Plugins make it easy for beginners and users with limited expertise to add a skin smoother effect in Final Cut Pro X. You can find both free and paid skin smoother plugins for FCPX online. Given below are some popular skin smoothening plugins for Final Cut Pro X.
- Skin Smoother 2
Skin Smoother 2 is a powerful and easy-to-use plugin that allows you to smooth out unwanted skin details and enhance your facial appearance.
Price: $19.99 (One-time Charges)
Software Requirements: FCP 10.2 or later
Features:
- Enhanced control over facial adjustments with fine-tuning giving more natural results;
- Precise color sampling without a need to match up with present skin tones; and
- 3 to 5 times faster rendering.
- Color Finale
Color Finale is a user-friendly, fine-tuned, and fully-featured professional skin smoother plugin purpose bit for FCP.
Price: $152
Software Requirements: FCP 10.4.8 - 10.5.1
Features:
- Color wheels, curves, and LUT utilities;
- A complete professional color toolset for videographers, colorists, and editors; and
- Allows personal preference on the interface.
- Universe
A comprehensive FCP tool with 89 individual plugins to apply the next-generation skin smoothening and facial improvement effects.
Price: $199/year
Software Requirements: FCPX 10.5 or later
Features:
- Advanced transitions and effects and motion graphics tools;
- A variety of cool presents and text generators; and
- Number counters, chromatic aberration, VHS looks, camera shake, glitch effects.
Part 3: How to adopt Skin Smoothing Plugins into FCPX?
Follow these steps to use the Skin Smooth 2 Plugin for Final Cut Pro X:
- Purchase and download the Skin Smoother 2 plugin. Go to downloads, unzip the folder containing the plugin and install it on your computer.
- Open the FCPX, go to Effects, and click on Skin Smoother 2. A list of options will appear. Import the image or video you want to edit.
- To apply the skin-smoothing effect, click on Add Color Mask, and select the areas of the face where the color mask has to be added.
- Adjust the Skin Smoothing, Smoothing Mix, and the Softness of the color mask as per your requirements.
- Finally, click on Add Shape Mask, two circles will appear on the image. Adjust the covering area of both circles for Shape Mask 1 to add a smiling face.
Part 4: How to Smooth Skin in Filmora?
Wondershare Filmora features advanced tuning tools and a variety of video filters and overlays. Learn how to smooth skin or beautify your face in the video with this advanced video-editing software.
- Open Filmora, open New Project and click Import to load your videos to the timeline.
- Double click on the video to open the editing window. Open the Color panel and adjust parameters according to your preference such as white balance, tone, and 3D LUT, etc.
- Open the toolbar, click the Advanced Color Tuning icon, go to the advanced color tuning window, and adjust the white balance, color tint and temperature, HSL, 3D LUT, Vignette, and Light. If you are a beginner, try applying the present templates.
- To set a specific tone or beautify your video, open the Tools tab and click the Color Correction option to change the color tones.
- Open Effects and Transitions and select the skin smooth filter. Hover the cursor over the filter and click the plus icon in the middle to add that effect. You can also apply the effect to the whole clip by dragging and dropping it directly onto the video clip.
Part 5: How to smooth skin in Adobe Pro?
Given below are simple steps to create a face matter, control the skin smoothing, adjust color correction, and correct the skin glow in Adobe Pro by using the Beauty Studio Effect:
- Applying the Beauty Studio effect smoothens all parts of the image including the background. However, it will make your footage look artificial, which is not desired. Hence, turn on the Pixel Chooser, pick two colors with the eye dropper tool. Color A for the darker area and Color B for the lighter area.
- Underneath the Mocha Matte, use the eyedropper tool to select colors on the skin of the subject in your footage.
- Now, click on View Matte/Mask to visualize the image areas where you are applying the skin smoothing effect. The Beauty Studio will affect the smoothing effect in the white area while the black area will remain unsmoothed.
- Adjust the Saturation, Hue, and Luma softness to enhance the appearance of the skin, eyes, and mouth.
- To prevent the rest of the image from getting affected, create a Mocha mask around the face by clicking on the Mocha logo and drawing a mask with the X-Spline tool. Make sure the mask moves as the subject is moved after your track forward and back.
- Beauty Studio offers four levels of skin smoothing. You can adjust these levels as per your situation by lowering the smoothing amount for each level. For better results, adjust the levels at 70 or below.
- For the final touch, adjust the sharpening between 10-20 points, add saturation between 3 to 8 points for color correction, and add 5 to 10 points of glow. Your image is ready, compare the results before and after applying the effect.
Conclusion
Smooth skin with clear facial expressions attracts everyone. You can apply a skin smooth effect in your video by using advanced video editing tools like Final Cut Pro, Adobe Premium, and Wondershare Filmora.
There are two methods to add a skin smooth effect with FCPX: By using in-built software settings, or by using plugins like Skin Smoother 2, Color Finale, and Universe. Use Beauty Studio Effect in Adobe Pro to smooth skin and improve facial appearance. Finally, you can beautify the face in your video by adding transitions, making color adjustments, and applying different effects with Wondershare Filmora.
Liza Brown
Liza Brown is a writer and a lover of all things video.
Follow @Liza Brown
Video Editing Made Easy: Top Choices for Beginners
New to video editing and don’t know how and where to edit videos, don’t have a media production, or can’t find a qualified video editor to film and produce your highlights? It’s all fine! The purpose of today’s article is to demonstrate that, with the correct video editor, you also can create slick, sophisticated video content—regardless of perception—and maintain your content marketing strategy ahead of the game.
In the coming year, over half of marketers will add YouTube and Facebook platforms for streaming video; one-third of all internet usage is spent viewing video; video will make for more than 80% of all internet traffic by 2019. 80% of the time! Let’s get started! From the most affordable (i.e., free!) for the beginners. Here is the best basic video editor that includes the features you’ll find handy in a video editor.
In this article
01 Best Basic Video Editors for Windows and Mac [Free and Paid]
02 Best Free Basic Video Editors Online
Part 1: Best Basic Video Editors for Windows and Mac [Free and Paid]
What should you do when you do not have access to a video studio or a team of video experts on staff to film and edit your videos? Do not be concerned!
Without the need for an in-house team or outsourcing your video brand awareness, it’s quicker than ever to make high-quality films on your own. Here are some of the top picks.
1. Windows Photos App
Microsoft Photos, a free digital viewer and video editor included with Windows 10 and Windows 11, provides capable visual effects and video enhancements, as well as techniques for organizing and editing videos, everything in a touch-friendly functionality. Windows 10/11 comes with the Photos app pre-integrated. You don’t have to do anything to obtain the app when you have Windows 10/11.
The free Microsoft photo and video editing app is a great choice for viewing, editing, and sharing digital photos and videos. As the name suggests, it’s for Windows users – a delight to use a picture and video-editing tool that’s simple to use, clean, and has all the functions you need for basic viewing and repairs. Obviously, a full-featured program like the Windows Photos App is required for advanced photo organizing, optimization, and effects.

Clips may be trimmed or divided, text can be added , motion or 3D effects can be applied, filters can be used, and the speed can be changed . It’s a huge array that allows you to create an interesting result. There are over 20 options for adding soundtracks at the backend at the top.
The Photos app features the Automatic Video tool which can create video automatically with the images or videos uploaded .
2. iMovie
Okay, so this one won’t actually apply to those of you who deal with computers, but we’d be negligent if we left it off the roster. Thanks to its high-class interface, it doesn’t get much nicer than Apple iMovie regarding elegance and beauty. It is only supported by macOS and iOS.
The ten high-fidelity filters in iMovie are among the best in the video editing game, and you can utilize AirDrop to instantly and smoothly transmit your video to your Mac when you’re filming on your iPhone or working on your iPad.

Green-screen , or “chroma-key,” is among iMovie’s most prized tools since it enables you to relocate your characters to exotic locations—say, Hawaii—at any time. Do you want to add “Somewhere Over the Rainbow” to the image? Because iMovie is integrated with iTunes and GarageBand, you may quickly add unique music and sounds to your movie. Once your video is finished, send it out into the world via iMessage, Facebook, YouTube, or any of iMovie’s numerous easily accessible venues.
Here are some tips and tricks in editing videos with iMovie, hope that will help you edit faster.
3. Apple Photos App
Apple Photos, a free app included with macOS and iOS, is our pick for the best basic video editing software for Mac and iOS users because it embodies the company’s concept of fun, easy-to-use software. The interface of Apple Photos is clean, straightforward, and direct, allowing you to express yourself using basic, uncomplicated shortcuts rather than the complex layers of capabilities seen in more feature-rich products. It is only supported by Apple devices only.
Years, collections, and Moments are used to arrange the videos. Only current devices with 64-bit CPUs, such as the iPhone 5s or above, is compliant with the new release of Apple Photos. The Apple Photos mobile application includes thumbnail sliders to switch numerous characteristics of a photo quickly, in addition to options for auto-enhance, red-eye removal, and crop/rotate.
In Adjust, for example, you may move an indicator over a thumbnail variant to change the video’s luminance or color intensity. The one-click filters are basic, but they can provide some interesting results. You can also use your fingers or type text on display to mark up a video, trim a video and save it as a short teaser, change the slow-motion segment of a film, and trim a video and save it as a new video.
Here are some of the best Apple video editing software , make sure to check it if you’re using a Mac.
4. Wondershare Filmora
In terms of video editors, Wondershare Filmora has long been a current favorite of several, particularly regular customers, due to its ease of use. You will be met with the interface where you will do all of your film editing production. You’ll note how clean, tidy, and uncomplicated it looks and seems at first sight.
For Win 7 or later (64-bit)
For macOS 10.12 or later
Library, Timeline, and Preview are the three options available in the interface. By heading to a specific section of the video on your timeline, double-clicking the area, waiting for it to pop into the preview segment, and then adding effects, transitions, audio, or stabilizing and correcting the video using any of the editing options that are available to you, you can perform simple video editing features.

Additional but equally impressive functions include Lens Correction, Compositing, which applies blend modes to transitions and overlays; Drop Shadow, which applies shadows to images and words. And Auto Enhance, which significantly improves the quality of a substandard video.
5. Adobe Premiere Elements
Adobe Premiere Elements allows even beginner editors to create polished projects from their video sources. It’s an all-in-one video editing and video production software for those who love graphic user interfaces and straightforward layouts. You may sketch around an item or region within a video after adding an effect to it.
As the videos go on, Elements keeps track of this item and conceals the effect on it. You can brighten the sky, change the color of a driving car, and blur a person’s face. Guided Edits, which walk the user step-by-step through multiple things, is a fundamental component of Elements. It is supported by Windows
They help learn the ropes and gain confidence thanks to the user-friendly design. The current version of Premiere Elements has received some under-the-hood improvements, depending less on the CPU and more on the graphics card to improve results.

Part 2: Best Free Basic Video Editors Online
With the advent of social video sharing platforms such as YouTube, Vimeo, Instagram, and TikTok, video editing and production are no longer limited to experts. In this section of the article, we’ll go through the top 5 most highly suggested free online video editing tools that you may use.
The majority of the free basic video editor are beginner-friendly, so even if you’re new to video production, you can rapidly create a movie with these resources.
1. Clipchamp
Clipchamp is an excellent free online video editing program that includes a video compressor, converter, and webcam recorder in addition to video editing features. You can cut, crop, rotate and flip films with ease using drag-and-drop tools.
It allows you to upload media files from a local computer or online cloud storage sites like Google Drive, Dropbox, etc. You can also record the screen, camera or use the text to speech feature to generate audio sound.
Besides the basic video editing feature, this online video editor also provides some templates, stock video and music & sound effect libraries, which makes creating a video much easier. Furthermore, brightness, saturation, and contrast may all be easily adjusted. Transitions, text, overlays, and backdrops may all be added.
You may choose from a variety of aspect ratios, including 1:1, 9:16, 4:3, and 16:9, and it also comes with a built-in instruction to help you build a movie quickly. Plus, the software provides the editor with a large number of templates to pick from.

2. Magisto
Magisto is a fantastic online video creator who automatically transforms ordinary movies into gorgeous, dynamic videos and amazing social videos. It’s easy to use and speedy, with all the features you’d expect from software you paid your kidney for.

You may contribute photographs and videos to Magisto after signing up with your Facebook or Google+ account. Magisto also offers a variety of video themes for a variety of sectors, including birthday wishes, weddings, promotions, announcements, and inspiration. Select from trendy, family, business, social, seasonal, fun, and clean editing themes.
3. Kizoa
Kizoa is well-known for its extensive transition effects, which may help you create professional-looking films quickly. Kizoa also offers 4K UHD videos in various aspect ratios, including 16:9, 4:3, 3:2, 1:1, and 9:16, 3:4, and 2:3 portraits. That’s not even taking into account the software’s numerous templates.

Kizoa’s library has a large number of animations and effects which can be used to adapt films to meet the demands of certain editing tasks. Many aspects of video clips will be considerably easier to customize, such as position, size, length, and timing. Because there is no need to log in to obtain all of these amazing features, most pros and novices prefer to utilize Kizoa for their daily requirements.
4. Canva
Another one on our list is the Canva , which is as easy and simpler to use as the rest of these. The interface on a computer’s web browser is quite straightforward, with a sidebar on the left-side guiding you through all of the stages required to complete your work. You may choose from a variety of templates. They’re divided into categories like Education, Reviews, Explainer, Sale, Fashion, Slideshow, YouTube into, and Outro, and so on.

There are dozens of templates to pick from, with some appearing in many categories. Canva makes use of layers to allow things to be put in front of and behind each other. You may view and adjust that function by clicking the ‘Position’ option. Transparency, filters, color tweaks, cut, and flip are some of the other options available.
5. Adobe Spark
Adobe Spark , like Canva, is a video design platform. It enables you to generate a variety of images and social media material for professional or personal usage. Adobe Spark’s layout and usability will appeal to you. The primary interface, which appears before you use the editor, is straightforward.

Adobe Spark includes a vast library of templates when you’re looking for ideas or motivation for your creations. For organizations who wish to maintain a strong brand image in their material, the Brand area is a must-have element. You may develop new brands with the corporate logo, color palette, and typefaces as the starting point. Adobe Spark features a separate project tab that stores all of your work in one place.
Conclusion
Well, there you have it – the best basic video editors for beginners. Video editing has grown by ten folds from where it was five or six years ago. Almost anyone can edit a video to an extent. But what takes them to the next level is the use of efficient, effective, and productive software in place to do almost any kind of video editing. If you don’t want to install any software on your computer, you can try these online video editors or the preset video makers; if you want to improve the video quality, desktop software is recommended.
02 Best Free Basic Video Editors Online
Part 1: Best Basic Video Editors for Windows and Mac [Free and Paid]
What should you do when you do not have access to a video studio or a team of video experts on staff to film and edit your videos? Do not be concerned!
Without the need for an in-house team or outsourcing your video brand awareness, it’s quicker than ever to make high-quality films on your own. Here are some of the top picks.
1. Windows Photos App
Microsoft Photos, a free digital viewer and video editor included with Windows 10 and Windows 11, provides capable visual effects and video enhancements, as well as techniques for organizing and editing videos, everything in a touch-friendly functionality. Windows 10/11 comes with the Photos app pre-integrated. You don’t have to do anything to obtain the app when you have Windows 10/11.
The free Microsoft photo and video editing app is a great choice for viewing, editing, and sharing digital photos and videos. As the name suggests, it’s for Windows users – a delight to use a picture and video-editing tool that’s simple to use, clean, and has all the functions you need for basic viewing and repairs. Obviously, a full-featured program like the Windows Photos App is required for advanced photo organizing, optimization, and effects.
Clips may be trimmed or divided, text can be added , motion or 3D effects can be applied, filters can be used, and the speed can be changed . It’s a huge array that allows you to create an interesting result. There are over 20 options for adding soundtracks at the backend at the top.
The Photos app features the Automatic Video tool which can create video automatically with the images or videos uploaded .
2. iMovie
Okay, so this one won’t actually apply to those of you who deal with computers, but we’d be negligent if we left it off the roster. Thanks to its high-class interface, it doesn’t get much nicer than Apple iMovie regarding elegance and beauty. It is only supported by macOS and iOS.
The ten high-fidelity filters in iMovie are among the best in the video editing game, and you can utilize AirDrop to instantly and smoothly transmit your video to your Mac when you’re filming on your iPhone or working on your iPad.
Green-screen , or “chroma-key,” is among iMovie’s most prized tools since it enables you to relocate your characters to exotic locations—say, Hawaii—at any time. Do you want to add “Somewhere Over the Rainbow” to the image? Because iMovie is integrated with iTunes and GarageBand, you may quickly add unique music and sounds to your movie. Once your video is finished, send it out into the world via iMessage, Facebook, YouTube, or any of iMovie’s numerous easily accessible venues.
Here are some tips and tricks in editing videos with iMovie, hope that will help you edit faster.
3. Apple Photos App
Apple Photos, a free app included with macOS and iOS, is our pick for the best basic video editing software for Mac and iOS users because it embodies the company’s concept of fun, easy-to-use software. The interface of Apple Photos is clean, straightforward, and direct, allowing you to express yourself using basic, uncomplicated shortcuts rather than the complex layers of capabilities seen in more feature-rich products. It is only supported by Apple devices only.
Years, collections, and Moments are used to arrange the videos. Only current devices with 64-bit CPUs, such as the iPhone 5s or above, is compliant with the new release of Apple Photos. The Apple Photos mobile application includes thumbnail sliders to switch numerous characteristics of a photo quickly, in addition to options for auto-enhance, red-eye removal, and crop/rotate.
In Adjust, for example, you may move an indicator over a thumbnail variant to change the video’s luminance or color intensity. The one-click filters are basic, but they can provide some interesting results. You can also use your fingers or type text on display to mark up a video, trim a video and save it as a short teaser, change the slow-motion segment of a film, and trim a video and save it as a new video.
Here are some of the best Apple video editing software , make sure to check it if you’re using a Mac.
4. Wondershare Filmora
In terms of video editors, Wondershare Filmora has long been a current favorite of several, particularly regular customers, due to its ease of use. You will be met with the interface where you will do all of your film editing production. You’ll note how clean, tidy, and uncomplicated it looks and seems at first sight.
For Win 7 or later (64-bit)
For macOS 10.12 or later
Library, Timeline, and Preview are the three options available in the interface. By heading to a specific section of the video on your timeline, double-clicking the area, waiting for it to pop into the preview segment, and then adding effects, transitions, audio, or stabilizing and correcting the video using any of the editing options that are available to you, you can perform simple video editing features.
Additional but equally impressive functions include Lens Correction, Compositing, which applies blend modes to transitions and overlays; Drop Shadow, which applies shadows to images and words. And Auto Enhance, which significantly improves the quality of a substandard video.
5. Adobe Premiere Elements
Adobe Premiere Elements allows even beginner editors to create polished projects from their video sources. It’s an all-in-one video editing and video production software for those who love graphic user interfaces and straightforward layouts. You may sketch around an item or region within a video after adding an effect to it.
As the videos go on, Elements keeps track of this item and conceals the effect on it. You can brighten the sky, change the color of a driving car, and blur a person’s face. Guided Edits, which walk the user step-by-step through multiple things, is a fundamental component of Elements. It is supported by Windows
They help learn the ropes and gain confidence thanks to the user-friendly design. The current version of Premiere Elements has received some under-the-hood improvements, depending less on the CPU and more on the graphics card to improve results.
Part 2: Best Free Basic Video Editors Online
With the advent of social video sharing platforms such as YouTube, Vimeo, Instagram, and TikTok, video editing and production are no longer limited to experts. In this section of the article, we’ll go through the top 5 most highly suggested free online video editing tools that you may use.
The majority of the free basic video editor are beginner-friendly, so even if you’re new to video production, you can rapidly create a movie with these resources.
1. Clipchamp
Clipchamp is an excellent free online video editing program that includes a video compressor, converter, and webcam recorder in addition to video editing features. You can cut, crop, rotate and flip films with ease using drag-and-drop tools.
It allows you to upload media files from a local computer or online cloud storage sites like Google Drive, Dropbox, etc. You can also record the screen, camera or use the text to speech feature to generate audio sound.
Besides the basic video editing feature, this online video editor also provides some templates, stock video and music & sound effect libraries, which makes creating a video much easier. Furthermore, brightness, saturation, and contrast may all be easily adjusted. Transitions, text, overlays, and backdrops may all be added.
You may choose from a variety of aspect ratios, including 1:1, 9:16, 4:3, and 16:9, and it also comes with a built-in instruction to help you build a movie quickly. Plus, the software provides the editor with a large number of templates to pick from.
2. Magisto
Magisto is a fantastic online video creator who automatically transforms ordinary movies into gorgeous, dynamic videos and amazing social videos. It’s easy to use and speedy, with all the features you’d expect from software you paid your kidney for.
You may contribute photographs and videos to Magisto after signing up with your Facebook or Google+ account. Magisto also offers a variety of video themes for a variety of sectors, including birthday wishes, weddings, promotions, announcements, and inspiration. Select from trendy, family, business, social, seasonal, fun, and clean editing themes.
3. Kizoa
Kizoa is well-known for its extensive transition effects, which may help you create professional-looking films quickly. Kizoa also offers 4K UHD videos in various aspect ratios, including 16:9, 4:3, 3:2, 1:1, and 9:16, 3:4, and 2:3 portraits. That’s not even taking into account the software’s numerous templates.
Kizoa’s library has a large number of animations and effects which can be used to adapt films to meet the demands of certain editing tasks. Many aspects of video clips will be considerably easier to customize, such as position, size, length, and timing. Because there is no need to log in to obtain all of these amazing features, most pros and novices prefer to utilize Kizoa for their daily requirements.
4. Canva
Another one on our list is the Canva , which is as easy and simpler to use as the rest of these. The interface on a computer’s web browser is quite straightforward, with a sidebar on the left-side guiding you through all of the stages required to complete your work. You may choose from a variety of templates. They’re divided into categories like Education, Reviews, Explainer, Sale, Fashion, Slideshow, YouTube into, and Outro, and so on.
There are dozens of templates to pick from, with some appearing in many categories. Canva makes use of layers to allow things to be put in front of and behind each other. You may view and adjust that function by clicking the ‘Position’ option. Transparency, filters, color tweaks, cut, and flip are some of the other options available.
5. Adobe Spark
Adobe Spark , like Canva, is a video design platform. It enables you to generate a variety of images and social media material for professional or personal usage. Adobe Spark’s layout and usability will appeal to you. The primary interface, which appears before you use the editor, is straightforward.
Adobe Spark includes a vast library of templates when you’re looking for ideas or motivation for your creations. For organizations who wish to maintain a strong brand image in their material, the Brand area is a must-have element. You may develop new brands with the corporate logo, color palette, and typefaces as the starting point. Adobe Spark features a separate project tab that stores all of your work in one place.
Conclusion
Well, there you have it – the best basic video editors for beginners. Video editing has grown by ten folds from where it was five or six years ago. Almost anyone can edit a video to an extent. But what takes them to the next level is the use of efficient, effective, and productive software in place to do almost any kind of video editing. If you don’t want to install any software on your computer, you can try these online video editors or the preset video makers; if you want to improve the video quality, desktop software is recommended.
7 Video Mergers Without Watermark
Sometimes, when delving into the vast space of internet and trying to find the perfect online platforms or software in order to edit some videos, it might get frustrating to find only the ones with watermark. But of course, the resources are endless and in case we have some information, we can easily access the free video editing platforms which give us the opportunity to edit our videos without undesired logos on them. In this case, we will be discussing 6 video mergers without watermark, and the way we can use them – the tools and features they offer, and how we can get the best out of them.
- Photos by Microsoft
If you are too lazy to get high-quality results using popular video editors, like Filmora, try Photos App. It is a built-in program that usually opens your images on Windows 10, but you can also use it for merging your videos. And guess what? Since it comes within the system, all the features, although limited, are absolutely free.
How to Merge Videos on Windows using Photos App?

These are the steps to combine multiple clips in Windows 10 with Photos App.
Step 1: Open Photos App
Go to the ‘Start’ menu, find Photos App, and click to open it.
Step 2: Make a New Project
Click the ‘New video project’ (big blue box) under the ‘Video Projects’ tab. Alternatively, you can click the ‘New video’ button and select the ‘New video project’ option from the dropdown menu.
Step 3: Add Clips
Look for the text ‘Project library.’ Then click the ‘+ Add’ button. This will open a new window so you can select the clips you want to combine. Also, import videos one by one in a proper sequence because you cannot arrange them later.
Step 4: Make a Storyboard
After importing all the shots, you want to merge, click the ‘Place in storyboard’ button. This option will add all the chosen clips to your project’s storyboard.
- Fastreel by Movavi
Fastreel is a free online video editor. It is extremely easy to use right away, without installing anything. So, on Fastreel, one can edit videos or use online templates in the browser itself. Actually, the first tool we see in the list of Fastreel tools is to merge a video; then, it can be used in order to compress, make, cut, and create a video. On fastreel, you can add a watermark to a video, if wanted - so, it is very voluntary. As for the merging of a video, when this tool is chosen, it’s pretty simple to understand the steps – you can just drop/add multiple files right away.

The format must be either of the listed: MP4, MOV, MKV, AVI, and WMV, and the total size mustn’t exceed 500 MB. Then, in order to add some transitions, a style can be chosen from the drop-down menu, and after that, you should hit on Continue button to stitch the videos together. For the last step, you can export the result by selecting Download option.

- Free Video Cutter Joiner
Free Video Cutter Joiner – the name already explains it all by itself! This is a free video merger which will not add watermark on your video. The software needs to be downloaded, and contributes to quickly cutting and joining videos. Free Video Cutter Joiner has no size limits – it can cut and merge videos with large file sizes without any trouble, and speed of it to do so is quite fast. It supports several file formats, such as AVI, MPEG, WMV, 3GP FLV, MP4, WMV, MOV, VOB, etc.
So, once downloaded, you will see how user-friendly and straightforward the software is: it shows two of its features right away – video cutter and video joiner. You choose which one you are about to use – so, in our case, video joiner.

Then, you should click the the “+” icon, which lets you add files from your PC.

Then, hit on the Join button, and choose Indirect Join. Hitting on Start Join will start merging all the uploaded videos, and, wait a little until the process has been completed.

- Clideo
Clideo is the online platform that declares that it makes it super easy to edit all your video files, images and GIFs, and is totally free. It gives us the opportunities to: merge, compress, resize, cut, make, crop, speed, rotate, add music to, loop, flip, reverse, mute, filter, and adjust the videos. Add subtitles, make memes, create slideshows, etc. Therefore, it’s pretty rich in its tools and features.
As for merging videos, much like Fastreel, Clideo is pretty straightforward. You just click on the mentioned tool, and then easily choose files you would like to combine – you can merge any amount of video clips there. Several files can be chosen at the same time, or they can be added one by one.

Then it will take you to the editor, where you can join the videos. It’s possible to rearrange the files, by using drag-and-drop until they’re in the desired order. You can also add images and set duration from them, add audio, change its length and volume. The last step is choosing the aspect ratio and clicking the Export button. You can watch the preview of your result and then click on Download if you are satisfied with the merged file.

- Typito
Typito is a platform to merge videos online, as well as Fastreel and Clideo. It is free, and mostly aims to create combinations one can use to post on social network such as Instagram, Facebook, and Youtube. Typito supports a great many formats, some of them being MP4, AVI, FLV and WMV. You can edit your videos before merging them by trimming, cropping and resizing, and also add transition effects and music. It quickly combines footage, doesn’t watermark the videos, has brand kit of colors, fonts and style. It can also create collection of images, which is used for making Youtube compilation at most times.
To merge videos, you should choose the tool, then Get Started, and register and sign in first.

Then click on New Project, choose a video format (the platform offers you the list of the most popular ones), and it will take you to the editor, where you start off by adding media.

Drag and drop images or videos that you want to combine into a single video. You can also click to upload media files from your system or browse our Stock Media library for high-quality stock photos and video. Then, you can put your video clips in order, and work on it, if you want to use different tools, such as: edit, crop, trim, or resize them, as well as add text captions, images, and transitions. After you have previewed your video, you can click on the export button in the top right corner, and then, your merged video will be ready to be shared.
- Online UniConverter
Online UniConverter is the next online platform giving us the chance to merge our videos without watermark. It is an online analogue of Wondershare UniConverter, and is a very powerful platform, where you can trim, split, rotate, adjust, and download videos in HD quality. UniConverter supports numerous video formats, including MP4, AVI, MOV, MP3, WEBM. Online UniConverter offers various transitions and aspect ratios to fit the screen.

The web-site has lots of tools and features to offer: in the description of it, it reads: video converter, video compressor, video editor, audio converter, audio compressor, audio cutter, GIF maker, YouTube thumbnail, and image resizer. Importing media to the online UniConverter is extremely easy, and combining videos turns out to be a quick process, too.

Anyway, if you want to combine a lot of files and the size of them all exceeds 100 MB, you will not be able to use Online Uniconverter for that. It supports the video no more than 100 MB and suggests using Wondershare UniConverter (originally Wondershare Video Converter Ultimate) for Desktop.
- Wondershare Filmora
Last but not least – Filmora Video Editor ! Even it differs from other abovementioned video mergers, as in it is not totally free and adds a Filmora logo on exported project, it’s a great suggestion for people who want to make their videos look great with the help of various tools. When a user is ready to pay, Filmora offers a subscription model, and for a bit more, one can get a permanent license. The software costs $51.99 per year or $79.99 for an outright purchase (prices are regularly discounted).
Wondershare Filmora has a clear and pleasing interface, offers trimming, transitions, overlays, several effects, as well as some more advanced and modern features, such as motion tracking. For this one particular software, we will be offering a step by step guide about how to merge videos there.
For Win 7 or later (64-bit)
For macOS 10.14 or later
- Open the program.
- Choose Import Media Files Here.

- Choose your

- We can click and drag, essentially, “insert” a video in a sequence below. The Linear Timeline allows us to understand exactly when a video clip ends and when a new one starts.

- Accordingly, we can make one video “sit” next to another. If we want or need it, we will add the third video clip, fourth, and so on.

- We can view the entire video and save the video afterwards.
- Start to save video - we make sure the result is exactly what we wanted, find the Export button above the timeline and click on it.

- In the opened window, on the left side, to be precise, if we observe well, we can already choose in which format we want to save our clip. On the right we can indicate what name we want to give to our video; The location where we want to store it; Also, we see the resolution (which we can modify freely after clicking on Settings); Size; Duration.

- In Settings, we can decide how much quality the video should have, how many kbps will be the Bit Rate, how many fps the Frame Rate should be, etc., but most likely, beginners will not need to change all this.

- After selecting everything, right-click on the Export button in the lower right corner of the window and the program will start saving the material.


So, in this article, we introduced some online platforms and software for you to use if you would like to merge videos and combine them into one. These are: Fastreel, Free Video Cutter Joiner, Clideo, Typito, Online UniConverter, Wondershare Filmora. It’s up to you which one you would like to choose to merge your videos or edit them in any other way, but you can try either of them and choose to your own liking – even so, of course, there are some other video mergers worth considering, that we might mention in the coming articles. Before then, enjoy with free video editors, without watermark!
If you are too lazy to get high-quality results using popular video editors, like Filmora, try Photos App. It is a built-in program that usually opens your images on Windows 10, but you can also use it for merging your videos. And guess what? Since it comes within the system, all the features, although limited, are absolutely free.
How to Merge Videos on Windows using Photos App?
These are the steps to combine multiple clips in Windows 10 with Photos App.
Step 1: Open Photos App
Go to the ‘Start’ menu, find Photos App, and click to open it.
Step 2: Make a New Project
Click the ‘New video project’ (big blue box) under the ‘Video Projects’ tab. Alternatively, you can click the ‘New video’ button and select the ‘New video project’ option from the dropdown menu.
Step 3: Add Clips
Look for the text ‘Project library.’ Then click the ‘+ Add’ button. This will open a new window so you can select the clips you want to combine. Also, import videos one by one in a proper sequence because you cannot arrange them later.
Step 4: Make a Storyboard
After importing all the shots, you want to merge, click the ‘Place in storyboard’ button. This option will add all the chosen clips to your project’s storyboard.
- Fastreel by Movavi
Fastreel is a free online video editor. It is extremely easy to use right away, without installing anything. So, on Fastreel, one can edit videos or use online templates in the browser itself. Actually, the first tool we see in the list of Fastreel tools is to merge a video; then, it can be used in order to compress, make, cut, and create a video. On fastreel, you can add a watermark to a video, if wanted - so, it is very voluntary. As for the merging of a video, when this tool is chosen, it’s pretty simple to understand the steps – you can just drop/add multiple files right away.
The format must be either of the listed: MP4, MOV, MKV, AVI, and WMV, and the total size mustn’t exceed 500 MB. Then, in order to add some transitions, a style can be chosen from the drop-down menu, and after that, you should hit on Continue button to stitch the videos together. For the last step, you can export the result by selecting Download option.
- Free Video Cutter Joiner
Free Video Cutter Joiner – the name already explains it all by itself! This is a free video merger which will not add watermark on your video. The software needs to be downloaded, and contributes to quickly cutting and joining videos. Free Video Cutter Joiner has no size limits – it can cut and merge videos with large file sizes without any trouble, and speed of it to do so is quite fast. It supports several file formats, such as AVI, MPEG, WMV, 3GP FLV, MP4, WMV, MOV, VOB, etc.
So, once downloaded, you will see how user-friendly and straightforward the software is: it shows two of its features right away – video cutter and video joiner. You choose which one you are about to use – so, in our case, video joiner.
Then, you should click the the “+” icon, which lets you add files from your PC.
Then, hit on the Join button, and choose Indirect Join. Hitting on Start Join will start merging all the uploaded videos, and, wait a little until the process has been completed.
- Clideo
Clideo is the online platform that declares that it makes it super easy to edit all your video files, images and GIFs, and is totally free. It gives us the opportunities to: merge, compress, resize, cut, make, crop, speed, rotate, add music to, loop, flip, reverse, mute, filter, and adjust the videos. Add subtitles, make memes, create slideshows, etc. Therefore, it’s pretty rich in its tools and features.
As for merging videos, much like Fastreel, Clideo is pretty straightforward. You just click on the mentioned tool, and then easily choose files you would like to combine – you can merge any amount of video clips there. Several files can be chosen at the same time, or they can be added one by one.
Then it will take you to the editor, where you can join the videos. It’s possible to rearrange the files, by using drag-and-drop until they’re in the desired order. You can also add images and set duration from them, add audio, change its length and volume. The last step is choosing the aspect ratio and clicking the Export button. You can watch the preview of your result and then click on Download if you are satisfied with the merged file.
- Typito
Typito is a platform to merge videos online, as well as Fastreel and Clideo. It is free, and mostly aims to create combinations one can use to post on social network such as Instagram, Facebook, and Youtube. Typito supports a great many formats, some of them being MP4, AVI, FLV and WMV. You can edit your videos before merging them by trimming, cropping and resizing, and also add transition effects and music. It quickly combines footage, doesn’t watermark the videos, has brand kit of colors, fonts and style. It can also create collection of images, which is used for making Youtube compilation at most times.
To merge videos, you should choose the tool, then Get Started, and register and sign in first.
Then click on New Project, choose a video format (the platform offers you the list of the most popular ones), and it will take you to the editor, where you start off by adding media.
Drag and drop images or videos that you want to combine into a single video. You can also click to upload media files from your system or browse our Stock Media library for high-quality stock photos and video. Then, you can put your video clips in order, and work on it, if you want to use different tools, such as: edit, crop, trim, or resize them, as well as add text captions, images, and transitions. After you have previewed your video, you can click on the export button in the top right corner, and then, your merged video will be ready to be shared.
- Online UniConverter
Online UniConverter is the next online platform giving us the chance to merge our videos without watermark. It is an online analogue of Wondershare UniConverter, and is a very powerful platform, where you can trim, split, rotate, adjust, and download videos in HD quality. UniConverter supports numerous video formats, including MP4, AVI, MOV, MP3, WEBM. Online UniConverter offers various transitions and aspect ratios to fit the screen.
The web-site has lots of tools and features to offer: in the description of it, it reads: video converter, video compressor, video editor, audio converter, audio compressor, audio cutter, GIF maker, YouTube thumbnail, and image resizer. Importing media to the online UniConverter is extremely easy, and combining videos turns out to be a quick process, too.
Anyway, if you want to combine a lot of files and the size of them all exceeds 100 MB, you will not be able to use Online Uniconverter for that. It supports the video no more than 100 MB and suggests using Wondershare UniConverter (originally Wondershare Video Converter Ultimate) for Desktop.
- Wondershare Filmora
Last but not least – Filmora Video Editor ! Even it differs from other abovementioned video mergers, as in it is not totally free and adds a Filmora logo on exported project, it’s a great suggestion for people who want to make their videos look great with the help of various tools. When a user is ready to pay, Filmora offers a subscription model, and for a bit more, one can get a permanent license. The software costs $51.99 per year or $79.99 for an outright purchase (prices are regularly discounted).
Wondershare Filmora has a clear and pleasing interface, offers trimming, transitions, overlays, several effects, as well as some more advanced and modern features, such as motion tracking. For this one particular software, we will be offering a step by step guide about how to merge videos there.
For Win 7 or later (64-bit)
For macOS 10.14 or later
- Open the program.
- Choose Import Media Files Here.
- Choose your
- We can click and drag, essentially, “insert” a video in a sequence below. The Linear Timeline allows us to understand exactly when a video clip ends and when a new one starts.
- Accordingly, we can make one video “sit” next to another. If we want or need it, we will add the third video clip, fourth, and so on.
- We can view the entire video and save the video afterwards.
- Start to save video - we make sure the result is exactly what we wanted, find the Export button above the timeline and click on it.
- In the opened window, on the left side, to be precise, if we observe well, we can already choose in which format we want to save our clip. On the right we can indicate what name we want to give to our video; The location where we want to store it; Also, we see the resolution (which we can modify freely after clicking on Settings); Size; Duration.
- In Settings, we can decide how much quality the video should have, how many kbps will be the Bit Rate, how many fps the Frame Rate should be, etc., but most likely, beginners will not need to change all this.
- After selecting everything, right-click on the Export button in the lower right corner of the window and the program will start saving the material.
So, in this article, we introduced some online platforms and software for you to use if you would like to merge videos and combine them into one. These are: Fastreel, Free Video Cutter Joiner, Clideo, Typito, Online UniConverter, Wondershare Filmora. It’s up to you which one you would like to choose to merge your videos or edit them in any other way, but you can try either of them and choose to your own liking – even so, of course, there are some other video mergers worth considering, that we might mention in the coming articles. Before then, enjoy with free video editors, without watermark!
Say Goodbye to Vegas Pro: 10 Top Mac Video Editing Software
For creating high-grade dynamic videos, simply shooting or recording a clip is not enough. Finding the best Sony Ve gas alternatives for Mac is essential since the software mainly targets Windows users.
Thanks to developers, there are many free and paid options to start your video editing journey on a Mac. Let’s first have a look at alternative software you could consider.
- Lightworks
- Wondershare Filmora
- Adobe Premiere Pro
- HitFilm Express
- Kdenlive
- OpenShot
- Blender
- Jahshaka
- Final Cut Pro
- Cyberlink PowerDirector 365
- What are the limitations when using Sony Vegas (Vegas Pro) on Mac?
- Hot FAQs about Vegas Pro Alternatives
Part 1: Sony Vegas Pro Alternatives & Competitors Overview
Here is a list of the top 10 tools we found after research. For an easier understanding, the following are the essential points of difference between alternative video editing software types for Sony Vegas Pro in a tabular form.
| Software | Supported OS | Price | Editor’s Verdict |
|---|---|---|---|
| Lightworks | Windows, Mac, Linux | Create-$9.99/month, Pro-$23.99/month | Medium-Difficult |
| Wondershare Filmora | Windows, Mac | Annual-$49.99, Perpetual-$79.99 | Easy |
| Adobe Premiere Pro | Windows, Mac | $20.99/month | Easy-Medium |
| HitFilm Express | Windows, Mac | Free | Easy |
| Kdenlive | Windows, Mac, Linux | Free | Medium-Difficult |
| OpenShot | Windows, Mac, Linux, OsX | Free | Medium-Difficult |
| Blender | Windows, Mac, Linux | Free | Easy |
| Jahshaka | Windows, Linux, OsX | Free | Easy-Medium |
| Final Cut Pro | Mac | Lifetime-$299.99 | Easy-Medium |
| Cyberlink PowerDirector 365 | Windows, Mac | Lifetime-$52.50 | Easy-Medium |
Part 2: Top 10 Sony Vegas (Vegas Pro) Alternatives & Competitors
Now that you know the primary differences between the Sony Vegas Pro alternatives. Are you find anything you like? Let’s move on to more details for your further consideration.
1. Lightworks
With Lightworks, using the independent timeline codec, format, and resolution alteration in videos is extremely simple. In addition, you can use the multi-cam editing feature for real-time, high-quality editing work. Moreover, drag and drop elements into videos for optimized video editing work, including pre-existing Storyboard points.
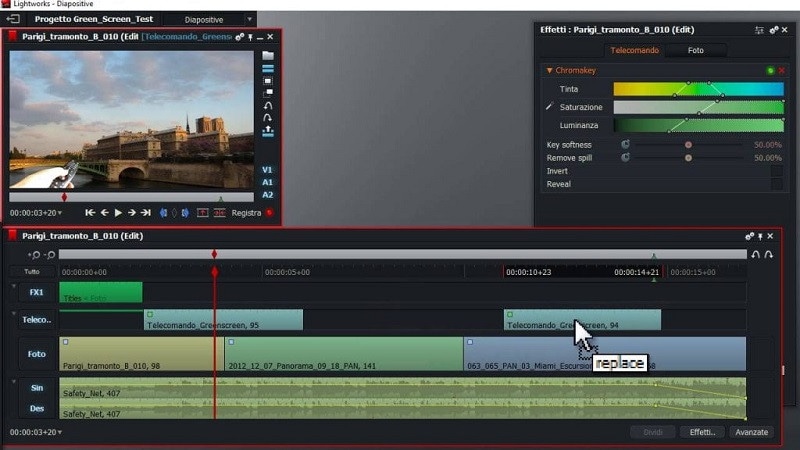
Main Features:
- Industry-grade features like QC, transcoding, and automated transfer are available.
- Edit files at different FPS limits and use three-point editing for recording/source files.
- Insert files and overwrite on a new project, replace, backfill, and fit to fill your video clips.
- Attach Storyboard tiles and match-frame clips/sub-clips easily.
Pros
- Flexible functionality and speedy transfers
- Edit files with professional movie-like quality
- Auto Sync feature for automatic timeline re-syncing is available
Cons
- Direct X is only available on the Windows version
- TotalFX plugin is not available for free- you have to upgrade to use them
OS Compatibility: Windows , Mac , Linux
Best For: Editing experts creating visually animated and professional-looking short videos can work with Lightworks.
What users say:
For professional-level video editing work, Lightworks brings a lot of resources and elements to users. According to reviews , people who have tried it have experienced better video editing functionality with these resources.
2. Wondershare Filmora
The top Vegas Pro alternative that both Windows and Mac users can opt for is Filmora. The software has advanced AI-incorporated editing functions for automated editing work, including preset effects from FX plugins. Besides that, you can easily add pre-set transitions, audio clips, text, images, and more.
Beginners find it simple to navigate through its interface and can opt for the Instant Mode function for automatic video edits .
Free Download For Win 7 or later(64-bit)
Free Download For macOS 10.14 or later

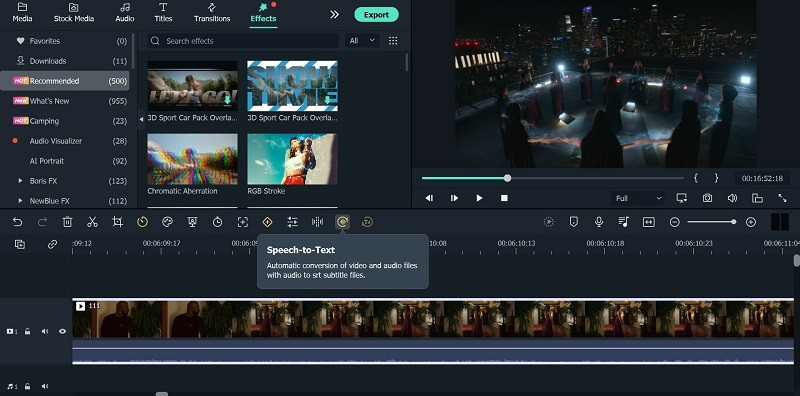
For a better idea of how this works, you should check out this tutorial video: https://filmora.wondershare.com/get-creative/make-a-video-quickly.html
Main Features:
- Instant Mode is available for automatic video/audio project editing out of 6 shorter clips.
- Support Advanced editing tools like Chroma Key and AI Portrait.
- Record voiceover, apply speech-to-text/text-to-speech functions, and more audio editing features.
- OpenFX plugins like BorisFX and NewBlue FX for a better list of pre-set effects.
Pros
- Simple to use and navigate on the editor timeline, especially with drag-and-drop support
- Output your editing files in different video/audio formats
- Quickly share the file on Vimeo or YouTube, besides downloading it on the local hard drive
Cons
- Free trial users cannot bring their Instant Mode-created videos into the editor timeline
- 4K support only with selected MKV, MOV, M4V (for Mac), and MP4 codecs
OS Compatibility: Windows , Mac
G2 Rating: 4.4 out of 5
Best For: All types of users like educators, students, homeowners, businesses, and video editors for comprehensive video editing tools and uses.
What users say:
Filmora is extremely simple to use, with advanced features available for top-level video editing work. Users mention in reviews how they have benefitted from the simple functionality and dynamic AI-based features available here for video editing.
3. Adobe Premiere Pro
If you are looking for high-quality programs like Sony Vegas, Adobe Premiere Pro is a reliable choice. This editing software allows you to easily create, delete, and move big video projects. Moreover, you can work on multiple files simultaneously and use shortcuts for faster editing work.
Preset filters and editing features are also available here, especially if they choose the Adobe Creative Cloud option.
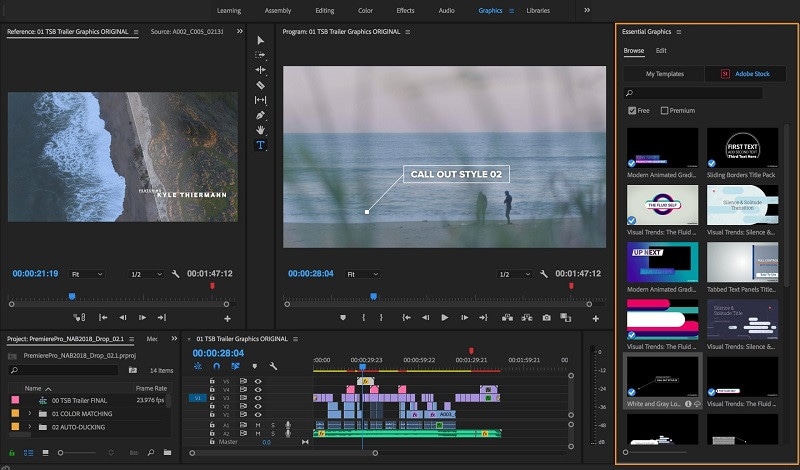
Main Features:
- Multiple pre-set transitions and effects are available for quick thematic changes.
- Add graphics, titles, and captions.
- Color grading and correction tools are available.
- It is possible to add keyframing and animation elements.
Pros
- Opting for group plans for video editing practice and learning using Adobe Premiere Pro is possible
- Aligns audio with videos instantly during editing
- Utilize Quick Export functionality for video files in some taps
Cons
- Windows High Contrast Mode is supported but to a limited extent, like with menus and title bars
- HDR workflows can only be handled on the Windows version with DisplayHDR 400 support
OS Compatibility: Windows , Mac
G2 Rating: 4.5 out of 5
Best For: Professional editors and trainers can use the various plans under Adobe Premiere Pro for video/audio editing.
What users say:
Advertisers and videographers enjoy high-grade video editing features and like the simple effects and interface quality. The motion graphics support in Adobe Premiere Pro is high-grade as well.
4. HitFilm Express
A capable Sony Vegas free alternative that you should check out is HitFilm Express. With this, you can expect many prepared designs for quick video edits. Additionally, you can manually customize the video files you are working on with high-grade personalization features available in the timeline.

Main Features:
- Pre-set customizable designs are available.
- Built-in sound effects and soundtracks are usable for free.
- Cache renders in timelines are optimized.
- The New Grade Clips feature allows users to apply varying effects to many video clips.
Pros
- Stable process of switching between timelines with an active orbit tool
- Easy to switch between 2D/3D timelines while using the text tool
- Simple to use for an unlimited period
Cons
- Does not work on older versions than Windows 10 and macOS 10.14
- Users cannot integrate this with Vegas Pro like before
OS Compatibility: Windows , Mac
TechRadar Rating: 4.5 out of 5
Best For: This software is a high-quality video editor for custom video editing work, fit for beginners and professionals alike.
What users say:
HitFilm Express is easy to use and efficient in the market for professional-level editing. The tutorial is available here for quick learning about the steps, and expandable features are well-admired by users.
5. Kdenlive
A high-quality Sony Vegas open-source variety that you should seriously consider is Kdenlive. The video editor comes with MLT framework support and holds many tools for optimizing video editing.
To simplify, you can arrange and adjust various video/audio tracks and mute or lock specific ones as needed. Add everything from filters, texts, and transitions using this editor for high-grade video projects.
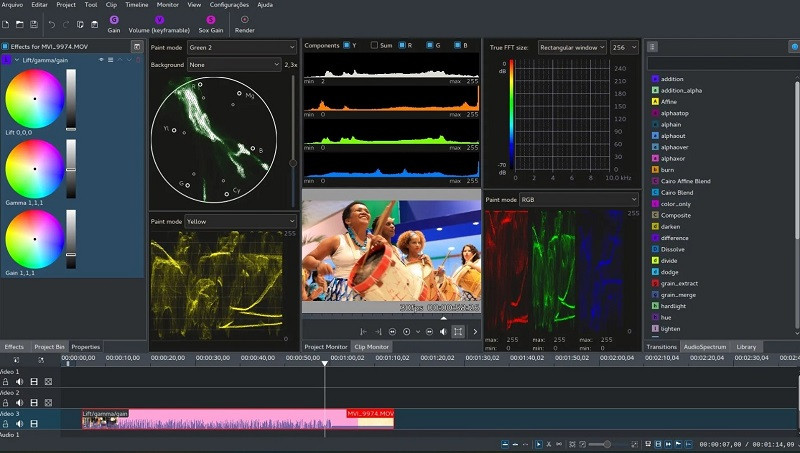
Main Features:
- Get an automatic backup of your video project while you are editing it.
- Use proxy editing to create low-resolution source clip copies and render them later on computers.
- Multiple video/audio scopes are available for monitoring projects like vectorscope, waveform, and RDB Parade.
- Many transition and effect choices to use.
Pros
- Flexibility with themes to add with multiple options
- Pre-render specific timeline parts for preview
- Effects are simple to use with keyframing quality
Cons
- Complex for completely non-technical users to adapt to
- Only supports 64-bit versions in regards to Windows-based compatibility
Trustpilot Rating: 3.7 out of 5
Best For: High-level editing experts who need strong video editing and monitoring features in an open-source platform.
What users say:
Kdenlive, as an open-source video editing software, assures quick and straightforward usability with projects. Per reviews , users like the ability to make simple video edits without bugs in this editor and quickly export finished projects.
6. OpenShot
OpenShot is a high-quality cross-platform video editor that you can use on different devices for quick but dynamic video project edits. Use keyframing ability here to adjust the animated elements you add to the file.
Moreover, cut the videos with simple steps and add many audio tracks/background videos/watermarks in layers. Also, get several video effects to optimize the video look easily.
Main Features:
- Adjust video speed in reverse motion, fast forward, and slow motion.
- Render effects and 3D animated elements into the video project.
- Get title templates and edit them as needed.
- Visualize the background audio beats with waveform support.
Pros
- Very user-friendly interface with a simple navigation guarantee
- Supports more than 70 languages that you can translate as well using LaunchPad
- Drag-and-drop functionality is supported for adding images, audio, and videos into the OpenShot editor timeline
Cons
- Some bug issues can occur
- Slightly complex learning curve
OS Compatibility: Windows , Linux , OsX
G2 Rating: 4.4 out of 5
Best For: Professional-level video editing experts can opt for this cross-platform free software for high-quality video creations.
What users say:
The OpenShot software is suitable for high-quality video editing across different devices and operating systems. Users like the lack of automated watermarks on all videos, its simple dashboard, and its multi-track editing ability, all available for free.
7. Blender
Blender is free video editing software like Sony Vegas that users can use for video editing, but it is also effective for game development with animations. Indeed, you can create and render dynamic-looking scenes with features like Cycles.
Furthermore, the software has a rich modelling toolset with solutions like curves and sculpting tools.

Main Features:
- Completely customization-friendly UI, shortcuts, and window layout here.
- Customization and scripting are possible to do with this software due to the Python API support.
- Supports access and integration of many pipeline tools for projects.
- Comes with advanced simulation-based features available in MantaFlow and Bullet libraries.
Pros
- Basic and advanced tools for quick video edits
- Strong composition and masking ability with object-based motion tracking benefits
- Easily create short animations with Blender
Cons
- Data under the standalone games created here fall under GPL conditions
- Strict licensing rules are applicable here
OS Compatibility: Windows , Mac , Linux
G2 Rating: 4.5 out of 5
Best For: Game developers and videographers for companies can use this open-source platform for creation and editing.
What users say:
Blender is a capable software for animation-based editing, with high-quality game-based features and interactive elements that make editing simple. As per reviews , users like the simple animation-based tools and fast rendering it offers.
8. Jahshaka
Users of Jahshaka can experience an inclusive, collaborative environment for metaverse-level editing work. This free editing software, like Sony Vegas, focuses mainly on VR-based editing functions and comes with powerful tools for project management and content creation.
Take the help of other team members to collaborate on dynamic virtual world building, editing, and publishing.
Main Features:
- Compatible player for different desktop and mobile devices.
- Create diversified worlds and scenes with one comprehensive platform.
- Immersive software 3D video development.
- Access to pre-built content and libraries of scenes and assets
Pros
- Easily share and distribute your virtual projects
- Deliver final projects offline and online
- An interactive multi-user engine is available
Cons
- Usable for a niche audience and does not include standard video editing tools
- Jahshaka V2 legacy support is no longer active
OS Compatibility: Windows , Linux , OsX
SourceForge Rating: 4.4 out of 5
Best For: Professional video editors who want a collaborative experience in VR-based development and publishing.
What users say:
Jahshaka is a suitable program for optimized VR-based editing with many preset features and themes to choose from. Most users enjoy the new features and worlds and can work with them efficiently.
9. Final Cut Pro
One of the top Sony Vegas alternatives Mac users can safely turn to is Final Cut Pro, which has powerful modern video editing features. With this software, you will access Cinematic Mode, which you can use to create stylish and thematic video scenes.
Similarly, the Object Tracker features utilize ML technology to automatically detect objects and faces in moving videos. It can align effects and titles accurately with the graphical elements in videos.

Main Features:
- Object Tracker feature for using color correction and adding texts into moving videos.
- Accelerated functional for motion tracking with Apple Neural Engine.
- Add high-quality effects and titles into videos with Cinematic Mode support.
- Preset audio tracks and royalty-free sound effects are available for editing.
Pros
- Handle color grading for optimized scene quality
- Adjust the field depth and focus depth in clips
- Share projects across iOS and macOS platforms
Cons
- Not valid for Windows users
- Relatively high cost to avail the paid version with all advanced features
OS Compatibility: Mac
TrustRadius Rating: 4.8 out of 5
Best For: Professional video editors, students, and filmmakers who want to create cinematic-quality video projects.
What users say:
Final Cut Pro is an efficient Mac-based video editing tool with easy sharing and editing capabilities, rich effects/transitions options, and fast rendering ability. Customers enjoy the intuitive non-linear editor, easy accessibility to social media platforms for file exporting, and live scrubbing, as noted in one review .
10. Cyberlink PowerDirector 365
Another Sony Vegas mac alternative for Windows you should give a try is PowerDirector 365 from Cyberlink. This software removes or compiles video clips and uses masking features like image/custom masks.
Preset special effects, blending modes, and sound effects are available here for quick editing. Additionally, the AI-powered Motion Tracking traces objects in clips and adds graphics, animations, and text quickly in line with it.

Main Features:
- You can create and remove videos with masking features.
- Drag and drop the pre-set effects and texts into videos.
- Adjust video clips with tools for border, gradation, and shadowing.
- Multiple animations, callouts, graphics, and stickers to add to videos.
Pros
- Use green screen functionality for quick background removal or editing
- Automatic audio mastering and mixing functionality are available
- Keyframing benefits for customized animations like scaling and positioning
Cons
- Dolby Digital-centric audio codec is not available for users
- Users can try features like Room Echo Removal and NVIDIA A/V Denoise only on Windows 11
OS Compatibility: Windows
TechRadar Rating: 4.5 out of 5
Best For: Professional videographers and regular users who want a Windows-based video editing software for standard video clip editing.
What users say:
Cyberlink PowerDirector is a powerful video editor with standard editing functions many users have tried and benefited from. According to customers , the program has high-quality video and audio editing benefits for presentations, with additional effects/splitting/cropping features.
Part 3: What are the limitations when using Sony Vegas (Vegas Pro) on Mac?
Yes, with the given Sony Vegas alternatives, Mac and Windows users can benefit heavily. But why is it important to try for a replacement when Sony Vegas Pro is relatively efficient software?
To know the answer, you should take the time to understand its limitations, which do exist.
It only works for Windows users
The Sony Vegas Pro software is not available for Mac or other operating systems besides Windows. In addition, it’ll be really complex and time-consuming, even if you opt for virtual machine software or handle dual booting techniques to configure the software on your Mac or Linux.
You need to invest in other hardware
Sony Vegas Pro does do not work within one comprehensive platform like other capable video editing software types, like Wondershare Filmora . You have to acquire a powerful PC and tools to operate it separately. The software works very slowly on older devices.
Not incredibly unique
The functions of Sony Vegas Pro match somewhat with other options in the market. So, users would not expect much value in purchasing this software’s plans that they want to upgrade from their previous system, but on the other hand, the available features are mostly standard-level in functionality as well.
Hot FAQs about Vegas Pro Alternatives
After knowing these details, many users still have specific common queries about opting for a Sony Vegas Pro alternatively. So these are some common FAQs about this- answered.
1. Can Sony Vegas be used on a Mac?
No, it is impossible to directly use Sony Vegas on macOS devices since it does not support it. Instead, you have to separately use a dual boot strategy or virtual machine software to activate the video editor on Mac devices, but the process for that is complex.
2. Is Wondershare Filmora or Vegas Pro better?
Wondershare Filmora and Vegas Pro are top-level options in video and audio editing projects with professional-level editing accuracy. However, Filmora has a cohesive ecosystem with rich AI and standard functions and comes with Mac/Windows support. So, in that sense, Filmora is comparatively a better choice.
Final Words
In place of Sony Vegas Pro, any of these options would also give you a great user experience. Out of them, Filmora is one that we will recommend due to its multi-faceted benefits and features for Mac and Windows users. Ultimately, make your decision based on your particular needs.
Free Download For Win 7 or later(64-bit)
Free Download For macOS 10.14 or later
Part 1: Sony Vegas Pro Alternatives & Competitors Overview
Here is a list of the top 10 tools we found after research. For an easier understanding, the following are the essential points of difference between alternative video editing software types for Sony Vegas Pro in a tabular form.
| Software | Supported OS | Price | Editor’s Verdict |
|---|---|---|---|
| Lightworks | Windows, Mac, Linux | Create-$9.99/month, Pro-$23.99/month | Medium-Difficult |
| Wondershare Filmora | Windows, Mac | Annual-$49.99, Perpetual-$79.99 | Easy |
| Adobe Premiere Pro | Windows, Mac | $20.99/month | Easy-Medium |
| HitFilm Express | Windows, Mac | Free | Easy |
| Kdenlive | Windows, Mac, Linux | Free | Medium-Difficult |
| OpenShot | Windows, Mac, Linux, OsX | Free | Medium-Difficult |
| Blender | Windows, Mac, Linux | Free | Easy |
| Jahshaka | Windows, Linux, OsX | Free | Easy-Medium |
| Final Cut Pro | Mac | Lifetime-$299.99 | Easy-Medium |
| Cyberlink PowerDirector 365 | Windows, Mac | Lifetime-$52.50 | Easy-Medium |
Part 2: Top 10 Sony Vegas (Vegas Pro) Alternatives & Competitors
Now that you know the primary differences between the Sony Vegas Pro alternatives. Are you find anything you like? Let’s move on to more details for your further consideration.
1. Lightworks
With Lightworks, using the independent timeline codec, format, and resolution alteration in videos is extremely simple. In addition, you can use the multi-cam editing feature for real-time, high-quality editing work. Moreover, drag and drop elements into videos for optimized video editing work, including pre-existing Storyboard points.
Main Features:
- Industry-grade features like QC, transcoding, and automated transfer are available.
- Edit files at different FPS limits and use three-point editing for recording/source files.
- Insert files and overwrite on a new project, replace, backfill, and fit to fill your video clips.
- Attach Storyboard tiles and match-frame clips/sub-clips easily.
Pros
- Flexible functionality and speedy transfers
- Edit files with professional movie-like quality
- Auto Sync feature for automatic timeline re-syncing is available
Cons
- Direct X is only available on the Windows version
- TotalFX plugin is not available for free- you have to upgrade to use them
OS Compatibility: Windows , Mac , Linux
Best For: Editing experts creating visually animated and professional-looking short videos can work with Lightworks.
What users say:
For professional-level video editing work, Lightworks brings a lot of resources and elements to users. According to reviews , people who have tried it have experienced better video editing functionality with these resources.
2. Wondershare Filmora
The top Vegas Pro alternative that both Windows and Mac users can opt for is Filmora. The software has advanced AI-incorporated editing functions for automated editing work, including preset effects from FX plugins. Besides that, you can easily add pre-set transitions, audio clips, text, images, and more.
Beginners find it simple to navigate through its interface and can opt for the Instant Mode function for automatic video edits .
Free Download For Win 7 or later(64-bit)
Free Download For macOS 10.14 or later
For a better idea of how this works, you should check out this tutorial video: https://filmora.wondershare.com/get-creative/make-a-video-quickly.html
Main Features:
- Instant Mode is available for automatic video/audio project editing out of 6 shorter clips.
- Support Advanced editing tools like Chroma Key and AI Portrait.
- Record voiceover, apply speech-to-text/text-to-speech functions, and more audio editing features.
- OpenFX plugins like BorisFX and NewBlue FX for a better list of pre-set effects.
Pros
- Simple to use and navigate on the editor timeline, especially with drag-and-drop support
- Output your editing files in different video/audio formats
- Quickly share the file on Vimeo or YouTube, besides downloading it on the local hard drive
Cons
- Free trial users cannot bring their Instant Mode-created videos into the editor timeline
- 4K support only with selected MKV, MOV, M4V (for Mac), and MP4 codecs
OS Compatibility: Windows , Mac
G2 Rating: 4.4 out of 5
Best For: All types of users like educators, students, homeowners, businesses, and video editors for comprehensive video editing tools and uses.
What users say:
Filmora is extremely simple to use, with advanced features available for top-level video editing work. Users mention in reviews how they have benefitted from the simple functionality and dynamic AI-based features available here for video editing.
3. Adobe Premiere Pro
If you are looking for high-quality programs like Sony Vegas, Adobe Premiere Pro is a reliable choice. This editing software allows you to easily create, delete, and move big video projects. Moreover, you can work on multiple files simultaneously and use shortcuts for faster editing work.
Preset filters and editing features are also available here, especially if they choose the Adobe Creative Cloud option.
Main Features:
- Multiple pre-set transitions and effects are available for quick thematic changes.
- Add graphics, titles, and captions.
- Color grading and correction tools are available.
- It is possible to add keyframing and animation elements.
Pros
- Opting for group plans for video editing practice and learning using Adobe Premiere Pro is possible
- Aligns audio with videos instantly during editing
- Utilize Quick Export functionality for video files in some taps
Cons
- Windows High Contrast Mode is supported but to a limited extent, like with menus and title bars
- HDR workflows can only be handled on the Windows version with DisplayHDR 400 support
OS Compatibility: Windows , Mac
G2 Rating: 4.5 out of 5
Best For: Professional editors and trainers can use the various plans under Adobe Premiere Pro for video/audio editing.
What users say:
Advertisers and videographers enjoy high-grade video editing features and like the simple effects and interface quality. The motion graphics support in Adobe Premiere Pro is high-grade as well.
4. HitFilm Express
A capable Sony Vegas free alternative that you should check out is HitFilm Express. With this, you can expect many prepared designs for quick video edits. Additionally, you can manually customize the video files you are working on with high-grade personalization features available in the timeline.
Main Features:
- Pre-set customizable designs are available.
- Built-in sound effects and soundtracks are usable for free.
- Cache renders in timelines are optimized.
- The New Grade Clips feature allows users to apply varying effects to many video clips.
Pros
- Stable process of switching between timelines with an active orbit tool
- Easy to switch between 2D/3D timelines while using the text tool
- Simple to use for an unlimited period
Cons
- Does not work on older versions than Windows 10 and macOS 10.14
- Users cannot integrate this with Vegas Pro like before
OS Compatibility: Windows , Mac
TechRadar Rating: 4.5 out of 5
Best For: This software is a high-quality video editor for custom video editing work, fit for beginners and professionals alike.
What users say:
HitFilm Express is easy to use and efficient in the market for professional-level editing. The tutorial is available here for quick learning about the steps, and expandable features are well-admired by users.
5. Kdenlive
A high-quality Sony Vegas open-source variety that you should seriously consider is Kdenlive. The video editor comes with MLT framework support and holds many tools for optimizing video editing.
To simplify, you can arrange and adjust various video/audio tracks and mute or lock specific ones as needed. Add everything from filters, texts, and transitions using this editor for high-grade video projects.
Main Features:
- Get an automatic backup of your video project while you are editing it.
- Use proxy editing to create low-resolution source clip copies and render them later on computers.
- Multiple video/audio scopes are available for monitoring projects like vectorscope, waveform, and RDB Parade.
- Many transition and effect choices to use.
Pros
- Flexibility with themes to add with multiple options
- Pre-render specific timeline parts for preview
- Effects are simple to use with keyframing quality
Cons
- Complex for completely non-technical users to adapt to
- Only supports 64-bit versions in regards to Windows-based compatibility
Trustpilot Rating: 3.7 out of 5
Best For: High-level editing experts who need strong video editing and monitoring features in an open-source platform.
What users say:
Kdenlive, as an open-source video editing software, assures quick and straightforward usability with projects. Per reviews , users like the ability to make simple video edits without bugs in this editor and quickly export finished projects.
6. OpenShot
OpenShot is a high-quality cross-platform video editor that you can use on different devices for quick but dynamic video project edits. Use keyframing ability here to adjust the animated elements you add to the file.
Moreover, cut the videos with simple steps and add many audio tracks/background videos/watermarks in layers. Also, get several video effects to optimize the video look easily.
Main Features:
- Adjust video speed in reverse motion, fast forward, and slow motion.
- Render effects and 3D animated elements into the video project.
- Get title templates and edit them as needed.
- Visualize the background audio beats with waveform support.
Pros
- Very user-friendly interface with a simple navigation guarantee
- Supports more than 70 languages that you can translate as well using LaunchPad
- Drag-and-drop functionality is supported for adding images, audio, and videos into the OpenShot editor timeline
Cons
- Some bug issues can occur
- Slightly complex learning curve
OS Compatibility: Windows , Linux , OsX
G2 Rating: 4.4 out of 5
Best For: Professional-level video editing experts can opt for this cross-platform free software for high-quality video creations.
What users say:
The OpenShot software is suitable for high-quality video editing across different devices and operating systems. Users like the lack of automated watermarks on all videos, its simple dashboard, and its multi-track editing ability, all available for free.
7. Blender
Blender is free video editing software like Sony Vegas that users can use for video editing, but it is also effective for game development with animations. Indeed, you can create and render dynamic-looking scenes with features like Cycles.
Furthermore, the software has a rich modelling toolset with solutions like curves and sculpting tools.
Main Features:
- Completely customization-friendly UI, shortcuts, and window layout here.
- Customization and scripting are possible to do with this software due to the Python API support.
- Supports access and integration of many pipeline tools for projects.
- Comes with advanced simulation-based features available in MantaFlow and Bullet libraries.
Pros
- Basic and advanced tools for quick video edits
- Strong composition and masking ability with object-based motion tracking benefits
- Easily create short animations with Blender
Cons
- Data under the standalone games created here fall under GPL conditions
- Strict licensing rules are applicable here
OS Compatibility: Windows , Mac , Linux
G2 Rating: 4.5 out of 5
Best For: Game developers and videographers for companies can use this open-source platform for creation and editing.
What users say:
Blender is a capable software for animation-based editing, with high-quality game-based features and interactive elements that make editing simple. As per reviews , users like the simple animation-based tools and fast rendering it offers.
8. Jahshaka
Users of Jahshaka can experience an inclusive, collaborative environment for metaverse-level editing work. This free editing software, like Sony Vegas, focuses mainly on VR-based editing functions and comes with powerful tools for project management and content creation.
Take the help of other team members to collaborate on dynamic virtual world building, editing, and publishing.
Main Features:
- Compatible player for different desktop and mobile devices.
- Create diversified worlds and scenes with one comprehensive platform.
- Immersive software 3D video development.
- Access to pre-built content and libraries of scenes and assets
Pros
- Easily share and distribute your virtual projects
- Deliver final projects offline and online
- An interactive multi-user engine is available
Cons
- Usable for a niche audience and does not include standard video editing tools
- Jahshaka V2 legacy support is no longer active
OS Compatibility: Windows , Linux , OsX
SourceForge Rating: 4.4 out of 5
Best For: Professional video editors who want a collaborative experience in VR-based development and publishing.
What users say:
Jahshaka is a suitable program for optimized VR-based editing with many preset features and themes to choose from. Most users enjoy the new features and worlds and can work with them efficiently.
9. Final Cut Pro
One of the top Sony Vegas alternatives Mac users can safely turn to is Final Cut Pro, which has powerful modern video editing features. With this software, you will access Cinematic Mode, which you can use to create stylish and thematic video scenes.
Similarly, the Object Tracker features utilize ML technology to automatically detect objects and faces in moving videos. It can align effects and titles accurately with the graphical elements in videos.
Main Features:
- Object Tracker feature for using color correction and adding texts into moving videos.
- Accelerated functional for motion tracking with Apple Neural Engine.
- Add high-quality effects and titles into videos with Cinematic Mode support.
- Preset audio tracks and royalty-free sound effects are available for editing.
Pros
- Handle color grading for optimized scene quality
- Adjust the field depth and focus depth in clips
- Share projects across iOS and macOS platforms
Cons
- Not valid for Windows users
- Relatively high cost to avail the paid version with all advanced features
OS Compatibility: Mac
TrustRadius Rating: 4.8 out of 5
Best For: Professional video editors, students, and filmmakers who want to create cinematic-quality video projects.
What users say:
Final Cut Pro is an efficient Mac-based video editing tool with easy sharing and editing capabilities, rich effects/transitions options, and fast rendering ability. Customers enjoy the intuitive non-linear editor, easy accessibility to social media platforms for file exporting, and live scrubbing, as noted in one review .
10. Cyberlink PowerDirector 365
Another Sony Vegas mac alternative for Windows you should give a try is PowerDirector 365 from Cyberlink. This software removes or compiles video clips and uses masking features like image/custom masks.
Preset special effects, blending modes, and sound effects are available here for quick editing. Additionally, the AI-powered Motion Tracking traces objects in clips and adds graphics, animations, and text quickly in line with it.
Main Features:
- You can create and remove videos with masking features.
- Drag and drop the pre-set effects and texts into videos.
- Adjust video clips with tools for border, gradation, and shadowing.
- Multiple animations, callouts, graphics, and stickers to add to videos.
Pros
- Use green screen functionality for quick background removal or editing
- Automatic audio mastering and mixing functionality are available
- Keyframing benefits for customized animations like scaling and positioning
Cons
- Dolby Digital-centric audio codec is not available for users
- Users can try features like Room Echo Removal and NVIDIA A/V Denoise only on Windows 11
OS Compatibility: Windows
TechRadar Rating: 4.5 out of 5
Best For: Professional videographers and regular users who want a Windows-based video editing software for standard video clip editing.
What users say:
Cyberlink PowerDirector is a powerful video editor with standard editing functions many users have tried and benefited from. According to customers , the program has high-quality video and audio editing benefits for presentations, with additional effects/splitting/cropping features.
Part 3: What are the limitations when using Sony Vegas (Vegas Pro) on Mac?
Yes, with the given Sony Vegas alternatives, Mac and Windows users can benefit heavily. But why is it important to try for a replacement when Sony Vegas Pro is relatively efficient software?
To know the answer, you should take the time to understand its limitations, which do exist.
It only works for Windows users
The Sony Vegas Pro software is not available for Mac or other operating systems besides Windows. In addition, it’ll be really complex and time-consuming, even if you opt for virtual machine software or handle dual booting techniques to configure the software on your Mac or Linux.
You need to invest in other hardware
Sony Vegas Pro does do not work within one comprehensive platform like other capable video editing software types, like Wondershare Filmora . You have to acquire a powerful PC and tools to operate it separately. The software works very slowly on older devices.
Not incredibly unique
The functions of Sony Vegas Pro match somewhat with other options in the market. So, users would not expect much value in purchasing this software’s plans that they want to upgrade from their previous system, but on the other hand, the available features are mostly standard-level in functionality as well.
Hot FAQs about Vegas Pro Alternatives
After knowing these details, many users still have specific common queries about opting for a Sony Vegas Pro alternatively. So these are some common FAQs about this- answered.
1. Can Sony Vegas be used on a Mac?
No, it is impossible to directly use Sony Vegas on macOS devices since it does not support it. Instead, you have to separately use a dual boot strategy or virtual machine software to activate the video editor on Mac devices, but the process for that is complex.
2. Is Wondershare Filmora or Vegas Pro better?
Wondershare Filmora and Vegas Pro are top-level options in video and audio editing projects with professional-level editing accuracy. However, Filmora has a cohesive ecosystem with rich AI and standard functions and comes with Mac/Windows support. So, in that sense, Filmora is comparatively a better choice.
Final Words
In place of Sony Vegas Pro, any of these options would also give you a great user experience. Out of them, Filmora is one that we will recommend due to its multi-faceted benefits and features for Mac and Windows users. Ultimately, make your decision based on your particular needs.
Free Download For Win 7 or later(64-bit)
Free Download For macOS 10.14 or later
Also read:
- New In 2024, Final Cut Pro vs Express Which One Reigns Supreme?
- New In 2024, FCPX Essentials The Ultimate Guide to Learning Final Cut Pro X
- New Free Windows Video Editing Software 10 Alternatives to Movie Maker
- Updated Download 4K Videos in MP4 The Most Reliable Conversion Method for 2024
- YouTube Thumbnail Secrets Unlocking the Power of Eye-Catching Images
- 2024 Approved Easy Facebook MP3 Conversion Top 8 Online Solutions
- Updated Vlogging Made Easy Best Video Editing Software for Popular Sites for 2024
- Updated 2024 Approved Top 16 AVI Video Cutters Trim/Cut AVI Videos Windows, MAC, Android, iPhone, and Online
- New Many People Think that There Isnt a Lot of Good Video Editing Software for Ubuntu, but This Isnt True. Here We Will Cover the Best Ubuntu Video Editor for Your Convenience
- Updated Digitalize Your DVDs A Beginners Guide to Video Conversion for 2024
- New In 2024, From Still to Motion 10 Top Image to Video Maker Tools
- The Ultimate Guide to Choosing an OGG Converter for 2024
- Best Slow-Mo to Fast-Mo Converters for Computer
- New Video Editing for Kids Made Easy Top 10 Apps to Get Started for 2024
- Stop Motion on Demand Cloud Software Solutions, Guides, and Options for 2024
- Updated The Inside Scoop on Mp3 Conversion What Youll Gain From Reading Our Article
- Bringing Your Vision to Life Top 7 Animation Drawing Software Tools for 2024
- Updated 2024 Approved OS X Mavericks MP4 Editing Software Top Picks
- New Unleash Your Creativity Best GoPro Video Editing Software (Beyond GoPro Studio) for 2024
- New The Ultimate Guide to Free MOV Video Editors Top 10 Picks for 2024
- Updated 2024 Approved Top Vignette Editing Apps for Mobile Devices Free and Premium Options
- New From Beginner to Pro 5 Final Cut Pro Editing Tips to Improve Your Skills for 2024
- 2024 Approved Professional-Grade Glitch Video Editors Top Paid and Free Tools for Windows, Mac, and Online
- Lip Sync Mastery Unlock the Power of These 5 Amazing Apps for 2024
- Updated Top Apple Video Editors for Creators for 2024
- Top Android Movie Makers A Comprehensive Comparison
- New Merge MOV Files for Free 5 Best Options for 2024
- Updated In 2024, The Best of Both Worlds Top 10 Desktop and Online Video Trimmers
- Updated In 2024, A Beginners Guide to Audio Editing in Final Cut Pro
- Updated Mavericks MP4 Video Editor Edit and Enhance Your Videos for 2024
- New Get Windows Movie Maker A Step-by-Step Download and Installation Guide
- New Video Pace Control A Beginners Guide to Camtasia Speed Adjustment for 2024
- Updated 2024 Approved Transform Your Videos Best Mobile Editing Apps for iPhone and Android
- 2024 Approved Free AVI Video Rotation Tools Compare the Best Options for Windows, MAC, Mobile & Online
- New In 2024, Discover the Best Top 10 Free MP4 Video Editing Tools
- New In 2024, A Step-by-Step Guide to Video Editing with QuickTime on Mac
- Updated In 2024, Make an Impact 10 Best Free Invitation Video Creators Online
- Updated 2024 Approved Video Editing on Windows Best iMovie Substitutes
- New Steady Shots Best Free Android Video Stabilizers
- Unlock YouTube Sounds The Ultimate Audio Download Tutorial for 2024
- 2024 Approved Free GIF Looping Software for Animated Fun 2023 Review
- Sim Unlock OnePlus Ace 2V Phones without Code 2 Ways to Remove Android Sim Lock
- Methods to Change GPS Location On Poco C65 | Dr.fone
- In 2024, 2 Ways to Transfer Text Messages from HTC U23 Pro to iPhone 15/14/13/12/11/X/8/ | Dr.fone
- New 2024 Approved 10 Cartoon Character Makers to Create Animated Characters
- How to Change your Infinix Note 30 5G Location on Twitter | Dr.fone
- In 2024, How to Reset Apple ID and Apple Password On iPhone X
- How to Fix Unfortunately, Contacts Has Stopped Error on Vivo Y78 5G | Dr.fone
- 7 Fixes for Unfortunately, Phone Has Stopped on Realme GT Neo 5 | Dr.fone
- In 2024, 5 Techniques to Transfer Data from OnePlus Nord CE 3 Lite 5G to iPhone 15/14/13/12 | Dr.fone
- How to Unlock a Network Locked Poco F5 Pro 5G Phone?
- How to Recover deleted pictures on iPhone 15? 5 Best Solutions | Stellar
- Top 12 Prominent Vivo Y36 Fingerprint Not Working Solutions
- All You Need To Know About Mega Greninja For Apple iPhone 15 Plus | Dr.fone
- How to Track WhatsApp Messages on Nokia C32 Without Them Knowing? | Dr.fone
- How to Downgrade Apple iPhone X to an Older iOS Version? | Dr.fone
- Will iSpoofer update On Samsung Galaxy Z Fold 5 | Dr.fone
- Samsung Galaxy S23 Tactical Edition Unlock Tool - Remove android phone password, PIN, Pattern and fingerprint
- In 2024, Top 10 Best Spy Watches For your Samsung Galaxy A54 5G | Dr.fone
- In 2024, 5 Ways to Move Contacts From Vivo Y100i to iPhone (13/14/15) | Dr.fone
- Guide to Mirror Your Honor Magic 6 Lite to Other Android devices | Dr.fone
- How to Fix & Retrieve Pictures/Videos From a Water Damaged iPhone 12 That Wont Turn on | Stellar
- In 2024, How to Detect and Stop mSpy from Spying on Your Lava Blaze 2 | Dr.fone
- In 2024, Why does the pokemon go battle league not available On Nokia 150 (2023) | Dr.fone
- Featuring The Use of Camera Shake in Creating the Best Videos for 2024
- Title: New Smoother Skin in Minutes A Plugin-Free FCPX Editing Technique
- Author: Amelia
- Created at : 2024-05-19 11:47:47
- Updated at : 2024-05-20 11:47:47
- Link: https://ai-driven-video-production.techidaily.com/new-smoother-skin-in-minutes-a-plugin-free-fcpx-editing-technique/
- License: This work is licensed under CC BY-NC-SA 4.0.
