
:max_bytes(150000):strip_icc():format(webp)/samsung-soundbar-dolby-atmos-569f1fdd925e46ab8b3e1f51d95e1e6c.jpg)
New Steady Your Shot The Best Free Online Video Stabilizers for 2024
Steady Your Shot: The Best Free Online Video Stabilizers
8 Best Free Online Video Stabilizers 2024

Liza Brown
Mar 27, 2024• Proven solutions
The time we spend with our families is invaluable, which is why most of us feel the need to capture the best moments from family vacations, birthdays or any other occasions that we want to remember. However, producing steady handheld footage is a challenging task even for experienced cinematographers.
You don’t have to worry if your video clip is shaky, because there are free online tools available that let you stabilize footage in only a few simple steps.
We’ve selected several of the best online video stabilizers that enable its users to fix their videos effortlessly, so let’s see which web-based platforms you can use to stabilize your videos.
If you need more powerful video stabilizers on computer, Filmora will be your best choice. Filmora video editor is a powerful video stabilizing software filled with powerful editing features. Unlike other editing software, Filmora is compatible with both Windows and Mac.
Some of the above video stabilizers are complex and require expertise. On the other hand, Wondershare Filmora video editor provides you with an easy-to-use interface and easy navigation options.
Key features:
- Modern and intuitive interface.
- Video stabilization in one click.
- Powerful edition features.
- Rich effects and templates.
Steps to stabilize videos using Wondershare Filmora video editor
8 Best Free Online Video Stabilizers
Even though fixing shaky footage is possible, you shouldn’t expect miracles because if your footage contains too many cameras shakes these online video stabilizers won’t be able to produce perfectly stable footage in every shot. On the other hand, if your video clips contain only a moderate amount of shaky footage the following video stabilizers will help you create smooth videos.
Let’s have a look at how you can stabilize your videos with these free online video stabilizers.
1. EZGIF Online Video Stabilizer

Besides offering a quick and easy way to stabilize video clips, EZGIF platform also lets you crop, resize or rotate videos. In addition, you can also cut videos, change their playback speed or add subtitles. You simply have to upload a video file to the platform, but you have to keep in mind that EZGIF only lets you upload files smaller than 120 MB.
You don’t have to worry about the video’s format, because the platform supports nearly all popular file formats like MP4, AVI, or MPEG. Here’s how you can stabilize your video with EZGIF Online Video Stabilizer.
Step 1: Once you open the Video Stabilizer option, you will be asked to either upload the video you’d like to stabilize from the hard drive on your computer or paste the video’s URL if the clip you want to stabilize is stored online. Hit the Upload Video button after you perform either of these actions and wait for the upload process to be finalized.
Step 2: To initiate the video stabilization process, you just have to click on the Stabilize button. The process will start automatically and its duration depends on the size of the file you’re stabilizing.
Step 3: Once the process is complete your video will appear in the Stabilized Video box, where you can preview it before downloading it as an MP4 file to your computer. You must click on the Save icon below the video to start the downloading the video.
2. Video Stabilize

If you are looking for an easy way to rotate, crop, slice or stabilize your videos, this free online platform may be one of your best options. There are no size limitations, which means that you can upload video clips of all sizes.
To make things even better, the platform supports all common file formats such as MOV or MP4, so you don’t have to waste time trying to change the video’s file format before you start the video stabilization process.
Step 1: Upon arriving at video-stabilize.com, you can simply drag and drop the video file to the designated box. Alternatively, you can click on the Upload your movie button or you can upload the video using Dropbox, OneDrive or Google Drive. Simply select the file you want to stabilize and the upload process will begin automatically.
Step 2: The size of the video clip and the speed of your Internet connection determines how long the upload is going to last. Once your video is uploaded you should simply click on the Transform Video to start the process of stabilizing your video. Arm yourself with patience, because you might have to spend more than half an hour waiting for the video stabilization process to be completed.
Step 3: Click on the Download Result button after the platform finishes stabilizing your video. You can choose the destination on your hard drive where the video file is going to be stored.
3. YouTube Video Editor
The world’s largest video sharing platform also offers basic video editing options to its users. In order to access the YouTube’s video editor, you must first create an account so you can upload your videos to the platform. You can upload virtually any file format because YouTube supports a wide range of video file formats.
The only downside is that the platform doesn’t allow you to download a video you stabilized directly to your computer, although you can use the video’s URL to share it with your friends online.
Step 1: Head over to your YouTube channel and upload a video by clicking on the Camera icon in the upper right corner of the screen. Before the upload starts you can change the Privacy settings from Public to Private so your video won’t be visible to other YouTube users.
Step 2: After the video is uploaded to your channel, open the Creator Studio and click on the Video Manager option. This action will enable you to see the video you’ve just uploaded. Click on the Edit button that is located below the video and proceed to open the Enhancements tab in the YouTube’s video editor.
Step 3: In the Enhancements tab, you’ll be able to see the Stabilize icon. Click on it to start the video stabilization process, and once the process is complete, you can copy the video’s URL and share it on social media or send it to your friends.
4. Online Converter

Despite being famous for converting videos and audio, Online Converter is a powerful free online video stabilizer. It is best known for correcting shaky videos captured through action cameras. You can also count on this tool for stabilizing clips taken from your mobile phones.
Online Converter helps you fix shaky videos to a certain extent and makes them smoother. You can choose different stabilizing levels according to your current video’s requirements. For example, you can select “Maximum” stability if your clip is extremely shaky. Or, you can leave the option to “Default” if the video is destabilized at certain parts.
The tool supports different video formats” AVI, MP4, MOV, FLV, MKV, 3GP, MV4, WMV, and more. But you can only upload a file that is 200MB in size.
Here’s how you can use Online Converter to stabilize videos:
Step 1: Click the “Choose File” button to upload the video.
Step 2: Select “Stable Level” from the dropdown menu.
Step 3: Click the “Stabilize” button to let the tool upload and stabilize the video.
Step 4: Once the stabilization process is complete, you can click the “Download Now” button to save the video on your PC.
5. Online Video Stabilizer by 123 Apps

123 Apps is a favorite website for many creative heads, and the reasons are quite logical. The website is home to a different video, audio, and photo editing tools. So, if you’re talking specifically about what you can do to your videos with 123 Apps, here’s a little glimpse.
- Trimming
- Merging
- Inserting audio and photos into video
- Adding text to video
And, of course, the free video stabilization.
Online Video Stabilizer by 123 Apps allows you to remove shakiness from videos shot on any device. So be it a drone, GoPro, iPhone, or an Android, this web-based tool welcomes all.
It’s a free online service with 30+ video codecs ensuring support to all prominent video formats, such as MOV, WEBM, MP4, WMV, AVI, and more.
You can follow these steps to stabilize your shaky video without paying a cent:
“ 1: Go to the 123 Apps Online Video Stabilizer website. Click on the “Open File” button to upload your video. Depending on the internet speed and video size, the upload might take a few seconds to several minutes. However, you should remember that this platform only allows uploading 700MB of video.
Step 2: After uploading the video, activate the tool and choose the portion of the video that you need to stabilize. Once selected, click the “Play” button to see the results.
Step 3: Next, choose your output video format from the options by selecting the gear icon. By default, the tool is set to MP4 output, so make sure to change it if you want to download the video in your preferred format.
Step 4: Click the “Save” button to export your video to your Mac or Windows OS.
6. MP4Compress

Don’”get confused by the name, as this online tool is a gateway to numerous video editing solutions. MP4Compress helps you stabilize shaky footage with ease. Plus, it has many more features to help you make the video look more professional.
For example, the core feature is video conversion to different formats. Likewise, you can compress the videos, make them greyscale, and remove the sound. Contrarily, if you want to stabilize the video through MP4Compress, here’s what you need to do:
Step 1: Go to the website, click the “Select file…” button, and choose the video you want that’s troubling you with its shakiness. Keep in mind that you can only upload MP4 files (500MB maximum).
So, if you have a video in other video formats, you will need to convert it into MP4 first.
Step 2: After selecting the video, click the “Upload Video File” button to start the process.
Step 3: Once this tool corrects the shaky video, save it on your computer.
7. Stabilizo

Stabilizo is another pick to stabilize shaky videos online for free. While the software also offers other services like a PDF converter and video compressor, the tool is famous for stabilizing videos recorded on different devices.
Usually, it takes a few minutes to work on the video, but it depends on the size of your footage and internet speed. If the video is recorded at a high resolution or you have slow internet, Stabilizo might take more than 5 minutes to do the job.
This is how the tool works:
Step 1: Go to the website and click the “Browse” button to select the video you want to stabilize.
Step 2: Click the “Upload Video” button to upload the video (500MB max) on the tool and wait until the software stabilizes the video.
Step 3: Once it’s completed, click the “Download File” button to save the video on your computer.
8. VideoUtils

VideoUtils is a complete pack of great tools for online video editing. You can rely on this free web-based program for audio, image, video, and even PDF editing. Nevertheless, you can simply check the “Video Stabilizer” tool to correct the shakiness you’ve got in your video during recording.
It has a simple interface and is also a bit familiar with previous video stabilizing tools mentioned in this list. But unlike most, this online stabilizer supports various video formats, such as AVI, MOV, MP4, WEBM, and MKV.
The developers a
Liza Brown
Liza Brown is a writer and a lover of all things video.
Follow @Liza Brown
Liza Brown
Mar 27, 2024• Proven solutions
The time we spend with our families is invaluable, which is why most of us feel the need to capture the best moments from family vacations, birthdays or any other occasions that we want to remember. However, producing steady handheld footage is a challenging task even for experienced cinematographers.
You don’t have to worry if your video clip is shaky, because there are free online tools available that let you stabilize footage in only a few simple steps.
We’ve selected several of the best online video stabilizers that enable its users to fix their videos effortlessly, so let’s see which web-based platforms you can use to stabilize your videos.
If you need more powerful video stabilizers on computer, Filmora will be your best choice. Filmora video editor is a powerful video stabilizing software filled with powerful editing features. Unlike other editing software, Filmora is compatible with both Windows and Mac.
Some of the above video stabilizers are complex and require expertise. On the other hand, Wondershare Filmora video editor provides you with an easy-to-use interface and easy navigation options.
Key features:
- Modern and intuitive interface.
- Video stabilization in one click.
- Powerful edition features.
- Rich effects and templates.
Steps to stabilize videos using Wondershare Filmora video editor
8 Best Free Online Video Stabilizers
Even though fixing shaky footage is possible, you shouldn’t expect miracles because if your footage contains too many cameras shakes these online video stabilizers won’t be able to produce perfectly stable footage in every shot. On the other hand, if your video clips contain only a moderate amount of shaky footage the following video stabilizers will help you create smooth videos.
Let’s have a look at how you can stabilize your videos with these free online video stabilizers.
1. EZGIF Online Video Stabilizer
Besides offering a quick and easy way to stabilize video clips, EZGIF platform also lets you crop, resize or rotate videos. In addition, you can also cut videos, change their playback speed or add subtitles. You simply have to upload a video file to the platform, but you have to keep in mind that EZGIF only lets you upload files smaller than 120 MB.
You don’t have to worry about the video’s format, because the platform supports nearly all popular file formats like MP4, AVI, or MPEG. Here’s how you can stabilize your video with EZGIF Online Video Stabilizer.
Step 1: Once you open the Video Stabilizer option, you will be asked to either upload the video you’d like to stabilize from the hard drive on your computer or paste the video’s URL if the clip you want to stabilize is stored online. Hit the Upload Video button after you perform either of these actions and wait for the upload process to be finalized.
Step 2: To initiate the video stabilization process, you just have to click on the Stabilize button. The process will start automatically and its duration depends on the size of the file you’re stabilizing.
Step 3: Once the process is complete your video will appear in the Stabilized Video box, where you can preview it before downloading it as an MP4 file to your computer. You must click on the Save icon below the video to start the downloading the video.
2. Video Stabilize
If you are looking for an easy way to rotate, crop, slice or stabilize your videos, this free online platform may be one of your best options. There are no size limitations, which means that you can upload video clips of all sizes.
To make things even better, the platform supports all common file formats such as MOV or MP4, so you don’t have to waste time trying to change the video’s file format before you start the video stabilization process.
Step 1: Upon arriving at video-stabilize.com, you can simply drag and drop the video file to the designated box. Alternatively, you can click on the Upload your movie button or you can upload the video using Dropbox, OneDrive or Google Drive. Simply select the file you want to stabilize and the upload process will begin automatically.
Step 2: The size of the video clip and the speed of your Internet connection determines how long the upload is going to last. Once your video is uploaded you should simply click on the Transform Video to start the process of stabilizing your video. Arm yourself with patience, because you might have to spend more than half an hour waiting for the video stabilization process to be completed.
Step 3: Click on the Download Result button after the platform finishes stabilizing your video. You can choose the destination on your hard drive where the video file is going to be stored.
3. YouTube Video Editor
The world’s largest video sharing platform also offers basic video editing options to its users. In order to access the YouTube’s video editor, you must first create an account so you can upload your videos to the platform. You can upload virtually any file format because YouTube supports a wide range of video file formats.
The only downside is that the platform doesn’t allow you to download a video you stabilized directly to your computer, although you can use the video’s URL to share it with your friends online.
Step 1: Head over to your YouTube channel and upload a video by clicking on the Camera icon in the upper right corner of the screen. Before the upload starts you can change the Privacy settings from Public to Private so your video won’t be visible to other YouTube users.
Step 2: After the video is uploaded to your channel, open the Creator Studio and click on the Video Manager option. This action will enable you to see the video you’ve just uploaded. Click on the Edit button that is located below the video and proceed to open the Enhancements tab in the YouTube’s video editor.
Step 3: In the Enhancements tab, you’ll be able to see the Stabilize icon. Click on it to start the video stabilization process, and once the process is complete, you can copy the video’s URL and share it on social media or send it to your friends.
4. Online Converter
Despite being famous for converting videos and audio, Online Converter is a powerful free online video stabilizer. It is best known for correcting shaky videos captured through action cameras. You can also count on this tool for stabilizing clips taken from your mobile phones.
Online Converter helps you fix shaky videos to a certain extent and makes them smoother. You can choose different stabilizing levels according to your current video’s requirements. For example, you can select “Maximum” stability if your clip is extremely shaky. Or, you can leave the option to “Default” if the video is destabilized at certain parts.
The tool supports different video formats” AVI, MP4, MOV, FLV, MKV, 3GP, MV4, WMV, and more. But you can only upload a file that is 200MB in size.
Here’s how you can use Online Converter to stabilize videos:
Step 1: Click the “Choose File” button to upload the video.
Step 2: Select “Stable Level” from the dropdown menu.
Step 3: Click the “Stabilize” button to let the tool upload and stabilize the video.
Step 4: Once the stabilization process is complete, you can click the “Download Now” button to save the video on your PC.
5. Online Video Stabilizer by 123 Apps
123 Apps is a favorite website for many creative heads, and the reasons are quite logical. The website is home to a different video, audio, and photo editing tools. So, if you’re talking specifically about what you can do to your videos with 123 Apps, here’s a little glimpse.
- Trimming
- Merging
- Inserting audio and photos into video
- Adding text to video
And, of course, the free video stabilization.
Online Video Stabilizer by 123 Apps allows you to remove shakiness from videos shot on any device. So be it a drone, GoPro, iPhone, or an Android, this web-based tool welcomes all.
It’s a free online service with 30+ video codecs ensuring support to all prominent video formats, such as MOV, WEBM, MP4, WMV, AVI, and more.
You can follow these steps to stabilize your shaky video without paying a cent:
“ 1: Go to the 123 Apps Online Video Stabilizer website. Click on the “Open File” button to upload your video. Depending on the internet speed and video size, the upload might take a few seconds to several minutes. However, you should remember that this platform only allows uploading 700MB of video.
Step 2: After uploading the video, activate the tool and choose the portion of the video that you need to stabilize. Once selected, click the “Play” button to see the results.
Step 3: Next, choose your output video format from the options by selecting the gear icon. By default, the tool is set to MP4 output, so make sure to change it if you want to download the video in your preferred format.
Step 4: Click the “Save” button to export your video to your Mac or Windows OS.
6. MP4Compress
Don’”get confused by the name, as this online tool is a gateway to numerous video editing solutions. MP4Compress helps you stabilize shaky footage with ease. Plus, it has many more features to help you make the video look more professional.
For example, the core feature is video conversion to different formats. Likewise, you can compress the videos, make them greyscale, and remove the sound. Contrarily, if you want to stabilize the video through MP4Compress, here’s what you need to do:
Step 1: Go to the website, click the “Select file…” button, and choose the video you want that’s troubling you with its shakiness. Keep in mind that you can only upload MP4 files (500MB maximum).
So, if you have a video in other video formats, you will need to convert it into MP4 first.
Step 2: After selecting the video, click the “Upload Video File” button to start the process.
Step 3: Once this tool corrects the shaky video, save it on your computer.
7. Stabilizo
Stabilizo is another pick to stabilize shaky videos online for free. While the software also offers other services like a PDF converter and video compressor, the tool is famous for stabilizing videos recorded on different devices.
Usually, it takes a few minutes to work on the video, but it depends on the size of your footage and internet speed. If the video is recorded at a high resolution or you have slow internet, Stabilizo might take more than 5 minutes to do the job.
This is how the tool works:
Step 1: Go to the website and click the “Browse” button to select the video you want to stabilize.
Step 2: Click the “Upload Video” button to upload the video (500MB max) on the tool and wait until the software stabilizes the video.
Step 3: Once it’s completed, click the “Download File” button to save the video on your computer.
8. VideoUtils
VideoUtils is a complete pack of great tools for online video editing. You can rely on this free web-based program for audio, image, video, and even PDF editing. Nevertheless, you can simply check the “Video Stabilizer” tool to correct the shakiness you’ve got in your video during recording.
It has a simple interface and is also a bit familiar with previous video stabilizing tools mentioned in this list. But unlike most, this online stabilizer supports various video formats, such as AVI, MOV, MP4, WEBM, and MKV.
The developers a
Liza Brown
Liza Brown is a writer and a lover of all things video.
Follow @Liza Brown
Image Dimension Mastery: How to Calculate and Optimize Ratios
You might have noticed that earlier DVDs came with full screen or widescreen viewing choices. Moreover, when you choose the wrong option, it cuts off the movie parts, or the video gets surrounded by black padding.
The standard resolution of your screen stretched from a 4:3 aspect ratio to the wider one. So, producers started making movies that fit on both screens. After the standardization of aspect ratio display, broadcasters pay attention to the image ratio of clips.
So, below is the guide to find, calculate and adjust image ratio with a picture ratio calculator. Let’s get started.
In this article
01 [What is the image ratio?](#Part 1)
02 [Where Can I Find the Image ratio?](#Part 2)
03 [How to adjust image ratio](#Part 3)
Part 1 What is the image ratio?
The image or aspect ratio is the ratio of width to the height of a picture without any pixels attached. It is expressed with two a colon that separates two numbers, for example, 16:9.
In cinematography, common image ratios are 1.85:1 and 2.39:1, and in TV photography, it is 4:3 and 16:9. However, in still photography, the standard aspect ratio is 3:2.
Part 2 Where Can I Find the Image ratio?
To select the right photo print size, you must consider the photo ratio and the print ratio. You can not accidentally choose the balance that needs cropping from the sides of the photo.
So, first, you must know how or where you can find the image ratio. The following are the methods to do so:
Method 1: Check your Camera
The image ratio depends directly on the camera’s sensor. You can find the correct balance for photo print based on your camera type. For example, APS-C and Full-frame cameras shoot in a 3:2 ratio. But compact cameras often shoot in a 4:3 ratio.
The photos that you click with your smartphones have a 16:9 or 4:3 ratio. The picture below shows some common photo ratios by type of camera and where it will look great in the home.

Method 2: Find Image Information
Unlike the photo ratios, image information determines the original width and height of the image in pixels. You can measure the picture dimensions in any unit, but you will always see the web or digital images in pixels.
Always remember that two different pictures with the same image ratio may not have the same dimensions. For example, a picture with size 1920X1080 pixels and a photo with size 1280x720 pixels can both have a 16:9 aspect ratio.
Method 3: Check with Photoshop
You can quickly check the image ratio in Photoshop (picture ratio calculator) using a crop tool. To do so, follow the steps mentioned below:
● Open the image in Photoshop.
● Choose a crop tool.
● Select the photo ratio.
● Test different image ratios. You can begin with the standard ratios like 3:2, 16:9, 4:3, or 5:4.
● If the crop frame captures the whole picture, it means you have already found the correct ratio.
Do you want a photo print in panorama or square shape? If yes, crop the picture to make it fit a different image ratio. For instance, edit the photo to fit a 1:1 ratio for a square shape.
Or crop a picture to 2:1. 3:1. 4:1, 5:1, or 6:1 ratio for a panorama photo.

Method 4: Image Ratio Calculation
You can find the image ratio using the resolution of a photo easily on a window’s system. To do so, right-click on an image file and scroll down to the Properties. Under details, you will notice, size of a photo in pixels.
To calculate the photo ratio, divide the width by the height of an image. If the total is an integer, multiply it by other numbers. These numbers are photo ratios.
Example 1:
● Photo is 4966px by 3312px
● Divide 4966 by 3312= 1.5
● Now, multiply 1.5 with 2 to obtain a whole number (1.5 X 2= 3)
● The photo’s ratio is 3:2
Example 2:
● Photo is 4416 x 3312 px
● Divide 4416 by 3312= 1.3
● Multiply 1.3 with 3 to obtain a whole number(1.3 x 3= 3.9 or approx. 4)
● The photo’s ratio is 4:3
Part 3 How to adjust image ratio
Image ratio is significant in the videography business. But adjusting the video aspect ratio is more critical. Therefore, if you are a video editor, you must know how to do it. There are plenty of options to adjust the aspect ratio, and one of them is to use a photo aspect ratio calculator.
If you want to make permanent adjustments, use a convertor or editor. “Wondershare Filmora” is the best video editor that allows you to create videos with different aspect ratios and adjust these ratios easily.

Wondershare Filmora - Best Video Editor for Mac/Windows
5,481,435 people have downloaded it.
Build unique custom animations without breaking a sweat.
Focus on creating epic stories and leave the details to Filmora’s auto features.
Start a creative adventure with drag & drop effects and endless possibilities.
Filmora simplifies advanced features to save you time and effort.
Filmora cuts out repetition so you can move on to your next creative breakthrough.
The following are different methods to adjust the aspect ratio in Wondershare Filmora:
Method 1: Adjust Aspect Ratio at the Starting Interface
Wondershare Filmora helps you to adjust the video aspect ratio once you launch the editor program. To begin, go to the “drop-down” menu button. Now, press on it to check some commonly used photo ratios such as 16:9, 1:1, 4:3, 9:16, or 21:9.
Choose the ratio that you want by simply clicking on it.

Method 2: Adjust Aspect Ratio under Project Settings
You can adjust the aspect ratio by clicking on the “Project Settings.” Then, decide the target aspect ratio depending on the aspect ratio of the media source.
For instance, if the aspect ratio of media source files is 4:3, select the standard aspect ratio of 4:3. Then, media files with other aspect ratios will shoe black bars.
So, if any discordance occurs or you want to change the video aspect ratio, select the proper balance from project settings.

Method 3: Adjust Aspect Ratio during Editing
Once you import the videos into the timeline of the Wondershare Filmora, you can easily adjust the ratio from the Crop and Zoom tool.
● Go to timeline and right-click on the video clip. Then, select “Crop and Zoom.” You will see the pop-up window.
● Click on 16:9, 4:3, 1:1, or 9:16 manually at the bottom to change the video aspect ratio.
● You can also manually enter the video aspect ratio. Then, click on the “Ok” button.

Once you make the adjustments in the aspect ratio, add background blur effects if you notice a black bar. It will enhance the video. You can also intensify your video by using filters, visual effects, overlays, or titles.

Method 4: Adjust Video Aspect Ratio with Auto-Reframe
If you use the latest versions of Filmora, you will see Auto Reframe helps adjust the aspect ratio. Other
Wondershare Filmora
Get started easily with Filmora’s powerful performance, intuitive interface, and countless effects!
Try It Free Try It Free Try It Free Learn More about Filmora>
The following are steps to change the aspect ratio using the Auto-Reframe option:
Step1
Once you upload the video clips to the media library, right-click on it and select the Auto-Reframe option.

Step2
You will see the Auto Reframe window appear on the screen. Replace the existing video with a new clip. Then, change the video aspect ratio and video motion speed. Make sure to change the aspect ratio that fits most with different social media platforms.

Step3
Once you select the aspect ratio, click on the “Analyze” button. Filmora will Auto-Reframe the video itself. Once the process completes, you can see results in the preview window. Drag box to adjust the frame or to keep the object in it. It will automatically delete the content outside the box.

Step4
After completing adjustment or reframing, click on the “Export” button to save your video.
Change the name of the video and select the location where you want to save the video.
Now, click on the “Export” again to save.

Method 5: Adjust Aspect Ratio at Exporting
You can save the clip to your system or smartphones, depending on your requirements. Then, upload them directly to Youtube or burn them into DVD by clicking on the “Export button.” In this way, you can watch it on widescreen or standard TV whenever you want with an image size aspect ratio calculator.

● Adjust Aspect Ratio for the Local Computer
First, you will see the “Local” tab. There you can save the clip in a particular aspect ratio to your system. You can see all resolutions with various aspect ratios after selecting the format. The output video depends on the media click resolution.
● Adjust Aspect Ratio for a Device
Change the “Device” tab to save the video in formats compatible with popular devices, including iPod, iPhone, PSP, iPad, etc. Choose your favorite or the best resolution. Once you choose the device, you will see all resolutions.
The video quality will continue improving with higher resolutions. But it will also increase the size of the file.
● Adjust Aspect Ratio for YouTube
Go to the “YouTube” tab and fill in the information. Then, click the “Export” button. Selecting the aspect ratio again is not necessary. It will directly upload your videos to YouTube.
● Adjust Aspect Ratio for DVD TV
When you go to the “DVD” tab, you will notice various aspect ratio options. Switching the aspect ratio for TV from 4:3 to 16:9 is pretty straightforward. To do so, select what you think is right. Try to use image size aspect ratio calculator to get the right ratio.
Conclusion
● Aspect ratio holds great importance in the proper display. So, it would be best to learn the calculation and adjustment of the image ratio using photo aspect ratio calculator or image size proportion calculator.
● Hopefully, the above points will help you to learn calculation and adjustment processes. Also, do not forget to use Wondersahe Filmora to set the image ratio and edit the video with ease.
02 [Where Can I Find the Image ratio?](#Part 2)
03 [How to adjust image ratio](#Part 3)
Part 1 What is the image ratio?
The image or aspect ratio is the ratio of width to the height of a picture without any pixels attached. It is expressed with two a colon that separates two numbers, for example, 16:9.
In cinematography, common image ratios are 1.85:1 and 2.39:1, and in TV photography, it is 4:3 and 16:9. However, in still photography, the standard aspect ratio is 3:2.
Part 2 Where Can I Find the Image ratio?
To select the right photo print size, you must consider the photo ratio and the print ratio. You can not accidentally choose the balance that needs cropping from the sides of the photo.
So, first, you must know how or where you can find the image ratio. The following are the methods to do so:
Method 1: Check your Camera
The image ratio depends directly on the camera’s sensor. You can find the correct balance for photo print based on your camera type. For example, APS-C and Full-frame cameras shoot in a 3:2 ratio. But compact cameras often shoot in a 4:3 ratio.
The photos that you click with your smartphones have a 16:9 or 4:3 ratio. The picture below shows some common photo ratios by type of camera and where it will look great in the home.
Method 2: Find Image Information
Unlike the photo ratios, image information determines the original width and height of the image in pixels. You can measure the picture dimensions in any unit, but you will always see the web or digital images in pixels.
Always remember that two different pictures with the same image ratio may not have the same dimensions. For example, a picture with size 1920X1080 pixels and a photo with size 1280x720 pixels can both have a 16:9 aspect ratio.
Method 3: Check with Photoshop
You can quickly check the image ratio in Photoshop (picture ratio calculator) using a crop tool. To do so, follow the steps mentioned below:
● Open the image in Photoshop.
● Choose a crop tool.
● Select the photo ratio.
● Test different image ratios. You can begin with the standard ratios like 3:2, 16:9, 4:3, or 5:4.
● If the crop frame captures the whole picture, it means you have already found the correct ratio.
Do you want a photo print in panorama or square shape? If yes, crop the picture to make it fit a different image ratio. For instance, edit the photo to fit a 1:1 ratio for a square shape.
Or crop a picture to 2:1. 3:1. 4:1, 5:1, or 6:1 ratio for a panorama photo.
Method 4: Image Ratio Calculation
You can find the image ratio using the resolution of a photo easily on a window’s system. To do so, right-click on an image file and scroll down to the Properties. Under details, you will notice, size of a photo in pixels.
To calculate the photo ratio, divide the width by the height of an image. If the total is an integer, multiply it by other numbers. These numbers are photo ratios.
Example 1:
● Photo is 4966px by 3312px
● Divide 4966 by 3312= 1.5
● Now, multiply 1.5 with 2 to obtain a whole number (1.5 X 2= 3)
● The photo’s ratio is 3:2
Example 2:
● Photo is 4416 x 3312 px
● Divide 4416 by 3312= 1.3
● Multiply 1.3 with 3 to obtain a whole number(1.3 x 3= 3.9 or approx. 4)
● The photo’s ratio is 4:3
Part 3 How to adjust image ratio
Image ratio is significant in the videography business. But adjusting the video aspect ratio is more critical. Therefore, if you are a video editor, you must know how to do it. There are plenty of options to adjust the aspect ratio, and one of them is to use a photo aspect ratio calculator.
If you want to make permanent adjustments, use a convertor or editor. “Wondershare Filmora” is the best video editor that allows you to create videos with different aspect ratios and adjust these ratios easily.
Wondershare Filmora - Best Video Editor for Mac/Windows
5,481,435 people have downloaded it.
Build unique custom animations without breaking a sweat.
Focus on creating epic stories and leave the details to Filmora’s auto features.
Start a creative adventure with drag & drop effects and endless possibilities.
Filmora simplifies advanced features to save you time and effort.
Filmora cuts out repetition so you can move on to your next creative breakthrough.
The following are different methods to adjust the aspect ratio in Wondershare Filmora:
Method 1: Adjust Aspect Ratio at the Starting Interface
Wondershare Filmora helps you to adjust the video aspect ratio once you launch the editor program. To begin, go to the “drop-down” menu button. Now, press on it to check some commonly used photo ratios such as 16:9, 1:1, 4:3, 9:16, or 21:9.
Choose the ratio that you want by simply clicking on it.
Method 2: Adjust Aspect Ratio under Project Settings
You can adjust the aspect ratio by clicking on the “Project Settings.” Then, decide the target aspect ratio depending on the aspect ratio of the media source.
For instance, if the aspect ratio of media source files is 4:3, select the standard aspect ratio of 4:3. Then, media files with other aspect ratios will shoe black bars.
So, if any discordance occurs or you want to change the video aspect ratio, select the proper balance from project settings.
Method 3: Adjust Aspect Ratio during Editing
Once you import the videos into the timeline of the Wondershare Filmora, you can easily adjust the ratio from the Crop and Zoom tool.
● Go to timeline and right-click on the video clip. Then, select “Crop and Zoom.” You will see the pop-up window.
● Click on 16:9, 4:3, 1:1, or 9:16 manually at the bottom to change the video aspect ratio.
● You can also manually enter the video aspect ratio. Then, click on the “Ok” button.
Once you make the adjustments in the aspect ratio, add background blur effects if you notice a black bar. It will enhance the video. You can also intensify your video by using filters, visual effects, overlays, or titles.
Method 4: Adjust Video Aspect Ratio with Auto-Reframe
If you use the latest versions of Filmora, you will see Auto Reframe helps adjust the aspect ratio. Other
Wondershare Filmora
Get started easily with Filmora’s powerful performance, intuitive interface, and countless effects!
Try It Free Try It Free Try It Free Learn More about Filmora>
The following are steps to change the aspect ratio using the Auto-Reframe option:
Step1
Once you upload the video clips to the media library, right-click on it and select the Auto-Reframe option.
Step2
You will see the Auto Reframe window appear on the screen. Replace the existing video with a new clip. Then, change the video aspect ratio and video motion speed. Make sure to change the aspect ratio that fits most with different social media platforms.
Step3
Once you select the aspect ratio, click on the “Analyze” button. Filmora will Auto-Reframe the video itself. Once the process completes, you can see results in the preview window. Drag box to adjust the frame or to keep the object in it. It will automatically delete the content outside the box.
Step4
After completing adjustment or reframing, click on the “Export” button to save your video.
Change the name of the video and select the location where you want to save the video.
Now, click on the “Export” again to save.
Method 5: Adjust Aspect Ratio at Exporting
You can save the clip to your system or smartphones, depending on your requirements. Then, upload them directly to Youtube or burn them into DVD by clicking on the “Export button.” In this way, you can watch it on widescreen or standard TV whenever you want with an image size aspect ratio calculator.
● Adjust Aspect Ratio for the Local Computer
First, you will see the “Local” tab. There you can save the clip in a particular aspect ratio to your system. You can see all resolutions with various aspect ratios after selecting the format. The output video depends on the media click resolution.
● Adjust Aspect Ratio for a Device
Change the “Device” tab to save the video in formats compatible with popular devices, including iPod, iPhone, PSP, iPad, etc. Choose your favorite or the best resolution. Once you choose the device, you will see all resolutions.
The video quality will continue improving with higher resolutions. But it will also increase the size of the file.
● Adjust Aspect Ratio for YouTube
Go to the “YouTube” tab and fill in the information. Then, click the “Export” button. Selecting the aspect ratio again is not necessary. It will directly upload your videos to YouTube.
● Adjust Aspect Ratio for DVD TV
When you go to the “DVD” tab, you will notice various aspect ratio options. Switching the aspect ratio for TV from 4:3 to 16:9 is pretty straightforward. To do so, select what you think is right. Try to use image size aspect ratio calculator to get the right ratio.
Conclusion
● Aspect ratio holds great importance in the proper display. So, it would be best to learn the calculation and adjustment of the image ratio using photo aspect ratio calculator or image size proportion calculator.
● Hopefully, the above points will help you to learn calculation and adjustment processes. Also, do not forget to use Wondersahe Filmora to set the image ratio and edit the video with ease.
The Ultimate List of Free Whiteboard Animation Software for Windows, Mac, and Beyond
FREE Top10 Best Whiteboard Animation Software [2024]

Shanoon Cox
Mar 27, 2024• Proven solutions
Searching for a way to make your presentations stand out? Hoping that you can share text and images with an audience to help convey your message? Whiteboard animation software helps bring stories and ideas to life.
With free whiteboard animation software, it is a lot easier to create interesting and unique content. Whether you are introducing a business, finding incredible ways to find suitable animated graphic makers for trying to turn funny animated images into comics , whiteboard animation is always a good way to present.
In this artile, we find the 12 best whiteboard animation software for you. Some of them are even free whiteboard animation makers. Read on to find the useful one for you.
- [Quick View] What Is Whiteboard Animation?
- Top 12 Whiteboard Animation Software You Can Get
- FAQ About Whiteboard Animation Software
[Quick View] What Is Whiteboard Animation?
Whiteboard animation is the process that which the author draws an illustrated story on a whiteboard or something white. Usually, the color is black and white. Viewers can see the whole drawing process, which is engaging. Typically, whiteboard animation is accompanied by a vivid narrative, and viewers can follow the drawing step by step.
Below are some points for your reference to choose an animation software.
- Price: A reasonable and cost-effective price, free is even better.
- Customization: Animation software contains various templates and can customize on your own.
- Easy-to-use: User-friendly software can save most of your time.
Top 12 Whiteboard Animation Software You Can Get
Here are the best 12 white borad animation makers we find for you. Read on and see how they work.
| 1 - Filmora Animation Maker | 2 - RawShorts | 3 - Renderforest |
|---|---|---|
| 4 - Animaker | 5 - Powtoon | 6 - VideoScribe |
| 7 - Biteable | 8 - Anireel | 9 - MySimpleShow |
| 10 - VideoJeeves | 11 - TruScribe | 12 - Easy Sketch Pro |
01 Filmora Animation Maker
Filmora is one of the best animation maker for making a whiteboard animation video. You can use it to make 3D animation or 2D animation by adding keyframes so that the animation will be smooth and natural.
Besides creating whiteboard animation, Filmora also offers various animation effects to match different video themes.
For Win 7 or later (64-bit)
 Secure Download
For macOS 10.14 or later
Secure Download


Features:
- Easy add whiteborad or blackborad for making animations
- Simply create animations with keyframes added
- Buile-in templates for applying animations with 1-click
02 RawShorts
Want to create a whiteboard explainer video? RawShorts will help you get it done. The software is very simple to use, and it features a drag and drop interface. The free version will let you make a 2 minutes duration whiteboard video. You can export three exports/month.
You can choose between animated whiteboard templates, or you may start from scratch. Rendering and sharing the video is also easy, and the program features integration with YouTube, Facebook, and other platforms.
RawShorts is the type of program that anyone can use. Whether you are creating business videos to show your clients, marketing videos to help demonstrate a strategy or training videos, the software will work flawlessly.
Features:
- Easy manipulation of images with drag and drop
- Thousands of whiteboard-style templates, graphics, unique characters, and more
- Animated charts to further enhance your content
- Free demo available to let you make a whiteboard animation video
03 Renderforest
Renderforest a free whiteboard animation tool makes it intuitive to create unique and interesting whiteboard animation shorts. Telling a story through simple videos is a lot better than constantly talking or showing sentences worth of information on a PowerPoint presentation.
The program is cloud-based, which means you do not need a powerful machine to run it. And there are already hundreds of ready-made scenes that you can use to enhance your whiteboard animation short.
By allowing you to preview your video and edit it before rendering, you can fix any mistakes that you may not have noticed until you saw the final product.
Features:
- Hundreds of interesting templates
- Close to 400 animated scenes pre-created
- Online content editing
04 Animaker
Another free whiteboard animation software is Animaker. You can use it to make whiteboard animation videos easily with various functions. It includes a free-to-use option. The full video length is enough though the free version only supports exporting 2 minutes video. It supports a few characters and props, animated maps and charts, infographic icons.
You can download five whiteboard videos in a month. One thing you need to know is you can only upload SD quality video to YouTube with this free whiteboard animation software plan. You can upgrade from a free plan to an advanced plan anytime.
Features:
- You can add effects, text, and music to make whiteboard animation videos better
- The new upgraded version includes four new styles to use
- More than 1000 brands use this whiteboard animation software
Filmora - Free Whiteboard Animation Software
• Easily make animation on screen, text, stickers and more.
• Offers remove video background and green screen function.
• Cross-platform supported - (Windows, Mac, iOS, Android)
Make Free Whiteboard Animation Make Free Whiteboard Animation
05 Powtoon
If you want to make a whiteboard animation video quickly, you can choose this free whiteboard video maker. You can use Powtoon to make a presentation with a short video type. It will be more engaging than only images. If you are new to the whiteboard animation field, you can attend a live webinar and learn training center knowledge to start making animation easily.
You can use the free whiteboard animation software to make up to 3 mins in HD quality. The storage is 100 MB.
Features:
- You can use free royalty-free music to make your whiteboard animation perfect
- It includes free to use an object to touch up video
06 VideoScribe
You just need to drag and drop to use this free whiteboard animation software. You are available to various images and music to make your animation better. It is used to make a video by the BBC. In its free plan, it includes more than 5,000 images to use. You can record voiceover by yourself, which is a useful function if you want to hear your voice in the animated video. Besides, you can share videos with YouTube, Vimeo, and Powerpoint.
Features:
- Export MOV and WMV animation video files
- You can import your assets to start making animation
07 Biteable
The Biteable whiteboard video creator is one of the truly easy-to-use options available today. Do you want to make animated videos for your business, website, social media profile, classroom, or training seminar? Biteable will make the process very simple for you. The free version is limited in that you can’t even download/share one video per month, so I put it on the paid list.
The beauty of using a program like Biteable is that you do not have to go through a learning curve. Everything is very intuitive, and every feature of the software is explained in the help section. If you get stuck, you will have guidance on how to proceed.
And there are plenty of templates available in this whiteboard animation maker that will make your life even easier. You can choose from these templates and use them directly, or customize them to your liking.
Features:
- Choose a video style from templates
- Add your text, images, and colors
- Easy drag and drop interface
- Choose the soundtrack for your video
- Share the finished product in any way you want
08 Anireel
Anireel is a simple yet powerful Video Creativity tool used to make 2D whiteboard animated explainer videos. Developed by Wondershare, one of the most popular Windows software and tool developers, Anireel uses rich, ready-to-use, and diverse assets to help one effortlessly make whiteboard animated videos.

Features:
- There are tons of drag and drop characters, actions, props, text, and audio assets.
- Easy Text-to-Speech conversion via deep studying technology.
- Animate integrated and imported assets.
- Tons of templates that match many script types.
Try Filmora to Add Animations on Video with Ease!
Filmora Animation Maker can easily apply various animations on video, text, stickers, and more. Make your video more vivid and get more fun. Use the motion tracking, speed ramping, and remove video background functions to polish your animation video.
Free Making Animation Video Free Making Animation Video
09 MySimpleShow
MySimpleShow makes it very easy for you to create explainer videos for corporate situations. It has a free-to-use whiteboard animation plan. Whether you are trying to communicate a marketing idea or highlighting the usefulness of a new product, you can do so with lively images and graphics. MySimpleShow is also useful to engage students in an educational setting or for personal use, such as creating a crowdfunding video. You can also use it to receive a public video page for free.
Pros:
- Very easy to use with storyline templates
- The software does all the technical work, and you can start for free
- Includes the option to add audio to presentations
Cons:
- Limited storyline options
10 VideoJeeves
There are many whiteboard animation options available with VideoJeeves. Whether you are hoping to create a whiteboard animation for work, or you want to share something with your friends, the software will make your job a lot easier. Major companies such as LeadGen, Freelancer.com, and GoldExport use the VideoJeeves service.
Pros:
- The experts at VideoJeeves will help you with your whiteboard animation creation
- Features include concept and scripting, themes and storyboard, illustration, and voiceovers - if needed
Cons:
- It has a steep learning curve
11 TruScribe
TruScribe offers its customers dedicated plans where they can get whiteboard animation stories created. The process starts when customers request a quote on the TrueScribe website, which gets them more dedicated information about the process and pricing.
Pros:
- Uses Scribology, a unique method for crafting whiteboard videos, the concept is based on neuroscience and behavioral psychology
- Small, creative teams help write scripts for animation videos, ensuring each client gets a premier service
- Artists draw images and help bring them to life
Cons:
- No free option
12 Easy Sketch Pro
The beauty of Easy Sketch Pro is that anyone can use this whiteboard video maker to create the type of whiteboard animation they want. Whether you are hoping to choose from some pre-created graphics, or you want to make your own, it is no issue. When you are using a compatible tablet, it is even easier to use the software.
Pros:
- Easy, drag and drop sketch video creation interface
- Build videos or stop-animation concepts from scratch
- Easy to incorporate videos into sketches, including adding voice-overs, text, graphics, and other items
Cons:
- Purchase is required.
- No professional support for animation creation.
FAQ About Whiteboard Animation Software
01 What is the best whiteboard animation software?
If you want to make whiteboard animation quickly, we recommend using Animaker. It includes various templates, and some of them support customization. You just need to choose one character you like to make a whiteboard animation. For paid software, TruScribe is a great choice. The cartoons are completely white. You can follow the script to make amazing whiteboard animation. Another tool you should not forget is Biteable. It is easy to use with an intuitive timeline. You can also add audio to give the whiteboard animation a special look.
02 How long does it take to make a whiteboard video?
Many people care about the time to make a whiteboard video. It depends on your skills and the complexity of the video you will make. If you are a beginner, you may take one day to make a 10 minutes whiteboard video. If you are an advanced editor, it only takes 4-5 hours to make 10 minutes videos.
03 Is Doodly free?
Doodly is an excellent animation maker, so many people want to know whether it is free or not. The answer is NO. It is not free to use. For monthly payment, the standard plan is $39 per month, and the enterprise plan is $69 per month. For annual payment, the standard plan is $20 per month, and the enterprise plan is $40.
Conclusion
These are the eight best options if you are hoping to create whiteboard animation content. Whether you are hoping to create a short video or a series of graphics, these free downloads will get you started with this process. And if you are looking to edit whiteboard animation videos, you can check out Filmora. It offers great editing features and free video effects, which are very easy to use. Download it now to have a try!


Shanoon Cox
Shanoon Cox is a writer and a lover of all things video.
Follow @Shanoon Cox
Shanoon Cox
Mar 27, 2024• Proven solutions
Searching for a way to make your presentations stand out? Hoping that you can share text and images with an audience to help convey your message? Whiteboard animation software helps bring stories and ideas to life.
With free whiteboard animation software, it is a lot easier to create interesting and unique content. Whether you are introducing a business, finding incredible ways to find suitable animated graphic makers for trying to turn funny animated images into comics , whiteboard animation is always a good way to present.
In this artile, we find the 12 best whiteboard animation software for you. Some of them are even free whiteboard animation makers. Read on to find the useful one for you.
- [Quick View] What Is Whiteboard Animation?
- Top 12 Whiteboard Animation Software You Can Get
- FAQ About Whiteboard Animation Software
[Quick View] What Is Whiteboard Animation?
Whiteboard animation is the process that which the author draws an illustrated story on a whiteboard or something white. Usually, the color is black and white. Viewers can see the whole drawing process, which is engaging. Typically, whiteboard animation is accompanied by a vivid narrative, and viewers can follow the drawing step by step.
Below are some points for your reference to choose an animation software.
- Price: A reasonable and cost-effective price, free is even better.
- Customization: Animation software contains various templates and can customize on your own.
- Easy-to-use: User-friendly software can save most of your time.
Top 12 Whiteboard Animation Software You Can Get
Here are the best 12 white borad animation makers we find for you. Read on and see how they work.
| 1 - Filmora Animation Maker | 2 - RawShorts | 3 - Renderforest |
|---|---|---|
| 4 - Animaker | 5 - Powtoon | 6 - VideoScribe |
| 7 - Biteable | 8 - Anireel | 9 - MySimpleShow |
| 10 - VideoJeeves | 11 - TruScribe | 12 - Easy Sketch Pro |
01 Filmora Animation Maker
Filmora is one of the best animation maker for making a whiteboard animation video. You can use it to make 3D animation or 2D animation by adding keyframes so that the animation will be smooth and natural.
Besides creating whiteboard animation, Filmora also offers various animation effects to match different video themes.
For Win 7 or later (64-bit)
Secure Download
For macOS 10.14 or later
Secure Download
Features:
- Easy add whiteborad or blackborad for making animations
- Simply create animations with keyframes added
- Buile-in templates for applying animations with 1-click
02 RawShorts
Want to create a whiteboard explainer video? RawShorts will help you get it done. The software is very simple to use, and it features a drag and drop interface. The free version will let you make a 2 minutes duration whiteboard video. You can export three exports/month.
You can choose between animated whiteboard templates, or you may start from scratch. Rendering and sharing the video is also easy, and the program features integration with YouTube, Facebook, and other platforms.
RawShorts is the type of program that anyone can use. Whether you are creating business videos to show your clients, marketing videos to help demonstrate a strategy or training videos, the software will work flawlessly.
Features:
- Easy manipulation of images with drag and drop
- Thousands of whiteboard-style templates, graphics, unique characters, and more
- Animated charts to further enhance your content
- Free demo available to let you make a whiteboard animation video
03 Renderforest
Renderforest a free whiteboard animation tool makes it intuitive to create unique and interesting whiteboard animation shorts. Telling a story through simple videos is a lot better than constantly talking or showing sentences worth of information on a PowerPoint presentation.
The program is cloud-based, which means you do not need a powerful machine to run it. And there are already hundreds of ready-made scenes that you can use to enhance your whiteboard animation short.
By allowing you to preview your video and edit it before rendering, you can fix any mistakes that you may not have noticed until you saw the final product.
Features:
- Hundreds of interesting templates
- Close to 400 animated scenes pre-created
- Online content editing
04 Animaker
Another free whiteboard animation software is Animaker. You can use it to make whiteboard animation videos easily with various functions. It includes a free-to-use option. The full video length is enough though the free version only supports exporting 2 minutes video. It supports a few characters and props, animated maps and charts, infographic icons.
You can download five whiteboard videos in a month. One thing you need to know is you can only upload SD quality video to YouTube with this free whiteboard animation software plan. You can upgrade from a free plan to an advanced plan anytime.
Features:
- You can add effects, text, and music to make whiteboard animation videos better
- The new upgraded version includes four new styles to use
- More than 1000 brands use this whiteboard animation software
Filmora - Free Whiteboard Animation Software
• Easily make animation on screen, text, stickers and more.
• Offers remove video background and green screen function.
• Cross-platform supported - (Windows, Mac, iOS, Android)
Make Free Whiteboard Animation Make Free Whiteboard Animation
05 Powtoon
If you want to make a whiteboard animation video quickly, you can choose this free whiteboard video maker. You can use Powtoon to make a presentation with a short video type. It will be more engaging than only images. If you are new to the whiteboard animation field, you can attend a live webinar and learn training center knowledge to start making animation easily.
You can use the free whiteboard animation software to make up to 3 mins in HD quality. The storage is 100 MB.
Features:
- You can use free royalty-free music to make your whiteboard animation perfect
- It includes free to use an object to touch up video
06 VideoScribe
You just need to drag and drop to use this free whiteboard animation software. You are available to various images and music to make your animation better. It is used to make a video by the BBC. In its free plan, it includes more than 5,000 images to use. You can record voiceover by yourself, which is a useful function if you want to hear your voice in the animated video. Besides, you can share videos with YouTube, Vimeo, and Powerpoint.
Features:
- Export MOV and WMV animation video files
- You can import your assets to start making animation
07 Biteable
The Biteable whiteboard video creator is one of the truly easy-to-use options available today. Do you want to make animated videos for your business, website, social media profile, classroom, or training seminar? Biteable will make the process very simple for you. The free version is limited in that you can’t even download/share one video per month, so I put it on the paid list.
The beauty of using a program like Biteable is that you do not have to go through a learning curve. Everything is very intuitive, and every feature of the software is explained in the help section. If you get stuck, you will have guidance on how to proceed.
And there are plenty of templates available in this whiteboard animation maker that will make your life even easier. You can choose from these templates and use them directly, or customize them to your liking.
Features:
- Choose a video style from templates
- Add your text, images, and colors
- Easy drag and drop interface
- Choose the soundtrack for your video
- Share the finished product in any way you want
08 Anireel
Anireel is a simple yet powerful Video Creativity tool used to make 2D whiteboard animated explainer videos. Developed by Wondershare, one of the most popular Windows software and tool developers, Anireel uses rich, ready-to-use, and diverse assets to help one effortlessly make whiteboard animated videos.
Features:
- There are tons of drag and drop characters, actions, props, text, and audio assets.
- Easy Text-to-Speech conversion via deep studying technology.
- Animate integrated and imported assets.
- Tons of templates that match many script types.
Try Filmora to Add Animations on Video with Ease!
Filmora Animation Maker can easily apply various animations on video, text, stickers, and more. Make your video more vivid and get more fun. Use the motion tracking, speed ramping, and remove video background functions to polish your animation video.
Free Making Animation Video Free Making Animation Video
09 MySimpleShow
MySimpleShow makes it very easy for you to create explainer videos for corporate situations. It has a free-to-use whiteboard animation plan. Whether you are trying to communicate a marketing idea or highlighting the usefulness of a new product, you can do so with lively images and graphics. MySimpleShow is also useful to engage students in an educational setting or for personal use, such as creating a crowdfunding video. You can also use it to receive a public video page for free.
Pros:
- Very easy to use with storyline templates
- The software does all the technical work, and you can start for free
- Includes the option to add audio to presentations
Cons:
- Limited storyline options
10 VideoJeeves
There are many whiteboard animation options available with VideoJeeves. Whether you are hoping to create a whiteboard animation for work, or you want to share something with your friends, the software will make your job a lot easier. Major companies such as LeadGen, Freelancer.com, and GoldExport use the VideoJeeves service.
Pros:
- The experts at VideoJeeves will help you with your whiteboard animation creation
- Features include concept and scripting, themes and storyboard, illustration, and voiceovers - if needed
Cons:
- It has a steep learning curve
11 TruScribe
TruScribe offers its customers dedicated plans where they can get whiteboard animation stories created. The process starts when customers request a quote on the TrueScribe website, which gets them more dedicated information about the process and pricing.
Pros:
- Uses Scribology, a unique method for crafting whiteboard videos, the concept is based on neuroscience and behavioral psychology
- Small, creative teams help write scripts for animation videos, ensuring each client gets a premier service
- Artists draw images and help bring them to life
Cons:
- No free option
12 Easy Sketch Pro
The beauty of Easy Sketch Pro is that anyone can use this whiteboard video maker to create the type of whiteboard animation they want. Whether you are hoping to choose from some pre-created graphics, or you want to make your own, it is no issue. When you are using a compatible tablet, it is even easier to use the software.
Pros:
- Easy, drag and drop sketch video creation interface
- Build videos or stop-animation concepts from scratch
- Easy to incorporate videos into sketches, including adding voice-overs, text, graphics, and other items
Cons:
- Purchase is required.
- No professional support for animation creation.
FAQ About Whiteboard Animation Software
01 What is the best whiteboard animation software?
If you want to make whiteboard animation quickly, we recommend using Animaker. It includes various templates, and some of them support customization. You just need to choose one character you like to make a whiteboard animation. For paid software, TruScribe is a great choice. The cartoons are completely white. You can follow the script to make amazing whiteboard animation. Another tool you should not forget is Biteable. It is easy to use with an intuitive timeline. You can also add audio to give the whiteboard animation a special look.
02 How long does it take to make a whiteboard video?
Many people care about the time to make a whiteboard video. It depends on your skills and the complexity of the video you will make. If you are a beginner, you may take one day to make a 10 minutes whiteboard video. If you are an advanced editor, it only takes 4-5 hours to make 10 minutes videos.
03 Is Doodly free?
Doodly is an excellent animation maker, so many people want to know whether it is free or not. The answer is NO. It is not free to use. For monthly payment, the standard plan is $39 per month, and the enterprise plan is $69 per month. For annual payment, the standard plan is $20 per month, and the enterprise plan is $40.
Conclusion
These are the eight best options if you are hoping to create whiteboard animation content. Whether you are hoping to create a short video or a series of graphics, these free downloads will get you started with this process. And if you are looking to edit whiteboard animation videos, you can check out Filmora. It offers great editing features and free video effects, which are very easy to use. Download it now to have a try!
Shanoon Cox
Shanoon Cox is a writer and a lover of all things video.
Follow @Shanoon Cox
The Ultimate List of Free Video Editors for Starters
Top 15 Free Video Editing Software for Beginners [Very Easy to Use]

Ollie Mattison
Mar 27, 2024• Proven solutions
If you are not a video-making expert, own a video studio, or have a video specialist to trim and shoot video features, then don’t worry!
We are here to take you on the tour of the easiest video editing software that would promise a professional-looking end-product despite being absolutely inexperienced!
In my opinion, an ideal video editing software should be easy for everyone to get started. It could be simple video editing software, but it at least contains all the basic features you want. My recommendation is Wondershare Filmora, which compromises usability and capability to the best. It not only comes with all common video editing tools at your fingertips but also features you may need to bring your videos to the next level.
- 15 Best Easy Video Editing Software
- Basic Features You Need in an Easy Video Editing Software
- Why Video Editing Matters Nowadays?
- Basic Video Editing Terms You Should Know
Watch Video to Take a Quick View of the 18 Best Video Editors
Filmora Video Editor is an expert in creating and editing videos with outstanding functions and features. The easy-to-use interface will help you much! It offers versions for Windows, Mac, Android and iOS! Worth to have a try!
Try Free Video Editor Try Free Video Editor Try Free Video Editor Learn More >
15 Best Easy Video Editing Software
Below are the brief detail of easy video editors for PC, giving you more editing scalability than mobile-based editing apps. So if you are seeking easy video editing software for YouTube or website then look no further!
1. Wondershare Filmora - Easy Video Editing Software, Unlimited Video Sharing
Compatibility: Windows, Mac, Android, iPhone and iPad.
Wondershare Filmora paves the way to share videos instantly with family and friends, whatever it’s on YouTube, computer, mobile devices, or TV, you’ll choose your way.
For Win 7 or later (64-bit)
Secure Download
For macOS 10.14 or later
Secure Download
You can directly upload the video to YouTube, as well as an optional message sending to Facebook and Twitter.
Preset profiles are included in output videos for playing on mobile devices like iPhone, iPad, iPod, PSP, etc. No further conversion required. A build-in DVD tool allows you to burn video to a high-quality DVD for watching on TV with your home DVD player.
Filmstock Stock Media Library ](https://filmstock.wondershare.com/creative-theme-tutorial?spm=rs.filmora%5Fweb&source%5Fchannel=seo%5Farticle )
Download the free trial version of Wondershare Filmora for your Mac/Windows version below, start to make your stunning home movies today!
2. Blender
Compatibility: Windows, Mac, and Linux.
This is free and open-source software, originally designed as a 3D animation suite but also has a use video editor. This editor lets you carry out basic actions like video cutting and video splicing. Hence, it is an easy video cutter and easy video joiner. It can also perform more advanced tasks such as video masking.
3. Lightworks
Compatibility: Windows, Mac, and Linux.
Lightworks is a free easy to use video editing software that comes with High precision video trimming, 720p video export for YouTube, Multicam support, and support of a large range of video formats. Its free version has ample features enough for most of the users. Although the paid pro version costs $25 a month.
4. Shotcut
Compatibility: Windows, Mac, and Linux.
Shotcut is a free, open-source video editing software, packed with ample features with wide range video formats support, timeline editing, 4K HD resolution support, and have several tutorials video.
Wondershare Filmora Video Editor
Filmora - No Watermark Video Editing Software
• Easily edit and export video files without watermark
• offers popular effects and filters for making your video professional
• Cross-platform supported - (Windows, Mac, iOS, Android)
Try Video Editor without Watermark Try Video Editor without Watermark Try Video Editor without Watermark Learn More >
5. VSDC
Compatibility: Windows
VSDC, an easy video editing software for windows, is a free video editing software, having an easy-to-learn powerful suite of features including audio editing and color correction. Although a paid version, pro, costs $19.99, having visual waveform, image stabilization and voice over support.
6. Machete Lite
Compatibility: Windows
Machete Lite is a free yet the simplest video editing software perfect for simple editing tasks. Only AVI and WMV files are supported in its free version. Its full version costs $19.95 having audio editing and more file type support, unlike the free version.
7. Avidemux
Compatibility: Windows, Mac, and Linux
Avoided is the simplest video editing software, perfect for beginners. It allows performing simple editing features like Encoding, simple cutting, and filtering with an easy-to-use interface.
8. Hitfilm Express
Compatibility: Windows and Mac
HitFilm Express is a free video editing software with features ranging from basic editing features like trimming, audio editing, and slicing to advance tools and features. Its free version supports over 180 special effects. There’s a built-in YouTube uploading.
Finding a Way to Edit Video for Free? Try This Out!
Filmora Video Editor brings you all the convenience of editing videos with handy functions. You can make your creative ideas into realize! More importantly, your edited video can export without a watermark!
Try It Free Try It Free Try It Free Learn More >
9. iMovie
Compatibility: Mac
If you are a beginner and searching for a good video editing software to get your hands clean on editing then iMovie editor is perfect for you. It is an easy video editing software for mac having an easy drag and drop interface. Features like Video trimming, split-screen, audio editing, pre-made transitions library, and 4K resolution support.
10. Openshot
Compatibility: Windows, Mac, and Linux
It is a free open source video editing software with an easy-to-use interface. Features like unlimited layers and tracks, time-mapping, real-time previews, trimming, snapping, clip resizing, curve-based keyframe animations etc. It offers more than enough features for free software.
11. Movie Maker
Compatibility: Windows
It is an easy video maker and editing software for beginners which can be downloaded from any third-party and use it to make and share high-quality movies.
12. Lumen5
Compatibility: Windows and Mac
It’s a perfect web-based video editing tool, best for Social Media promotion Campaigns with an easy drag-and-drop interface.
![]()
A cross-platform for making videos anywhere for all creators

Why your video editing isn’t good enough? How about some creative inspo?
- 100 Million+ Users
- 150+ Countries and Regions
- 4 Million+ Social Media Followers
- 5 Million+ Stock Media for Use
* Secure Download

13. Adobe Spark
Compatibility: Windows and Mac
Adobe Sparks is also a web-based easy video editor, similar to Lumen5. It offers an easy user interface but is a little restricted when it comes to offering a bank of images and footage to use.
14. Videopad
Compatibility: Windows
VideoPad is a simple video editing software for beginners, maybe not suitable for professional use. It has features like 3D Video Editing, Sound Effects and pre-made transitions Library, Reduce Camera Shakes and Multiple Resolutions export support.
15. Freemake
Compatibility: Windows
Freemake is a free video converter that is used to convert and alter videos that can modify and convert videos, embed videos to websites, and extract audio from video clips simply and fast. It supports above 500 video file formats and is compatible with multiple audio and image file formats for slideshows and video clip creation.
Basic Features You Need in an Easy Video Editing Software
A software having:
- Easy montage maker
- Easy video cutter
- Easy video joiner
- Compositing multiple elements together
- Color grading
- Motion tracking
- Stabilization
- Titles
- Background replacement
- Basic color correction
- Cross dissolves and fade-to-black transitions
- Audio crossfades
- Audio level adjustment using keyframes
- Auto synchronization of additional audio tracks
- Image position adjustment using keyframes
- Footage speed adjustments
- Basic color correction
- Footage bins for roughly organizing imported footage
Why Video Editing Matters Nowadays?
If videos aren’t a primary focus of your content marketing plan, the probability is it’s soon going to be certain! Every next production is turning into video-based content, be it content marketers or SEOs.
Around 50% of the content marketers are using Facebook and YouTube channels for the sake of video distribution since online activity spent on watching videos is 50%.
Moreover, by 2021, video is going to be projected to account for more than 80% out of all internet traffic.
Therefore, it has become a need to focus on video content if you are looking to grow the organic traffic of your publications.

Filmora Free Video Editor
Create AI-Generated Video with Filmora
Filmora Free video editor offers a ChatGPT plug-in and AI tools to enhance your creative vision. Make your idea into reality.
Try It Free Try It Free Try It Free Learn More >
Basic Video Editing Terms You Should Know
Below are some of the important yet basic terms that you should know related to videography in general and video editing in specific as well, whether you are a beginner or professional.
Aspect ratio:
The aspect ratio is the ratio of width and height of a video. Examples of the most used aspect ratios are: 4:3, 16:9, 1.85:1.
Refer to the image given below for a better understanding.

B-roll:
B-roll facilities one with the flexibility, when editing, to the video editing rules as it is an add-on picture that makes a previously incoherent scene seamless.
As shown in the image below, B-roll is used to insert which can make the transition easy to look on the eyes.
Bit rate:
Bit rate, also known as data rate, refers to the amount of data used for every second within the video. It is most commonly expressed in kilobits per second (kbps).
Close up:
Close-up refers to the shots that frame to subject tightly.
For instance, if it is a person, then the close-up covers solely his face.
Color temperature:
Color temperature refers to the light visibility in a shot. Color temperature is expressed in Kelvin. The scale of color temperature ranges from cool to warm.
Composition:
Composition entails the process of combining multiple footages using video editing software.
Compression:
Compression is the process of minimizing the quantity of data utilized in a video file. It helps make in the process of uploading and downloading quite faster. This also leaves you with ample space for more of your publications.
Crop factor:
Crop factor refers to a number that expresses the ratio of the imaging area of a sensor to a full-frame sensor. It typically ranges from 1.3 to 2.0.
Cut-in
Cut-in refers to showing a specific part of a subject in order to emphasize a certain aspect or emotion. For instance, hand gestures may show nervousness, enthusiasm, agitation, etc.
Foley:
Often times the original sound of the scene captured in the video is not captured as naturally as they were supposed to sound like in reality. Hence, Foley is when you reproduce those sounds for that video.
Frame rate:
Frame rate refers to the video capturing by a shutter in a second or shutter cycling rate through opening and closing. Some of the common frame rates are 24, 25, 29.97, 30, etc. The frame rate is expressed in frames per second (fps).
High definition media interface:
HDMI is the connectors that digitally transfer audio and HD video to a television. This is helpful if you intend to work on a bigger screen or wish to share some of your productions.
Resolution:
Resolution refers to the horizontal and vertical pixels of your video. For instance 640×480 for SD and 1280×720 for HD. Sometimes resolution refers only to the number of pixels that paper vertically. For example 480p, 720p, and 1080p respectively.
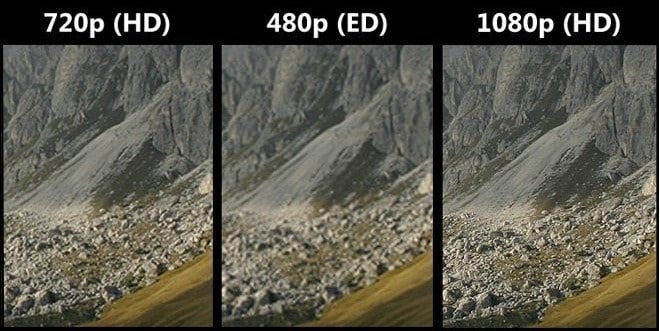
J-Cut:
J-cut refers to the editing technique in which the audio from a next scene is overlapped with the image from the previous scene, such that the audio segment of the next scene begins playing prior to its picture.
Jumpcut:
Jumpcut editing techniques refer to an abrupt transition between the two consecutive frames. The entity in the video containing jump cuts appears to jump along with the scene from one place to another. This looks disruptive to the audience.
L-Cut:
L-cut is exactly opposite to J-cut where the audio from the next scene overlays the image from the next scene to play the audio after an image has been displayed in the video.
Lower third:
As the name suggests, the lower third is derived from the rule of third which refers to the type of title, mostly used by vloggers, broadcasters, interviewers, and you tubers.
Memory bank:
You can understand the term by thinking of a memory box where we keep certain things as a memory of the events in someone’s life. Memory bank serves the same purpose through the use of video. It often uses natural sounds, document travel or merely store moments in routine life.
Press kit:
Press kit is used to provide information regarding your productions to the press for promotional purposes. Such information is often background including synopsis, crew, cast’s bios Q&A with the director, production stills and its reviews.
Shot list:
The shot list refers to the checklist related to the shots that a videographer plans to include in his/her content. This may help you save time and gear with efficient planning and handling. This gives a sense of direction to your production.
Storyboard:
A storyboard is a drawing to illustrate the scenes in the video. This gives a direct and organized way to visualize the needs for the shots or animation.
Sync:
Synchronization, aka sync, refers to the alignment of audio with video imaging.
Rule of thirds:
The rule of third is a grid that helps you to compose interesting and balanced shots to make your productions aesthetically pleasing. The grid is similar to a tic-tac-toe board since it segregates the picture into 9 segments. It helps bring points of interest to be aligned with the lines or intersection given in the grid.
Three-point lighting:
This helps one to diminish the shadows for image balancing and provides an appealing contrast. These three lights are commonly known as fill, key, and backlight.

Tilts:
Tilts refer to the vertical transitions that your camera. This is the opposite of pans.

Pans:
Pans refer to the horizontal movements of your camera. This is exactly contrary to tilts.
White balance:
White balance refers to the process where the unrealistic color casts are removed in order to render a white object to be actually white in your photo, and not have other tints.
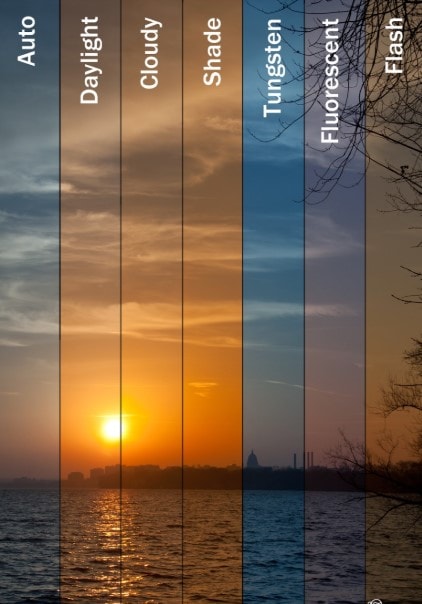
Wide-angle:
A wide-angel lens refers to a short focal length of a lens. This brings more of a subject rather than a subject being captured by a normal lens at equal distances.
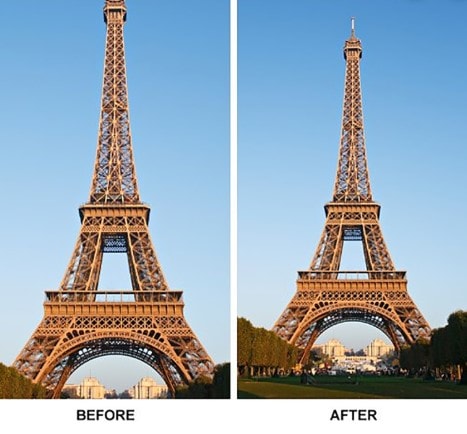
Non-linear editing:
NLEs is a non-destructive editing technique that allows one to access any frame in a video clip regardless of the sequence in the clip. It gives you the freedom to easily include effects, transitions, fades, etc. which cannot be achieved with linear editing
Pixel aspect ratio:
Pixels are several tiny squares that build up an image in a video. Whereas, aspect ratio refers to the ratio of width to height of a video. Hence, the pixel aspect ratio (PAR) is the ratio of width to height of the pixels.
Conclusion
Be it Instagram stories, YouTube product testimonials, or Facebook ads, using these easy-to-use video editing software will elevate your content into a professional and slick look.
So, I hope you are now ready to get started.
Lights, camera, action!
For Win 7 or later (64-bit)
Secure Download
For macOS 10.14 or later
Secure Download
Click here to get Filmora for PC by email
or Try Filmora App for mobile >>>
download filmora app for ios ](https://app.adjust.com/b0k9hf2%5F4bsu85t ) download filmora app for android ](https://app.adjust.com/b0k9hf2%5F4bsu85t )
Ollie Mattison
Ollie Mattison is a writer and a lover of all things video.
Follow @Ollie Mattison
Ollie Mattison
Mar 27, 2024• Proven solutions
If you are not a video-making expert, own a video studio, or have a video specialist to trim and shoot video features, then don’t worry!
We are here to take you on the tour of the easiest video editing software that would promise a professional-looking end-product despite being absolutely inexperienced!
In my opinion, an ideal video editing software should be easy for everyone to get started. It could be simple video editing software, but it at least contains all the basic features you want. My recommendation is Wondershare Filmora, which compromises usability and capability to the best. It not only comes with all common video editing tools at your fingertips but also features you may need to bring your videos to the next level.
- 15 Best Easy Video Editing Software
- Basic Features You Need in an Easy Video Editing Software
- Why Video Editing Matters Nowadays?
- Basic Video Editing Terms You Should Know
Watch Video to Take a Quick View of the 18 Best Video Editors
Filmora Video Editor is an expert in creating and editing videos with outstanding functions and features. The easy-to-use interface will help you much! It offers versions for Windows, Mac, Android and iOS! Worth to have a try!
Try Free Video Editor Try Free Video Editor Try Free Video Editor Learn More >
15 Best Easy Video Editing Software
Below are the brief detail of easy video editors for PC, giving you more editing scalability than mobile-based editing apps. So if you are seeking easy video editing software for YouTube or website then look no further!
1. Wondershare Filmora - Easy Video Editing Software, Unlimited Video Sharing
Compatibility: Windows, Mac, Android, iPhone and iPad.
Wondershare Filmora paves the way to share videos instantly with family and friends, whatever it’s on YouTube, computer, mobile devices, or TV, you’ll choose your way.
For Win 7 or later (64-bit)
Secure Download
For macOS 10.14 or later
Secure Download
You can directly upload the video to YouTube, as well as an optional message sending to Facebook and Twitter.
Preset profiles are included in output videos for playing on mobile devices like iPhone, iPad, iPod, PSP, etc. No further conversion required. A build-in DVD tool allows you to burn video to a high-quality DVD for watching on TV with your home DVD player.
Filmstock Stock Media Library ](https://filmstock.wondershare.com/creative-theme-tutorial?spm=rs.filmora%5Fweb&source%5Fchannel=seo%5Farticle )
Download the free trial version of Wondershare Filmora for your Mac/Windows version below, start to make your stunning home movies today!
2. Blender
Compatibility: Windows, Mac, and Linux.
This is free and open-source software, originally designed as a 3D animation suite but also has a use video editor. This editor lets you carry out basic actions like video cutting and video splicing. Hence, it is an easy video cutter and easy video joiner. It can also perform more advanced tasks such as video masking.
3. Lightworks
Compatibility: Windows, Mac, and Linux.
Lightworks is a free easy to use video editing software that comes with High precision video trimming, 720p video export for YouTube, Multicam support, and support of a large range of video formats. Its free version has ample features enough for most of the users. Although the paid pro version costs $25 a month.
4. Shotcut
Compatibility: Windows, Mac, and Linux.
Shotcut is a free, open-source video editing software, packed with ample features with wide range video formats support, timeline editing, 4K HD resolution support, and have several tutorials video.
Wondershare Filmora Video Editor
Filmora - No Watermark Video Editing Software
• Easily edit and export video files without watermark
• offers popular effects and filters for making your video professional
• Cross-platform supported - (Windows, Mac, iOS, Android)
Try Video Editor without Watermark Try Video Editor without Watermark Try Video Editor without Watermark Learn More >
5. VSDC
Compatibility: Windows
VSDC, an easy video editing software for windows, is a free video editing software, having an easy-to-learn powerful suite of features including audio editing and color correction. Although a paid version, pro, costs $19.99, having visual waveform, image stabilization and voice over support.
6. Machete Lite
Compatibility: Windows
Machete Lite is a free yet the simplest video editing software perfect for simple editing tasks. Only AVI and WMV files are supported in its free version. Its full version costs $19.95 having audio editing and more file type support, unlike the free version.
7. Avidemux
Compatibility: Windows, Mac, and Linux
Avoided is the simplest video editing software, perfect for beginners. It allows performing simple editing features like Encoding, simple cutting, and filtering with an easy-to-use interface.
8. Hitfilm Express
Compatibility: Windows and Mac
HitFilm Express is a free video editing software with features ranging from basic editing features like trimming, audio editing, and slicing to advance tools and features. Its free version supports over 180 special effects. There’s a built-in YouTube uploading.
Finding a Way to Edit Video for Free? Try This Out!
Filmora Video Editor brings you all the convenience of editing videos with handy functions. You can make your creative ideas into realize! More importantly, your edited video can export without a watermark!
Try It Free Try It Free Try It Free Learn More >
9. iMovie
Compatibility: Mac
If you are a beginner and searching for a good video editing software to get your hands clean on editing then iMovie editor is perfect for you. It is an easy video editing software for mac having an easy drag and drop interface. Features like Video trimming, split-screen, audio editing, pre-made transitions library, and 4K resolution support.
10. Openshot
Compatibility: Windows, Mac, and Linux
It is a free open source video editing software with an easy-to-use interface. Features like unlimited layers and tracks, time-mapping, real-time previews, trimming, snapping, clip resizing, curve-based keyframe animations etc. It offers more than enough features for free software.
11. Movie Maker
Compatibility: Windows
It is an easy video maker and editing software for beginners which can be downloaded from any third-party and use it to make and share high-quality movies.
12. Lumen5
Compatibility: Windows and Mac
It’s a perfect web-based video editing tool, best for Social Media promotion Campaigns with an easy drag-and-drop interface.
![]()
A cross-platform for making videos anywhere for all creators
Why your video editing isn’t good enough? How about some creative inspo?
- 100 Million+ Users
- 150+ Countries and Regions
- 4 Million+ Social Media Followers
- 5 Million+ Stock Media for Use
* Secure Download
13. Adobe Spark
Compatibility: Windows and Mac
Adobe Sparks is also a web-based easy video editor, similar to Lumen5. It offers an easy user interface but is a little restricted when it comes to offering a bank of images and footage to use.
14. Videopad
Compatibility: Windows
VideoPad is a simple video editing software for beginners, maybe not suitable for professional use. It has features like 3D Video Editing, Sound Effects and pre-made transitions Library, Reduce Camera Shakes and Multiple Resolutions export support.
15. Freemake
Compatibility: Windows
Freemake is a free video converter that is used to convert and alter videos that can modify and convert videos, embed videos to websites, and extract audio from video clips simply and fast. It supports above 500 video file formats and is compatible with multiple audio and image file formats for slideshows and video clip creation.
Basic Features You Need in an Easy Video Editing Software
A software having:
- Easy montage maker
- Easy video cutter
- Easy video joiner
- Compositing multiple elements together
- Color grading
- Motion tracking
- Stabilization
- Titles
- Background replacement
- Basic color correction
- Cross dissolves and fade-to-black transitions
- Audio crossfades
- Audio level adjustment using keyframes
- Auto synchronization of additional audio tracks
- Image position adjustment using keyframes
- Footage speed adjustments
- Basic color correction
- Footage bins for roughly organizing imported footage
Why Video Editing Matters Nowadays?
If videos aren’t a primary focus of your content marketing plan, the probability is it’s soon going to be certain! Every next production is turning into video-based content, be it content marketers or SEOs.
Around 50% of the content marketers are using Facebook and YouTube channels for the sake of video distribution since online activity spent on watching videos is 50%.
Moreover, by 2021, video is going to be projected to account for more than 80% out of all internet traffic.
Therefore, it has become a need to focus on video content if you are looking to grow the organic traffic of your publications.
Filmora Free Video Editor
Create AI-Generated Video with Filmora
Filmora Free video editor offers a ChatGPT plug-in and AI tools to enhance your creative vision. Make your idea into reality.
Try It Free Try It Free Try It Free Learn More >
Basic Video Editing Terms You Should Know
Below are some of the important yet basic terms that you should know related to videography in general and video editing in specific as well, whether you are a beginner or professional.
Aspect ratio:
The aspect ratio is the ratio of width and height of a video. Examples of the most used aspect ratios are: 4:3, 16:9, 1.85:1.
Refer to the image given below for a better understanding.
B-roll:
B-roll facilities one with the flexibility, when editing, to the video editing rules as it is an add-on picture that makes a previously incoherent scene seamless.
As shown in the image below, B-roll is used to insert which can make the transition easy to look on the eyes.
Bit rate:
Bit rate, also known as data rate, refers to the amount of data used for every second within the video. It is most commonly expressed in kilobits per second (kbps).
Close up:
Close-up refers to the shots that frame to subject tightly.
For instance, if it is a person, then the close-up covers solely his face.
Color temperature:
Color temperature refers to the light visibility in a shot. Color temperature is expressed in Kelvin. The scale of color temperature ranges from cool to warm.
Composition:
Composition entails the process of combining multiple footages using video editing software.
Compression:
Compression is the process of minimizing the quantity of data utilized in a video file. It helps make in the process of uploading and downloading quite faster. This also leaves you with ample space for more of your publications.
Crop factor:
Crop factor refers to a number that expresses the ratio of the imaging area of a sensor to a full-frame sensor. It typically ranges from 1.3 to 2.0.
Cut-in
Cut-in refers to showing a specific part of a subject in order to emphasize a certain aspect or emotion. For instance, hand gestures may show nervousness, enthusiasm, agitation, etc.
Foley:
Often times the original sound of the scene captured in the video is not captured as naturally as they were supposed to sound like in reality. Hence, Foley is when you reproduce those sounds for that video.
Frame rate:
Frame rate refers to the video capturing by a shutter in a second or shutter cycling rate through opening and closing. Some of the common frame rates are 24, 25, 29.97, 30, etc. The frame rate is expressed in frames per second (fps).
High definition media interface:
HDMI is the connectors that digitally transfer audio and HD video to a television. This is helpful if you intend to work on a bigger screen or wish to share some of your productions.
Resolution:
Resolution refers to the horizontal and vertical pixels of your video. For instance 640×480 for SD and 1280×720 for HD. Sometimes resolution refers only to the number of pixels that paper vertically. For example 480p, 720p, and 1080p respectively.
J-Cut:
J-cut refers to the editing technique in which the audio from a next scene is overlapped with the image from the previous scene, such that the audio segment of the next scene begins playing prior to its picture.
Jumpcut:
Jumpcut editing techniques refer to an abrupt transition between the two consecutive frames. The entity in the video containing jump cuts appears to jump along with the scene from one place to another. This looks disruptive to the audience.
L-Cut:
L-cut is exactly opposite to J-cut where the audio from the next scene overlays the image from the next scene to play the audio after an image has been displayed in the video.
Lower third:
As the name suggests, the lower third is derived from the rule of third which refers to the type of title, mostly used by vloggers, broadcasters, interviewers, and you tubers.
Memory bank:
You can understand the term by thinking of a memory box where we keep certain things as a memory of the events in someone’s life. Memory bank serves the same purpose through the use of video. It often uses natural sounds, document travel or merely store moments in routine life.
Press kit:
Press kit is used to provide information regarding your productions to the press for promotional purposes. Such information is often background including synopsis, crew, cast’s bios Q&A with the director, production stills and its reviews.
Shot list:
The shot list refers to the checklist related to the shots that a videographer plans to include in his/her content. This may help you save time and gear with efficient planning and handling. This gives a sense of direction to your production.
Storyboard:
A storyboard is a drawing to illustrate the scenes in the video. This gives a direct and organized way to visualize the needs for the shots or animation.
Sync:
Synchronization, aka sync, refers to the alignment of audio with video imaging.
Rule of thirds:
The rule of third is a grid that helps you to compose interesting and balanced shots to make your productions aesthetically pleasing. The grid is similar to a tic-tac-toe board since it segregates the picture into 9 segments. It helps bring points of interest to be aligned with the lines or intersection given in the grid.
Three-point lighting:
This helps one to diminish the shadows for image balancing and provides an appealing contrast. These three lights are commonly known as fill, key, and backlight.
Tilts:
Tilts refer to the vertical transitions that your camera. This is the opposite of pans.
Pans:
Pans refer to the horizontal movements of your camera. This is exactly contrary to tilts.
White balance:
White balance refers to the process where the unrealistic color casts are removed in order to render a white object to be actually white in your photo, and not have other tints.
Wide-angle:
A wide-angel lens refers to a short focal length of a lens. This brings more of a subject rather than a subject being captured by a normal lens at equal distances.
Non-linear editing:
NLEs is a non-destructive editing technique that allows one to access any frame in a video clip regardless of the sequence in the clip. It gives you the freedom to easily include effects, transitions, fades, etc. which cannot be achieved with linear editing
Pixel aspect ratio:
Pixels are several tiny squares that build up an image in a video. Whereas, aspect ratio refers to the ratio of width to height of a video. Hence, the pixel aspect ratio (PAR) is the ratio of width to height of the pixels.
Conclusion
Be it Instagram stories, YouTube product testimonials, or Facebook ads, using these easy-to-use video editing software will elevate your content into a professional and slick look.
So, I hope you are now ready to get started.
Lights, camera, action!
For Win 7 or later (64-bit)
Secure Download
For macOS 10.14 or later
Secure Download
Click here to get Filmora for PC by email
or Try Filmora App for mobile >>>
download filmora app for ios ](https://app.adjust.com/b0k9hf2%5F4bsu85t ) download filmora app for android ](https://app.adjust.com/b0k9hf2%5F4bsu85t )
Ollie Mattison
Ollie Mattison is a writer and a lover of all things video.
Follow @Ollie Mattison
Also read:
- In 2024, How to Create Closed Captions in Final Cut Pro X (2023 Update)
- New In 2024, Rising Stars of Lego Animation Top Makers
- New Minitool Movie Maker A Comprehensive Review and User Guide
- Updated Expert Picks Top Hand Drawing Whiteboard Animation Makers This Year for 2024
- Mac VLC Video Editor Trim and Optimize Your Videos
- Updated Discover the Best Video Editing Software Beyond Windows Movie Maker for 2024
- Top 5 Best Free WMV Video Joiners
- In 2024, Music Video Magic 10 Essential Software and Apps for Creators
- New In 2024, Unleash Your Inner Meme Lord Top 10 Mobile Apps for Meme Creation
- New Facebook MP3 Converter Top 8 Online Options for 2024
- New VN Video Editor PC Version A Quick Overview for 2024
- Updated In 2024, Online Aspect Ratio Conversion Made Easy Top Picks
- New The Ultimate Video Editors Toolkit 35 Must-Have Apps for Windows, Mac, iOS, Android, and Linux for 2024
- Updated FCPX Error Fixing Essentials A Step-by-Step Guide
- Updated 2024 Approved Wav Converter Mastery A Step-by-Step Tutorial
- Updated 2024 Approved The Art of Video Resizing Tips for Perfect Proportions
- New Mac VLC Video Cutter Trim, Cut, and Edit Videos Without Quality Degradation for 2024
- Updated 2024 Approved Top 10 4K Video Samples You Cant Miss
- In 2024, S Most Cost-Effective Video Editing Tools
- New Top Animation Tools A Step-by-Step Guide to Bringing Your Drawings to Life for 2024
- New Gaming Intro Mastery 10 Essential Online Tools for 2024
- Updated WeVideo The Fast and Easy Way to Create Online Videos for 2024
- New In 2024, Free and Fast Top 10 Video Speed Adjustment Apps for Mobile Devices
- New Should You Buy Videopad Video Editor? A Honest Review and Analysis
- S Top PowerDirector Substitutes for Android and iOS Devices for 2024
- Bring Back the 80S Best VHS-Style Filter Apps for iPhone and Android
- New Stop Motion on Demand Cloud-Based Solutions and Guidance
- New March Madness Score Big with Our Exclusive Filmora Coupon Code for 2024
- New Split 3GP Files Into Multiple Segments Easy Guide 2023 for 2024
- Updated Loop Your Videos with These Free Programs
- New 2024 Approved Effortless Video Editing How to Change Aspect Ratios Quickly
- Updated Unify Your Visuals How to Match Colors Across Video Clips in Final Cut Pro
- In 2024, Crafting Compelling Lower Thirds FCPX Essentials
- New In 2024, Bringing Your Memories to Life A Guide to Creating Video Slideshows in Final Cut Pro
- New The Ultimate Guide to Selecting the Perfect OGG Converter for 2024
- New Apples Finest Video Editing Software for Creative Pros
- In 2024, Virtual Identity Studio Top Free Online Face Creation Tools
- Updated From Video to MP3 The Essential YouTube Audio Download Guide
- New In 2024, Transform Photos Into Videos The Top 5 Slideshow Makers
- In 2024, Trim Your Videos for Free on Windows 10 The Best Online and Offline Tools
- New In 2024, The Ultimate List of Vignette Apps for Mobile Free, Paid, and Everything in Between
- Updated 2024 Approved Design Beautiful Invitations with These 10 Free Video Makers
- What Pokémon Evolve with A Dawn Stone For Vivo Y100t? | Dr.fone
- 8 Workable Fixes to the SIM not provisioned MM#2 Error on Lava Agni 2 5G | Dr.fone
- In 2024, How to Transfer Apps from Vivo X Fold 2 to Another | Dr.fone
- 5 Ways to Restart Honor Magic 6 Without Power Button | Dr.fone
- In 2024, How Screen Mirroring Apple iPhone 14 Plus to TV or PC? | Dr.fone
- In 2024, Pokemon Go Error 12 Failed to Detect Location On Apple iPhone 12 mini? | Dr.fone
- Bricked Your Vivo Y100t? Heres A Full Solution | Dr.fone
- In 2024, 9 Best Phone Monitoring Apps for Realme C55 | Dr.fone
- In 2024, Top 4 Ways to Trace Motorola Edge 40 Neo Location | Dr.fone
- In 2024, How Can I Catch the Regional Pokémon without Traveling On Apple iPhone XS Max | Dr.fone
- 2024 Approved How to Build A Video Editing Career
- How To Use Allshare Cast To Turn On Screen Mirroring On Oppo A78 | Dr.fone
- In 2024, Create Engaging Videos with the Ken Burns Effect A Step-by-Step Tutorial
- In 2024, Remove Device Supervision From your iPhone 11 | Dr.fone
- How to Retrieve deleted photos on Pixel 8 Pro
- How to Unlock Verizon Apple iPhone SE
- In 2024, How to Fix Pokemon Go Route Not Working On Vivo Y100? | Dr.fone
- How To Change Realme 12 Pro 5G Lock Screen Password?
- Fixing Foneazy MockGo Not Working On Infinix Smart 7 | Dr.fone
- How To Unlock a Poco C55 Easily?
- Title: New Steady Your Shot The Best Free Online Video Stabilizers for 2024
- Author: Amelia
- Created at : 2024-04-29 19:52:33
- Updated at : 2024-04-30 19:52:33
- Link: https://ai-driven-video-production.techidaily.com/new-steady-your-shot-the-best-free-online-video-stabilizers-for-2024/
- License: This work is licensed under CC BY-NC-SA 4.0.
