
:max_bytes(150000):strip_icc():format(webp)/istabletworthit-a75b20684e5241b8a64efc0733092fcd.jpg)
New WebM vs MP4 10 Best Conversion Software Options
WebM vs MP4: 10 Best Conversion Software Options
10 Best WebM to MP4 Converters

Liza Brown
Mar 27, 2024• Proven solutions
Reaching the widest audience possible is the goal of every video content creator, but achieving this goal might be impossible if the videos you share online are not saved in the right file format. MP4 is probably the most common video file there is, because it is compatible with a broad range of media players , as well as online video hosting and social media platforms.
WebM, on the other hand, is perfectly suited for videos that are viewed from Google Chrome or Mozilla Firefox, but only a handful of desktop-based media players offer support for this video file format. That is why in this article we are going to take a look at the 10 best WebM to MP4 converters on the market.
The 10 Best WebM to MP4 Converters
Changing the format of a video file is never a complicated process, regardless of the software or the web-based application you are using. However, the duration, speed, and quality of the conversion process depend on the converter you’ve selected for this task. Here are the ten best WebM to MP4 converters that make the file conversion process swift and smooth.
1. UniConverter
Price: Subscription plans start at $2.95 for the online version of UniConverter
Compatibility: Windows, Mac, web-based
This is a powerful file converter that is available both online and on desktop computers. You can choose from more than a thousand conversion formats, which enables you to convert your video files into virtually any format you want.
So, in order to convert a WebM video to MP4 you just need to add one or more WebM files to UniConverter and then set MP4 as the output file format. The amount of time you will have to wait for the conversion process to be completed varies on the desktop and online versions of UniConverter, and you can only convert two WebM files to MP4 at the same time with the online version of this file converter.
2. VLC
Price: Free
Compatibility: Windows, Mac, Linux, iOS, Android

Even though VLC is primarily a media player, you can still use it to convert WebM videos to MP4. Head over to the Media menu after you launch VLC and select the Convert/Save option or use the CTRL+R keyboard shortcut to bring up the Open Media window.
Afterward, you should click on the Add button and proceed to import the WebM file into the media player, and then click on the Browse button in order to specify the location on your hard drive where the converted file is going to be saved. When done, you should click on the Convert/Save button to initiate the file conversion process.
3. Any Video Converter
Price: Free, $69.95
Compatibility: Windows

As its name suggests, you can convert any video file with this software regardless of the format in which it is saved. Converting WebM files to MP4 with Any Video Converter is a simple three-step process that can be completed in just a few moments.
To import the WebM video files into Any Video Converter you must click on the Add Video button and then set MP4 as the output format. The software also allows you to adjust the Bit Rate, audio, and video codec settings, so once you are done fine-tuning these settings you should click on the Convert button. After the conversion process is completed, your files will be accessible from the Output Folder.
4. Online Converter
Price: Free
Compatibility: Web-based

This online file conversion platform enables you to convert a broad range of documents for free. It also supports nearly all commonly used video file formats, including the WebM format, which makes it a perfect choice if you want to convert WebM videos to MP4.
In order to convert a WebM file with Online Converter you just need to upload it to the platform either from an online source or from a local hard drive. Optionally you can set the frame size or cut a video clip before clicking on the Convert button. Uploading a WebM video file can be time-consuming, especially if your file is larger than a few hundred MB.
5. Convertio
Price: Free, pricing options start at $9.99 per month
Compatibility: Web-based

Changing the format of an image, audio and files or presentations is an effortless process that can be completed in just a few clicks. Convertio lets you upload WebM videos from a local hard drive, a URL or cloud storage platforms like Dropbox and Google Drive.
After the upload is completed you just have to change the output format to MP4 and click on the Convert button. The size of the files you can convert with the free version of the platform cannot exceed 100MB and you must opt for one of the available subscription models if you want to convert video files that exceed this limit. What’s more the number of concurrent conversions you can make depends on the subscription model you select.
6. Zamzar
Price: Free, pricing options start at $9.00 per month
Compatibility: Web-based

The fact that 480 million files have been converted with Zamzar since 2006, shows you just how popular this file conversion platform really is. Converting a video with this platform requires you to go through a simple three-step process, so you just have to upload a WebM video file, select the output format and click on the Convert Now button.
You cannot convert files larger than 150MB with the free version of Zamzar. Moreover, this file conversion platform doesn’t allow its users to convert videos that exceed 2GB limit even if they purchase the Business subscription plan. In addition, the maximum online storage capacity you will have at your disposal varies from one subscription plan to another.
7. CloudConvert
Price: Free, pricing options start at $9. 52 per month
Compatibility: Web-based

With the support for over 200 file formats, CloudConvert is easily one of the best file conversion platforms on the Internet. That is why it is hardly a surprise that converting a WebM video file to MP4 requires a minimum amount of effort. However, the platform also enables you to fine-tune the conversion settings by choosing video and audio codecs, setting the constant frame rate or selecting the resolution of the output video.
Trimming the WebM videos is yet another option you will have at your disposal if you choose to convert your files with CloudConvert. In case you’re planning on using this file conversion platform on a regular basis, you can choose how many conversion minutes you’re going to have every month.
8. Video2Edit
Price: Free, $15.00 per month
Compatibility: Web-based

Video2Edit offers a quick way to convert a WebM video to MP4, since you just have to upload a file, either from Google Drive, Dropbox or your hard drive and click on the Start button. Optionally, you can adjust the frame rate, choose a video codec or select a new resolution for the video you’re converting. What’s more, the Video2Edit platform lets you disable a video’s audio track or change the audio codec.
Creating a profile on this file conversion platform will enable you to convert WebM video files that are smaller than 400MB. Purchasing the premium version of Video2Edit will enable you to convert WebM files that don’t exceed a 1GB size limit.
9. Onlineconvertforfree
Price: Free, pricing options start at $6.99
Compatibility: Web-based

You don’t need any previous experience with the file conversion process to convert a WebM video to MP4 with the online file conversion platform. Simply upload a file from your computer or from an online source, choose MP4 as the output file format and then download your file after the conversion.
The platform offers batch conversion options, which can be quite useful if you are looking to convert multiple video files quickly. It is worth noting that converting a video larger than 500MB with this platform isn’t possible, regardless of the subscription model you choose. The number of daily conversions, however, is not limited.
10. Aconvert
Price: Free
Compatibility: Web-based

This is a simple online file conversion tool that lets you convert WebM videos that are stored locally on your computer or on the cloud. You just have to select the source from which you want to import the video, select the output format and decide if you want to change the video’s frame rate , aspect ratio or size.
When done, simply click on the Convert Now button and then after the conversion process is completed, proceed to download your video to your computer. The only downside is that you cannot convert WebM video files that are larger than 200MB with Aconvert.
WebM vs MP4: Which Video File Format is Better?
The file format in which a video is saved determines its compatibility with different media players. So, if your videos are only going to be played in web-browsers like Google Chrome or Mozilla Firefox, then it is better to save your video in WebM file format.
However, you should keep in mind that this file format isn’t used often outside of the online context and that finding a media player that is compatible with the WebM format can be a challenge. MP4 video files, on the other hand, can be played in virtually any macOS or Windows-based media player or uploaded to YouTube or any other video hosting service. That’s why MP4 is a more appealing option to video content creators who want to ensure that their videos can be played anywhere regardless of the device or the media player that is being used to open them.
Conclusion
Changing a video’s file format in 2020 no longer requires you to have access to a professional video editing software, because there are countless online file conversion platforms, that enable you to complete this process in just a couple of clicks. Even so, most online solutions limit the maximum size of the video files you can convert with them, which is why it is better to choose one of the desktop-based options if you are working with large video files. Which WebM to MP4 converter do you like to use the most? Share your opinions with us in the comments.
Liza Brown
Liza Brown is a writer and a lover of all things video.
Follow @Liza Brown
Liza Brown
Mar 27, 2024• Proven solutions
Reaching the widest audience possible is the goal of every video content creator, but achieving this goal might be impossible if the videos you share online are not saved in the right file format. MP4 is probably the most common video file there is, because it is compatible with a broad range of media players , as well as online video hosting and social media platforms.
WebM, on the other hand, is perfectly suited for videos that are viewed from Google Chrome or Mozilla Firefox, but only a handful of desktop-based media players offer support for this video file format. That is why in this article we are going to take a look at the 10 best WebM to MP4 converters on the market.
The 10 Best WebM to MP4 Converters
Changing the format of a video file is never a complicated process, regardless of the software or the web-based application you are using. However, the duration, speed, and quality of the conversion process depend on the converter you’ve selected for this task. Here are the ten best WebM to MP4 converters that make the file conversion process swift and smooth.
1. UniConverter
Price: Subscription plans start at $2.95 for the online version of UniConverter
Compatibility: Windows, Mac, web-based
This is a powerful file converter that is available both online and on desktop computers. You can choose from more than a thousand conversion formats, which enables you to convert your video files into virtually any format you want.
So, in order to convert a WebM video to MP4 you just need to add one or more WebM files to UniConverter and then set MP4 as the output file format. The amount of time you will have to wait for the conversion process to be completed varies on the desktop and online versions of UniConverter, and you can only convert two WebM files to MP4 at the same time with the online version of this file converter.
2. VLC
Price: Free
Compatibility: Windows, Mac, Linux, iOS, Android
Even though VLC is primarily a media player, you can still use it to convert WebM videos to MP4. Head over to the Media menu after you launch VLC and select the Convert/Save option or use the CTRL+R keyboard shortcut to bring up the Open Media window.
Afterward, you should click on the Add button and proceed to import the WebM file into the media player, and then click on the Browse button in order to specify the location on your hard drive where the converted file is going to be saved. When done, you should click on the Convert/Save button to initiate the file conversion process.
3. Any Video Converter
Price: Free, $69.95
Compatibility: Windows
As its name suggests, you can convert any video file with this software regardless of the format in which it is saved. Converting WebM files to MP4 with Any Video Converter is a simple three-step process that can be completed in just a few moments.
To import the WebM video files into Any Video Converter you must click on the Add Video button and then set MP4 as the output format. The software also allows you to adjust the Bit Rate, audio, and video codec settings, so once you are done fine-tuning these settings you should click on the Convert button. After the conversion process is completed, your files will be accessible from the Output Folder.
4. Online Converter
Price: Free
Compatibility: Web-based
This online file conversion platform enables you to convert a broad range of documents for free. It also supports nearly all commonly used video file formats, including the WebM format, which makes it a perfect choice if you want to convert WebM videos to MP4.
In order to convert a WebM file with Online Converter you just need to upload it to the platform either from an online source or from a local hard drive. Optionally you can set the frame size or cut a video clip before clicking on the Convert button. Uploading a WebM video file can be time-consuming, especially if your file is larger than a few hundred MB.
5. Convertio
Price: Free, pricing options start at $9.99 per month
Compatibility: Web-based
Changing the format of an image, audio and files or presentations is an effortless process that can be completed in just a few clicks. Convertio lets you upload WebM videos from a local hard drive, a URL or cloud storage platforms like Dropbox and Google Drive.
After the upload is completed you just have to change the output format to MP4 and click on the Convert button. The size of the files you can convert with the free version of the platform cannot exceed 100MB and you must opt for one of the available subscription models if you want to convert video files that exceed this limit. What’s more the number of concurrent conversions you can make depends on the subscription model you select.
6. Zamzar
Price: Free, pricing options start at $9.00 per month
Compatibility: Web-based
The fact that 480 million files have been converted with Zamzar since 2006, shows you just how popular this file conversion platform really is. Converting a video with this platform requires you to go through a simple three-step process, so you just have to upload a WebM video file, select the output format and click on the Convert Now button.
You cannot convert files larger than 150MB with the free version of Zamzar. Moreover, this file conversion platform doesn’t allow its users to convert videos that exceed 2GB limit even if they purchase the Business subscription plan. In addition, the maximum online storage capacity you will have at your disposal varies from one subscription plan to another.
7. CloudConvert
Price: Free, pricing options start at $9. 52 per month
Compatibility: Web-based
With the support for over 200 file formats, CloudConvert is easily one of the best file conversion platforms on the Internet. That is why it is hardly a surprise that converting a WebM video file to MP4 requires a minimum amount of effort. However, the platform also enables you to fine-tune the conversion settings by choosing video and audio codecs, setting the constant frame rate or selecting the resolution of the output video.
Trimming the WebM videos is yet another option you will have at your disposal if you choose to convert your files with CloudConvert. In case you’re planning on using this file conversion platform on a regular basis, you can choose how many conversion minutes you’re going to have every month.
8. Video2Edit
Price: Free, $15.00 per month
Compatibility: Web-based
Video2Edit offers a quick way to convert a WebM video to MP4, since you just have to upload a file, either from Google Drive, Dropbox or your hard drive and click on the Start button. Optionally, you can adjust the frame rate, choose a video codec or select a new resolution for the video you’re converting. What’s more, the Video2Edit platform lets you disable a video’s audio track or change the audio codec.
Creating a profile on this file conversion platform will enable you to convert WebM video files that are smaller than 400MB. Purchasing the premium version of Video2Edit will enable you to convert WebM files that don’t exceed a 1GB size limit.
9. Onlineconvertforfree
Price: Free, pricing options start at $6.99
Compatibility: Web-based
You don’t need any previous experience with the file conversion process to convert a WebM video to MP4 with the online file conversion platform. Simply upload a file from your computer or from an online source, choose MP4 as the output file format and then download your file after the conversion.
The platform offers batch conversion options, which can be quite useful if you are looking to convert multiple video files quickly. It is worth noting that converting a video larger than 500MB with this platform isn’t possible, regardless of the subscription model you choose. The number of daily conversions, however, is not limited.
10. Aconvert
Price: Free
Compatibility: Web-based
This is a simple online file conversion tool that lets you convert WebM videos that are stored locally on your computer or on the cloud. You just have to select the source from which you want to import the video, select the output format and decide if you want to change the video’s frame rate , aspect ratio or size.
When done, simply click on the Convert Now button and then after the conversion process is completed, proceed to download your video to your computer. The only downside is that you cannot convert WebM video files that are larger than 200MB with Aconvert.
WebM vs MP4: Which Video File Format is Better?
The file format in which a video is saved determines its compatibility with different media players. So, if your videos are only going to be played in web-browsers like Google Chrome or Mozilla Firefox, then it is better to save your video in WebM file format.
However, you should keep in mind that this file format isn’t used often outside of the online context and that finding a media player that is compatible with the WebM format can be a challenge. MP4 video files, on the other hand, can be played in virtually any macOS or Windows-based media player or uploaded to YouTube or any other video hosting service. That’s why MP4 is a more appealing option to video content creators who want to ensure that their videos can be played anywhere regardless of the device or the media player that is being used to open them.
Conclusion
Changing a video’s file format in 2020 no longer requires you to have access to a professional video editing software, because there are countless online file conversion platforms, that enable you to complete this process in just a couple of clicks. Even so, most online solutions limit the maximum size of the video files you can convert with them, which is why it is better to choose one of the desktop-based options if you are working with large video files. Which WebM to MP4 converter do you like to use the most? Share your opinions with us in the comments.
Liza Brown
Liza Brown is a writer and a lover of all things video.
Follow @Liza Brown
Free Gaming Paradise: Top 10 Download Sites for PC and Android
Top 10 Best Free Game Download Sites [PC & Android][2024]

Ollie Mattison
Mar 27, 2024• Proven solutions


We all know and firmly believe that games are an integral part of our life. But the world has progressed, and we yearn to achieve real-life experiences through virtual reality instead of experiencing the actual thing. Online games are not only mentally stimulating, but they are also very addictive. Not everyone wants to pay to play games for a couple of hours, so here is a list of top free game downloading sites. You can download full versions of your favorite games for free.
Recommended Video Recorder & Editor for Gameplay: Filmora
If you want to edit a video recorded from games with more effects and templates, we recommend using Filmora . It is an easy-to-use video editor. It offers various title templates. You can also use it to record game videos. Just download it to have a try. Don’t know how to make a video? Visit the Wondershare Video Community and get some inspiration in video creation.
Part 1: Best Free PC Game Download Sites
1 Acid Play
Platforms: OS X and Windows

Key Features:
- Huge gaming library
The acid play has a gigantic collection of games of various types. The games at acid play have been categorized into action, arcade, board games, RPG, card games, puzzles, driving games, simulation, etc.
- Custom Search
The customized search helps you find the exact game you are looking for. It saves time since you cannot browse through thousands of games.
- Ratings
If you are new to this site or looking for a new game to play, you can choose only without trying every game to decide the best one. Just check the ratings provided by other players, and it will solve your problem. You can also rate a game according to your liking.
Pros:
- The games are easily downloadable and free.
- There is a large variety of games available to play.
Cons:
- The site is not updated, and no new games are introduced.
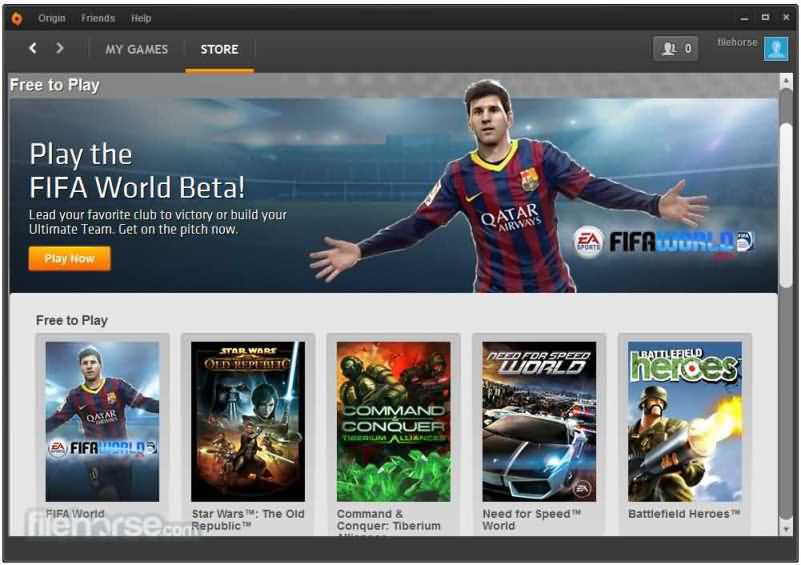
2 Origin Games
Platforms: OS X and Windows
Origin games are another best-known digital distribution platform for a free online gaming experience. It contains a fairly large library of premium games, but origin games provide links for free downloads for a limited time.
Key Features:
- Social Features
Origin provides its users with many social features like profile management, networking with friends through chatting, and video streaming via TwitchTV. You can also share your game library and community integration through social media and networking sites like Facebook, Xbox Live, PlayStation Network, and Nintendo Network.
- Variety in games
It provides various games, from PC games to Fifa and even classic games like Plant Vs. Zombies are also available.
- On-the-house games
The on-the-house features allow the customers to download a free trial of a premium game.
Pros:
- It provides great game streaming features.
- is developed by a renowned and successful company so that it can be trusted.
- The ‘on-the-house specials’ are appreciated by many gamers, allowing them to play a paid game for free now and then.
Cons:
- It has a lot of updates and takes an unreasonable amount of time to install and update the software.
- Customers have complained that they provide expired discount codes.
- Customer service needs to be improved as it is not very responsive.
3 AllGamesAtoZ
Platforms: OS X and Windows
If you want the best full version of a game for free, then AllGamesAtoZ is where you should go.
Key Features:
- The website is full of addictive games from different genres like action, arcade, shooting, role-playing, adventure, racing, simulation, etc.
- Multiple links for downloading a single game are available.
- A customized search bar is available so that you can locate the exact game you are looking for without having to browse through thousands of games.
- The games on AllGamesAtoZ are available on Windows, Linux, and Mac.
- A forum for game reviews is provided, so it is easier to decide which game you want to download without trying them all.
Pros:
- The gaming library is enormous.
- The game reviews make it easier to make a decision and save time.
- The website does not transfer viruses and is entirely safe from scams.
Cons:
- The downloading process is quite long.
- The website is not updated with new games.
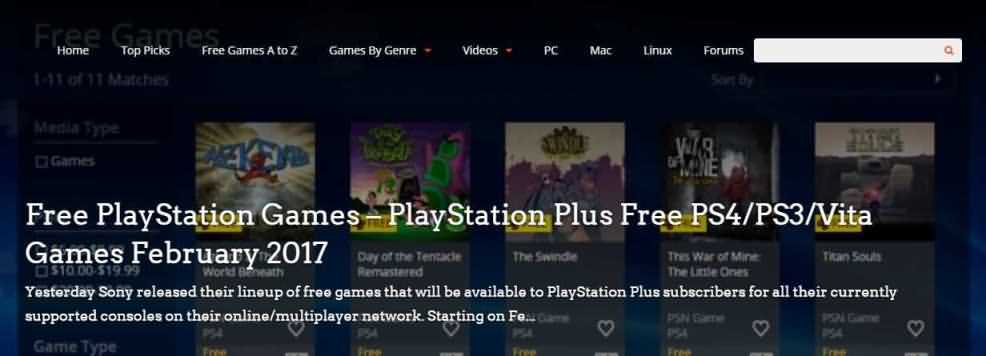
4 Mega Games
Platforms: OS X and Windows
It is another highly recommended online gaming site. It not only provides PC games for free but also offers 3D PlayStation games to be downloaded on your PC without any charge.

Key Features:
- Search and download
Mega games allow a search and download option for every game published on their site.
- PlayStation games
It has provided its customers with not only PC games but also 3D PlayStation games that can be downloaded for free.
- Cheat codes
Apart from all the standard gaming features, mega games also provide free cheat codes for the games.
Pros:
- The games are easily downloaded.
- The games have variety.
Cons:
- The website stops working after a while, and the download gets interrupted
5 Caiman.us
Platforms: OS X and Windows
It is another digital distribution platform for free online gaming. After the death of the site’s developer, the site has gone offline.

Key Features:
- It has a vast collection of games and over twenty free games categories.
- 2D and 3D gaming experiences are also provided.
- A customized search is available to make it easier for players to find the game they are looking for.
Pros:
- There is a vast collection of free games to download and play.
Cons:
- The site is not well organized and confusing.
- The search bar is at the very bottom of the page, so a person might find it hard to locate.
- Since the site has gone offline, the games are not updated, so there are no new games.
Part 2: Best Android Game Download Sites to Download Free Android Games
Android is growing very fast; now, almost everyone uses it and prefers it over any other software. Here are the best websites from where you can download free android apps:
1 Google Play
Google Play is the most common website to download free android apps. It is free, it is fast, and it is efficient. You can not only use this from your android mobile but also operate it and download apps using your laptop.

Key Features:
- The apps are easily downloaded, depending upon your internet connection.
- The purchase methods are through credit cards, and the procedure is straightforward.
- The platform allows everyone and anyone to sell their games.
- Sign up through your Google account is necessary to access these features.
Pros:
- It is easily accessible.
- It is pre-installed on all android supported devices.
- It contains a massive collection of unique apps, from books to music, workout, and games of various types.
Cons:
- Since everyone and anyone can access it without paying any registration fee, it is exposed to scams and harassment.
- A few games do not function and keep crashing.
2 Android Games Room

It contains thousands of free gaming apps in different categories like action, arcade, adventure, simulation, song games, and puzzle games. The download links are readily available; you can even access this site from your mobile by scanning a QR code. This site is a pretty good platform to download free games but has certain flaws. It does not allow a multiplayer gaming experience, and no customer services are provided.
3 Android Apps
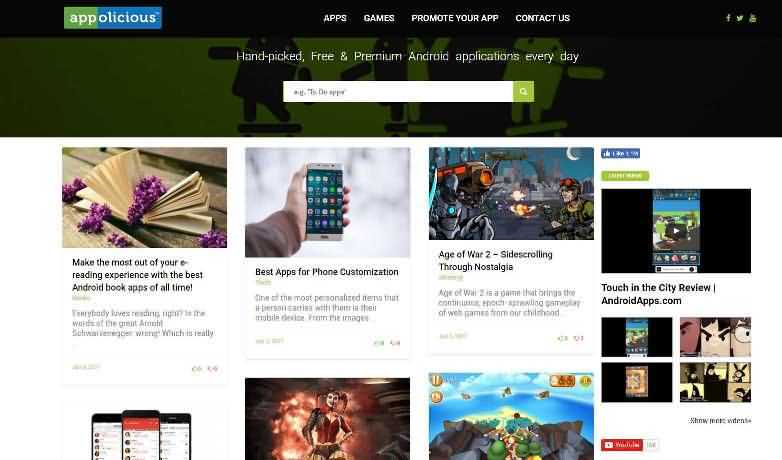
It is another platform to download android apps for free. This site is pretty good since it updates games that developers handpick almost daily. You can also promote your app using the ‘promote your app’ feature. The site has a lot of updates and takes an unreasonable amount of time to install and update the software. Furthermore, you can say that they do not have a customer service function because nobody ever responds to the customer’s queries.
4 1 Mobile
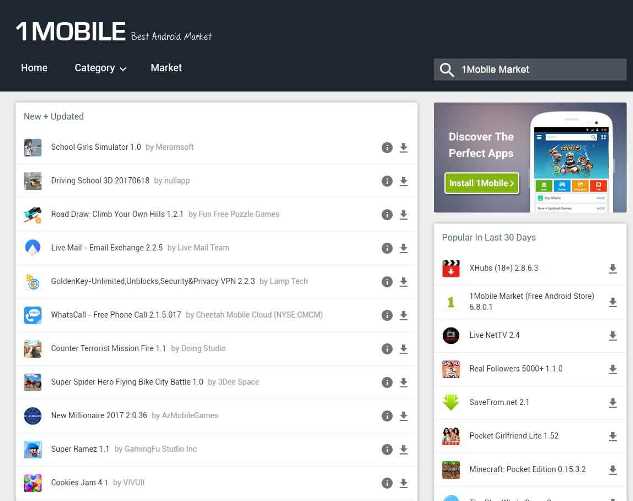
One mobile is a free android store. It provides its users the easiest way to locate, download and manage free apps. 1 Mobile has over eighty (80) million apps. One mobile has just been recently updated, has a brand new interface design, and operates much smoother. The content is more prosperous, smoother, and a thousand times better than before the latest update. All the apps and games are 100% free forever without hidden charges. It supports various languages like English, Korean, Chinese, French, Spanish, Japanese, and Portugal.
5 Approx
It provides the best free apps not only for android but OS as well. You can download it on your phone by scanning a QR code. This software has been functioning for the past six years and is free from viruses or malware.
To furnish your gameplay videos, Filmora also provides some cool effects, transitions, and elements, such as camera shake chaos effects, distortion effects, 3D change, speed blur transitions, and more. Moreover, you can always find some specially designed gaming effects in the Filmstock effects store.
Ollie Mattison
Ollie Mattison is a writer and a lover of all things video.
Follow @Ollie Mattison
Ollie Mattison
Mar 27, 2024• Proven solutions
We all know and firmly believe that games are an integral part of our life. But the world has progressed, and we yearn to achieve real-life experiences through virtual reality instead of experiencing the actual thing. Online games are not only mentally stimulating, but they are also very addictive. Not everyone wants to pay to play games for a couple of hours, so here is a list of top free game downloading sites. You can download full versions of your favorite games for free.
Recommended Video Recorder & Editor for Gameplay: Filmora
If you want to edit a video recorded from games with more effects and templates, we recommend using Filmora . It is an easy-to-use video editor. It offers various title templates. You can also use it to record game videos. Just download it to have a try. Don’t know how to make a video? Visit the Wondershare Video Community and get some inspiration in video creation.
Part 1: Best Free PC Game Download Sites
1 Acid Play
Platforms: OS X and Windows
Key Features:
- Huge gaming library
The acid play has a gigantic collection of games of various types. The games at acid play have been categorized into action, arcade, board games, RPG, card games, puzzles, driving games, simulation, etc.
- Custom Search
The customized search helps you find the exact game you are looking for. It saves time since you cannot browse through thousands of games.
- Ratings
If you are new to this site or looking for a new game to play, you can choose only without trying every game to decide the best one. Just check the ratings provided by other players, and it will solve your problem. You can also rate a game according to your liking.
Pros:
- The games are easily downloadable and free.
- There is a large variety of games available to play.
Cons:
- The site is not updated, and no new games are introduced.
2 Origin Games
Platforms: OS X and Windows
Origin games are another best-known digital distribution platform for a free online gaming experience. It contains a fairly large library of premium games, but origin games provide links for free downloads for a limited time.
Key Features:
- Social Features
Origin provides its users with many social features like profile management, networking with friends through chatting, and video streaming via TwitchTV. You can also share your game library and community integration through social media and networking sites like Facebook, Xbox Live, PlayStation Network, and Nintendo Network.
- Variety in games
It provides various games, from PC games to Fifa and even classic games like Plant Vs. Zombies are also available.
- On-the-house games
The on-the-house features allow the customers to download a free trial of a premium game.
Pros:
- It provides great game streaming features.
- is developed by a renowned and successful company so that it can be trusted.
- The ‘on-the-house specials’ are appreciated by many gamers, allowing them to play a paid game for free now and then.
Cons:
- It has a lot of updates and takes an unreasonable amount of time to install and update the software.
- Customers have complained that they provide expired discount codes.
- Customer service needs to be improved as it is not very responsive.
3 AllGamesAtoZ
Platforms: OS X and Windows
If you want the best full version of a game for free, then AllGamesAtoZ is where you should go.
Key Features:
- The website is full of addictive games from different genres like action, arcade, shooting, role-playing, adventure, racing, simulation, etc.
- Multiple links for downloading a single game are available.
- A customized search bar is available so that you can locate the exact game you are looking for without having to browse through thousands of games.
- The games on AllGamesAtoZ are available on Windows, Linux, and Mac.
- A forum for game reviews is provided, so it is easier to decide which game you want to download without trying them all.
Pros:
- The gaming library is enormous.
- The game reviews make it easier to make a decision and save time.
- The website does not transfer viruses and is entirely safe from scams.
Cons:
- The downloading process is quite long.
- The website is not updated with new games.
4 Mega Games
Platforms: OS X and Windows
It is another highly recommended online gaming site. It not only provides PC games for free but also offers 3D PlayStation games to be downloaded on your PC without any charge.
Key Features:
- Search and download
Mega games allow a search and download option for every game published on their site.
- PlayStation games
It has provided its customers with not only PC games but also 3D PlayStation games that can be downloaded for free.
- Cheat codes
Apart from all the standard gaming features, mega games also provide free cheat codes for the games.
Pros:
- The games are easily downloaded.
- The games have variety.
Cons:
- The website stops working after a while, and the download gets interrupted
5 Caiman.us
Platforms: OS X and Windows
It is another digital distribution platform for free online gaming. After the death of the site’s developer, the site has gone offline.
Key Features:
- It has a vast collection of games and over twenty free games categories.
- 2D and 3D gaming experiences are also provided.
- A customized search is available to make it easier for players to find the game they are looking for.
Pros:
- There is a vast collection of free games to download and play.
Cons:
- The site is not well organized and confusing.
- The search bar is at the very bottom of the page, so a person might find it hard to locate.
- Since the site has gone offline, the games are not updated, so there are no new games.
Part 2: Best Android Game Download Sites to Download Free Android Games
Android is growing very fast; now, almost everyone uses it and prefers it over any other software. Here are the best websites from where you can download free android apps:
1 Google Play
Google Play is the most common website to download free android apps. It is free, it is fast, and it is efficient. You can not only use this from your android mobile but also operate it and download apps using your laptop.
Key Features:
- The apps are easily downloaded, depending upon your internet connection.
- The purchase methods are through credit cards, and the procedure is straightforward.
- The platform allows everyone and anyone to sell their games.
- Sign up through your Google account is necessary to access these features.
Pros:
- It is easily accessible.
- It is pre-installed on all android supported devices.
- It contains a massive collection of unique apps, from books to music, workout, and games of various types.
Cons:
- Since everyone and anyone can access it without paying any registration fee, it is exposed to scams and harassment.
- A few games do not function and keep crashing.
2 Android Games Room
It contains thousands of free gaming apps in different categories like action, arcade, adventure, simulation, song games, and puzzle games. The download links are readily available; you can even access this site from your mobile by scanning a QR code. This site is a pretty good platform to download free games but has certain flaws. It does not allow a multiplayer gaming experience, and no customer services are provided.
3 Android Apps
It is another platform to download android apps for free. This site is pretty good since it updates games that developers handpick almost daily. You can also promote your app using the ‘promote your app’ feature. The site has a lot of updates and takes an unreasonable amount of time to install and update the software. Furthermore, you can say that they do not have a customer service function because nobody ever responds to the customer’s queries.
4 1 Mobile
One mobile is a free android store. It provides its users the easiest way to locate, download and manage free apps. 1 Mobile has over eighty (80) million apps. One mobile has just been recently updated, has a brand new interface design, and operates much smoother. The content is more prosperous, smoother, and a thousand times better than before the latest update. All the apps and games are 100% free forever without hidden charges. It supports various languages like English, Korean, Chinese, French, Spanish, Japanese, and Portugal.
5 Approx
It provides the best free apps not only for android but OS as well. You can download it on your phone by scanning a QR code. This software has been functioning for the past six years and is free from viruses or malware.
To furnish your gameplay videos, Filmora also provides some cool effects, transitions, and elements, such as camera shake chaos effects, distortion effects, 3D change, speed blur transitions, and more. Moreover, you can always find some specially designed gaming effects in the Filmstock effects store.
Ollie Mattison
Ollie Mattison is a writer and a lover of all things video.
Follow @Ollie Mattison
The Ultimate Guide to Blurring Faces in Photos and Videos (Free Resources)
10 Best Free Blur Face Apps
Ollie Mattison
Mar 27, 2024• Proven solutions
Respecting the privacy of the people who accidentally ended up in your shot is a common courtesy. In addition, making that material public can have legal consequences. So, to avoid needless complications, you can blur a person’s face before you share a photo or a video on social networks.
There are plenty of Android and iPhone apps that enable you to blur a face or any part of an image just moments after you’ve recorded a video or taken a photo. In this article, we will take you through the ten best free apps you can use to blur faces on your Android devices or iPhone & iPad.
Blurring Face/Object/Private Information With Wondershare Filmora


As a video editor with rich effects and tools, Filmora offers a few ways to blur a face or object, such as applying the Mosaic effect, Blurring effects, or Face-off. The video tutorial above is made with Filmora. Click Effects at the top, find Filter on the left, and click UTILITY; from there, you will see the mosaic, face-off, tilt-shift circle, and tilt-shift linear tools.

Check our picks of the best video editing software to blur faces in videos on Windows & Mac or learn more from Wondershare Video Community .
10 Best FREE iPhone and Android Apps for Blurring Faces in Photos and Videos
Concealing the identity of the people in your photos and videos is just the tip of the iceberg because the apps we featured in our top ten list allow you to manipulate images in any way you want. Let’s take a look at some of the best apps that can help you blur a face in just a few easy steps.
1. Skitch
Price: Free, offers in-app purchases
Compatibility: iOS
User Rating: 4.1
iPhone photographers in need of an app that enables them to snap and edit photos quickly will love using Skitch. The app is perfect for editing photos while you are on the go, as you can easily annotate images or add any text, stickers, or emojis to your photos. The Pixelate option lets you select the portion of the image you’d like to blur in just a couple of taps. Skitch’s photo editing capabilities can help you enhance the colors of each photo you take with this app. At the same time, its file-sharing features allow you to post your favorite creations on social media in seconds.
2. Video Mosaic
Price: Free, offers in-app purchases
Compatibility: iOS
User Rating: 4.6

This app is designed with just one purpose, to enable iPhone users to blur videos while recording is in progress easily**.** You can choose from several different blur options, so you can blur an entire video, add an automatic mosaic over a face in the shot, or choose an area of the screen you’d like to blur. Moreover, the app lets you select the shape of the mosaic so the blurred area of the shot can have any form you want. The only downside is that you will have to make an in-app purchase to get rid of ads.
3. Video Toolbox Movie Maker
Price: Free, offers in-app purchases
Compatibility: iOS
User Rating: 3.5

The video editing tools this iOS-based app offers will enable you to create professional-looking social media videos. There are over thirty transitions to choose from and more than twenty video effects. You can experiment with the Green Screen feature to combine two or more clips into a single video or try out the Reverse video option. Despite a solid number of video editing options, Video Toolbox offers only a limited number of face blurring options. The pixelate or blur effect you add to a video will be static, so if your subject moves a lot, you will have to use another app.
4. MovStash
Price: Free
Compatibility: iOS
User Rating: 3.7

There are four types of blur you can choose from, and you can edit your videos in Simple and Timeline modes. You can specify the area of the shot you’d like to blur manually and use the slider to set the intensity of the blur effect. The Timeline mode lets you add as many blur areas to a video as you want so that you can blur multiple faces in a single shot. MovStash is specifically designed to make the process of blurring portions of a video quick and simple, but the app doesn’t offer any other video editing option.
5. KineMaster – Pro Video Editor
Price: Free, offers in-app purchases
User Rating: 4.7
KineMaster is a professional video editing app that enables users to trim a video frame by frame, apply the Chroma Key effect or add 3D transitions between video clips. That’s why it is not surprising that iPhone and Android users can easily blur faces in their videos with this app. However, the free version of KineMaster provides you with only a limited amount of options, and you have to make a series of in-app purchases to unlock all the features this app has to offer.
6. Blur Photos
Price: Free
Compatibility: iOS
User Rating: 4.3

Blur Photos app allows you to share your photos on all popular social networks in just a few taps. If you have an iOS 8 or a later version of this mobile operating system installed on your iPhone, you will be able to use this app as an extension for the Photos app. Blur Photos is completely free to use on iPhones, iPads, and iPod touch, so you can easily conceal the identity of people in your photos, regardless of the device you’re currently using. You can define the area of the picture you’d like to blur manually, and the app lets you control the intensity of the blur effect you’re applying.
7. Mosaic Pixelate Censor Photo
Price: Free
Compatibility: Android
User Rating: 4.2
![]()
You can blur the faces in your photos using the Mosaic, Pixelate, Blur, or Color options. You have to pick one of the options and designate the screen area you’d like to blur, and the app will do the rest for you. However, you can’t zoom into a photo, which means that you won’t have a great deal of control over the face blurring process in certain situations. The Mosaic Pixelate Censor Photo doesn’t offer any other photo editing options, which makes it a good choice only if you’re looking for an efficient tool that lets you censor photos quickly.
8. Point Blur
Price: Free, contains ads
Compatibility: Android
User Rating: 4.3

It is nothing complicated about blurring faces or any other photo part with this app. You have to use your finger to select the area of a picture you’d like to pixelate or blur and then proceed to choose the brush size and the intensity of the effect. In addition, you can use Point Blur to blur the background of a photo and create a smooth bokeh effect. Once you’ve blurred an image successfully, you can share it on any social media of your choice.
9.iMovie
Price: Free
Compatibility: iOS
User Rating: 3.9
Learn more details about How to blur faces in iMovie
Even though iMovie offers a rich selection of video editing options, unfortunately, there are no options that enable you to blur or pixelate a face. To conceal a beginning or an object in a video, you’ll have toadd a non-transparent layer over the area of the video you’d like to hide. This is by no means an elegant solution since adding a monochrome rectangle over a video can completely ruin its visual appeal. Using iMovie to conceal faces in videos is only a good option if, for whatever reason, you can’t install any other app that grants you more control over the process of blurring faces in videos.
10. Blur&Mosaic
Price: Free, offers in-app purchases
Compatibility: iOS
User Rating: 4.7

If you are looking for an app that makes obscuring faces in photos and videos easy, then Blur&Mosaic is probably one of the best choices you have at your disposal. You have to use your finger to mark the area you’d like to blur and choose from nine available mosaic styles. Furthermore, four different thickness and strength options allow you to control the amount of effect you’re going to apply to the image. However, the app contains ads, and you have to make an in-app purchase to remove them.
FAQs About Face Blur
1. How Do You Blur Out Faces in Photos on iPhone?
iPhone users can blur out faces with free blurring faces apps for photos and videos, such as Skitch, Video Mosaic, Video Toolbox Movie Maker, MovStash, KineMaster, and iMovie.
2. How Can I Blur Moving Face in a Video?
The Face-Off tool in Filmora can blur human faces or anything that looks like a face. You can also add emojis to the face of the subject. What’s more, the face-changer feature also comes with an in-built motion-tracker mechanism, which automatically sensors the position of a moving face and adjusts the emoji accordingly.
To blur faces , import your video, go to “Effects,” then search “Utility,” and select Face-Off. Choose an emoji if you want to add one; otherwise, click “OK.” The faces have now been blurred, and the video is ready to be exported.
![]()
A cross-platform for making videos anywhere for all creators

Why your video editing isn’t good enough? How about some creative inspo?
- 100 Million+ Users
- 150+ Countries and Regions
- 4 Million+ Social Media Followers
- 5 Million+ Stock Media for Use
* Secure Download

Conclusion
Just because a photo or a video contains information, you can’t share publicly shouldn’t be the reason why you can’t post it on your social media accounts. The apps we presented in this article are going to help you blur a face or conceal any other object in just a few easy steps. Which app do you like to use the most to blur faces in your videos and photos? Leave a comment below and share your experiences with us.
Ollie Mattison
Ollie Mattison is a writer and a lover of all things video.
Follow @Ollie Mattison
Ollie Mattison
Mar 27, 2024• Proven solutions
Respecting the privacy of the people who accidentally ended up in your shot is a common courtesy. In addition, making that material public can have legal consequences. So, to avoid needless complications, you can blur a person’s face before you share a photo or a video on social networks.
There are plenty of Android and iPhone apps that enable you to blur a face or any part of an image just moments after you’ve recorded a video or taken a photo. In this article, we will take you through the ten best free apps you can use to blur faces on your Android devices or iPhone & iPad.
Blurring Face/Object/Private Information With Wondershare Filmora
As a video editor with rich effects and tools, Filmora offers a few ways to blur a face or object, such as applying the Mosaic effect, Blurring effects, or Face-off. The video tutorial above is made with Filmora. Click Effects at the top, find Filter on the left, and click UTILITY; from there, you will see the mosaic, face-off, tilt-shift circle, and tilt-shift linear tools.
Check our picks of the best video editing software to blur faces in videos on Windows & Mac or learn more from Wondershare Video Community .
10 Best FREE iPhone and Android Apps for Blurring Faces in Photos and Videos
Concealing the identity of the people in your photos and videos is just the tip of the iceberg because the apps we featured in our top ten list allow you to manipulate images in any way you want. Let’s take a look at some of the best apps that can help you blur a face in just a few easy steps.
1. Skitch
Price: Free, offers in-app purchases
Compatibility: iOS
User Rating: 4.1
iPhone photographers in need of an app that enables them to snap and edit photos quickly will love using Skitch. The app is perfect for editing photos while you are on the go, as you can easily annotate images or add any text, stickers, or emojis to your photos. The Pixelate option lets you select the portion of the image you’d like to blur in just a couple of taps. Skitch’s photo editing capabilities can help you enhance the colors of each photo you take with this app. At the same time, its file-sharing features allow you to post your favorite creations on social media in seconds.
2. Video Mosaic
Price: Free, offers in-app purchases
Compatibility: iOS
User Rating: 4.6
This app is designed with just one purpose, to enable iPhone users to blur videos while recording is in progress easily**.** You can choose from several different blur options, so you can blur an entire video, add an automatic mosaic over a face in the shot, or choose an area of the screen you’d like to blur. Moreover, the app lets you select the shape of the mosaic so the blurred area of the shot can have any form you want. The only downside is that you will have to make an in-app purchase to get rid of ads.
3. Video Toolbox Movie Maker
Price: Free, offers in-app purchases
Compatibility: iOS
User Rating: 3.5
The video editing tools this iOS-based app offers will enable you to create professional-looking social media videos. There are over thirty transitions to choose from and more than twenty video effects. You can experiment with the Green Screen feature to combine two or more clips into a single video or try out the Reverse video option. Despite a solid number of video editing options, Video Toolbox offers only a limited number of face blurring options. The pixelate or blur effect you add to a video will be static, so if your subject moves a lot, you will have to use another app.
4. MovStash
Price: Free
Compatibility: iOS
User Rating: 3.7
There are four types of blur you can choose from, and you can edit your videos in Simple and Timeline modes. You can specify the area of the shot you’d like to blur manually and use the slider to set the intensity of the blur effect. The Timeline mode lets you add as many blur areas to a video as you want so that you can blur multiple faces in a single shot. MovStash is specifically designed to make the process of blurring portions of a video quick and simple, but the app doesn’t offer any other video editing option.
5. KineMaster – Pro Video Editor
Price: Free, offers in-app purchases
User Rating: 4.7
KineMaster is a professional video editing app that enables users to trim a video frame by frame, apply the Chroma Key effect or add 3D transitions between video clips. That’s why it is not surprising that iPhone and Android users can easily blur faces in their videos with this app. However, the free version of KineMaster provides you with only a limited amount of options, and you have to make a series of in-app purchases to unlock all the features this app has to offer.
6. Blur Photos
Price: Free
Compatibility: iOS
User Rating: 4.3
Blur Photos app allows you to share your photos on all popular social networks in just a few taps. If you have an iOS 8 or a later version of this mobile operating system installed on your iPhone, you will be able to use this app as an extension for the Photos app. Blur Photos is completely free to use on iPhones, iPads, and iPod touch, so you can easily conceal the identity of people in your photos, regardless of the device you’re currently using. You can define the area of the picture you’d like to blur manually, and the app lets you control the intensity of the blur effect you’re applying.
7. Mosaic Pixelate Censor Photo
Price: Free
Compatibility: Android
User Rating: 4.2
![]()
You can blur the faces in your photos using the Mosaic, Pixelate, Blur, or Color options. You have to pick one of the options and designate the screen area you’d like to blur, and the app will do the rest for you. However, you can’t zoom into a photo, which means that you won’t have a great deal of control over the face blurring process in certain situations. The Mosaic Pixelate Censor Photo doesn’t offer any other photo editing options, which makes it a good choice only if you’re looking for an efficient tool that lets you censor photos quickly.
8. Point Blur
Price: Free, contains ads
Compatibility: Android
User Rating: 4.3
It is nothing complicated about blurring faces or any other photo part with this app. You have to use your finger to select the area of a picture you’d like to pixelate or blur and then proceed to choose the brush size and the intensity of the effect. In addition, you can use Point Blur to blur the background of a photo and create a smooth bokeh effect. Once you’ve blurred an image successfully, you can share it on any social media of your choice.
9.iMovie
Price: Free
Compatibility: iOS
User Rating: 3.9
Learn more details about How to blur faces in iMovie
Even though iMovie offers a rich selection of video editing options, unfortunately, there are no options that enable you to blur or pixelate a face. To conceal a beginning or an object in a video, you’ll have toadd a non-transparent layer over the area of the video you’d like to hide. This is by no means an elegant solution since adding a monochrome rectangle over a video can completely ruin its visual appeal. Using iMovie to conceal faces in videos is only a good option if, for whatever reason, you can’t install any other app that grants you more control over the process of blurring faces in videos.
10. Blur&Mosaic
Price: Free, offers in-app purchases
Compatibility: iOS
User Rating: 4.7
If you are looking for an app that makes obscuring faces in photos and videos easy, then Blur&Mosaic is probably one of the best choices you have at your disposal. You have to use your finger to mark the area you’d like to blur and choose from nine available mosaic styles. Furthermore, four different thickness and strength options allow you to control the amount of effect you’re going to apply to the image. However, the app contains ads, and you have to make an in-app purchase to remove them.
FAQs About Face Blur
1. How Do You Blur Out Faces in Photos on iPhone?
iPhone users can blur out faces with free blurring faces apps for photos and videos, such as Skitch, Video Mosaic, Video Toolbox Movie Maker, MovStash, KineMaster, and iMovie.
2. How Can I Blur Moving Face in a Video?
The Face-Off tool in Filmora can blur human faces or anything that looks like a face. You can also add emojis to the face of the subject. What’s more, the face-changer feature also comes with an in-built motion-tracker mechanism, which automatically sensors the position of a moving face and adjusts the emoji accordingly.
To blur faces , import your video, go to “Effects,” then search “Utility,” and select Face-Off. Choose an emoji if you want to add one; otherwise, click “OK.” The faces have now been blurred, and the video is ready to be exported.
![]()
A cross-platform for making videos anywhere for all creators
Why your video editing isn’t good enough? How about some creative inspo?
- 100 Million+ Users
- 150+ Countries and Regions
- 4 Million+ Social Media Followers
- 5 Million+ Stock Media for Use
* Secure Download
Conclusion
Just because a photo or a video contains information, you can’t share publicly shouldn’t be the reason why you can’t post it on your social media accounts. The apps we presented in this article are going to help you blur a face or conceal any other object in just a few easy steps. Which app do you like to use the most to blur faces in your videos and photos? Leave a comment below and share your experiences with us.
Ollie Mattison
Ollie Mattison is a writer and a lover of all things video.
Follow @Ollie Mattison
Chromebook Linux Installation Tutorial: The Ultimate Guide
How to Install Linux on Chromebook
Ollie Mattison
Mar 27, 2024• Proven solutions
Chromebooks are an excellent choice for educational institutions or businesses that require their employees to have constant access to the Internet. Even though these devices are a perfect tool that can accompany you on business trips and enable you to answer important emails or have access to crucial information stored on the cloud, performing more demanding tasks, like video editing, is still a challenge. However, it is far from impossible, although you may have to take a few extra steps before running a video editing software on your Chromebook.
Chrome OS is a Linux based environment and for that reason, Chromebook owners who would like to use professional editing software on their Chromebooks can install a Linux OS that will enable them to use programs such as Lightworks that are perfectly suited for high-end video editing. There are two different ways to install Linux on a Chromebook, you can either do it using Gallium OS or ChrUbuntu or in a Chroot environment using Crouton. Each of these methods is relatively easy and we will take you through the process step by step. Here’s how you can install Linux on your Chromebook.
- Part 1: Preparing before installing Linux OS on Chromebook
- Part 2: How to Install Linux as a Chroot Using Crouton on Chromebook
- Part 3: How to Dual-Boot a Chromebook Using ChrUbuntu
- Part 4: How to Install Linux as a Chroot Using Crouton on Chromebook
- Part 5: Recommended Linux Video Editing Software
Part 1: Preparing before installing Linux OS on Chromebook
The first step of the process of installing the Linux OS is the decision itself, and you need to have all the necessary information before you decide to install a Linux OS on your Chromebook.
- Make sure that the version of Chromebook you have is capable of supporting a Linux OS. Your device must be equipped with an ARM or Intel chip in order to be able to run the version of Linux OS you want to install. Although both chips will allow you to go through the process, running closed source software such the Steam is only possible with Intel chips.
- Regardless of which method of installing Linux OS you choose, you will have to switch to the Developer Mode, a special built-in function that allows you to install the unapproved operating system, among other things.
- Now that you are aware of the requirements and risks, you will have to backup all the files you have on your Chromebook because once you switch to the Developer Mode all the information stored locally will be erased. You can save the files on another computer or on the cloud depending on how much data you need to move and which one is more convenient for you.
Part 2: How to Install Linux as a Chroot Using Crouton on Chromebook
After you have stored all your data safely, your Chromebook is ready for the beginning of the installation process of the secondary operating system. You will have to perform a series of actions that will allow you to start the installation, starting from accessing the Developer Mode.
1. Acessing the developer mode
The first step of the process is to reboot your system, while your Chromebook is on. In order to do so hold Escape and Refresh keys on your keyboard and then hit the power button. Once your device is back online you will find yourself in the recovery mode, and you will see a message telling you to insert a recovery disc. Instead of inserting the disc, hold Ctrl+D and wait for OS verification menu to appear on the screen. At this point, if you are still having second thoughts about this process, you can hit the spacebar to return to recovery mode, or press Enter to proceed. Hitting Enter will delete all the data stored on your device and take you into the Developer Mode. Once your Chromebook lets you know that you are now in the Developer Mode, reboot the system and install a fresh version of the Chrome OS. Insert your login information and follow the instructions until you are looking at the Chrome OS desktop.

2. Installing Chroot
At this stage of the process, your Chromebook is ready for the installation of the Crouton environment. Crouton is a series of scripts that makes running a Linux OS much easier, especially for inexperienced users. In order to download Crouton, go to GitHub and find the download link, detailed instructions or extensions that can add more functionality to your OS. Once the installation file or files are in the Download folder, your next step is to access the Chromebook’s terminal a feature called ‘Crosh’. The fastest way to do this is to hold CTRL + ALT keys and then hit the T key. This action will cause the Chrome window to appear on the screen, and you will need to type the ‘shell’ command without using quotation marks. Afterwards, enter the following command: ‘sudo sh ~/Downloads/crouton -t xfce’ and if you want to install extensions you will have to add ‘xfce,extension’ command at the end.

Press the Enter key and wait for the system to start setting up the Chroot. This process may take a while, so it is important to be patient, but more importantly, do not interfere with it in any way. Installation of your secondary OS is now on the way, and you may be asked to insert your login data, like your Gmail username and password. Wait patiently until the process is over and then return to shell and enter this command: ‘sudo enter-chroot startxfce4’. Your screen will go black for a while, but after the black screen is gone your Chromebook will be in the freshly installed Linux OS.
3. Optimizing your new OS
You may have to optimize your new OS in order to improve the experience of using it. Enabling your keyboard’s brightness and volume keys inside the new OS can be done easily by holding CTRL+ALT+T and then typing shell once you’ve accessed Chrome OS’s shell and hit Enter. Issue the following command: ‘sudo sh -e ~/Downloads/crouton-r precise-t keyboard–u’ and then press Enter again. Removing the screen saver or installing more extensions may also be a good way to enable more options in the new OS. Most importantly, you can now download and install the video editing software you want to use for editing your footage.
4. Remove Chroot from your Chromebook
If for some reason you want to uninstall Linux from your Chromebook, simply reboot the system and press the spacebar when the ‘OS verification is off’ message appears on the screen. In this manner, you will exit the Developer Mode and all locally stored data, including all installed environments, will be deleted.
Part 3: How to Dual-Boot a Chromebook Using ChrUbuntu
An alternative option is available for Chromebook users that have Intel based devices like recently released Haswell models. The ChrUbuntu can be installed on the USB stick or external hard-drive or directly to the local memory of your Chromebook. Even though ARM-based machines can also use ChrUbuntu it isn’t advisable because they may perform poorly due to slower processor speeds and less RAM power. Unlike Chroot, ChrUbuntu will not allow you to switch between operating systems without a reboot, and if the system is stored locally, you may need to go through the full system recovery.
1. Preparation for the installation
Like with the previous method you will have to go into the Developer Mode and make sure that you have access to a WiFi connection. When you are asked to provide your login details, instead of entering them press Ctrl+Alt+Forward and then type ‘chronos’ and press Enter. The next step will require you to issue the following command: ‘curl -L -O http://goo.gl/9sgchs ; sudo bash 9sgchs’ and then once more hit Enter. Again press Enter after the information about the installation is displayed on the screen and then you will be asked to decide how much space you want to allocate for Linux installation. Experts say that 9GB is the upper limit. After you’ve made your choice press Enter.
2. Installing ChrUbuntu
Once the partitioning of your hard-drive is completed, you will have to repeat the first several steps from typing ‘chronos’ to pressing enter when information about the installation is displayed on the screen. The installation process is now in progress and you will be occasionally asked to select a few settings, make sure you always click on default. At the end of the installation process, you will have to choose the location where GRUB should be installed, please select /dev/sda, because the failure to do so may interrupt the installation.
Once the installation is completed, restart your Chromebook to finalize the process, and when you see the ‘OS Verification is Off’ notification press Ctrl+L to access Linux or Ctrl+D boot into Chrome OS.

3. Uninstall ChrUbuntu
Removing ChrUbuntu is a relatively painless process that can be completed with just a few simple commands. If the OS is stored locally the only way to erase it is to perform a full system recovery. While all your data located on the cloud will re-sync with your Chromebook, the data stored locally will be deleted, which is why it is important to backup all the important files before starting a system recovery process. The fastest and easiest way to perform a system recovery is by creating a recovery disk from your device. Insert ‘chrome://imageburner’ in your browser’s address bar, and carefully read and follow the instructions.
This Linux removal method will also require you to have a USB stick with a minimum of 4GB of storage space. After you created the disk, you can go into the Recovery Mode, by holding Esc and Refresh buttons simultaneously and then pressing the Power button. In the Recovery Mode, you will be asked to insert the recovery disk and the process will be on the way.
Part 4: How to Dual-Boot a Chromebook Using Gallium OS
If neither Chroot nor ChrUbuntu work for you, using Gallium OS may be the right choice. The Gallium is Xbuntu-based OS that is equipped with touchpad mouse drivers among other advantages it offers over other operating systems. The installation process isn’t complicated, although it may require more effort than installing Crouton.
1. Preparation for the installation
In order to be aware of all the preparation steps, you need to take, you must first find out your device’s Hardware ID number and you can obtain this information by navigating to Chrome://System, Hardware Class within the Chrome OS. Hardware Compatibility page will provide the information regarding the CPU’s family, which can be crucial for the OS’ performance. You can run the installation either from an ISO image on an external USB drive or from the Chrome OS command line using Chrx. We will describe how to install Gallium OS from the Chrome OS command line because the other option doesn’t allow you to dual-boot your Chromebook.
2. Enabling the Legacy Mode
Like previously described, enter the Developer Mode and when the ‘ OS verification is OFF’ notification appears on the screen proceed to enable the Legacy Mode. You can do this by holding CTRL+D keys to enable the Chrome OS to boot in the Developer Mode. After you’ve successfully made this step, press CTRl+ALT+T to access the ‘Crosh’ terminal and then type ‘shell’. At the ‘chronos/localhost/$ issue the following command: ‘sudo crossystem dev_boot_legacy=1’. Update and install all the necessary firmware by running the Firmware Utility Script.
3. Installation process
If you choose to install Gallium OS through Chrome OS command line using Chrx that will enable you to dual-boot your Chromebook, you should start by booting the device into Chrome OS and configuring networking. The next step you’ll need to take is switching to a virtual terminal by holding Ctrl+Alt+F2, and then you should log in as user chronos without a password. Once you’ve completed this step issue the following command: ‘curl -O https://chrx.org/go && sh go’ and follow the on-screen instructions to repartition your hard-drive and install the Gallium OS. Once the installation is over reboot the device and press Ctrl+L when the ‘OS Verification is Off’ notification appears on the screen to boot Gallium OS or hold Ctrl+D to access Chrome OS. After the Gallium OS is successfully installed on your Chromebook you can start using programs such as Skype or Lightworks.
Which Method is the Best?
Each of the options to install a Linux OS on your Chromebook we described has its advantages and disadvantages. It is our opinion that the Crouton method is the easiest and the fastest. Furthermore, this method enables you to switch between your primary and secondary OS without the need to reboot the device and the Downloads folder makes working in both environments much easier.
On the other hand, other methods require more knowledge about the Linux OS installation process and switching between OS’ is not that simple. If you are looking for an easy way to dual-boot your Chromebook that best way to do it is to install Linux as a Chroot using Crouton.
Part 5: Recommended Linux Video Editing Software: Lightworks
Price: $24.99/month, although free versions of the software are also available.
What we like: A powerful video and audio editor perfectly suited for the production of professional video content.
What we don’t like: The software isn’t easy to use and inexperienced editors will find it difficult to use at first.
Lightworks Resolve may not be as popular as Adobe Premiere Pro or Final Cut Pro, but that doesn’t mean that this video editing software isn’t as capable as its more popular counterparts.
The software is compatible with Mac, Windows, and Linux OS, which makes it a perfect choice for Chromebook users that have a Linux OS installed on their devices. Lightworks features literally every editing tool imaginable and for that reason, it is a perfect choice for editing videos you would like to upload to Vimeo or YouTube or high-end professional projects. This editing software offers plenty of transitions and visual effects that will help its users to create seamless jumps between shots and visually impressive videos.
Ollie Mattison
Ollie Mattison is a writer and a lover of all things video.
Follow @Ollie Mattison
Ollie Mattison
Mar 27, 2024• Proven solutions
Chromebooks are an excellent choice for educational institutions or businesses that require their employees to have constant access to the Internet. Even though these devices are a perfect tool that can accompany you on business trips and enable you to answer important emails or have access to crucial information stored on the cloud, performing more demanding tasks, like video editing, is still a challenge. However, it is far from impossible, although you may have to take a few extra steps before running a video editing software on your Chromebook.
Chrome OS is a Linux based environment and for that reason, Chromebook owners who would like to use professional editing software on their Chromebooks can install a Linux OS that will enable them to use programs such as Lightworks that are perfectly suited for high-end video editing. There are two different ways to install Linux on a Chromebook, you can either do it using Gallium OS or ChrUbuntu or in a Chroot environment using Crouton. Each of these methods is relatively easy and we will take you through the process step by step. Here’s how you can install Linux on your Chromebook.
- Part 1: Preparing before installing Linux OS on Chromebook
- Part 2: How to Install Linux as a Chroot Using Crouton on Chromebook
- Part 3: How to Dual-Boot a Chromebook Using ChrUbuntu
- Part 4: How to Install Linux as a Chroot Using Crouton on Chromebook
- Part 5: Recommended Linux Video Editing Software
Part 1: Preparing before installing Linux OS on Chromebook
The first step of the process of installing the Linux OS is the decision itself, and you need to have all the necessary information before you decide to install a Linux OS on your Chromebook.
- Make sure that the version of Chromebook you have is capable of supporting a Linux OS. Your device must be equipped with an ARM or Intel chip in order to be able to run the version of Linux OS you want to install. Although both chips will allow you to go through the process, running closed source software such the Steam is only possible with Intel chips.
- Regardless of which method of installing Linux OS you choose, you will have to switch to the Developer Mode, a special built-in function that allows you to install the unapproved operating system, among other things.
- Now that you are aware of the requirements and risks, you will have to backup all the files you have on your Chromebook because once you switch to the Developer Mode all the information stored locally will be erased. You can save the files on another computer or on the cloud depending on how much data you need to move and which one is more convenient for you.
Part 2: How to Install Linux as a Chroot Using Crouton on Chromebook
After you have stored all your data safely, your Chromebook is ready for the beginning of the installation process of the secondary operating system. You will have to perform a series of actions that will allow you to start the installation, starting from accessing the Developer Mode.
1. Acessing the developer mode
The first step of the process is to reboot your system, while your Chromebook is on. In order to do so hold Escape and Refresh keys on your keyboard and then hit the power button. Once your device is back online you will find yourself in the recovery mode, and you will see a message telling you to insert a recovery disc. Instead of inserting the disc, hold Ctrl+D and wait for OS verification menu to appear on the screen. At this point, if you are still having second thoughts about this process, you can hit the spacebar to return to recovery mode, or press Enter to proceed. Hitting Enter will delete all the data stored on your device and take you into the Developer Mode. Once your Chromebook lets you know that you are now in the Developer Mode, reboot the system and install a fresh version of the Chrome OS. Insert your login information and follow the instructions until you are looking at the Chrome OS desktop.
2. Installing Chroot
At this stage of the process, your Chromebook is ready for the installation of the Crouton environment. Crouton is a series of scripts that makes running a Linux OS much easier, especially for inexperienced users. In order to download Crouton, go to GitHub and find the download link, detailed instructions or extensions that can add more functionality to your OS. Once the installation file or files are in the Download folder, your next step is to access the Chromebook’s terminal a feature called ‘Crosh’. The fastest way to do this is to hold CTRL + ALT keys and then hit the T key. This action will cause the Chrome window to appear on the screen, and you will need to type the ‘shell’ command without using quotation marks. Afterwards, enter the following command: ‘sudo sh ~/Downloads/crouton -t xfce’ and if you want to install extensions you will have to add ‘xfce,extension’ command at the end.
Press the Enter key and wait for the system to start setting up the Chroot. This process may take a while, so it is important to be patient, but more importantly, do not interfere with it in any way. Installation of your secondary OS is now on the way, and you may be asked to insert your login data, like your Gmail username and password. Wait patiently until the process is over and then return to shell and enter this command: ‘sudo enter-chroot startxfce4’. Your screen will go black for a while, but after the black screen is gone your Chromebook will be in the freshly installed Linux OS.
3. Optimizing your new OS
You may have to optimize your new OS in order to improve the experience of using it. Enabling your keyboard’s brightness and volume keys inside the new OS can be done easily by holding CTRL+ALT+T and then typing shell once you’ve accessed Chrome OS’s shell and hit Enter. Issue the following command: ‘sudo sh -e ~/Downloads/crouton-r precise-t keyboard–u’ and then press Enter again. Removing the screen saver or installing more extensions may also be a good way to enable more options in the new OS. Most importantly, you can now download and install the video editing software you want to use for editing your footage.
4. Remove Chroot from your Chromebook
If for some reason you want to uninstall Linux from your Chromebook, simply reboot the system and press the spacebar when the ‘OS verification is off’ message appears on the screen. In this manner, you will exit the Developer Mode and all locally stored data, including all installed environments, will be deleted.
Part 3: How to Dual-Boot a Chromebook Using ChrUbuntu
An alternative option is available for Chromebook users that have Intel based devices like recently released Haswell models. The ChrUbuntu can be installed on the USB stick or external hard-drive or directly to the local memory of your Chromebook. Even though ARM-based machines can also use ChrUbuntu it isn’t advisable because they may perform poorly due to slower processor speeds and less RAM power. Unlike Chroot, ChrUbuntu will not allow you to switch between operating systems without a reboot, and if the system is stored locally, you may need to go through the full system recovery.
1. Preparation for the installation
Like with the previous method you will have to go into the Developer Mode and make sure that you have access to a WiFi connection. When you are asked to provide your login details, instead of entering them press Ctrl+Alt+Forward and then type ‘chronos’ and press Enter. The next step will require you to issue the following command: ‘curl -L -O http://goo.gl/9sgchs ; sudo bash 9sgchs’ and then once more hit Enter. Again press Enter after the information about the installation is displayed on the screen and then you will be asked to decide how much space you want to allocate for Linux installation. Experts say that 9GB is the upper limit. After you’ve made your choice press Enter.
2. Installing ChrUbuntu
Once the partitioning of your hard-drive is completed, you will have to repeat the first several steps from typing ‘chronos’ to pressing enter when information about the installation is displayed on the screen. The installation process is now in progress and you will be occasionally asked to select a few settings, make sure you always click on default. At the end of the installation process, you will have to choose the location where GRUB should be installed, please select /dev/sda, because the failure to do so may interrupt the installation.
Once the installation is completed, restart your Chromebook to finalize the process, and when you see the ‘OS Verification is Off’ notification press Ctrl+L to access Linux or Ctrl+D boot into Chrome OS.
3. Uninstall ChrUbuntu
Removing ChrUbuntu is a relatively painless process that can be completed with just a few simple commands. If the OS is stored locally the only way to erase it is to perform a full system recovery. While all your data located on the cloud will re-sync with your Chromebook, the data stored locally will be deleted, which is why it is important to backup all the important files before starting a system recovery process. The fastest and easiest way to perform a system recovery is by creating a recovery disk from your device. Insert ‘chrome://imageburner’ in your browser’s address bar, and carefully read and follow the instructions.
This Linux removal method will also require you to have a USB stick with a minimum of 4GB of storage space. After you created the disk, you can go into the Recovery Mode, by holding Esc and Refresh buttons simultaneously and then pressing the Power button. In the Recovery Mode, you will be asked to insert the recovery disk and the process will be on the way.
Part 4: How to Dual-Boot a Chromebook Using Gallium OS
If neither Chroot nor ChrUbuntu work for you, using Gallium OS may be the right choice. The Gallium is Xbuntu-based OS that is equipped with touchpad mouse drivers among other advantages it offers over other operating systems. The installation process isn’t complicated, although it may require more effort than installing Crouton.
1. Preparation for the installation
In order to be aware of all the preparation steps, you need to take, you must first find out your device’s Hardware ID number and you can obtain this information by navigating to Chrome://System, Hardware Class within the Chrome OS. Hardware Compatibility page will provide the information regarding the CPU’s family, which can be crucial for the OS’ performance. You can run the installation either from an ISO image on an external USB drive or from the Chrome OS command line using Chrx. We will describe how to install Gallium OS from the Chrome OS command line because the other option doesn’t allow you to dual-boot your Chromebook.
2. Enabling the Legacy Mode
Like previously described, enter the Developer Mode and when the ‘ OS verification is OFF’ notification appears on the screen proceed to enable the Legacy Mode. You can do this by holding CTRL+D keys to enable the Chrome OS to boot in the Developer Mode. After you’ve successfully made this step, press CTRl+ALT+T to access the ‘Crosh’ terminal and then type ‘shell’. At the ‘chronos/localhost/$ issue the following command: ‘sudo crossystem dev_boot_legacy=1’. Update and install all the necessary firmware by running the Firmware Utility Script.
3. Installation process
If you choose to install Gallium OS through Chrome OS command line using Chrx that will enable you to dual-boot your Chromebook, you should start by booting the device into Chrome OS and configuring networking. The next step you’ll need to take is switching to a virtual terminal by holding Ctrl+Alt+F2, and then you should log in as user chronos without a password. Once you’ve completed this step issue the following command: ‘curl -O https://chrx.org/go && sh go’ and follow the on-screen instructions to repartition your hard-drive and install the Gallium OS. Once the installation is over reboot the device and press Ctrl+L when the ‘OS Verification is Off’ notification appears on the screen to boot Gallium OS or hold Ctrl+D to access Chrome OS. After the Gallium OS is successfully installed on your Chromebook you can start using programs such as Skype or Lightworks.
Which Method is the Best?
Each of the options to install a Linux OS on your Chromebook we described has its advantages and disadvantages. It is our opinion that the Crouton method is the easiest and the fastest. Furthermore, this method enables you to switch between your primary and secondary OS without the need to reboot the device and the Downloads folder makes working in both environments much easier.
On the other hand, other methods require more knowledge about the Linux OS installation process and switching between OS’ is not that simple. If you are looking for an easy way to dual-boot your Chromebook that best way to do it is to install Linux as a Chroot using Crouton.
Part 5: Recommended Linux Video Editing Software: Lightworks
Price: $24.99/month, although free versions of the software are also available.
What we like: A powerful video and audio editor perfectly suited for the production of professional video content.
What we don’t like: The software isn’t easy to use and inexperienced editors will find it difficult to use at first.
Lightworks Resolve may not be as popular as Adobe Premiere Pro or Final Cut Pro, but that doesn’t mean that this video editing software isn’t as capable as its more popular counterparts.
The software is compatible with Mac, Windows, and Linux OS, which makes it a perfect choice for Chromebook users that have a Linux OS installed on their devices. Lightworks features literally every editing tool imaginable and for that reason, it is a perfect choice for editing videos you would like to upload to Vimeo or YouTube or high-end professional projects. This editing software offers plenty of transitions and visual effects that will help its users to create seamless jumps between shots and visually impressive videos.
Ollie Mattison
Ollie Mattison is a writer and a lover of all things video.
Follow @Ollie Mattison
Also read:
- New Rock-Solid Footage Mastering Video Stabilization in Adobe Premiere Pro
- New Free VOB Video Editor Roundup Top 5 Choices for 2024
- New 2024 Approved This Article Introduce Top 10 4K Video Samples
- Updated In 2024, Learn Video Editing Fast Top Beginner-Friendly Software
- New In 2024, Create Stunning Videos Without Spending a Dime Top Free Online Editors
- Updated In 2024, Unbiased Review The Best MP3 Converter Software for Mac Users
- Updated In 2024, Easy Video Tagging on Mac Discover the 8 Best Metadata Editors
- New The Ultimate Picture Ratio Calculator Resource Tips and Tricks
- Updated Unlock Pro-Level Video Editing on Windows 8 and Beyond for 2024
- Updated 2024 Approved Ratio Matters The Influence of Aspect Ratio on Video Aesthetics
- Top-Rated Free Invitation Video Makers for Any Occasion for 2024
- New From Cassette to Smartphone Best VHS Effect Apps for Mobile Devices
- New In 2024, 10 Best Free Security Camera Software
- Updated In 2024, 7 Best Free Video Cutters with No Watermark Output
- Updated Unsplash Your Brand Free Commercial-Use Image Resources
- New 2024 Approved Optimizing Your TikTok Videos Aspect Ratio Tips and Tricks
- Updated In 2024, Uncover the Secrets of Mp3 Conversion on Windows A Compelling Read
- In 2024, The Best Free Video Cutters for MOV File Editing
- Updated Best Free Video Stabilizer Apps for Android
- The 10 Most Popular Aspect Ratio Adjustment Tools
- In 2024, Get Steady Top-Rated Video Stabilization Softwa
- New 2024 Approved Transform Your Images Into Engaging Videos with These 10 Tools
- Updated 2024 Approved Easy Video Editing How to Reverse Clips in Final Cut Pro 2023 Tutorial
- New PS4 Screenshot Sharing A Step-by-Step Guide for 2024
- Transform Your Footage How to Add Stunning Effects in FCP X (3 Steps) for 2024
- Updated Free Video Editing Essentials Top 5 Splitter Tools
- New Unlock Pro-Level Text Animation on Your Phone with These Apps
- New No Watermark, No Cost Top 10 Online Video Editing Tools for 2024
- 2024 Approved Free Video Looping Software Top 10 Picks
- Updated In 2024, GIF Speed Editors The Ultimate Online and App Roundup
- 2024 Approved Create Stunning Videos on Android for Free No Watermark Required
- New In 2024, Top 10 Best Free Android Video Editors Free&Paid
- New Intelligent Video Editors for Seamless Aspect Ratio Conversion for 2024
- In 2024, Create Stunning Animations with These iOS and Android Apps
- 2024 Approved New Year, New Animations The 10 Best 2D Animation Software
- New Movie Magic on Windows 6 Best Video Editing Software
- New Create Unforgettable DVDs Tips, Tricks, and Tools for Home Video Editors for 2024
- In 2024, FCPX Not Responding? Get Back to Editing with These Fixes
- New Get More Done in Less Time Free Mac Speech-to-Text Software You Need for 2024
- Updated In 2024, Final Cut Pro X Debugging Made Easy A Step-by-Step Guide
- In 2024, Webs Best Image Resizers Top 10 Ratio Conversion Tools
- Ultimate Guide from Vivo S18 Pro FRP Bypass
- Planning to Use a Pokemon Go Joystick on Vivo Y56 5G? | Dr.fone
- The Ultimate Guide How to Bypass Swipe Screen to Unlock on Vivo Y77t Device
- In 2024, How to Use Pokémon Emerald Master Ball Cheat On Realme Narzo 60 Pro 5G | Dr.fone
- In 2024, Two Ways to Track My Boyfriends Oppo K11x without Him Knowing | Dr.fone
- New In 2024, How to Learn Cartoon Characters Sketch Quickly
- App Wont Open on Your Vivo Y17s? Here Are All Fixes | Dr.fone
- In 2024, How Can You Transfer Files From Honor X9a To iPhone 15/14/13? | Dr.fone
- In 2024, Why does the pokemon go battle league not available On Xiaomi Civi 3 | Dr.fone
- Prevent Cross-Site Tracking on Vivo S17 and Browser | Dr.fone
- In 2024, Is Fake GPS Location Spoofer a Good Choice On Poco M6 5G? | Dr.fone
- In 2024, How To Leave a Life360 Group On Vivo V29e Without Anyone Knowing? | Dr.fone
- Updated 2024 Approved This Is a Recommendation About Bandicut. If You Are Confused, Please Check It Out
- How to Repair corrupt MP4 and MOV files of Nubia Red Magic 8S Pro+ using Video Repair Utility on Mac?
- Top 10 Fingerprint Lock Apps to Lock Your Xiaomi Civi 3 Phone
- The Best 8 VPN Hardware Devices Reviewed On Nubia Red Magic 9 Pro | Dr.fone
- Use Device Manager to identify missing or malfunctioning drivers with Windows Device Manager on Windows 11/10
- How to Fix Life360 Shows Wrong Location On Vivo Y78+ (T1) Edition? | Dr.fone
- The Ultimate Guide to Get the Rare Candy on Pokemon Go Fire Red On Vivo S17 Pro | Dr.fone
- In 2024, Tips and Tricks for Setting Up your Realme Phone Pattern Lock
- How To Fix Auto Lock Greyed Out on Apple iPhone SE (2020) | Dr.fone
- In 2024, How To Fix Apple iPhone 12 Pro Unavailable Issue With Ease
- In 2024, 3 Ways to Change Location on Facebook Marketplace for Honor Play 8T | Dr.fone
- In 2024, How to Unlock Apple iPhone 15 Pro Max With an Apple Watch & What to Do if It Doesnt Work
- How To Restore a Bricked Nokia 130 Music Back to Operation | Dr.fone
- Why Does My Nokia C210 Keep Turning Off By Itself? 6 Fixes Are Here | Dr.fone
- How Can I Use a Fake GPS Without Mock Location On Lava Blaze Pro 5G? | Dr.fone
- How to remove Google FRP Lock on Itel P55+
- In 2024, Unlock Your Apple iPhone XS Max in Minutes with ICCID Code Everything You Need to Know
- How To Get the Apple ID Verification Code From Apple iPhone 8 in the Best Ways
- Forgot Pattern Lock? Heres How You Can Unlock Vivo V30 Pro Pattern Lock Screen
- 8 Ultimate Fixes for Google Play Your Realme V30 Isnt Compatible | Dr.fone
- How to Factory Reset Realme C33 2023 without Losing Data | Dr.fone
- Where Is the Best Place to Catch Dratini On OnePlus Ace 3 | Dr.fone
- How Motorola Moto G24 Mirror Screen to PC? | Dr.fone
- Dose Life360 Notify Me When Someone Checks My Location On Oppo Reno 11F 5G? | Dr.fone
- In 2024, Why Your WhatsApp Location is Not Updating and How to Fix On Honor X9b | Dr.fone
- Title: New WebM vs MP4 10 Best Conversion Software Options
- Author: Amelia
- Created at : 2024-04-29 19:36:54
- Updated at : 2024-04-30 19:36:54
- Link: https://ai-driven-video-production.techidaily.com/new-webm-vs-mp4-10-best-conversion-software-options/
- License: This work is licensed under CC BY-NC-SA 4.0.
