
:max_bytes(150000):strip_icc():format(webp)/GettyImages-849896688-6d69f22bcf0a4ff092f444abe6e1c19f.jpg)
Updated 2024 Approved Learn How to Add Captivating Titles in Final Cut Pro X
Learn How to Add Captivating Titles in Final Cut Pro X
How to Add Titles in Final Cut Pro X

Benjamin Arango
Mar 27, 2024• Proven solutions
We add text titles to our projects to tell the audience something they can’t figure out on their own, such as the title of our program, the name of the person speaking, or technical details about a subject.
This is a basic tutorial about Apple Final Cut Pro X, professional video editing software. However, if video editing is new to you, consider Wondershare Filmora for Mac . This is a powerful but easy-to-use tool for users just starting out. Download the free trial version below.
 Download Mac Version ](https://tools.techidaily.com/wondershare/filmora/download/ )
Final Cut Pro X has almost 200 different text effects that we can add, but the process of adding titles is essentially the same. Adding titles is what this article is about.
DEFINITIONS
Just to keep us all on the same page, here are my definitions of key terms related to text:
- Text or titles. Words placed on the screen. I use these terms interchangeably.
- Superimpose. Text displayed on the the screen with other video below it. These are also called “supers” or “keys.”
- Full-screen. Text which occupies the entire screen.
- Lower-third. Text which fits below a person talking; in the “lower-third” of the screen.
- Info-graphics. Full-screen text which is superimposed on a graphic, generally used to convey technical information. Typical uses are sports statistics or other information which is easier to convey using text than having someone read the words.
JUST THE BASICS

I’d like to introduce “Yertle,” he’s a sea turtle and the star of this article. (Footage courtesy of Jim Walker and Lobsters Gone Wild Productions.)
At its simplest, we use titles to display his (its?) name.

In the Timeline, put the playhead where you want a title to appear and type Shift+Control+T. This inserts the default lower-third title at the position of the playhead. The title, like almost all titles, has a default duration of 10:00 seconds.

Look at the Browser and see the results of your work. A lower-third title is superimposed over the video in the lower left corner. (I’ll talk about formatting the text in a few paragraphs.)
NOTE: The big limitation of this lower-third title is that it can only be positioned in the left corner. Moving it to the center or right corner requires manual adjustment.
You position or trim a title the same as any video clip: drag the clip to a different location, or drag an edge to change its duration.
Select that title and delete it by pressing the Delete key.

This time, type Control+T and the default full-screen title appears in the center of the screen. Again, this has a default duration of 10 seconds.

If you look right in the center of the screen, you’ll see the word “Title.” Yes, its darn near invisible. And, yes, it looks, um, ugly. However, we have a TON of formatting control to make this look however we want.
Select and delete that full-screen title.
There’s one more way to apply a title: dragging from the Titles Browser.

Click the Title icon in the Toolbar. This displays the contents of the Title Browser. The column on the left displays title categories, the icons on the right indicate individual titles, the search box at the bottom allows you to search for specific titles by name, while the number in the lower right indicates the number of titles currently displayed. (Your number may not match mine because I’ve added a few custom titles to my system.)

Let’s add a totally ridiculous title to our turtle - drag Clouds from the Title Browser and place it above the clip at the point where you want a title to appear.
NOTE: I’m using a marker in the Timeline to help me find the same place in a clip so my screen shots are consistent. Markers are not needed in any way for titles.

Um, yeah. So, some titles look more professional than others… You can delete this title now.
So, we:
- Add titles using keyboard shortcuts
- Drag titles from the Title Browser
- Change position by dragging the title
- Change duration by dragging the edge of the clip
- Delete a title by selecting it and pressing the Delete key
CHANGING TEXT

Add a new full-screen title (type Control+T) to the Timeline. To change the text in a title, double-click it in the Viewer. Here, I’ve changed my title to “An Undersea Adventure.”
NOTE: We can also change the text using the Inspector. I’ll show you how in a few paragraphs. Pick whichever method is easiest for you.
All text, in any title, can be changed by double-clicking it in the Viewer to select it, then typing the new text you want to use.
FORMATTING TEXT

You can format any text that you can select. This means that you can format entire phrases, words, or individual letters differently. For this article, I will format everything the same, because once you know how this works, you can experiment on your own.
Here, I selected my entire title and opened the Inspector (shortcut Cmd+4). Click the Text tab at the top. This section of the Inspector allows you to format the text.
NOTE: The text box near the top of the panel is the second place you can select text for formatting.
If you want a fast way to format text, click the word “Normal” at the top. This displays a menu filled with different text formats. Some of these formats look pretty dreadful; the rest look worse.
NOTE: You can create your own text styles. Refer to the Help for information on how.

The Basic section of the Inspector allows you to change fonts, size, alignment… all the standard font settings we see in other programs. Here, I’ve changed the font to Hobo Std, at 167 points.
While many of these settings you already know there are a few you may not:
- Line spacing. Adjusts the vertical distance between lines within the same paragraph.
- Tracking. Adjusts the horizontal spacing between letters.
- Baseline. Adjusts the vertical spacing of text compared to the horizontal line running thru the center of the white circle in the Viewer.

The Face section allows us to change font color, opacity and blue. Outline and Glow allows us to add, not surprisingly, outlines and glows. You can adjust these as you see fit - I tend not to add outlines or glows.

However, I STRONGLY recommend adding drop shadows to all text that you want viewers to read. Video, even HD video, is low resolution compared to print. Drop shadows make your text much easier to read. These are the settings I recommend for drop shadows.

After making a few changes in the Inspector, here’s the final result. Very cool - and very different from where we started!
ACTION SAFE/TITLE SAFE ZONES
Since television was first invented, we needed to compensate for the differences in TV sets by designing graphics to stay within Action Safe and Title Safe boundaries.
While much of today’s video is designed for the web, your titles will look the best if you follow the same guidelines.
Titles015

Go to the Switch in the Viewer and select “Show Action Safe/Title Safe Zones.”

This displays two pale rectangles in the frame. The outer rectangle is called “Action Safe,” the inner one is called “Title Safe.” Action Safe is 5% in from all edges; Title Safe is 10% in from all edges.
When designing text and graphics for the web, keep all essential elements inside the outer rectangle. When designing graphics and text for broadcast or cable, keep all essential elements inside the inner rectangle.
Here, for example, notice that my title is fully contained within Action Safe.
SUMMARY
Titles give our programs character and personality, plus they explain what’s going on to the audience. Final Cut Pro X provides a wealth of formatting options to make our text look great.
Benjamin Arango
Benjamin Arango is a writer and a lover of all things video.
Follow @Benjamin Arango
Benjamin Arango
Mar 27, 2024• Proven solutions
We add text titles to our projects to tell the audience something they can’t figure out on their own, such as the title of our program, the name of the person speaking, or technical details about a subject.
This is a basic tutorial about Apple Final Cut Pro X, professional video editing software. However, if video editing is new to you, consider Wondershare Filmora for Mac . This is a powerful but easy-to-use tool for users just starting out. Download the free trial version below.
Download Mac Version ](https://tools.techidaily.com/wondershare/filmora/download/ )
Final Cut Pro X has almost 200 different text effects that we can add, but the process of adding titles is essentially the same. Adding titles is what this article is about.
DEFINITIONS
Just to keep us all on the same page, here are my definitions of key terms related to text:
- Text or titles. Words placed on the screen. I use these terms interchangeably.
- Superimpose. Text displayed on the the screen with other video below it. These are also called “supers” or “keys.”
- Full-screen. Text which occupies the entire screen.
- Lower-third. Text which fits below a person talking; in the “lower-third” of the screen.
- Info-graphics. Full-screen text which is superimposed on a graphic, generally used to convey technical information. Typical uses are sports statistics or other information which is easier to convey using text than having someone read the words.
JUST THE BASICS
I’d like to introduce “Yertle,” he’s a sea turtle and the star of this article. (Footage courtesy of Jim Walker and Lobsters Gone Wild Productions.)
At its simplest, we use titles to display his (its?) name.
In the Timeline, put the playhead where you want a title to appear and type Shift+Control+T. This inserts the default lower-third title at the position of the playhead. The title, like almost all titles, has a default duration of 10:00 seconds.
Look at the Browser and see the results of your work. A lower-third title is superimposed over the video in the lower left corner. (I’ll talk about formatting the text in a few paragraphs.)
NOTE: The big limitation of this lower-third title is that it can only be positioned in the left corner. Moving it to the center or right corner requires manual adjustment.
You position or trim a title the same as any video clip: drag the clip to a different location, or drag an edge to change its duration.
Select that title and delete it by pressing the Delete key.
This time, type Control+T and the default full-screen title appears in the center of the screen. Again, this has a default duration of 10 seconds.
If you look right in the center of the screen, you’ll see the word “Title.” Yes, its darn near invisible. And, yes, it looks, um, ugly. However, we have a TON of formatting control to make this look however we want.
Select and delete that full-screen title.
There’s one more way to apply a title: dragging from the Titles Browser.
Click the Title icon in the Toolbar. This displays the contents of the Title Browser. The column on the left displays title categories, the icons on the right indicate individual titles, the search box at the bottom allows you to search for specific titles by name, while the number in the lower right indicates the number of titles currently displayed. (Your number may not match mine because I’ve added a few custom titles to my system.)
Let’s add a totally ridiculous title to our turtle - drag Clouds from the Title Browser and place it above the clip at the point where you want a title to appear.
NOTE: I’m using a marker in the Timeline to help me find the same place in a clip so my screen shots are consistent. Markers are not needed in any way for titles.
Um, yeah. So, some titles look more professional than others… You can delete this title now.
So, we:
- Add titles using keyboard shortcuts
- Drag titles from the Title Browser
- Change position by dragging the title
- Change duration by dragging the edge of the clip
- Delete a title by selecting it and pressing the Delete key
CHANGING TEXT
Add a new full-screen title (type Control+T) to the Timeline. To change the text in a title, double-click it in the Viewer. Here, I’ve changed my title to “An Undersea Adventure.”
NOTE: We can also change the text using the Inspector. I’ll show you how in a few paragraphs. Pick whichever method is easiest for you.
All text, in any title, can be changed by double-clicking it in the Viewer to select it, then typing the new text you want to use.
FORMATTING TEXT
You can format any text that you can select. This means that you can format entire phrases, words, or individual letters differently. For this article, I will format everything the same, because once you know how this works, you can experiment on your own.
Here, I selected my entire title and opened the Inspector (shortcut Cmd+4). Click the Text tab at the top. This section of the Inspector allows you to format the text.
NOTE: The text box near the top of the panel is the second place you can select text for formatting.
If you want a fast way to format text, click the word “Normal” at the top. This displays a menu filled with different text formats. Some of these formats look pretty dreadful; the rest look worse.
NOTE: You can create your own text styles. Refer to the Help for information on how.
The Basic section of the Inspector allows you to change fonts, size, alignment… all the standard font settings we see in other programs. Here, I’ve changed the font to Hobo Std, at 167 points.
While many of these settings you already know there are a few you may not:
- Line spacing. Adjusts the vertical distance between lines within the same paragraph.
- Tracking. Adjusts the horizontal spacing between letters.
- Baseline. Adjusts the vertical spacing of text compared to the horizontal line running thru the center of the white circle in the Viewer.
The Face section allows us to change font color, opacity and blue. Outline and Glow allows us to add, not surprisingly, outlines and glows. You can adjust these as you see fit - I tend not to add outlines or glows.
However, I STRONGLY recommend adding drop shadows to all text that you want viewers to read. Video, even HD video, is low resolution compared to print. Drop shadows make your text much easier to read. These are the settings I recommend for drop shadows.
After making a few changes in the Inspector, here’s the final result. Very cool - and very different from where we started!
ACTION SAFE/TITLE SAFE ZONES
Since television was first invented, we needed to compensate for the differences in TV sets by designing graphics to stay within Action Safe and Title Safe boundaries.
While much of today’s video is designed for the web, your titles will look the best if you follow the same guidelines.
Titles015
Go to the Switch in the Viewer and select “Show Action Safe/Title Safe Zones.”
This displays two pale rectangles in the frame. The outer rectangle is called “Action Safe,” the inner one is called “Title Safe.” Action Safe is 5% in from all edges; Title Safe is 10% in from all edges.
When designing text and graphics for the web, keep all essential elements inside the outer rectangle. When designing graphics and text for broadcast or cable, keep all essential elements inside the inner rectangle.
Here, for example, notice that my title is fully contained within Action Safe.
SUMMARY
Titles give our programs character and personality, plus they explain what’s going on to the audience. Final Cut Pro X provides a wealth of formatting options to make our text look great.
Benjamin Arango
Benjamin Arango is a writer and a lover of all things video.
Follow @Benjamin Arango
Get Ready to Play: The Top 10 Best Free Game Download Sites [PC, Android, 2024]
Top 10 Best Free Game Download Sites [PC & Android][2024]

Ollie Mattison
Mar 27, 2024• Proven solutions

We all know and firmly believe that games are an integral part of our life. But the world has progressed, and we yearn to achieve real-life experiences through virtual reality instead of experiencing the actual thing. Online games are not only mentally stimulating, but they are also very addictive. Not everyone wants to pay to play games for a couple of hours, so here is a list of top free game downloading sites. You can download full versions of your favorite games for free.
Recommended Video Recorder & Editor for Gameplay: Filmora
If you want to edit a video recorded from games with more effects and templates, we recommend using Filmora . It is an easy-to-use video editor. It offers various title templates. You can also use it to record game videos. Just download it to have a try. Don’t know how to make a video? Visit the Wondershare Video Community and get some inspiration in video creation.
Part 1: Best Free PC Game Download Sites
1 Acid Play
Platforms: OS X and Windows

Key Features:
- Huge gaming library
The acid play has a gigantic collection of games of various types. The games at acid play have been categorized into action, arcade, board games, RPG, card games, puzzles, driving games, simulation, etc.
- Custom Search
The customized search helps you find the exact game you are looking for. It saves time since you cannot browse through thousands of games.
- Ratings
If you are new to this site or looking for a new game to play, you can choose only without trying every game to decide the best one. Just check the ratings provided by other players, and it will solve your problem. You can also rate a game according to your liking.
Pros:
- The games are easily downloadable and free.
- There is a large variety of games available to play.
Cons:
- The site is not updated, and no new games are introduced.
2 Origin Games
Platforms: OS X and Windows
Origin games are another best-known digital distribution platform for a free online gaming experience. It contains a fairly large library of premium games, but origin games provide links for free downloads for a limited time.
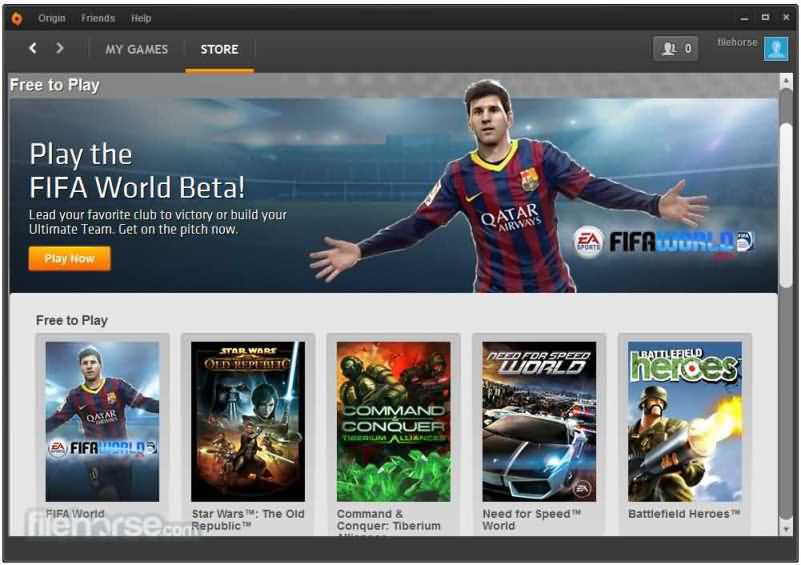
Key Features:
- Social Features
Origin provides its users with many social features like profile management, networking with friends through chatting, and video streaming via TwitchTV. You can also share your game library and community integration through social media and networking sites like Facebook, Xbox Live, PlayStation Network, and Nintendo Network.
- Variety in games
It provides various games, from PC games to Fifa and even classic games like Plant Vs. Zombies are also available.
- On-the-house games
The on-the-house features allow the customers to download a free trial of a premium game.
Pros:
- It provides great game streaming features.
- is developed by a renowned and successful company so that it can be trusted.
- The ‘on-the-house specials’ are appreciated by many gamers, allowing them to play a paid game for free now and then.
Cons:
- It has a lot of updates and takes an unreasonable amount of time to install and update the software.
- Customers have complained that they provide expired discount codes.
- Customer service needs to be improved as it is not very responsive.
3 AllGamesAtoZ
Platforms: OS X and Windows
If you want the best full version of a game for free, then AllGamesAtoZ is where you should go.
Key Features:
- The website is full of addictive games from different genres like action, arcade, shooting, role-playing, adventure, racing, simulation, etc.
- Multiple links for downloading a single game are available.
- A customized search bar is available so that you can locate the exact game you are looking for without having to browse through thousands of games.
- The games on AllGamesAtoZ are available on Windows, Linux, and Mac.
- A forum for game reviews is provided, so it is easier to decide which game you want to download without trying them all.
Pros:
- The gaming library is enormous.
- The game reviews make it easier to make a decision and save time.
- The website does not transfer viruses and is entirely safe from scams.
Cons:
- The downloading process is quite long.
- The website is not updated with new games.
4 Mega Games
Platforms: OS X and Windows
It is another highly recommended online gaming site. It not only provides PC games for free but also offers 3D PlayStation games to be downloaded on your PC without any charge.

Key Features:
- Search and download
Mega games allow a search and download option for every game published on their site.
- PlayStation games
It has provided its customers with not only PC games but also 3D PlayStation games that can be downloaded for free.
- Cheat codes
Apart from all the standard gaming features, mega games also provide free cheat codes for the games.
Pros:
- The games are easily downloaded.
- The games have variety.
Cons:
- The website stops working after a while, and the download gets interrupted
5 Caiman.us
Platforms: OS X and Windows
It is another digital distribution platform for free online gaming. After the death of the site’s developer, the site has gone offline.

Key Features:
- It has a vast collection of games and over twenty free games categories.
- 2D and 3D gaming experiences are also provided.
- A customized search is available to make it easier for players to find the game they are looking for.
Pros:
- There is a vast collection of free games to download and play.
Cons:
- The site is not well organized and confusing.
- The search bar is at the very bottom of the page, so a person might find it hard to locate.
- Since the site has gone offline, the games are not updated, so there are no new games.
Part 2: Best Android Game Download Sites to Download Free Android Games
Android is growing very fast; now, almost everyone uses it and prefers it over any other software. Here are the best websites from where you can download free android apps:
1 Google Play
Google Play is the most common website to download free android apps. It is free, it is fast, and it is efficient. You can not only use this from your android mobile but also operate it and download apps using your laptop.

Key Features:
- The apps are easily downloaded, depending upon your internet connection.
- The purchase methods are through credit cards, and the procedure is straightforward.
- The platform allows everyone and anyone to sell their games.
- Sign up through your Google account is necessary to access these features.
Pros:
- It is easily accessible.
- It is pre-installed on all android supported devices.
- It contains a massive collection of unique apps, from books to music, workout, and games of various types.
Cons:
- Since everyone and anyone can access it without paying any registration fee, it is exposed to scams and harassment.
- A few games do not function and keep crashing.
2 Android Games Room

It contains thousands of free gaming apps in different categories like action, arcade, adventure, simulation, song games, and puzzle games. The download links are readily available; you can even access this site from your mobile by scanning a QR code. This site is a pretty good platform to download free games but has certain flaws. It does not allow a multiplayer gaming experience, and no customer services are provided.
3 Android Apps
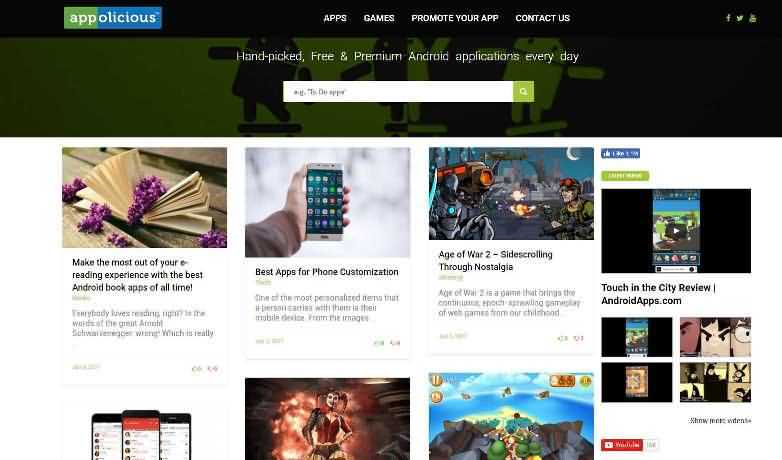
It is another platform to download android apps for free. This site is pretty good since it updates games that developers handpick almost daily. You can also promote your app using the ‘promote your app’ feature. The site has a lot of updates and takes an unreasonable amount of time to install and update the software. Furthermore, you can say that they do not have a customer service function because nobody ever responds to the customer’s queries.
4 1 Mobile
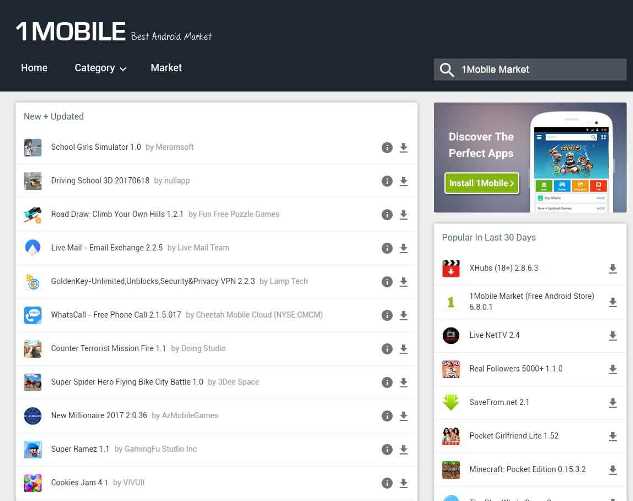
One mobile is a free android store. It provides its users the easiest way to locate, download and manage free apps. 1 Mobile has over eighty (80) million apps. One mobile has just been recently updated, has a brand new interface design, and operates much smoother. The content is more prosperous, smoother, and a thousand times better than before the latest update. All the apps and games are 100% free forever without hidden charges. It supports various languages like English, Korean, Chinese, French, Spanish, Japanese, and Portugal.
5 Approx

It provides the best free apps not only for android but OS as well. You can download it on your phone by scanning a QR code. This software has been functioning for the past six years and is free from viruses or malware.
To furnish your gameplay videos, Filmora also provides some cool effects, transitions, and elements, such as camera shake chaos effects, distortion effects, 3D change, speed blur transitions, and more. Moreover, you can always find some specially designed gaming effects in the Filmstock effects store.
Ollie Mattison
Ollie Mattison is a writer and a lover of all things video.
Follow @Ollie Mattison
Ollie Mattison
Mar 27, 2024• Proven solutions
We all know and firmly believe that games are an integral part of our life. But the world has progressed, and we yearn to achieve real-life experiences through virtual reality instead of experiencing the actual thing. Online games are not only mentally stimulating, but they are also very addictive. Not everyone wants to pay to play games for a couple of hours, so here is a list of top free game downloading sites. You can download full versions of your favorite games for free.
Recommended Video Recorder & Editor for Gameplay: Filmora
If you want to edit a video recorded from games with more effects and templates, we recommend using Filmora . It is an easy-to-use video editor. It offers various title templates. You can also use it to record game videos. Just download it to have a try. Don’t know how to make a video? Visit the Wondershare Video Community and get some inspiration in video creation.
Part 1: Best Free PC Game Download Sites
1 Acid Play
Platforms: OS X and Windows
Key Features:
- Huge gaming library
The acid play has a gigantic collection of games of various types. The games at acid play have been categorized into action, arcade, board games, RPG, card games, puzzles, driving games, simulation, etc.
- Custom Search
The customized search helps you find the exact game you are looking for. It saves time since you cannot browse through thousands of games.
- Ratings
If you are new to this site or looking for a new game to play, you can choose only without trying every game to decide the best one. Just check the ratings provided by other players, and it will solve your problem. You can also rate a game according to your liking.
Pros:
- The games are easily downloadable and free.
- There is a large variety of games available to play.
Cons:
- The site is not updated, and no new games are introduced.
2 Origin Games
Platforms: OS X and Windows
Origin games are another best-known digital distribution platform for a free online gaming experience. It contains a fairly large library of premium games, but origin games provide links for free downloads for a limited time.
Key Features:
- Social Features
Origin provides its users with many social features like profile management, networking with friends through chatting, and video streaming via TwitchTV. You can also share your game library and community integration through social media and networking sites like Facebook, Xbox Live, PlayStation Network, and Nintendo Network.
- Variety in games
It provides various games, from PC games to Fifa and even classic games like Plant Vs. Zombies are also available.
- On-the-house games
The on-the-house features allow the customers to download a free trial of a premium game.
Pros:
- It provides great game streaming features.
- is developed by a renowned and successful company so that it can be trusted.
- The ‘on-the-house specials’ are appreciated by many gamers, allowing them to play a paid game for free now and then.
Cons:
- It has a lot of updates and takes an unreasonable amount of time to install and update the software.
- Customers have complained that they provide expired discount codes.
- Customer service needs to be improved as it is not very responsive.
3 AllGamesAtoZ
Platforms: OS X and Windows
If you want the best full version of a game for free, then AllGamesAtoZ is where you should go.
Key Features:
- The website is full of addictive games from different genres like action, arcade, shooting, role-playing, adventure, racing, simulation, etc.
- Multiple links for downloading a single game are available.
- A customized search bar is available so that you can locate the exact game you are looking for without having to browse through thousands of games.
- The games on AllGamesAtoZ are available on Windows, Linux, and Mac.
- A forum for game reviews is provided, so it is easier to decide which game you want to download without trying them all.
Pros:
- The gaming library is enormous.
- The game reviews make it easier to make a decision and save time.
- The website does not transfer viruses and is entirely safe from scams.
Cons:
- The downloading process is quite long.
- The website is not updated with new games.
4 Mega Games
Platforms: OS X and Windows
It is another highly recommended online gaming site. It not only provides PC games for free but also offers 3D PlayStation games to be downloaded on your PC without any charge.
Key Features:
- Search and download
Mega games allow a search and download option for every game published on their site.
- PlayStation games
It has provided its customers with not only PC games but also 3D PlayStation games that can be downloaded for free.
- Cheat codes
Apart from all the standard gaming features, mega games also provide free cheat codes for the games.
Pros:
- The games are easily downloaded.
- The games have variety.
Cons:
- The website stops working after a while, and the download gets interrupted
5 Caiman.us
Platforms: OS X and Windows
It is another digital distribution platform for free online gaming. After the death of the site’s developer, the site has gone offline.
Key Features:
- It has a vast collection of games and over twenty free games categories.
- 2D and 3D gaming experiences are also provided.
- A customized search is available to make it easier for players to find the game they are looking for.
Pros:
- There is a vast collection of free games to download and play.
Cons:
- The site is not well organized and confusing.
- The search bar is at the very bottom of the page, so a person might find it hard to locate.
- Since the site has gone offline, the games are not updated, so there are no new games.
Part 2: Best Android Game Download Sites to Download Free Android Games
Android is growing very fast; now, almost everyone uses it and prefers it over any other software. Here are the best websites from where you can download free android apps:
1 Google Play
Google Play is the most common website to download free android apps. It is free, it is fast, and it is efficient. You can not only use this from your android mobile but also operate it and download apps using your laptop.
Key Features:
- The apps are easily downloaded, depending upon your internet connection.
- The purchase methods are through credit cards, and the procedure is straightforward.
- The platform allows everyone and anyone to sell their games.
- Sign up through your Google account is necessary to access these features.
Pros:
- It is easily accessible.
- It is pre-installed on all android supported devices.
- It contains a massive collection of unique apps, from books to music, workout, and games of various types.
Cons:
- Since everyone and anyone can access it without paying any registration fee, it is exposed to scams and harassment.
- A few games do not function and keep crashing.
2 Android Games Room
It contains thousands of free gaming apps in different categories like action, arcade, adventure, simulation, song games, and puzzle games. The download links are readily available; you can even access this site from your mobile by scanning a QR code. This site is a pretty good platform to download free games but has certain flaws. It does not allow a multiplayer gaming experience, and no customer services are provided.
3 Android Apps
It is another platform to download android apps for free. This site is pretty good since it updates games that developers handpick almost daily. You can also promote your app using the ‘promote your app’ feature. The site has a lot of updates and takes an unreasonable amount of time to install and update the software. Furthermore, you can say that they do not have a customer service function because nobody ever responds to the customer’s queries.
4 1 Mobile
One mobile is a free android store. It provides its users the easiest way to locate, download and manage free apps. 1 Mobile has over eighty (80) million apps. One mobile has just been recently updated, has a brand new interface design, and operates much smoother. The content is more prosperous, smoother, and a thousand times better than before the latest update. All the apps and games are 100% free forever without hidden charges. It supports various languages like English, Korean, Chinese, French, Spanish, Japanese, and Portugal.
5 Approx
It provides the best free apps not only for android but OS as well. You can download it on your phone by scanning a QR code. This software has been functioning for the past six years and is free from viruses or malware.
To furnish your gameplay videos, Filmora also provides some cool effects, transitions, and elements, such as camera shake chaos effects, distortion effects, 3D change, speed blur transitions, and more. Moreover, you can always find some specially designed gaming effects in the Filmstock effects store.
Ollie Mattison
Ollie Mattison is a writer and a lover of all things video.
Follow @Ollie Mattison
The Ultimate List: 10 Best Free Online Video Repeaters
Top 10 Free Online Video Loopers 2024
Ollie Mattison
Mar 27, 2024• Proven solutions
If you find a particular section of a video or an entire clip quite interesting and wish that you, your friends, or the target audience on your social networking account should also view that interesting part, again and again, it would be a good idea to play the footage in repeat mode. This is where the loopers come into play as they allow you to configure the video loop multiple times.
Therefore, below is a list of free video looper web solutions that, as per their policies, allow you to set the segment of footage to play repeatedly.
Top 10 Free Online Video Loopers
Note: Although the following list introduces the 10 best video looper online apps, each of them may vary in their nature, level of granularity they offer while setting up the loops, or the size of video they can accept in a single session.
1. Filmora Video Editor - [Free Trial, for Windows or Mac Computer]

If you need more powerful video looper, online tools may be not the first choice. You can have a try Filmora video editor. Filmora offers a unique balance between beginner-friendly video editing software and a feature-rich tool that even experts can edit on. This means anyone can use it to create any video editing project they like.
Making a loop video with Filmora is as easy as spreading warm butter on toast. Just open the program, click on New Project, and follow these simple steps to loop video on Filmora .
2. Clideo Loop Video
Loop Video is not the only feature that Clideo offers, and the web portal can be used as a beginners’ gear to form a strong foundation for anyone who is planning to get a career in the post-production industry. When talking about the solution’s video looper online feature, the interface is well-balanced, with no distracting adverts to hinder your operations.
How to loop video with Clideo?
- Launch any web browser and go to https://clideo.com/editor/loop-video
- Use your preferred method to upload the source video
- Choose an output format from the Format menu at the bottom-left corner of the new page that appears
- From the Loop this clip section on the right, choose how many times you want the video to loop
- Click Loop from the bottom-right corner of the page
- Wait while Clideo prepares your video
- Click Download (or choose your preferred download location) from the next page to obtain the clip once the process completes
Pros
- Lets you produce a looped video an unlimited number of times (at the cost of converting the clip to GIF format)
- Lets you edit the videos post-processing for better output
Cons
- Requires a subscription plan to be purchased to remove the watermark from the output videos
3. Kapwing Loop Video
Kapwing is another multipurpose multimedia and post-production solution that is also a free video looper with a couple of lucrative features. The web solution has a built-in video maker, meme maker, video resizer, GIF editor to add audio, video trimmer, and much more. The portal is trustworthy and is used by giants like Spotify, Amazon, Sony, etc.
How to use Kapwing to loop video?
- Use your preferred web browser to go to https://www.kapwing.com/tools/loop-video
- Click Upload to upload or paste the YouTube URL of the source clip in the given field
- Click Trim Video from the top-left section of the right window (Optional)
- Choose the number of times the video should loop from the Loop this clip section present at the top of the left pane
- Click CREATE from the bottom-left corner
- Edit (optional) and/or download the processed clip from the next page
Pros
- Generates a unique URL that can be used to share with people or on social networking sites
- Requires no registration as long as you are OK with the watermark. Registration is free
Cons
- Free users can upload videos of as long as up to 7 minutes with a file size of up to 250MB in a single session
4. FileConverto Online Video Loop
Offering a plethora of video and audio tools like compressor, joiner, trimmer, and much more, FileConverto is also an MP4 looper that can accept your files from your PC, and can easily loop them multiple times as needed. All the other tools, including the video loop offered with the online solution, are free to use.
How to loop video with FileConverto?
- Go to https://www.fileconverto.com/loop-repeat-video/ using your favorite web browser
- Click Browse on the webpage and upload the source video file
- From the available drop-down list, choose the number of times you want your video to loop
- Click Submit Now
- Wait while the portal processes the video
- Click Download File to save the output clip to your PC
Pros
- Requires no registration or paid subscription plan whatsoever
- The entire process can be completed in 3 simple steps
Cons
- Doesn’t allow to trim the videos or choose their output format
5. Animaker
A decent and feature-equipped tool that not only allows you to loop your videos, it also enables you to add text effects, animated characters, background images and music, objects, and many other such elements to the clips in order to make them more interesting and engaging for the target audience.
How to loop video with Animaker Online?
- Go to https://app.animaker.com/dashboard using any web browser of your choice
- Sign up for an account using your preferred method
- From the left pane, go to Create > Create a video > Blank Page
- Click Upload from the lower section of the navigation pane on the left
- Upload a clip from your PC
- Drag the clip from the Media bin to the Workspace at the center of the page
- Click the Duplicate button present at the bottom of the clip’s thumbnail in the right panel to add a video loop.
Note: You can click the Duplicate button as many times as you want the clip to loop for
- Click Publish from the top-right corner
- Click Download to download the processed video to your PC. Alternatively, choose any other option to share the clip on your preferred social media platform
Pros
- Has plenty of robust and efficient tools to granularly prepare your videos
- Allows you to add multiple elements to the clips before enabling loops
Cons
- A paid subscription is required to remove the watermark
6. Rocketium
A web solution for both indie professionals and teams, Rocketium still allows you to loop your footage for free. All you need to do is, upload the video to the portal, make the required adjustments as per your preferences, and download the processed clip to your PC without any hindrance.
Process of looping video with Rocketium
- Go to https://rocketium.com/is/video-looper/ on your web browser
- Click Upload a file
- Select and upload a clip from your PC
- Choose the number of loops for your video from the right section
- Click Loop Video
- Click Download to save the processed output on your computer
Pros
- Allows video loop at absolutely no cost
- The entire process can be completed in 3 simple steps
Cons
- Registration is required to edit the videos
7. LoopTube
LoopTube is an online YouTube video loop portal that lets you repeat the entire clip or its particular section an unlimited number of times. The best thing is, that the landing page itself has all the features and options, and the entire interface is extremely easy to use, even by those who have least or absolutely no knowledge about video editing or looping.
How to use LoopTube to loop video?
- Launch a web browser on your computer and go to https://looptube.io/
- Paste the URL of the YouTube video in the available field at the top
- Click the Search button to allow LoopTube to search and access the clip
- Use the left and right handles from below the player window to select the segment in the video you want to loop for an unlimited number of times
Pros
- Absolutely free to use
- Lets you select a segment of the video for infinite loop
Cons
- Doesn’t allow you to download or share the output video
8. VEED.IO
A complete online post-production tool for both beginners and professionals, VEED.IO is enriched with plenty of tools to make your source clips look much more engaging, interesting, and informative. While the subscriptions start from $0.00 USD to $24.00 USD per month, the videos can be uploaded, looped, and downloaded for free.
How to loop video with Veed.io?
- Make sure to download the video you want to loop to your local hard drive
- Use a web browser to go to https://www.veed.io/tools/video-looper
- Click Get Started Now
- Use your preferred method to upload the source video
- Use the Playhead (Skimmer) in the Timeline at the bottom to go to a frame, and click Split to split the clip as needed
- Select the unwanted segment and press Delete on your keyboard to remove
- Drag the remaining part to place it in your preferred position
- Click Add Video to add the same clip to the portal again
- Repeat the above step as many times as you want the clip to loop for
- Click Export from the top-right corner, and wait while VEED.IO renders the uploaded video(s)
- Use your preferred method to download or share the output footage when done
Pros
- Free to use
- Has several options to edit and decorate your footage before looping
Cons
- A paid subscription is needed to remove the watermark
9. WoFox Loop Video Tool
A free solution for video loop and making other adjustments to your source footage, WoFox is a decent web app for graphic designing, animated designs, photo collages, logo creation, and much more. The tool can also create animated lyrics and video songs that could be used to impart information or practice singing.
How to loop video with WoFox?
- On your Internet browser, go to https://www.wofox.com/video-editing-tools/loop-video
- Click Upload and select the number of loops from the Loop video section in the left pane
- Click Download from the top-right corner of the page
Pros
- Absolutely free to use
- Is equipped with several other video editing tools
Cons
- Subscription plans are hefty if you ever plan to use the tool for business purposes
- At the time of this writing, the tool doesn’t work with Mozilla Firefox
10. Video Looper Chrome Extension
A free tool that works with the Google Chrome web browser, Video Looper is a Chrome Extension that can be added and enabled in order to loop the videos that you play on YouTube. Post adding, the extension automatically gets enabled as soon as it detects an eligible YouTube video on Chrome. Once enabled, you can even detach the panel to use it independently.
How to use the Chrome extension to loop video?
- Launch Google Chrome and go to https://chrome.google.com/webstore/detail/video-looper/cakhljgchfghghfapljifddkaomfijcn
- Click Add to Chrome, and then click Add Extension when the confirmation box pops up
- Close and then reopen Google Chrome
- Go to the YouTube’s clip URL that you want to video loop
- Click the Video Looper icon from the top-right corner of the browser
- Click Create Repeat
- Enter a value (the number of times you want to loop the video) in the Repeat Times field
- Optionally enter the relevant values in the Start Time and End Time fields to trim the footage
- Click Create
- Click Start & Play on the next box that appears to play the YouTube video for the number of times you specified
Pros
- Free to use
- Can create an unlimited number of presets to play the videos in loops
Cons
- Doesn’t allow you to download the videos
Summary
Depending on your budget, frequency of video loop requirements, and the level of details you need while preparing a full-fledged video with repetitions, you can choose any of the tools explained above. However, if you need a comparatively better solution, Wondershare UniConverter would be your best bet as it is not merely a free video looper, it also offers several other features to get a complete output with quite granular edits.
Ollie Mattison
Ollie Mattison is a writer and a lover of all things video.
Follow @Ollie Mattison
Ollie Mattison
Mar 27, 2024• Proven solutions
If you find a particular section of a video or an entire clip quite interesting and wish that you, your friends, or the target audience on your social networking account should also view that interesting part, again and again, it would be a good idea to play the footage in repeat mode. This is where the loopers come into play as they allow you to configure the video loop multiple times.
Therefore, below is a list of free video looper web solutions that, as per their policies, allow you to set the segment of footage to play repeatedly.
Top 10 Free Online Video Loopers
Note: Although the following list introduces the 10 best video looper online apps, each of them may vary in their nature, level of granularity they offer while setting up the loops, or the size of video they can accept in a single session.
1. Filmora Video Editor - [Free Trial, for Windows or Mac Computer]
If you need more powerful video looper, online tools may be not the first choice. You can have a try Filmora video editor. Filmora offers a unique balance between beginner-friendly video editing software and a feature-rich tool that even experts can edit on. This means anyone can use it to create any video editing project they like.
Making a loop video with Filmora is as easy as spreading warm butter on toast. Just open the program, click on New Project, and follow these simple steps to loop video on Filmora .
2. Clideo Loop Video
Loop Video is not the only feature that Clideo offers, and the web portal can be used as a beginners’ gear to form a strong foundation for anyone who is planning to get a career in the post-production industry. When talking about the solution’s video looper online feature, the interface is well-balanced, with no distracting adverts to hinder your operations.
How to loop video with Clideo?
- Launch any web browser and go to https://clideo.com/editor/loop-video
- Use your preferred method to upload the source video
- Choose an output format from the Format menu at the bottom-left corner of the new page that appears
- From the Loop this clip section on the right, choose how many times you want the video to loop
- Click Loop from the bottom-right corner of the page
- Wait while Clideo prepares your video
- Click Download (or choose your preferred download location) from the next page to obtain the clip once the process completes
Pros
- Lets you produce a looped video an unlimited number of times (at the cost of converting the clip to GIF format)
- Lets you edit the videos post-processing for better output
Cons
- Requires a subscription plan to be purchased to remove the watermark from the output videos
3. Kapwing Loop Video
Kapwing is another multipurpose multimedia and post-production solution that is also a free video looper with a couple of lucrative features. The web solution has a built-in video maker, meme maker, video resizer, GIF editor to add audio, video trimmer, and much more. The portal is trustworthy and is used by giants like Spotify, Amazon, Sony, etc.
How to use Kapwing to loop video?
- Use your preferred web browser to go to https://www.kapwing.com/tools/loop-video
- Click Upload to upload or paste the YouTube URL of the source clip in the given field
- Click Trim Video from the top-left section of the right window (Optional)
- Choose the number of times the video should loop from the Loop this clip section present at the top of the left pane
- Click CREATE from the bottom-left corner
- Edit (optional) and/or download the processed clip from the next page
Pros
- Generates a unique URL that can be used to share with people or on social networking sites
- Requires no registration as long as you are OK with the watermark. Registration is free
Cons
- Free users can upload videos of as long as up to 7 minutes with a file size of up to 250MB in a single session
4. FileConverto Online Video Loop
Offering a plethora of video and audio tools like compressor, joiner, trimmer, and much more, FileConverto is also an MP4 looper that can accept your files from your PC, and can easily loop them multiple times as needed. All the other tools, including the video loop offered with the online solution, are free to use.
How to loop video with FileConverto?
- Go to https://www.fileconverto.com/loop-repeat-video/ using your favorite web browser
- Click Browse on the webpage and upload the source video file
- From the available drop-down list, choose the number of times you want your video to loop
- Click Submit Now
- Wait while the portal processes the video
- Click Download File to save the output clip to your PC
Pros
- Requires no registration or paid subscription plan whatsoever
- The entire process can be completed in 3 simple steps
Cons
- Doesn’t allow to trim the videos or choose their output format
5. Animaker
A decent and feature-equipped tool that not only allows you to loop your videos, it also enables you to add text effects, animated characters, background images and music, objects, and many other such elements to the clips in order to make them more interesting and engaging for the target audience.
How to loop video with Animaker Online?
- Go to https://app.animaker.com/dashboard using any web browser of your choice
- Sign up for an account using your preferred method
- From the left pane, go to Create > Create a video > Blank Page
- Click Upload from the lower section of the navigation pane on the left
- Upload a clip from your PC
- Drag the clip from the Media bin to the Workspace at the center of the page
- Click the Duplicate button present at the bottom of the clip’s thumbnail in the right panel to add a video loop.
Note: You can click the Duplicate button as many times as you want the clip to loop for
- Click Publish from the top-right corner
- Click Download to download the processed video to your PC. Alternatively, choose any other option to share the clip on your preferred social media platform
Pros
- Has plenty of robust and efficient tools to granularly prepare your videos
- Allows you to add multiple elements to the clips before enabling loops
Cons
- A paid subscription is required to remove the watermark
6. Rocketium
A web solution for both indie professionals and teams, Rocketium still allows you to loop your footage for free. All you need to do is, upload the video to the portal, make the required adjustments as per your preferences, and download the processed clip to your PC without any hindrance.
Process of looping video with Rocketium
- Go to https://rocketium.com/is/video-looper/ on your web browser
- Click Upload a file
- Select and upload a clip from your PC
- Choose the number of loops for your video from the right section
- Click Loop Video
- Click Download to save the processed output on your computer
Pros
- Allows video loop at absolutely no cost
- The entire process can be completed in 3 simple steps
Cons
- Registration is required to edit the videos
7. LoopTube
LoopTube is an online YouTube video loop portal that lets you repeat the entire clip or its particular section an unlimited number of times. The best thing is, that the landing page itself has all the features and options, and the entire interface is extremely easy to use, even by those who have least or absolutely no knowledge about video editing or looping.
How to use LoopTube to loop video?
- Launch a web browser on your computer and go to https://looptube.io/
- Paste the URL of the YouTube video in the available field at the top
- Click the Search button to allow LoopTube to search and access the clip
- Use the left and right handles from below the player window to select the segment in the video you want to loop for an unlimited number of times
Pros
- Absolutely free to use
- Lets you select a segment of the video for infinite loop
Cons
- Doesn’t allow you to download or share the output video
8. VEED.IO
A complete online post-production tool for both beginners and professionals, VEED.IO is enriched with plenty of tools to make your source clips look much more engaging, interesting, and informative. While the subscriptions start from $0.00 USD to $24.00 USD per month, the videos can be uploaded, looped, and downloaded for free.
How to loop video with Veed.io?
- Make sure to download the video you want to loop to your local hard drive
- Use a web browser to go to https://www.veed.io/tools/video-looper
- Click Get Started Now
- Use your preferred method to upload the source video
- Use the Playhead (Skimmer) in the Timeline at the bottom to go to a frame, and click Split to split the clip as needed
- Select the unwanted segment and press Delete on your keyboard to remove
- Drag the remaining part to place it in your preferred position
- Click Add Video to add the same clip to the portal again
- Repeat the above step as many times as you want the clip to loop for
- Click Export from the top-right corner, and wait while VEED.IO renders the uploaded video(s)
- Use your preferred method to download or share the output footage when done
Pros
- Free to use
- Has several options to edit and decorate your footage before looping
Cons
- A paid subscription is needed to remove the watermark
9. WoFox Loop Video Tool
A free solution for video loop and making other adjustments to your source footage, WoFox is a decent web app for graphic designing, animated designs, photo collages, logo creation, and much more. The tool can also create animated lyrics and video songs that could be used to impart information or practice singing.
How to loop video with WoFox?
- On your Internet browser, go to https://www.wofox.com/video-editing-tools/loop-video
- Click Upload and select the number of loops from the Loop video section in the left pane
- Click Download from the top-right corner of the page
Pros
- Absolutely free to use
- Is equipped with several other video editing tools
Cons
- Subscription plans are hefty if you ever plan to use the tool for business purposes
- At the time of this writing, the tool doesn’t work with Mozilla Firefox
10. Video Looper Chrome Extension
A free tool that works with the Google Chrome web browser, Video Looper is a Chrome Extension that can be added and enabled in order to loop the videos that you play on YouTube. Post adding, the extension automatically gets enabled as soon as it detects an eligible YouTube video on Chrome. Once enabled, you can even detach the panel to use it independently.
How to use the Chrome extension to loop video?
- Launch Google Chrome and go to https://chrome.google.com/webstore/detail/video-looper/cakhljgchfghghfapljifddkaomfijcn
- Click Add to Chrome, and then click Add Extension when the confirmation box pops up
- Close and then reopen Google Chrome
- Go to the YouTube’s clip URL that you want to video loop
- Click the Video Looper icon from the top-right corner of the browser
- Click Create Repeat
- Enter a value (the number of times you want to loop the video) in the Repeat Times field
- Optionally enter the relevant values in the Start Time and End Time fields to trim the footage
- Click Create
- Click Start & Play on the next box that appears to play the YouTube video for the number of times you specified
Pros
- Free to use
- Can create an unlimited number of presets to play the videos in loops
Cons
- Doesn’t allow you to download the videos
Summary
Depending on your budget, frequency of video loop requirements, and the level of details you need while preparing a full-fledged video with repetitions, you can choose any of the tools explained above. However, if you need a comparatively better solution, Wondershare UniConverter would be your best bet as it is not merely a free video looper, it also offers several other features to get a complete output with quite granular edits.
Ollie Mattison
Ollie Mattison is a writer and a lover of all things video.
Follow @Ollie Mattison
Pixel Perfect: Calculating Aspect Ratios with Ease
How to Calculate Pixel Calculator Ratio
An easy yet powerful editor
Numerous effects to choose from
Detailed tutorials provided by the official channel
Size, formats, and resolution… What are pixels exactly doing with it?
![]()
So let’s review some basics on pixel calculator ratio to create an easy life, your workflow more productive, and your photos of the ideal size for the intended purpose.
In this article
01 [What is Pixel Aspect Ratio?](#Part 1)
02 [How is Pixel Ratio Calculated?](#Part 2)
03 [Par (pixel Aspect Ratio) in Adobe Premiere Pro/Filmora?](#Part 3)
04 [Difference among Pixel Aspect Ratio, Display Aspect Ratio, and Storage Aspect Ratio](#Part 4)
05 [How Aspect Ratios Affect UI/UX Design?](#Part 5)
Part 1 What is Pixel Aspect Ratio?
A digital image is not a single non-dividable thing. You’ll see that your photo is like a mosaic formed by small tiles if you zoom in far enough, which are known as pixels in photography.
The amount of these pixels and the way they are divided are the two elements that you’re required to take into account to know more about the resolution and pixel calculator ratio.
The Pixel Aspect Ratio is simply the latest way of defining the length of one side of a pixel in context to the length of the other.
Let’s say the ratio is 1:1; each side of the pixel is the same length as the other, also known as a square in pixels.
If the ratio is 2:1, it means that one side is twice the length of the other.
NOTE: The ‘Aspect Ratio’ does not define the actual or exact length of the side of a pixel is, just its “relative” size of one side to the other. The actual length will depend on how much you shrink or stretch a photo when recreating it. But if the Pixel Calculator Ratio is 1:1, then the pixels will always be square irrespective of the size of that particular photo.
![]()
Part 2 How is Pixel Ratio Calculated?
You can use a pixel ratio calculator to calculate the pixels within a screen. So, we’d like to suggest a calculator by xwebtools.com.
Here, you can see tabs, namely the Common Ratios Ratio Width, Ratio Height, Pixels Width, and Pixels Height.
![]()
How it works:
This pixel ratio calculator converts pixel dimensions to aspect ratios. It is an online free tool that assists you in calculating the aspect ratio value of an object or a photo.
The conversion can be carried in both ways, aspect ratio to pixels and pixels to aspect ratio. This screen resolution calculator offers a powerful and simple tool that can convert the ratio of images to pixels resolution and pixels to ratio dimensions.
You need to provide Pixels Width and Pixels Height to calculate the aspect ratio; the aspect ratio will be automatically calculated.
You need to provide Ratio Height and Ratio Width to calculate pixel resolutions. Both the Pixels Width and Height will get automatically calculated.
Part 3 What is Par (pixel Aspect Ratio) in Adobe Premiere Pro/Filmora?
Pixel ratio: Adobe Premiere Pro
As we already discussed, an aspect ratio defines width to height. The still picture and video frames have a frame aspect ratio. The pixels that create the frame have a pixel aspect ratio (sometimes called PAR).
Different video recording standards have different aspect ratios. For instance, you record video for television in either a 16:9 or a 4:3 frame aspect ratio.
You set the frame and pixel aspect when you create a project in Adobe Premiere Pro. Once you set these ratios, you can’t change them for that project. However, you can edit the aspect ratio of a sequence. You can also use assets made with different aspect ratios in the project.
Premiere Pro automatically compensates for the pixel aspect ratio of source files.
If an asset still feels distorted, you can manually mention its pixel aspect ratio. But that isn’t very clear, especially for a beginner. This is why we recommend doing the following.
Pixel ratio: Wondershare Filmora
You need a converter or a video editor to change the aspect ratio permanently. Here we humbly recommend an excellent aspect ratio changer - Wondershare Filmora video editor, which helps you make 4:3, 9:16, 16:9, and 1:1 aspect ratio videos pretty quickly.
Wondershare Filmora
Get started easily with Filmora’s powerful performance, intuitive interface, and countless effects!
Try It Free Try It Free Try It Free Learn More >

Furthermore, you can conveniently share these videos on YouTube, Apple TV, Vimeo, and mobile devices.
Transform aspect ratio at the beginning interface
Wondershare Filmora Video Editor helps you change the project aspect ratio right after launching the video editor program.
If you click the drop-down menu, you will see the usual 16:9, 1:1, 9:16, 4:3, and 21:9 aspect ratios.
![]()
Unlike Adobe Premiere Pro, Wondershare Filmora offers you four more ways of setting aspect ratios efficiently.
Method 2: You can change the aspect ratio under Project Settings
![]()
Method 3: Change the aspect ratio of video with Auto-Reframe
![]()
Method 4: Change aspect ratio during Editing
![]()
Method 5: Change aspect ratio while Exporting
![]()
Thus, using the Wondershare Filmora along with the pixel ratio calculator makes a difference!
Part 4 Difference among Pixel Aspect Ratio, Display Aspect Ratio, and Storage Aspect Ratio
Although the image aspect ratio comes from its width and height, it also contains multiple subsets that help to define image proportions properly.
1 - Pixel aspect ratio
Pixel aspect ratio (PAR) is the proportion of the specific pixels within an image. They are generally square within the pixel aspect ratio of 1:1.
But sometimes, specific images are optimized for certain types of displays. And, they have rectangular pixels with an aspect ratio of 4:3 or similar.
2 - Display aspect ratio
The display aspect ratio (DAR) is the designers’ most frequent aspect ratio and gets generally synced with the general term.
As the name suggests, the display aspect ratio refers to the proportions of an image as it appears on different screens out there.
Some devices, such as televisions and cameras, have a fixed DAR for images to display nicely on these devices.
They need optimization for their specific or respective aspect ratio. For instance, a typical display aspect ratio for the widescreen video on a television screen or monitor screen is 16:9.
They appear distorted when images with different aspect ratios are presented on these devices. Digital SLR camera sensors also consist of a fixed display aspect ratio, which controls how pictures captured by the camera will be displayed and saved.
3 - Storage aspect ratio
Storage aspect ratio, commonly known as (SAR) is an aspect ratio formula that concerns specifically to encoded digital video files. SAR refers to the height and the width relationship in video frame size, and it is required to be consistent among all individual frames.
SAR x PAR = DAR for max widescreen videos in a usual used formula.
Part 1 Part 5: How Aspect Ratios Affect UI/UX Design?
Aspect ratios play a vital part in any project that consists of displaying and capturing photographs, videos, or other image-based files in an ideal manner. The camera’s fixed aspect ratio can considerably impact, especially for photographers.
And for videographers or anyone working with slideshows, animations, and other motion projects, the aspect ratio is a prominent element for correct display on mobile devices and widescreen.
But even in the environment of responsive web design, problems can arise, such as when an image is not adjustable for display without compromising its quality or content.
A small example is when you need a square image with a 1:1 aspect ratio to insert into a rectangular box on a web page. To accommodate varying image size requirements, proportions and size may need adjustment.
In an increasingly picture-driven digital world, videos and images that look even slightly out of the way add to a visitor’s negative impression of a site. Besides those forced into the wrong configurations can even interfere with a site’s usability.
Poorly proportioned user guide or product images video that’s too stretched to check clearly can affect both a visitor’s want and their ability to use the site. Developers, designers, and anyone working with images will need to know how aspect ratios work and manipulate them for the best visual effect.
Various pixel calculator ratios, both paid and free, have popped up on the web to streamline the process.
Key Takeaways from This Episode
● An overview of pixels
● Understanding the importance of pixel ratio calculators
● Different pixel ratios and their impact on UI/UX design
Size, formats, and resolution… What are pixels exactly doing with it?
![]()
So let’s review some basics on pixel calculator ratio to create an easy life, your workflow more productive, and your photos of the ideal size for the intended purpose.
In this article
01 [What is Pixel Aspect Ratio?](#Part 1)
02 [How is Pixel Ratio Calculated?](#Part 2)
03 [Par (pixel Aspect Ratio) in Adobe Premiere Pro/Filmora?](#Part 3)
04 [Difference among Pixel Aspect Ratio, Display Aspect Ratio, and Storage Aspect Ratio](#Part 4)
05 [How Aspect Ratios Affect UI/UX Design?](#Part 5)
Part 1 What is Pixel Aspect Ratio?
A digital image is not a single non-dividable thing. You’ll see that your photo is like a mosaic formed by small tiles if you zoom in far enough, which are known as pixels in photography.
The amount of these pixels and the way they are divided are the two elements that you’re required to take into account to know more about the resolution and pixel calculator ratio.
The Pixel Aspect Ratio is simply the latest way of defining the length of one side of a pixel in context to the length of the other.
Let’s say the ratio is 1:1; each side of the pixel is the same length as the other, also known as a square in pixels.
If the ratio is 2:1, it means that one side is twice the length of the other.
NOTE: The ‘Aspect Ratio’ does not define the actual or exact length of the side of a pixel is, just its “relative” size of one side to the other. The actual length will depend on how much you shrink or stretch a photo when recreating it. But if the Pixel Calculator Ratio is 1:1, then the pixels will always be square irrespective of the size of that particular photo.
![]()
Part 2 How is Pixel Ratio Calculated?
You can use a pixel ratio calculator to calculate the pixels within a screen. So, we’d like to suggest a calculator by xwebtools.com.
Here, you can see tabs, namely the Common Ratios Ratio Width, Ratio Height, Pixels Width, and Pixels Height.
![]()
How it works:
This pixel ratio calculator converts pixel dimensions to aspect ratios. It is an online free tool that assists you in calculating the aspect ratio value of an object or a photo.
The conversion can be carried in both ways, aspect ratio to pixels and pixels to aspect ratio. This screen resolution calculator offers a powerful and simple tool that can convert the ratio of images to pixels resolution and pixels to ratio dimensions.
You need to provide Pixels Width and Pixels Height to calculate the aspect ratio; the aspect ratio will be automatically calculated.
You need to provide Ratio Height and Ratio Width to calculate pixel resolutions. Both the Pixels Width and Height will get automatically calculated.
Part 3 What is Par (pixel Aspect Ratio) in Adobe Premiere Pro/Filmora?
Pixel ratio: Adobe Premiere Pro
As we already discussed, an aspect ratio defines width to height. The still picture and video frames have a frame aspect ratio. The pixels that create the frame have a pixel aspect ratio (sometimes called PAR).
Different video recording standards have different aspect ratios. For instance, you record video for television in either a 16:9 or a 4:3 frame aspect ratio.
You set the frame and pixel aspect when you create a project in Adobe Premiere Pro. Once you set these ratios, you can’t change them for that project. However, you can edit the aspect ratio of a sequence. You can also use assets made with different aspect ratios in the project.
Premiere Pro automatically compensates for the pixel aspect ratio of source files.
If an asset still feels distorted, you can manually mention its pixel aspect ratio. But that isn’t very clear, especially for a beginner. This is why we recommend doing the following.
Pixel ratio: Wondershare Filmora
You need a converter or a video editor to change the aspect ratio permanently. Here we humbly recommend an excellent aspect ratio changer - Wondershare Filmora video editor, which helps you make 4:3, 9:16, 16:9, and 1:1 aspect ratio videos pretty quickly.
Wondershare Filmora
Get started easily with Filmora’s powerful performance, intuitive interface, and countless effects!
Try It Free Try It Free Try It Free Learn More >
Furthermore, you can conveniently share these videos on YouTube, Apple TV, Vimeo, and mobile devices.
Transform aspect ratio at the beginning interface
Wondershare Filmora Video Editor helps you change the project aspect ratio right after launching the video editor program.
If you click the drop-down menu, you will see the usual 16:9, 1:1, 9:16, 4:3, and 21:9 aspect ratios.
![]()
Unlike Adobe Premiere Pro, Wondershare Filmora offers you four more ways of setting aspect ratios efficiently.
Method 2: You can change the aspect ratio under Project Settings
![]()
Method 3: Change the aspect ratio of video with Auto-Reframe
![]()
Method 4: Change aspect ratio during Editing
![]()
Method 5: Change aspect ratio while Exporting
![]()
Thus, using the Wondershare Filmora along with the pixel ratio calculator makes a difference!
Part 4 Difference among Pixel Aspect Ratio, Display Aspect Ratio, and Storage Aspect Ratio
Although the image aspect ratio comes from its width and height, it also contains multiple subsets that help to define image proportions properly.
1 - Pixel aspect ratio
Pixel aspect ratio (PAR) is the proportion of the specific pixels within an image. They are generally square within the pixel aspect ratio of 1:1.
But sometimes, specific images are optimized for certain types of displays. And, they have rectangular pixels with an aspect ratio of 4:3 or similar.
2 - Display aspect ratio
The display aspect ratio (DAR) is the designers’ most frequent aspect ratio and gets generally synced with the general term.
As the name suggests, the display aspect ratio refers to the proportions of an image as it appears on different screens out there.
Some devices, such as televisions and cameras, have a fixed DAR for images to display nicely on these devices.
They need optimization for their specific or respective aspect ratio. For instance, a typical display aspect ratio for the widescreen video on a television screen or monitor screen is 16:9.
They appear distorted when images with different aspect ratios are presented on these devices. Digital SLR camera sensors also consist of a fixed display aspect ratio, which controls how pictures captured by the camera will be displayed and saved.
3 - Storage aspect ratio
Storage aspect ratio, commonly known as (SAR) is an aspect ratio formula that concerns specifically to encoded digital video files. SAR refers to the height and the width relationship in video frame size, and it is required to be consistent among all individual frames.
SAR x PAR = DAR for max widescreen videos in a usual used formula.
Part 1 Part 5: How Aspect Ratios Affect UI/UX Design?
Aspect ratios play a vital part in any project that consists of displaying and capturing photographs, videos, or other image-based files in an ideal manner. The camera’s fixed aspect ratio can considerably impact, especially for photographers.
And for videographers or anyone working with slideshows, animations, and other motion projects, the aspect ratio is a prominent element for correct display on mobile devices and widescreen.
But even in the environment of responsive web design, problems can arise, such as when an image is not adjustable for display without compromising its quality or content.
A small example is when you need a square image with a 1:1 aspect ratio to insert into a rectangular box on a web page. To accommodate varying image size requirements, proportions and size may need adjustment.
In an increasingly picture-driven digital world, videos and images that look even slightly out of the way add to a visitor’s negative impression of a site. Besides those forced into the wrong configurations can even interfere with a site’s usability.
Poorly proportioned user guide or product images video that’s too stretched to check clearly can affect both a visitor’s want and their ability to use the site. Developers, designers, and anyone working with images will need to know how aspect ratios work and manipulate them for the best visual effect.
Various pixel calculator ratios, both paid and free, have popped up on the web to streamline the process.
Key Takeaways from This Episode
● An overview of pixels
● Understanding the importance of pixel ratio calculators
● Different pixel ratios and their impact on UI/UX design
Also read:
- Updated Illuminating Video Editing Software Top Choices for 2024
- New In 2024, Top 10 Free Video Repeater Tools for Seamless Loops
- Updated 2024 Approved Get Ready to Wow Add Slow Mo to Your Videos Without Spending a Dime
- New Premiere Pro Performance Optimization Tips for a Faster Workflow
- New In 2024, The Ultimate Guide to Subtitling in Final Cut Pro X Tips and Tricks
- In 2024, Best Free Video Rotator Apps for iPhone 2023 Edition
- Updated In 2024, Whats the Best Video Editor for Mac in ? Weve Got You Covered
- Free M4A Editor Downloads Top 5 Options for 2024
- New Subtitle Edit for Mac Download Alternatives
- Updated 2024 Approved Best iPhone Video Editors Ranked and Reviewed
- Updated In 2024, Ratio Rebellion How to Break Free From Conventional YouTube Aspect Ratios
- Updated Make Your Own Movie Masterpiece A Fun and Easy Guide for Kids for 2024
- New In 2024, Top-Rated Free Video Editing Software for Windows 10
- Updated Best of the Best Top 5 Video Editing Apps for iPhone This Year
- 2024 Approved Slow Down The 10 Best Video Players for Smooth Playback
- New 2024 Approved From the Heart A Beginners Guide to Making a Valentines Day Video for Your Loved One
- New Today, We Are Going to Explore some of the Top Tools that You Can Use as a Dailymotion Converter. So, Lets Start with Our First Contender for 2024
- The Ultimate Guide to Free Video Trimming on Windows 10 for 2024
- Updated 2024 Approved Video to GIF Made Easy 28 Converter Options Compared
- Updated In 2024, Free Music Making Software The Top 10 Picks
- Updated Convert YouTube Videos to MP3 Like a Pro Expert Reviews & Guides
- In 2024, The Difference Is in the Details Final Cut Pro Vs. Final Cut Express
- Best Free Online Face Generators
- New Leading Online Video Teaser Creators for 2024
- New FCP Audio Editing 101 A Beginners Guide to Better Sound for 2024
- In 2024, Motion Capture Apps Android and iOS Essentials
- New 2024 Approved Say Goodbye to Upside-Down Videos Easy Flipping Hacks
- Updated YouTube Thumbnail Mastery Dimensions, Design Tips, and More for 2024
- New Trim Your Videos Like a Pro Best Free Windows 10 Video Editors
- How Can We Unlock Our Xiaomi Redmi Note 13 Pro 5G Phone Screen?
- New In 2024, How to Make Text Reveal Effect Easily
- How to Fix It Poco X6 Pro Wont Turn On | Dr.fone
- In 2024, How to Reset Gmail Password on Samsung Galaxy Z Flip 5 Devices
- Updated Top 10 Free AI Voice Generators to Use in Daily Life
- 10 Free Location Spoofers to Fake GPS Location on your Oppo F25 Pro 5G | Dr.fone
- How to recover deleted photos on Gionee
- In 2024, The Best Android SIM Unlock Code Generators Unlock Your Samsung Galaxy S23 Ultra Phone Hassle-Free
- Best 10 Mock Location Apps Worth Trying On Xiaomi Redmi Note 13 Pro 5G | Dr.fone
- In 2024, How Can We Bypass Motorola FRP?
- How to retrieve erased messages from Asus ROG Phone 7
- In 2024, A Quick Guide to Vivo V29e FRP Bypass Instantly
- In 2024, How Can I Unlock My Apple iPhone SE (2022) After Forgetting my PIN Code? | Dr.fone
- How to Reset Honor 90 Without the Home Button | Dr.fone
- 6 Proven Ways to Unlock Infinix GT 10 Pro Phone When You Forget the Password
- All About Factory Reset, What Is It and What It Does to Your Honor Magic V2? | Dr.fone
- How to Reset your ZTE Lock Screen Password
- In 2024, Does Airplane Mode Turn off GPS Location On Itel A60? | Dr.fone
- How to Fix My Apple iPhone 15 Location Is Wrong | Dr.fone
- Title: Updated 2024 Approved Learn How to Add Captivating Titles in Final Cut Pro X
- Author: Amelia
- Created at : 2024-04-29 19:48:34
- Updated at : 2024-04-30 19:48:34
- Link: https://ai-driven-video-production.techidaily.com/updated-2024-approved-learn-how-to-add-captivating-titles-in-final-cut-pro-x/
- License: This work is licensed under CC BY-NC-SA 4.0.
