
:max_bytes(150000):strip_icc():format(webp)/E-reader-57b936e05f9b58cdfd3e07e1.jpg)
Updated In 2024, Top-Rated Mac MP3 Conversion Tools A Comprehensive Guide
Top-Rated Mac MP3 Conversion Tools: A Comprehensive Guide
What is the Best MP3 Converter Mac Software?
An easy yet powerful editor
Numerous effects to choose from
Detailed tutorials provided by the official channel
Mp3 Converter Mac allows the user to obtain the audio file from your favorite video and save it on your device for having better listening experience.
This article will discuss how to convert MP3 on Mac with high quality and enlist some of the leading and popular converter tools available both online and offline.
In this article
01 [5 Ways to Convert MP3 on Mac with High Quality](#Part 1)
02 [What Is The Best MP3 Converter Software for Mac?](#Part 2)
03 [The Runner-Up MP3 Converter Software List](#Part 3)
Part 1 5 Ways to Convert MP3 on Mac with High Quality
01Way 1: Best Way to Convert MP4 to MP3 with Highest Quality and Fastest Speed
If you want to convert MP3 on Mac with high quality, the best possible method is to download the Vidmore video converter. This software is consistent with both Windows and Mac devices. It comes with a multi-core processor and hardware acceleration, which facilitate you to convert MP4 to MP3 at a 50x faster conversion speed. It also comprises the built-in video clipper, which helps you shorten the MP4 video without losing its quality.
Step 1: You have to download and install the Vidmore converter on your device. Now, drag and drop the video file you want to convert to audio file format.

Step 2: In this step, you have to unfold the “Profile list to avail all the profiles and set MP3 format as a destination from the “General Audio “option. You can even select the portable device you use to convert videos to MP3 format.

Step 3: Now click the “Clip” option to access the video splitter and drag the clipper to set the start/ finish time to trim the available video. The preview window will represent all the modifications instantly. Lastly, click again on the “Clip” option to confirm and receive a new segment.

Step 4: Now, select the “Settings” option to adjust audio settings if required and further click “Convert” to start the conversion process with high quality.

02Way 2: How to Convert MP4 to MP3 for Free Online
As we have already discussed Vidmore software, you can also convert MP3 on Mac online using the same software. All you have to do is to observe the simple steps listed below.
Step 1: You have to type https://www.vidmore.com/free-online-video-converter/ on the browser to run the converter online. Select “Add files to convert,” which help you to navigate to its launcher
Step 2: Now select the “Add File “option to import the video files. You need to discover and click the” Audio” icon and choose “MP3” as the output audio format for each video.

Step 3: If you want to adjust the sample rate, channel, audio encoder, and bit-rate, you have to select the “Setting “option and proceed to the next step by clicking the “Ok” option.

Step 4: Now click the “Convert “option to define the output folder. Successfully, you can convert MP4 to MP3 free of cost.

03Way 3: How to Convert MP4 to MP3 with VLC Media Player
If you want to convert favorite videos into MP3 format using the VLC Media player, follow some of the steps which make your conversion process look easier.
Step 1: Firstly, you have to Run VLC Media Player. Select “Convert/Save” from the “Media” drop-down menu.
Step 2: You need to select the “Add” button to browse and open the MP4 video file. Now, you are required to click the “Convert/ save” option to proceed.
Step 3: Select “Audio – MP3“ from the “Profile” list available under “Settings”.
Step 4: Now, all you have to do is click “Start” to convert MP4 to MP3 with VLC Media Player.

04Way 4: How to Convert MP4 to MP3 Using Windows Media Player
If you have Windows Media Player installed, you will convert the MP4 format to MP3 format. You have to follow the below steps to convert file format without losing its quality.
Step 1: First, open the Window Media player on your computer and select the “Open” option from the “File” list.
Step 2: Now, find the MP4 videos and click “Open” further.
Step 3: Select “Menu” and return to the home screen of Windows Media Player.
Step 4: Now select “Organize” and click on “Options”.
Step 5: In the “Rip Music” section, you have to click the “Change…” option to choose a new destination folder.
Step 6: Now, choose “MP3” as the converted audio format under “Format”.
Step 7: Click “OK” to start the converting process.

05Way 5: How to Convert MP4 to MP3 via Video to MP3 Converter
If you want to convert MP4 files to MP3, you need to download Video to MP3 Converter Apk available for Android users. By using this Apk, you will be able to extract the high quality from the video, which later be saved as an MP3 file by default. It is beneficial if you want to set a ringtone for your phone.
Part 2 What Is The Best MP3 Converter Software for Mac?
01Handbrake
It is recognized as one of the best MP3 converter software compatible with Mac and supports various formats. This tool is also available for Linux and Windows.

Features:
The software has a different feature that facilitates easy conversion of MP3 audios. It works with standard formats and tools like x265 and Libav. According to the user reviews, Handbrake is the right choice if you want to convert videos to MP3 format.
Pros:
● It is an open-source tool and free audio converter Mac.
● Advanced control option with customization settings.
Cons:
● Intimidating interfaces make navigation complex, especially for the beginner.
● Not user-friendly
Rating – 4star/ 5star
02Leawo Video converter
It is a multifunctional converter that facilitates Mac users to convert the MP3 to the most audio format supported. The software is compatible with both Windows and Mac devices.

Features:
It is a YouTube MP3 converter compatible with most audio and video formats and can convert the media files in any combination as per the requirement. It also facilitates the user to optimize the video for playback on particular devices, including iPods, iPads and gaming consoles, etc.
Pros:
● Ease of accessibility
● Facilitate users to customize the conversion settings.
Cons:
● The conversion speed is low
● Not available free of cost
● Low performance in comparison to other converters listed.
Rating – 4.2 star/ 5star
03FFmpeg
It is a cross-platform solution available to convert videos to audio format. The user is forced to enter the instruction from the terminal. Nevertheless, it is available free of cost for Mac users.

Features: This software uses the free FFmpeg encoder and also supports various audio and video formats, including MPEG4, ASF, MOV, AVI, and more. The considerable salient feature of the tool refers to the fact that it supports batch conversion.
Pros:
● Support various audio/ video formats
● Support vast range of filters and codec’s
Cons:
● The official documentation is complex
● Not ideal for beginner
Rating – 4.5 star/ 5star
04Xilisoft Audio Converter
This converter is compatible with both Windows and Mac platforms and holds a reputed position in the marketplace.

Features: This tool accepts the standard audio and video formats and converts them to FLAC, OCG, MP3, etc. It also includes the capability to deliver lossless output post-conversion.
Pros:
● You can extract the output file directly to the designation device.
● Lossless output post-conversion
Cons:
● A limited number of output formats.
Rating – 3.9star/ 5star
05Movavi Video Converter
It is another option available if you are looking to convert MP3 on MAC as it supports almost all ranges of formats and seems to be compatible with both Windows and Mac platforms.

Features:
This converter includes a user-friendly interface that improves navigation and usability and converts most of the standard audio and video formats. It has a predefined setting for different media players like iTunes and Window Media Player.
Pros:
● Sustains a wide range of audio/video formats
● User-friendly interface
● Facilitate users to convert YouTube videos into audio format.
Cons:
● Slow conversion speed
● Not available free of cost( only limited trial version)
Rating – 4.7 star/ 5star
06Switch Audio File Converter
This FLAC to mp3 Mac is developed by one of the reputed vendors, i.e., NCH Software. This tool can run on a 64-bit operating system and provide comparatively better performance than another converter available.

Features: The tool will facilitate the users to obtain the song information from the online database and facilitate a batch conversion. It can be used as a CLI plug-in concerning automated conversion.
Pros:
● Fast conversion speed.
● Carry out the automatic normalization.
Cons:
● Advanced features are only accessible to Pro members.
● Not ideal for beginner
Rating – 4.3 star/ 5star
07Aiseesoft Audio Converter
It is one efficient tool compatible with both Windows and Mac platforms. It is available for a free trial to check the feature before investing in the converter tool.

Features: It allows the user to trim the audio and video clip before choosing the output preference. This tool supports almost all file formats, and also according to a user review, it allows conversion at a reasonable speed.
Pros:
● Support batch conversion
● Support almost all major formats of audio/video
Cons:
● Not available free of cost
Rating – 4.1star/ 5star
08Stellar Audio/ video converter
You can even choose a stellar audio/ video converter to convert videos file into supported audio formats. The tool is compatible with both Windows and Mac platforms.

Features:
This tool supports the standard audio/video format for conversion and lets you save the converted audio format on your device. You can use the converted format for setting ringtones for your phone device.
Pros:
● Compatible with both Windows and Mac platforms
● User-friendly interface
Cons:
● Limited formats supported
Rating – 3.8 star/ 5star
Part 3 The Runner-Up MP3 Converter Software List
Some alternative MP4 to MP3 Converters are available for Mac, making the conversion process more accessible and practical without losing quality.
● Filmora for Mac is recognized as one of the leading and influential video editing software through which you can easily access advanced features such as keyframing and motion tracking. You can easily download the tool by visiting the official website of Wondershare and avail a hassle-free video editing and conversion experience.
● VLC is another option available to you, and the process to convert video to audio is already discussed in the article.
● Convertio is an online tool available free of cost and works as MP4 to MP3 Converter browser support. This tool allows the vast range of conversion and facilitate user to convert archives, audio, videos, eBooks, and presentation.
● QuickTime Player and iTunes is another option available to you offline and available free of cost. The tool is highly compatible with the Mac platform and almost supports all major types of formats.
● Online UniConvert allows the user to convert the videos to audio format online. It is identified as a popular online conversion program that supports a variety of audio and videos format, including iTunes to MP3.
Key Takeaways from This Episode
● An MP4 to MP3 converter Mac computers support will facilitate the user to convert the video format to audio file format.
● Various methods and tools are available to make your conversion process more straightforward.
● The best tool you can use is Filmora from Wondershare due to its salient features.
● It provides you with the best experience as it features complete video conversion and editing features.
● If you have distrust or suggestions about the reading, do let us know by dropping a comment in the box below.
● Some alternative MP4 to MP3 Converters are available for Mac, making the conversion process more accessible and practical without losing quality.
Mp3 Converter Mac allows the user to obtain the audio file from your favorite video and save it on your device for having better listening experience.
This article will discuss how to convert MP3 on Mac with high quality and enlist some of the leading and popular converter tools available both online and offline.
In this article
01 [5 Ways to Convert MP3 on Mac with High Quality](#Part 1)
02 [What Is The Best MP3 Converter Software for Mac?](#Part 2)
03 [The Runner-Up MP3 Converter Software List](#Part 3)
Part 1 5 Ways to Convert MP3 on Mac with High Quality
01Way 1: Best Way to Convert MP4 to MP3 with Highest Quality and Fastest Speed
If you want to convert MP3 on Mac with high quality, the best possible method is to download the Vidmore video converter. This software is consistent with both Windows and Mac devices. It comes with a multi-core processor and hardware acceleration, which facilitate you to convert MP4 to MP3 at a 50x faster conversion speed. It also comprises the built-in video clipper, which helps you shorten the MP4 video without losing its quality.
Step 1: You have to download and install the Vidmore converter on your device. Now, drag and drop the video file you want to convert to audio file format.
Step 2: In this step, you have to unfold the “Profile list to avail all the profiles and set MP3 format as a destination from the “General Audio “option. You can even select the portable device you use to convert videos to MP3 format.
Step 3: Now click the “Clip” option to access the video splitter and drag the clipper to set the start/ finish time to trim the available video. The preview window will represent all the modifications instantly. Lastly, click again on the “Clip” option to confirm and receive a new segment.
Step 4: Now, select the “Settings” option to adjust audio settings if required and further click “Convert” to start the conversion process with high quality.
02Way 2: How to Convert MP4 to MP3 for Free Online
As we have already discussed Vidmore software, you can also convert MP3 on Mac online using the same software. All you have to do is to observe the simple steps listed below.
Step 1: You have to type https://www.vidmore.com/free-online-video-converter/ on the browser to run the converter online. Select “Add files to convert,” which help you to navigate to its launcher
Step 2: Now select the “Add File “option to import the video files. You need to discover and click the” Audio” icon and choose “MP3” as the output audio format for each video.
Step 3: If you want to adjust the sample rate, channel, audio encoder, and bit-rate, you have to select the “Setting “option and proceed to the next step by clicking the “Ok” option.
Step 4: Now click the “Convert “option to define the output folder. Successfully, you can convert MP4 to MP3 free of cost.
03Way 3: How to Convert MP4 to MP3 with VLC Media Player
If you want to convert favorite videos into MP3 format using the VLC Media player, follow some of the steps which make your conversion process look easier.
Step 1: Firstly, you have to Run VLC Media Player. Select “Convert/Save” from the “Media” drop-down menu.
Step 2: You need to select the “Add” button to browse and open the MP4 video file. Now, you are required to click the “Convert/ save” option to proceed.
Step 3: Select “Audio – MP3“ from the “Profile” list available under “Settings”.
Step 4: Now, all you have to do is click “Start” to convert MP4 to MP3 with VLC Media Player.
04Way 4: How to Convert MP4 to MP3 Using Windows Media Player
If you have Windows Media Player installed, you will convert the MP4 format to MP3 format. You have to follow the below steps to convert file format without losing its quality.
Step 1: First, open the Window Media player on your computer and select the “Open” option from the “File” list.
Step 2: Now, find the MP4 videos and click “Open” further.
Step 3: Select “Menu” and return to the home screen of Windows Media Player.
Step 4: Now select “Organize” and click on “Options”.
Step 5: In the “Rip Music” section, you have to click the “Change…” option to choose a new destination folder.
Step 6: Now, choose “MP3” as the converted audio format under “Format”.
Step 7: Click “OK” to start the converting process.
05Way 5: How to Convert MP4 to MP3 via Video to MP3 Converter
If you want to convert MP4 files to MP3, you need to download Video to MP3 Converter Apk available for Android users. By using this Apk, you will be able to extract the high quality from the video, which later be saved as an MP3 file by default. It is beneficial if you want to set a ringtone for your phone.
Part 2 What Is The Best MP3 Converter Software for Mac?
01Handbrake
It is recognized as one of the best MP3 converter software compatible with Mac and supports various formats. This tool is also available for Linux and Windows.
Features:
The software has a different feature that facilitates easy conversion of MP3 audios. It works with standard formats and tools like x265 and Libav. According to the user reviews, Handbrake is the right choice if you want to convert videos to MP3 format.
Pros:
● It is an open-source tool and free audio converter Mac.
● Advanced control option with customization settings.
Cons:
● Intimidating interfaces make navigation complex, especially for the beginner.
● Not user-friendly
Rating – 4star/ 5star
02Leawo Video converter
It is a multifunctional converter that facilitates Mac users to convert the MP3 to the most audio format supported. The software is compatible with both Windows and Mac devices.
Features:
It is a YouTube MP3 converter compatible with most audio and video formats and can convert the media files in any combination as per the requirement. It also facilitates the user to optimize the video for playback on particular devices, including iPods, iPads and gaming consoles, etc.
Pros:
● Ease of accessibility
● Facilitate users to customize the conversion settings.
Cons:
● The conversion speed is low
● Not available free of cost
● Low performance in comparison to other converters listed.
Rating – 4.2 star/ 5star
03FFmpeg
It is a cross-platform solution available to convert videos to audio format. The user is forced to enter the instruction from the terminal. Nevertheless, it is available free of cost for Mac users.
Features: This software uses the free FFmpeg encoder and also supports various audio and video formats, including MPEG4, ASF, MOV, AVI, and more. The considerable salient feature of the tool refers to the fact that it supports batch conversion.
Pros:
● Support various audio/ video formats
● Support vast range of filters and codec’s
Cons:
● The official documentation is complex
● Not ideal for beginner
Rating – 4.5 star/ 5star
04Xilisoft Audio Converter
This converter is compatible with both Windows and Mac platforms and holds a reputed position in the marketplace.
Features: This tool accepts the standard audio and video formats and converts them to FLAC, OCG, MP3, etc. It also includes the capability to deliver lossless output post-conversion.
Pros:
● You can extract the output file directly to the designation device.
● Lossless output post-conversion
Cons:
● A limited number of output formats.
Rating – 3.9star/ 5star
05Movavi Video Converter
It is another option available if you are looking to convert MP3 on MAC as it supports almost all ranges of formats and seems to be compatible with both Windows and Mac platforms.
Features:
This converter includes a user-friendly interface that improves navigation and usability and converts most of the standard audio and video formats. It has a predefined setting for different media players like iTunes and Window Media Player.
Pros:
● Sustains a wide range of audio/video formats
● User-friendly interface
● Facilitate users to convert YouTube videos into audio format.
Cons:
● Slow conversion speed
● Not available free of cost( only limited trial version)
Rating – 4.7 star/ 5star
06Switch Audio File Converter
This FLAC to mp3 Mac is developed by one of the reputed vendors, i.e., NCH Software. This tool can run on a 64-bit operating system and provide comparatively better performance than another converter available.
Features: The tool will facilitate the users to obtain the song information from the online database and facilitate a batch conversion. It can be used as a CLI plug-in concerning automated conversion.
Pros:
● Fast conversion speed.
● Carry out the automatic normalization.
Cons:
● Advanced features are only accessible to Pro members.
● Not ideal for beginner
Rating – 4.3 star/ 5star
07Aiseesoft Audio Converter
It is one efficient tool compatible with both Windows and Mac platforms. It is available for a free trial to check the feature before investing in the converter tool.
Features: It allows the user to trim the audio and video clip before choosing the output preference. This tool supports almost all file formats, and also according to a user review, it allows conversion at a reasonable speed.
Pros:
● Support batch conversion
● Support almost all major formats of audio/video
Cons:
● Not available free of cost
Rating – 4.1star/ 5star
08Stellar Audio/ video converter
You can even choose a stellar audio/ video converter to convert videos file into supported audio formats. The tool is compatible with both Windows and Mac platforms.
Features:
This tool supports the standard audio/video format for conversion and lets you save the converted audio format on your device. You can use the converted format for setting ringtones for your phone device.
Pros:
● Compatible with both Windows and Mac platforms
● User-friendly interface
Cons:
● Limited formats supported
Rating – 3.8 star/ 5star
Part 3 The Runner-Up MP3 Converter Software List
Some alternative MP4 to MP3 Converters are available for Mac, making the conversion process more accessible and practical without losing quality.
● Filmora for Mac is recognized as one of the leading and influential video editing software through which you can easily access advanced features such as keyframing and motion tracking. You can easily download the tool by visiting the official website of Wondershare and avail a hassle-free video editing and conversion experience.
● VLC is another option available to you, and the process to convert video to audio is already discussed in the article.
● Convertio is an online tool available free of cost and works as MP4 to MP3 Converter browser support. This tool allows the vast range of conversion and facilitate user to convert archives, audio, videos, eBooks, and presentation.
● QuickTime Player and iTunes is another option available to you offline and available free of cost. The tool is highly compatible with the Mac platform and almost supports all major types of formats.
● Online UniConvert allows the user to convert the videos to audio format online. It is identified as a popular online conversion program that supports a variety of audio and videos format, including iTunes to MP3.
Key Takeaways from This Episode
● An MP4 to MP3 converter Mac computers support will facilitate the user to convert the video format to audio file format.
● Various methods and tools are available to make your conversion process more straightforward.
● The best tool you can use is Filmora from Wondershare due to its salient features.
● It provides you with the best experience as it features complete video conversion and editing features.
● If you have distrust or suggestions about the reading, do let us know by dropping a comment in the box below.
● Some alternative MP4 to MP3 Converters are available for Mac, making the conversion process more accessible and practical without losing quality.
Windows Movie Maker Tutorial: Editing Videos Like a Pro
How to Edit Videos in Windows Live Movie Maker

Ollie Mattison
Mar 27, 2024• Proven solutions
Microsoft has released Windows Live Movie Maker on August 19, 2009 as part of a refresh to their Windows Live Essentials download. Windows Live Movie Maker is the first application designed for Windows 7 and is built to make beautiful movies from your photos and videos. And the latest version is Windows Live Movie Maker 2011.
Update in 2017: Microsoft has stopped the Windows Essentials Suite support on January 10, 2017. It is claimed that it is no longer available for download. If you are looking for an alternative to windows essentials movie maker, or windows movie maker, try Filmora video editor, which is available on both Windows7, Windows8 and Windows 10.
Part 1: Best Alternative to Windows Movie Maker: Filmora [Windows7/8/10 & Mac]


Windows Live Movie Maker is a little bit limiting for video editing. In most cases, you need to run Windows 7. Fortunately, you do have other options. There is plenty of software which will do the same thing but better than Windows Live Movie Maker for you to edit your videos and burn videos to DVD. Among many of them, we recommend one Wondershare Filmora. You may wonder what’s so special with this Video Editor. First of all, it supports almost all kinds of video formats, such as AVI, MP4, MPG, MPEG, 3GP, WMV, ASF, RM, RMVB, DAT, MOV, MKV and HD video formats: MTS, M2TS(AVCHD ), TS(MPEG-2), HD MKV(, MPEG-2 HD), HD WMV(VC-1), and HD MOV(, MPEG-4). Secondly, it provides powerful video editing function, such as crop, trim, adjust video effect, add watermark, etc. Also, there are various title and text templates, filter/transition and effects presets for you to choose from. Thirdly, Windows Live Movie Maker can only generate WMV files directly, but this video editor supports burn video to DVD disc, DVD Folder and ISO file or save the video to most of the popular formats.
Part 2: How to Edit Videos in Windows Live Movie Maker [Step by Step]
1.Add Videos and Photos

While you are adding videos to Windows Live Movie Maker, you may encounter a problem like 3GP files can’t be added to Windows Live Movie Maker. Or it can’t be played in Window Live Movie Maker. And many other video files as well, such as RM, RMVB, DAT and HD video formats: MTS, TS, HD MKV, HD WMV, and HD MOV, etc. It’s quite necessary to get familiar with what all those files that could be imported to Windows Live Movie Maker.

Notes
- Video and music files that are protected with digital rights management (DRM) can’t be used in Windows Live Movie Maker.
- Support for using MPEG-2 and Microsoft Recorded TV Show video files in your movie is available only if your computer is running one of the following editions of Windows Vista or Windows 7: Windows Vista Home Premium, Windows Vista Ultimate, Windows 7 Home Premium, Windows 7 Professional, Windows 7 Enterprise, or Windows 7 Ultimate.
- AVCHD video files that contain Dolby Digital audio can be used in Windows Live Movie Maker if your computer is running one of the following editions of Windows 7: Windows 7 Home Premium, Windows 7 Professional, Windows 7 Enterprise, or Windows 7 Ultimate.
- MPEG-4 video files that contain audio can be used if you’re using Movie Maker on a computer running Windows 7.
- Some MPEG-4 video files can be used when you’re using Movie Maker on a computer running Windows Vista if the necessary audio and video codecs are installed.
After adding your photos or videos, you can also add audio or background music to your video clips by clicking the Add music option.
Learn details about How to Add and Edit Music in Windows Movie Maker
2. Video Editing
As we said before, Windows Live Movie Maker (later named Windows Movie Maker) is a simple and easy video editing software for Windows, it can complete some basic video editing and become a good choice for novices. Here, I will share with you about the basic video editing tutorial in the Movie Maker.

Cut & Trim & Split video in Windows Movie Maker
After adding videos and photos to the storyboard, you can now keep the useful sections and remove unwanted parts. To trim video, just place the playhead to the target position and right click the clip to select the Trim Set Start Point and move the playhead again to then end point and right click to select Set End Point. You can also go to the Edit tab and click the Split menu to split the video into parts. You can then delete and cut out unwanted sections or move it to the proper position.
Add Audio to Video: Record and add voiceover or Music
Windows Movie Maker also allows you to add narrations and background music to video footage. Just click the Add Music option and you can add music from online music libraries such as AudioMicro, Free Music Archive, and Vimeo or add music from the computer.

Add auto movie themes to Video
There is a built-in AutoMovie themes library in Movie Maker. You can use some popular themes such as Contemporary, Cinematic, Fade, Pan and Zoom, Black and White and Sepia.
Add texts &titles to Video
You can add titles, captions, and credits to video with windows movie maker, but it seems hard to add subtitles and customize its position. For more details about the text and title editing, check
Learn more details about How to Add Text to Video with Windows Movie Maker
Apply transitions & animations to video
The Movie Maker features lots of transitions under Animations tab. You can choose from wipes, cinematics, shatters, sweeps and curls, patterns and shapes, reveals, diagonals and dissolves.
Note: if you use the default themes, you won’t see all these transitions. Check the detailed steps about How to Add Transitions in Windows Movie Maker
Apply visual effects to video
We’ve introduced some of the best visual effects software before, but in Windows Movie Maker, you can also add effects such as 3D Ripple, Black and White, Blur, pixelate, mirrors, motions and fade effects.
Change video speed of video
The Movie Maker Edit tab allows you to adjust video volume, add fade in and fade out effects to video, or change video speed.
Learn more details about How to Speed Up Video in Windows Movie Maker
3. Save Video
After finish editing, you can upload your video clips to Facebook, YouTube, and other social media, or burn your videos to DVD with Windows DVD maker. You can also save your video clips on your computer.

You may also like: Windows Movie Maker VS Windows Live Movie Maker: What’s the Difference
While, if you find the windows movie maker editing features are limited based on your editing skills, you can try Wondershare Filmora. Below is a video tutorial about how to edit videos with Filmora.
Ollie Mattison
Ollie Mattison is a writer and a lover of all things video.
Follow @Ollie Mattison
Ollie Mattison
Mar 27, 2024• Proven solutions
Microsoft has released Windows Live Movie Maker on August 19, 2009 as part of a refresh to their Windows Live Essentials download. Windows Live Movie Maker is the first application designed for Windows 7 and is built to make beautiful movies from your photos and videos. And the latest version is Windows Live Movie Maker 2011.
Update in 2017: Microsoft has stopped the Windows Essentials Suite support on January 10, 2017. It is claimed that it is no longer available for download. If you are looking for an alternative to windows essentials movie maker, or windows movie maker, try Filmora video editor, which is available on both Windows7, Windows8 and Windows 10.
Part 1: Best Alternative to Windows Movie Maker: Filmora [Windows7/8/10 & Mac]
Windows Live Movie Maker is a little bit limiting for video editing. In most cases, you need to run Windows 7. Fortunately, you do have other options. There is plenty of software which will do the same thing but better than Windows Live Movie Maker for you to edit your videos and burn videos to DVD. Among many of them, we recommend one Wondershare Filmora. You may wonder what’s so special with this Video Editor. First of all, it supports almost all kinds of video formats, such as AVI, MP4, MPG, MPEG, 3GP, WMV, ASF, RM, RMVB, DAT, MOV, MKV and HD video formats: MTS, M2TS(AVCHD ), TS(MPEG-2), HD MKV(, MPEG-2 HD), HD WMV(VC-1), and HD MOV(, MPEG-4). Secondly, it provides powerful video editing function, such as crop, trim, adjust video effect, add watermark, etc. Also, there are various title and text templates, filter/transition and effects presets for you to choose from. Thirdly, Windows Live Movie Maker can only generate WMV files directly, but this video editor supports burn video to DVD disc, DVD Folder and ISO file or save the video to most of the popular formats.
Part 2: How to Edit Videos in Windows Live Movie Maker [Step by Step]
1.Add Videos and Photos
While you are adding videos to Windows Live Movie Maker, you may encounter a problem like 3GP files can’t be added to Windows Live Movie Maker. Or it can’t be played in Window Live Movie Maker. And many other video files as well, such as RM, RMVB, DAT and HD video formats: MTS, TS, HD MKV, HD WMV, and HD MOV, etc. It’s quite necessary to get familiar with what all those files that could be imported to Windows Live Movie Maker.
Notes
- Video and music files that are protected with digital rights management (DRM) can’t be used in Windows Live Movie Maker.
- Support for using MPEG-2 and Microsoft Recorded TV Show video files in your movie is available only if your computer is running one of the following editions of Windows Vista or Windows 7: Windows Vista Home Premium, Windows Vista Ultimate, Windows 7 Home Premium, Windows 7 Professional, Windows 7 Enterprise, or Windows 7 Ultimate.
- AVCHD video files that contain Dolby Digital audio can be used in Windows Live Movie Maker if your computer is running one of the following editions of Windows 7: Windows 7 Home Premium, Windows 7 Professional, Windows 7 Enterprise, or Windows 7 Ultimate.
- MPEG-4 video files that contain audio can be used if you’re using Movie Maker on a computer running Windows 7.
- Some MPEG-4 video files can be used when you’re using Movie Maker on a computer running Windows Vista if the necessary audio and video codecs are installed.
After adding your photos or videos, you can also add audio or background music to your video clips by clicking the Add music option.
Learn details about How to Add and Edit Music in Windows Movie Maker
2. Video Editing
As we said before, Windows Live Movie Maker (later named Windows Movie Maker) is a simple and easy video editing software for Windows, it can complete some basic video editing and become a good choice for novices. Here, I will share with you about the basic video editing tutorial in the Movie Maker.
Cut & Trim & Split video in Windows Movie Maker
After adding videos and photos to the storyboard, you can now keep the useful sections and remove unwanted parts. To trim video, just place the playhead to the target position and right click the clip to select the Trim Set Start Point and move the playhead again to then end point and right click to select Set End Point. You can also go to the Edit tab and click the Split menu to split the video into parts. You can then delete and cut out unwanted sections or move it to the proper position.
Add Audio to Video: Record and add voiceover or Music
Windows Movie Maker also allows you to add narrations and background music to video footage. Just click the Add Music option and you can add music from online music libraries such as AudioMicro, Free Music Archive, and Vimeo or add music from the computer.
Add auto movie themes to Video
There is a built-in AutoMovie themes library in Movie Maker. You can use some popular themes such as Contemporary, Cinematic, Fade, Pan and Zoom, Black and White and Sepia.
Add texts &titles to Video
You can add titles, captions, and credits to video with windows movie maker, but it seems hard to add subtitles and customize its position. For more details about the text and title editing, check
Learn more details about How to Add Text to Video with Windows Movie Maker
Apply transitions & animations to video
The Movie Maker features lots of transitions under Animations tab. You can choose from wipes, cinematics, shatters, sweeps and curls, patterns and shapes, reveals, diagonals and dissolves.
Note: if you use the default themes, you won’t see all these transitions. Check the detailed steps about How to Add Transitions in Windows Movie Maker
Apply visual effects to video
We’ve introduced some of the best visual effects software before, but in Windows Movie Maker, you can also add effects such as 3D Ripple, Black and White, Blur, pixelate, mirrors, motions and fade effects.
Change video speed of video
The Movie Maker Edit tab allows you to adjust video volume, add fade in and fade out effects to video, or change video speed.
Learn more details about How to Speed Up Video in Windows Movie Maker
3. Save Video
After finish editing, you can upload your video clips to Facebook, YouTube, and other social media, or burn your videos to DVD with Windows DVD maker. You can also save your video clips on your computer.
You may also like: Windows Movie Maker VS Windows Live Movie Maker: What’s the Difference
While, if you find the windows movie maker editing features are limited based on your editing skills, you can try Wondershare Filmora. Below is a video tutorial about how to edit videos with Filmora.
Ollie Mattison
Ollie Mattison is a writer and a lover of all things video.
Follow @Ollie Mattison
Want Amazing Opening Effects? Today, We Will Share with You 20 Best Places that Are Free to Download Title, Intro Templates for Adobe Premiere Pro
Top 20 Adobe Premiere Title/Intro Templates [Free Download]

Benjamin Arango
Mar 29, 2024• Proven solutions
One of the things that can make your output stand out from the crowd is the titles. Many people think creating eye-catching title effects is beyond them, but with Premiere Pro, you really couldn’t be more wrong.
As Premiere Pro doesn’t have built-in templates, the ability to import free Premiere Pro templates is a must. Anyone need to find a custom title style that suits the project and looks professional and carries impact.
The great thing is that there are many of these resources that are offered entirely free! If you don’t know how to add text/title to Adobe Premiere, here are steps to add text resources .
In this article, we will share with you 20 Free to download Title Templates for Premiere Pro.
- Part1: Top 15 Free Adobe Premiere Pro Title Templates
- Part2: Best 5 Premiere Pro Intro Templates Free Download
- Part3: How to Import and Customize Title Templates in Premiere
You may also like: 10 Free Star Wars Fonts to Make Your Video Amazing
Part 1: Top 15 Free Adobe Premiere Title Templates
Adding the finishing touches to a project, like creating the opening titles or end credits, is often not at the top of anyone’s priority list during the video editing process.
Nonetheless, making a unique opening sequence along with impressive animations in Adobe Premiere Pro can be a time-consuming endeavor, so instead of spending countless hours on producing a perfect combination of text and images, you can just download a title template from the Internet.
1 Premier Pro
Jarle Leirpoll runs this site, and it is a treasure trove of information, help, and advice on Premiere from a man who wrote the book (literally, it’s for sale on the site!) on Premiere.
His first title collection is consisting of 8 templates, including Lower Thirds templates, end credit template, and some special characters. However, it well worth a look around the site as there is plenty more free stuff including presets, and a whole range of tips and tricks to help with your editing.
Features:
- Free Premiere Pro templates to download
- Easy to import the title template to Premiere
- 100% ready to use
In case that you’re just a beginner of video editing software, you can start with Wondershare Filmora (Latest Filmora version 11) to add text to videos, which is powerful but easy-to-use for green hands. Download the Wondershare Filmora below.
There are hundreds of Text and Titles presets available in Filmora, which allows you to add titles, subtitles, scrolling end credits, lower 3d, and openers with ease. You can also apply some animation effects to the selected title presets.
Check the video below to find out how to add text to video with Wondershare Filmora.
Besides the built-in title presets, Wondershare Filmora (Latest Filmora version X) also provides more title templates in Filmstock , which offers lots of special effects templates.
Currently, there are Title Expansion Set, business title set, wedding title set, and lower third expansion set to download. Check the video below to watch the Title Expansion set templates.
Download Mac Version ](https://tools.techidaily.com/wondershare/filmora/download/ )
Learn more details about How to Add Text to Video with Filmora.
2 Richard Harrington
This is another site that offers templates for download but is also a great place to visit for ideas and information. Richard approaches Premiere from a photographer’s viewpoint, and so has a slightly different view on many topics that are well worth reading.
He has links to a sizable number of templates on Richard Harrington covering a range of styles and subjects, including DVD menus, animated text, and high-quality models. Still, his blog is updated regularly and often includes free downloads.
Features:
- Supports Adobe Premiere intro templates to use
- It includes various templates and presets on Windows and Mac
- More than title templates also has DVD menus and animated text
3 ProVideoCoalition
Another all-encompassing site has a huge amount of information and knowledge to be gained. The templates are just part of the story. They are available on Pro Video Coalition and include numerous files and even some free video content showing their implementation.
Also on this page are links to some other sites offering free content or advice on various aspects of Premiere, making it well worth a visit and definitely worth its place in this top 10.
Of particular interest on this site is the regularly updated news which focuses on the latest hardware and software announcements.
Features:
- Supports lower thirds for Adobe Premiere
- You can customize the Premiere Pro intro template free download
- You can create graphic elements
4 Coremelt
This is a commercial site that offers a wide variety of high-quality plugins and templates for several video editing platforms. However, we are on the lookout for that fabulous price of free here, so a little digging finds this page , here you will find ten templates from one of their best selling products offered entirely free.
All templates are quality professionally produced products and worth the visit alone. For anyone who is looking to take their editing output to the professional level, the commercial products on offer here are well worth a look, high quality, and a reasonable cost.
Features:
- It includes 3D text and motion graphics templates
- Free and safe download the Premiere template

5 Bestproaction
Another commercial site. This one has a range of free templates and presets to download for Premiere. Fourteen open items altogether can be downloaded. This site at least deserves a browse through their catalog after a download. The emphasis here is on low cost but high quality, useful templates, and plugins to suit any project.
Even for those of us with a limited budget, there may be something that catches the eye. It is an excellent site for browsing when looking for inspiration.
Features:
- Offers multimedia products like free Premiere Pro text, title templates
- Includes professional Premiere Pro template for videographers
- You can create graphic elements
6 FXFactory
This is another commercial site that has a smattering of very high-quality free downloads on offer, including a beautiful template for the original Star Wars movie style scrolling titles.
Again, it is worth browsing the catalog when you are on the site, but all the free products can be found here .
FX Factory has also created some great video tutorials on a variety of aspects of video production that are well worth a view when you are at the site.
Features:
- Free Premiere Pro effects templates to download
- Includes a step by step Premiere Pro tutorial
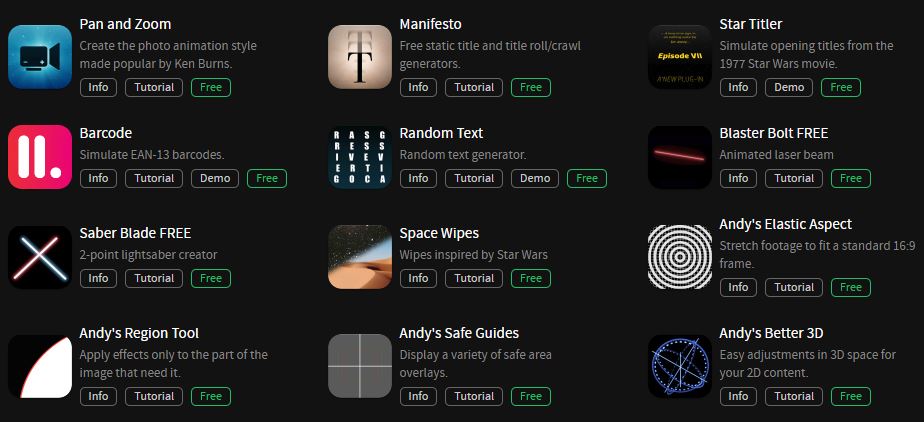
7 Creative Impatience
A fantastic site full of information, tips, and opinion on all aspects of video production, it’s a great place to spend some time, with the bonus of a bunch of free downloads for Premiere.
Of particular note are the tutorials, an excellent source of information and tricks that you may not have seen before, with their YouTube channel being a great source of free guidance for editors of any sort of experience.
Features:
- Apart from free Premiere Pro templates, you can also find blogs
- Easy steps to make Premiere Pro templates
- Safe and clean to use. All real
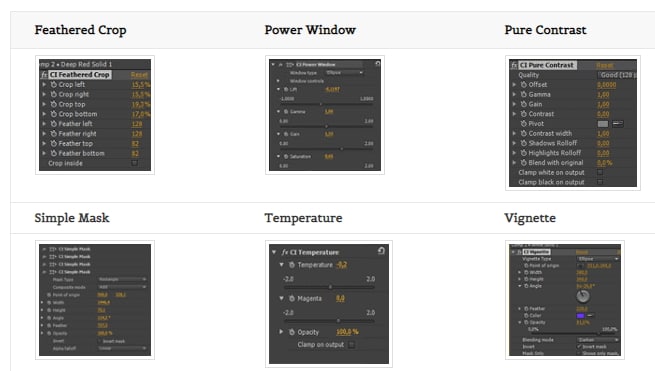
8Filmimpact
A commercial site is offering some great products at competitive prices. At first glance, this may not seem to be a useful place for our search for the free stuff.
However, all the products do have a free trial download, and as a bonus, the trial for pack one includes four free to use templates. They are quality products too, and well worth a look.

9 Style4Type
Style4Type is an exciting site regularly updated with new free templates as well as offering technical advice and having further templates available as commercial products.
And to the side is even a free download for a PDF file that walks you through installing and using the templates within Premiere once you have them.
There are already a lot of free templates on offer covering a wide variety of styles, but they are added to with regularity, so it is a site to bookmark for the future.
Features:
- Free title templates to use including texture templates
- Professional tools to better your video

10 Premiere Beat
Lots of information on this site as its been running for a decade, it is a website that imparts a wealth of knowledge along the way on not just video editing but music.
The pack includes 21 Premiere title templates to use. Another site that you will want to visit again and again.
Features:
- High-quality Premiere Pro templates to download
- A large number of Premiere templates to use
11 Clean Elegant Rotation Title
It is a clean title template without unnecessary parts. If you like simple titles, this one is best for you. You can customize in Premiere easily with a few clicks. For beginners, it also includes free tutorials to use.
Features:
- Simple and clean Premiere title templates
- Customizable in Premiere
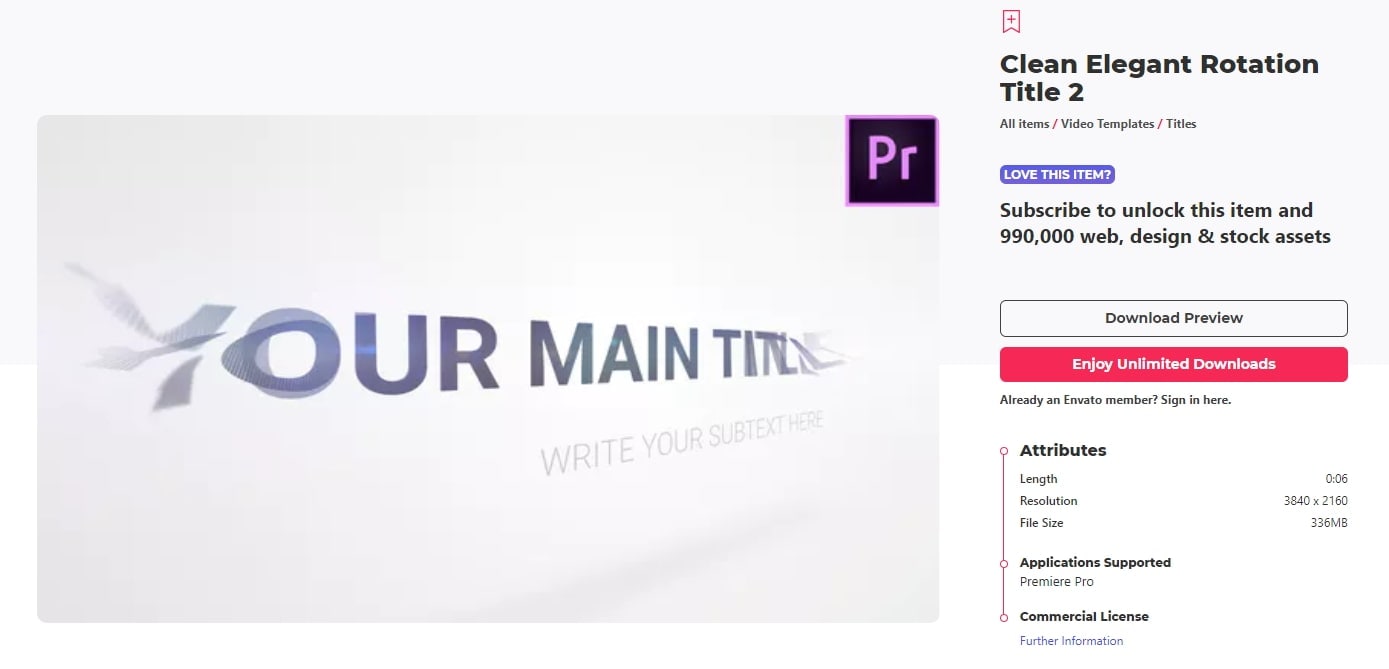
12 Unfolding Titles
It is a clean title template with an unfolding effect. Each text has two unfolding effects, which are convenient to use with customization. It supports 4K and HD versions. In this pack, it wons 10 title formats. After importing Premiere, you can also change text size.
Features:
- 20 unfolding title effects
- Supports rendering your video
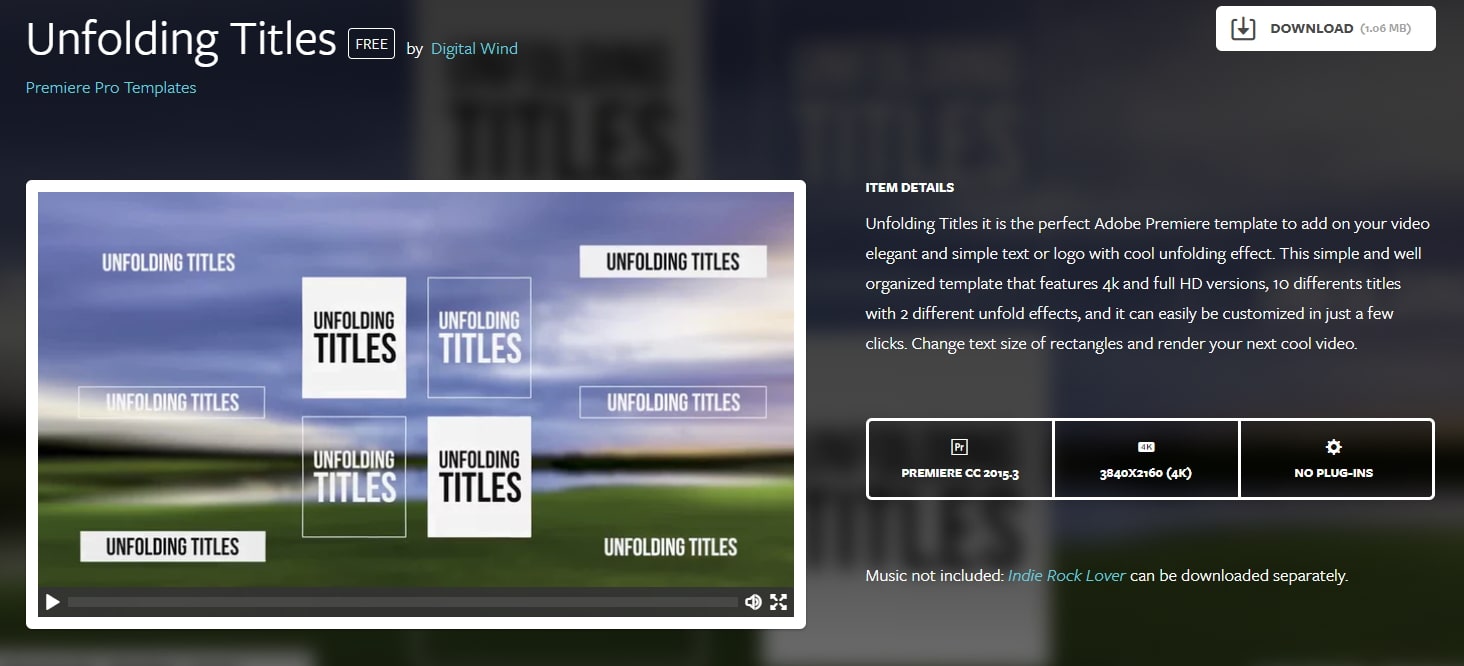
13 Orange83
These are five modern title packs for Premiere. With it, you don’t need to use After Effects as you can import them to edit. The best part is you can include your logo and other stuff you like.
Features:
- Include 5 title packs
- Modern and clean titles
14 Video Intro Templates - Premiere Pro intro template free download
It is a free download Premiere Pro intro template that you can add to your video. It is highly recommended to use promotion and commercial video.
This intro template can be adjusted after you import it to Premiere Pro. This Premiere Pro intro template is HD, so you don’t need to worry about the whole video quality.
Features:
- 1920X1080 (HD) is supported
- This intro template doesn’t include built-in music
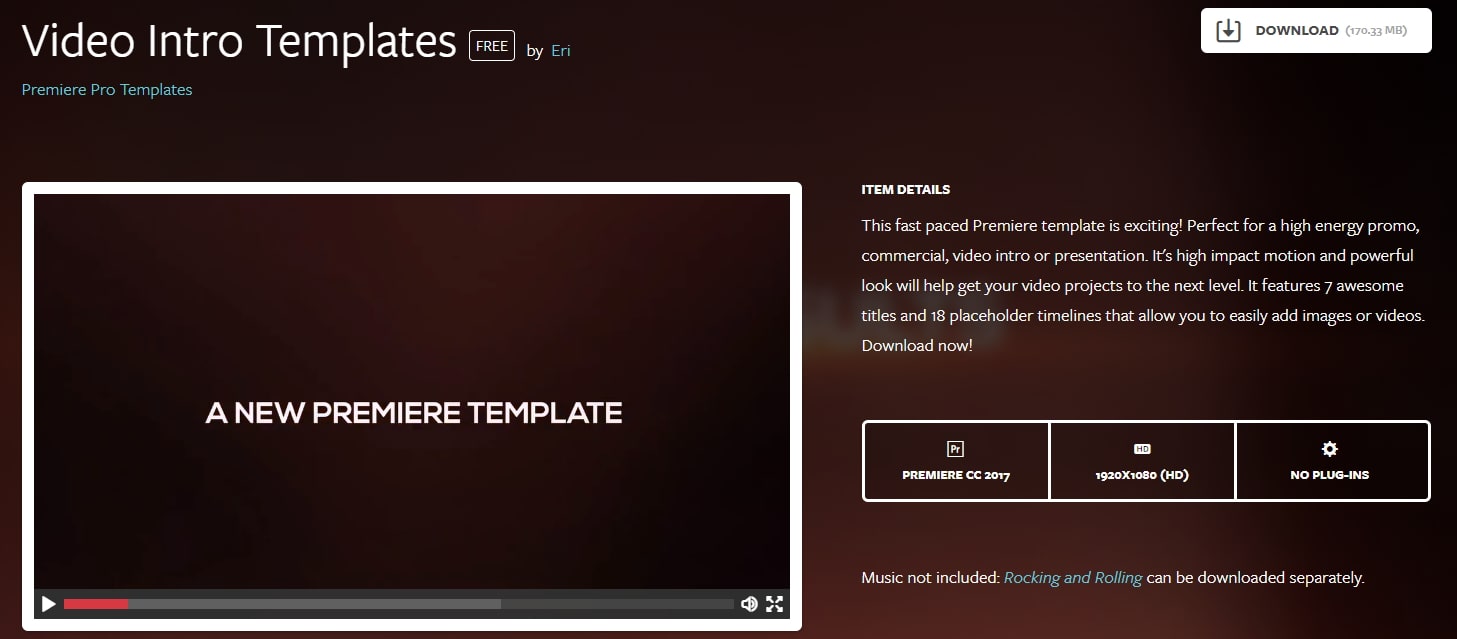
15 Elegant Promo - another Premiere Pro intro template free to use
It is intro template for Premiere Pro is modern and free to use. The whole style is young and energetic, which will give viewers a fresh new feeling. It includes 12 images and 26 text layers, and all of them are free to download.
You can use it for your presentation, promotional video, and product video. Besides, it doesn’t require a plug in to use this intro template in Premiere Pro.
Features:
- It includes animated intro elements.
- Use an HD intro template to make a popular video.

These are free templates, and they are enough to get anyone up and running with a new project. As said before, with the commercial enterprises that offer freebies, it’s always worth checking out their paid for output as well, you may not be in the market for it right now, but something may stick for a later time.
Part 2: Bonus: Best 5 Premiere Pro Intro Templates Free Download
Even though all websites we featured in this article offer some free intro templates for Adobe Premiere Pro. However, it is still a much better solution to buy a subscription plan on a platform if you are working on a large number of projects each month.
Let’s see which websites you can use to download the intro and title templates for Premiere Pro.
16. Motion Array
In addition to an impressive library of intro templates, Motion Array offers presets, sound effects, royalty-free music, and stock footage.
Furthermore, you can choose the software version to make sure that the templates you download can be used with the version of Adobe Premiere Pro you have installed on your computer.
The website provides you with powerful search tools, so you can select the resolution of the template, up to 8K, or choose which types of templates are going to be displayed.
Using the free subscription plan can limit your options since you’ll only be able to download free templates, and your upload storage will be limited to just 1GB.
The Pro subscription plan that can be purchased for $54 per month will grant you access to an almost endless selection of title templates as well as a huge selection of plugins for Adobe Premiere Pro.

17. Cinecom – Simple Intro for Premiere Pro
It is a designer pack that features ten pre-animated lower-thirds intro templates. You can change the duration of the font and color of the text in each template, and you can choose if you want to download a 1080 or the 4K version of the designer pack.
The templates are compatible with CS6, CC2013, CC2014, and CC2016 versions of the Premiere Pro. The Simple Titles pack can be easily installed, as you just have to drag and drop it into the software.
However, before you can download these title templates, you have to subscribe to Cinecom’s mailing list.
Even though this can be a bit inconvenient, it is very well worth the trouble since you’ll be able to transform or build upon the intro templates and use them freely in all videos you edit in Adobe Premiere Pro.
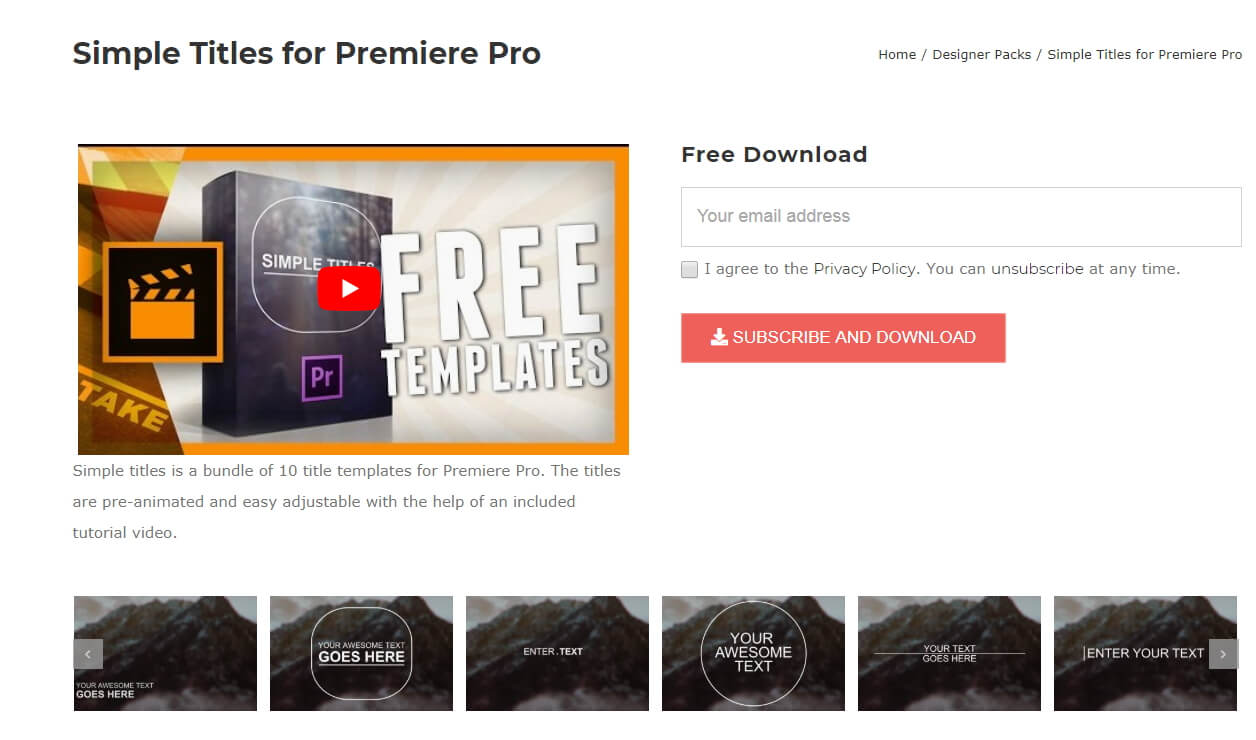
18. EnvatoElements
You can find much more than intro templates on the EnvatoElements platform since you can choose from 740.000 items you can use for anything from creating a WordPress website to preparing your next business presentation.
The Video Templates category alone features over 4000 items, including Logo Stings or Infographics assets.
There are nearly one hundred available intro templates for Adobe Premiere Pro, but downloading any of them requires you to create an account and purchase a subscription plan.
Prices start from $16.50 per month, and packages include virtually unlimited access to stock photos and videos, video templates, and much more. The EnvatoElements platform also offers assets that can be used with Final Cut Pro, Adobe After Effects or Apple Motion.

19. Videohive
Videohive is a part of the Envato Market platform that also features Web Themes and Templates, Code, Audio, or Graphic sections. It is free to use, but only a limited amount of assets can be downloaded for free.
To download an item, you must purchase it, and prices can range from $16 to $50 for a single title template.
Videohive is also a great source of title templates for Adobe After Effects, as it offers more than 5000 titles and intros that are compatible with this software.
Furthermore, you can download presets for both Premiere Pro and After Effects that can be used to create stop-motion animations, perform color correction, or make the footage look like it was captured with a VHS camera.

20. RocketStock
This option is best suited for video editors who want to create their intros because RocketStok’s Cinematic Style Library extends the scope of options provided by Premiere Pro.
Downloading all fonts except Helvetica Neue is free, but you must check which fonts you can use in commercial projects. You will have no trouble installing the fonts since you can just double-click on the font and follow the on-screen instructions.
Once you’ve installed all the fonts from the library, you can use them to replace the software’s default library. You just have to click on the Replace Style Library option that can be accessed from Premiere Pro’s Title Style tab.
If you don’t feel comfortable creating your titles or if you simply don’t have the time to create your own titles, the Free Cinematic Style Library is not the best choice for you.
On the other hand, Premiere Pro’s users who don’t often use title templates can benefit from downloading RocketStock’s intro library.

Part 3: How to Import and Customize Title Templates in Premiere
If you download the template, all the title templates support customization. You can change its size, font, color, and add 3D effects.
It is easy to import and use it to touch up your video. Check out the steps below to know how to import title templates quickly.
- Install the title template. Choose one template you like and download it to your PC. Remember to unzip it before importing it. Now install them.
- Import the title template. You just need to go to click Effects at the top. Then at right, you will find Presets in the effects section.
- Right-click on presets, and choose Import Presets. If the title template format is .mogrt, you need to open it in Essential Graphics Panel. At the bottom right corner, click the plus icon to import the title template and install it.
- Customize the title template. Once the title template is imported, drag it to the timeline. Click the Editing tab. Here you can customize colors, text, opacities, and positions. There are more options for you to explore.
- You can also copy and paste the title template to another place in the timeline. If you change one place of the pasted template, the original one will remain the same.
Note: each version of Premiere’s interface will look different, but the workflow is similar.
Conclusion
Using title templates can help you achieve a certain visual style faster, so you don’t have to spend a lot of time looking for a perfect background or animating the text.
The Internet provides almost unlimited video editing resources, but not all of these resources can be acquired for free.
Which website you will choose as a source of fresh title templates depends on how often you work on new projects in Adobe Premiere Pro.
If you want to make professional video editing and tired of Premiere, try Filmora! It includes various titles templates to use.
You can sync audio automatically, use detailed color correction to make your title and video like a movie. Download it now (FREE)!
Benjamin Arango
Benjamin Arango is a writer and a lover of all things video.
Follow @Benjamin Arango
Benjamin Arango
Mar 29, 2024• Proven solutions
One of the things that can make your output stand out from the crowd is the titles. Many people think creating eye-catching title effects is beyond them, but with Premiere Pro, you really couldn’t be more wrong.
As Premiere Pro doesn’t have built-in templates, the ability to import free Premiere Pro templates is a must. Anyone need to find a custom title style that suits the project and looks professional and carries impact.
The great thing is that there are many of these resources that are offered entirely free! If you don’t know how to add text/title to Adobe Premiere, here are steps to add text resources .
In this article, we will share with you 20 Free to download Title Templates for Premiere Pro.
- Part1: Top 15 Free Adobe Premiere Pro Title Templates
- Part2: Best 5 Premiere Pro Intro Templates Free Download
- Part3: How to Import and Customize Title Templates in Premiere
You may also like: 10 Free Star Wars Fonts to Make Your Video Amazing
Part 1: Top 15 Free Adobe Premiere Title Templates
Adding the finishing touches to a project, like creating the opening titles or end credits, is often not at the top of anyone’s priority list during the video editing process.
Nonetheless, making a unique opening sequence along with impressive animations in Adobe Premiere Pro can be a time-consuming endeavor, so instead of spending countless hours on producing a perfect combination of text and images, you can just download a title template from the Internet.
1 Premier Pro
Jarle Leirpoll runs this site, and it is a treasure trove of information, help, and advice on Premiere from a man who wrote the book (literally, it’s for sale on the site!) on Premiere.
His first title collection is consisting of 8 templates, including Lower Thirds templates, end credit template, and some special characters. However, it well worth a look around the site as there is plenty more free stuff including presets, and a whole range of tips and tricks to help with your editing.
Features:
- Free Premiere Pro templates to download
- Easy to import the title template to Premiere
- 100% ready to use
In case that you’re just a beginner of video editing software, you can start with Wondershare Filmora (Latest Filmora version 11) to add text to videos, which is powerful but easy-to-use for green hands. Download the Wondershare Filmora below.
There are hundreds of Text and Titles presets available in Filmora, which allows you to add titles, subtitles, scrolling end credits, lower 3d, and openers with ease. You can also apply some animation effects to the selected title presets.
Check the video below to find out how to add text to video with Wondershare Filmora.
Besides the built-in title presets, Wondershare Filmora (Latest Filmora version X) also provides more title templates in Filmstock , which offers lots of special effects templates.
Currently, there are Title Expansion Set, business title set, wedding title set, and lower third expansion set to download. Check the video below to watch the Title Expansion set templates.
Download Mac Version ](https://tools.techidaily.com/wondershare/filmora/download/ )
Learn more details about How to Add Text to Video with Filmora.
2 Richard Harrington
This is another site that offers templates for download but is also a great place to visit for ideas and information. Richard approaches Premiere from a photographer’s viewpoint, and so has a slightly different view on many topics that are well worth reading.
He has links to a sizable number of templates on Richard Harrington covering a range of styles and subjects, including DVD menus, animated text, and high-quality models. Still, his blog is updated regularly and often includes free downloads.
Features:
- Supports Adobe Premiere intro templates to use
- It includes various templates and presets on Windows and Mac
- More than title templates also has DVD menus and animated text
3 ProVideoCoalition
Another all-encompassing site has a huge amount of information and knowledge to be gained. The templates are just part of the story. They are available on Pro Video Coalition and include numerous files and even some free video content showing their implementation.
Also on this page are links to some other sites offering free content or advice on various aspects of Premiere, making it well worth a visit and definitely worth its place in this top 10.
Of particular interest on this site is the regularly updated news which focuses on the latest hardware and software announcements.
Features:
- Supports lower thirds for Adobe Premiere
- You can customize the Premiere Pro intro template free download
- You can create graphic elements
4 Coremelt
This is a commercial site that offers a wide variety of high-quality plugins and templates for several video editing platforms. However, we are on the lookout for that fabulous price of free here, so a little digging finds this page , here you will find ten templates from one of their best selling products offered entirely free.
All templates are quality professionally produced products and worth the visit alone. For anyone who is looking to take their editing output to the professional level, the commercial products on offer here are well worth a look, high quality, and a reasonable cost.
Features:
- It includes 3D text and motion graphics templates
- Free and safe download the Premiere template
5 Bestproaction
Another commercial site. This one has a range of free templates and presets to download for Premiere. Fourteen open items altogether can be downloaded. This site at least deserves a browse through their catalog after a download. The emphasis here is on low cost but high quality, useful templates, and plugins to suit any project.
Even for those of us with a limited budget, there may be something that catches the eye. It is an excellent site for browsing when looking for inspiration.
Features:
- Offers multimedia products like free Premiere Pro text, title templates
- Includes professional Premiere Pro template for videographers
- You can create graphic elements
6 FXFactory
This is another commercial site that has a smattering of very high-quality free downloads on offer, including a beautiful template for the original Star Wars movie style scrolling titles.
Again, it is worth browsing the catalog when you are on the site, but all the free products can be found here .
FX Factory has also created some great video tutorials on a variety of aspects of video production that are well worth a view when you are at the site.
Features:
- Free Premiere Pro effects templates to download
- Includes a step by step Premiere Pro tutorial
7 Creative Impatience
A fantastic site full of information, tips, and opinion on all aspects of video production, it’s a great place to spend some time, with the bonus of a bunch of free downloads for Premiere.
Of particular note are the tutorials, an excellent source of information and tricks that you may not have seen before, with their YouTube channel being a great source of free guidance for editors of any sort of experience.
Features:
- Apart from free Premiere Pro templates, you can also find blogs
- Easy steps to make Premiere Pro templates
- Safe and clean to use. All real
8Filmimpact
A commercial site is offering some great products at competitive prices. At first glance, this may not seem to be a useful place for our search for the free stuff.
However, all the products do have a free trial download, and as a bonus, the trial for pack one includes four free to use templates. They are quality products too, and well worth a look.
9 Style4Type
Style4Type is an exciting site regularly updated with new free templates as well as offering technical advice and having further templates available as commercial products.
And to the side is even a free download for a PDF file that walks you through installing and using the templates within Premiere once you have them.
There are already a lot of free templates on offer covering a wide variety of styles, but they are added to with regularity, so it is a site to bookmark for the future.
Features:
- Free title templates to use including texture templates
- Professional tools to better your video
10 Premiere Beat
Lots of information on this site as its been running for a decade, it is a website that imparts a wealth of knowledge along the way on not just video editing but music.
The pack includes 21 Premiere title templates to use. Another site that you will want to visit again and again.
Features:
- High-quality Premiere Pro templates to download
- A large number of Premiere templates to use
11 Clean Elegant Rotation Title
It is a clean title template without unnecessary parts. If you like simple titles, this one is best for you. You can customize in Premiere easily with a few clicks. For beginners, it also includes free tutorials to use.
Features:
- Simple and clean Premiere title templates
- Customizable in Premiere
12 Unfolding Titles
It is a clean title template with an unfolding effect. Each text has two unfolding effects, which are convenient to use with customization. It supports 4K and HD versions. In this pack, it wons 10 title formats. After importing Premiere, you can also change text size.
Features:
- 20 unfolding title effects
- Supports rendering your video
13 Orange83
These are five modern title packs for Premiere. With it, you don’t need to use After Effects as you can import them to edit. The best part is you can include your logo and other stuff you like.
Features:
- Include 5 title packs
- Modern and clean titles
14 Video Intro Templates - Premiere Pro intro template free download
It is a free download Premiere Pro intro template that you can add to your video. It is highly recommended to use promotion and commercial video.
This intro template can be adjusted after you import it to Premiere Pro. This Premiere Pro intro template is HD, so you don’t need to worry about the whole video quality.
Features:
- 1920X1080 (HD) is supported
- This intro template doesn’t include built-in music
15 Elegant Promo - another Premiere Pro intro template free to use
It is intro template for Premiere Pro is modern and free to use. The whole style is young and energetic, which will give viewers a fresh new feeling. It includes 12 images and 26 text layers, and all of them are free to download.
You can use it for your presentation, promotional video, and product video. Besides, it doesn’t require a plug in to use this intro template in Premiere Pro.
Features:
- It includes animated intro elements.
- Use an HD intro template to make a popular video.
These are free templates, and they are enough to get anyone up and running with a new project. As said before, with the commercial enterprises that offer freebies, it’s always worth checking out their paid for output as well, you may not be in the market for it right now, but something may stick for a later time.
Part 2: Bonus: Best 5 Premiere Pro Intro Templates Free Download
Even though all websites we featured in this article offer some free intro templates for Adobe Premiere Pro. However, it is still a much better solution to buy a subscription plan on a platform if you are working on a large number of projects each month.
Let’s see which websites you can use to download the intro and title templates for Premiere Pro.
16. Motion Array
In addition to an impressive library of intro templates, Motion Array offers presets, sound effects, royalty-free music, and stock footage.
Furthermore, you can choose the software version to make sure that the templates you download can be used with the version of Adobe Premiere Pro you have installed on your computer.
The website provides you with powerful search tools, so you can select the resolution of the template, up to 8K, or choose which types of templates are going to be displayed.
Using the free subscription plan can limit your options since you’ll only be able to download free templates, and your upload storage will be limited to just 1GB.
The Pro subscription plan that can be purchased for $54 per month will grant you access to an almost endless selection of title templates as well as a huge selection of plugins for Adobe Premiere Pro.
17. Cinecom – Simple Intro for Premiere Pro
It is a designer pack that features ten pre-animated lower-thirds intro templates. You can change the duration of the font and color of the text in each template, and you can choose if you want to download a 1080 or the 4K version of the designer pack.
The templates are compatible with CS6, CC2013, CC2014, and CC2016 versions of the Premiere Pro. The Simple Titles pack can be easily installed, as you just have to drag and drop it into the software.
However, before you can download these title templates, you have to subscribe to Cinecom’s mailing list.
Even though this can be a bit inconvenient, it is very well worth the trouble since you’ll be able to transform or build upon the intro templates and use them freely in all videos you edit in Adobe Premiere Pro.
18. EnvatoElements
You can find much more than intro templates on the EnvatoElements platform since you can choose from 740.000 items you can use for anything from creating a WordPress website to preparing your next business presentation.
The Video Templates category alone features over 4000 items, including Logo Stings or Infographics assets.
There are nearly one hundred available intro templates for Adobe Premiere Pro, but downloading any of them requires you to create an account and purchase a subscription plan.
Prices start from $16.50 per month, and packages include virtually unlimited access to stock photos and videos, video templates, and much more. The EnvatoElements platform also offers assets that can be used with Final Cut Pro, Adobe After Effects or Apple Motion.
19. Videohive
Videohive is a part of the Envato Market platform that also features Web Themes and Templates, Code, Audio, or Graphic sections. It is free to use, but only a limited amount of assets can be downloaded for free.
To download an item, you must purchase it, and prices can range from $16 to $50 for a single title template.
Videohive is also a great source of title templates for Adobe After Effects, as it offers more than 5000 titles and intros that are compatible with this software.
Furthermore, you can download presets for both Premiere Pro and After Effects that can be used to create stop-motion animations, perform color correction, or make the footage look like it was captured with a VHS camera.
20. RocketStock
This option is best suited for video editors who want to create their intros because RocketStok’s Cinematic Style Library extends the scope of options provided by Premiere Pro.
Downloading all fonts except Helvetica Neue is free, but you must check which fonts you can use in commercial projects. You will have no trouble installing the fonts since you can just double-click on the font and follow the on-screen instructions.
Once you’ve installed all the fonts from the library, you can use them to replace the software’s default library. You just have to click on the Replace Style Library option that can be accessed from Premiere Pro’s Title Style tab.
If you don’t feel comfortable creating your titles or if you simply don’t have the time to create your own titles, the Free Cinematic Style Library is not the best choice for you.
On the other hand, Premiere Pro’s users who don’t often use title templates can benefit from downloading RocketStock’s intro library.
Part 3: How to Import and Customize Title Templates in Premiere
If you download the template, all the title templates support customization. You can change its size, font, color, and add 3D effects.
It is easy to import and use it to touch up your video. Check out the steps below to know how to import title templates quickly.
- Install the title template. Choose one template you like and download it to your PC. Remember to unzip it before importing it. Now install them.
- Import the title template. You just need to go to click Effects at the top. Then at right, you will find Presets in the effects section.
- Right-click on presets, and choose Import Presets. If the title template format is .mogrt, you need to open it in Essential Graphics Panel. At the bottom right corner, click the plus icon to import the title template and install it.
- Customize the title template. Once the title template is imported, drag it to the timeline. Click the Editing tab. Here you can customize colors, text, opacities, and positions. There are more options for you to explore.
- You can also copy and paste the title template to another place in the timeline. If you change one place of the pasted template, the original one will remain the same.
Note: each version of Premiere’s interface will look different, but the workflow is similar.
Conclusion
Using title templates can help you achieve a certain visual style faster, so you don’t have to spend a lot of time looking for a perfect background or animating the text.
The Internet provides almost unlimited video editing resources, but not all of these resources can be acquired for free.
Which website you will choose as a source of fresh title templates depends on how often you work on new projects in Adobe Premiere Pro.
If you want to make professional video editing and tired of Premiere, try Filmora! It includes various titles templates to use.
You can sync audio automatically, use detailed color correction to make your title and video like a movie. Download it now (FREE)!
Benjamin Arango
Benjamin Arango is a writer and a lover of all things video.
Follow @Benjamin Arango
Say Goodbye to Shaky Footage: Top Video Stabilization Apps
Stabilize Shaky Videos After Recording Easily
Wondershare Filmora is one of the most popular video editing software among YouTubers , which provides the video stabilization tool to remove shake from videos within one-click. Download and have a try now.
Gone are the days when creating a movie or short video required a high level of technical expertise and the ability to handle video editing and related chores. With today’s smartphone cameras, anyone can shoot and capture video.
Following the introduction of these breakthrough technologies and their everyday applications, video editing has become a simple task, giving you an understanding of which video stabilizer to use. There are several free and premium video stabilizer software solutions available in the market.
These video editing programs have varied features, prices, and some are difficult to use. It doesn’t matter if you’re a beginner or an expert; there’s a lot of excellent software available. This article will give you a fast rundown of the best and most outstanding free and commercial Video Stabilizer App available.
In this article
01 What is Video Stabilization?
02 Best Video Stabilizer Apps for iPhone and Android
03 What Features Should I Look for in a Video Stabilizer App?
Part 1: What is Video Stabilization?
Video stabilization refers to algorithms that remove undesirable camera tremors and jitters caused by hand jiggling and the unintended camera panning to improve video quality.
Without affecting moving objects or purposeful camera panning, video stabilization technology is used to minimize visual quality loss by decreasing undesired shaking and twitches of an image/video capture equipment. This is especially important in portable imaging equipment, which is more susceptible to vibrations due to its smaller size.
Excessive hand wobbling and purposeful camera panning often result in inconsistent photos, while undesired camera position variations result in unstable image sequences. Video stabilization techniques maintain good visual clarity and steady video footage even under less-than-ideal settings.
It is not always feasible to re-enact a video, and in those cases, we must make amends with what we have. This approach will necessitate particular video stabilization software, which will increase the movie’s transparency, allowing more innovation and modification.
Part 2: Best Video Stabilizer Apps for iPhone and Android
Here are the best video stabilizer apps for iPhone and Android for you to choose from.
1. Emulsio

Emulsio is a fantastic iPhone and iPad video stabilizer software for smoothing down jittery footage. You may modify the stabilizer strength using the tool’s stabilization function. Without leaving the application, you may examine the stabilized footage to the original video. Emulsio provides tools for editing and cutting footage and repairing shaky films.
Emulsio allows you to import movies from any location. It offers camera motion correction in horizontal, vertical, and rotating directions and is capable of removing rolling shutter distortion.
Overall, this app provides accurate control as well as previewing capabilities. It offers time-editing capabilities as well as live comparison capabilities. Finally, you may send altered films by email or social media. However, if you want to remove the watermark, you need to pay.
Using Emulsio to stabilize video on iPhone is easy, all you need to do is importing the video to analyse, and the app will analyse the video for you automatically. After analysing, the video will be stabilized accordingly, and you can then modify it based on your needs.
Emulsio also provides some additional settings, such as stabilization profile, rolling shutter, avoid black borders, and discontinuity handling to improve the stabilization result.
2. Shaky Video Stabilizer

The second one on our list is the Shaky Video Stabilizer app for Android phones, which is simple to use and straightforwardly transforms your video into a much more stabilized one. You can now transform a shaky video into a smooth and motion-stabilized one. Watch the results, which seems like it was shot with a gimbal. There are no watermarks! It’s possible to share it right from your phone. A steady video is more enjoyable to view and post on social media.
It’s easy to use Shaky Video Stabilizer app to remove the shakiness. Choose a video from your library. Begin the process of stabilization, and use the Background or wait. After the video is stabilized, save the result. And now you can examine the video’s Before and After result.
3. VideoStabilizer for KineMaster

KineMaster is a common choice amongst expert YouTubers and social networking experts who want to incorporate more sophisticated editing tools into their films. The VideoStabilizer for KineMaster app is for iPhone and Android both, which makes your videos smoother! This app offers all of the essentials and a large selection of professional editing tools and effects not seen in other apps.
At KineMaster, you can change the color of your movies and improve their visual quality with the press of a button. Its loudness tools take your audio to a professional level, allowing you to easily add voice-overs, background music, and other sound effects.
Advanced capabilities include keyframe animation tools for adding movement to your layers and speed control and quality blending options. Your videos may be exported in 4K or 2160p and directly uploaded to social networking sites.
How to use KineMaster to stabilize video? Well, it is easy as well. Tap the Add button to add a video and then tap Next to continue. And this app will analyse the video automatically. After analysed, you will see the original and the stabilized result in the screen. Tap the Save button and set the quality to High from Medium or Low to Medium, depending on your preference.
4. PowerDirector

The PowerDirector app has many options that allow you to create the ideal film from beginning to end—all on your Android hone or tablet.
Speed adjustment, keyframe controls for transparency and placement, animated text and titles, and video stabilization are just a few of the easy-to-use editing capabilities included in PowerDirector.
You can create fantastic effects with filters, overlays, and blending modes, and the app’s green screen chroma-key editor allows altering your background very simple. This program also includes several fine-tuning tools for splicing sequences, rotating films, and adjusting brightness, color, and saturation. However, if you want to unlocks more complex templates and editing tools, you may need to pay for the premium plan.
Stabilizing videos with PowerDirector on Android phone is not complex. Follow the steps below to find out how.
Step 1: Install the PowerDirector app on your smartphone
Step 2: Launch the app, create a new project, then upload the video you wish to stabilize to it.
Step 3: Select the video from the Timeline and then hit the edit (pencil) icon in the upper-left corner.
Step 4: Simply click the Stabilizer button to discover an option to stabilize the video.
5. Deshake

Deshake offers desktop-quality video stabilization to your iPhone, iPad, and iPod touch, so you can fix all those shaky-hand movies of your favorite moments.
Choose a film from your picture gallery and tweak the parameters while seeing the results in real-time on your phone! It’s super-fast due to a next-generation stabilization technology that surpasses most pro programs and has been thoroughly tested on genuine home movies like yours.
6. LumaFusion

LumaFusion is among the “pro” iPad apps that people frequently request. The sophisticated video editor uses the Apple Pencil and touch screen for people who wish to edit on the move. At the same time, Apple has yet to confirm whether or not Final Cut will be released for iPadOS.
LumaFusion is so beautifully built that you can film and edit on an iPhone while on location and make professional-looking shows without having to transfer all of your clips to an iPad or Mac.
You would save a huge amount of time and work by filming and editing on the same device instead of transferring large video files to another place.
To stabilize video footage with LumaFusion, double tap on the footage in the timeline, and in the Clip Editor pane, tap on the Stabilize button to start stabilizing the video.
Part 3: What Features Should I Look for in a Video Stabilizer App?
There are a lot of features to look for when choosing a video stabilizer for your videos. The application for your iPhone or Android should be easy-to-use. It should also allow the stabilization strength adjustment. Further, never compromise on video quality. Choose one that produces high-quality video results.
The stabilizer app should offer a large variety of format support. Plus, it should have many other editing tools to enhance photos or videos for your future projects.
If you are editing videos on Windows and Mac computers, you can try Wondershare Filmora , which is an easy to use and powerful video editing software for all video content creators. Stabilize video in Filmora video editor is easy. All you need to do is import videos to timeline, enable the Video Stabilization tool, and the video is stabilized automatically.
For Win 7 or later (64-bit)
For macOS 10.12 or later
Conclusion
Well, there you have it – your ideal Video Stabilizer App. Oftentimes, your shaky videos kill the entertaining side of the video. If the video is too shaky, the viewer would lose interest soon and not watch the full video. But that’s not the case anymore. With the advanced technology and so many apps on the market, stabilizing a video has never been easier!
Gone are the days when creating a movie or short video required a high level of technical expertise and the ability to handle video editing and related chores. With today’s smartphone cameras, anyone can shoot and capture video.
Following the introduction of these breakthrough technologies and their everyday applications, video editing has become a simple task, giving you an understanding of which video stabilizer to use. There are several free and premium video stabilizer software solutions available in the market.
These video editing programs have varied features, prices, and some are difficult to use. It doesn’t matter if you’re a beginner or an expert; there’s a lot of excellent software available. This article will give you a fast rundown of the best and most outstanding free and commercial Video Stabilizer App available.
In this article
01 What is Video Stabilization?
02 Best Video Stabilizer Apps for iPhone and Android
03 What Features Should I Look for in a Video Stabilizer App?
Part 1: What is Video Stabilization?
Video stabilization refers to algorithms that remove undesirable camera tremors and jitters caused by hand jiggling and the unintended camera panning to improve video quality.
Without affecting moving objects or purposeful camera panning, video stabilization technology is used to minimize visual quality loss by decreasing undesired shaking and twitches of an image/video capture equipment. This is especially important in portable imaging equipment, which is more susceptible to vibrations due to its smaller size.
Excessive hand wobbling and purposeful camera panning often result in inconsistent photos, while undesired camera position variations result in unstable image sequences. Video stabilization techniques maintain good visual clarity and steady video footage even under less-than-ideal settings.
It is not always feasible to re-enact a video, and in those cases, we must make amends with what we have. This approach will necessitate particular video stabilization software, which will increase the movie’s transparency, allowing more innovation and modification.
Part 2: Best Video Stabilizer Apps for iPhone and Android
Here are the best video stabilizer apps for iPhone and Android for you to choose from.
1. Emulsio
Emulsio is a fantastic iPhone and iPad video stabilizer software for smoothing down jittery footage. You may modify the stabilizer strength using the tool’s stabilization function. Without leaving the application, you may examine the stabilized footage to the original video. Emulsio provides tools for editing and cutting footage and repairing shaky films.
Emulsio allows you to import movies from any location. It offers camera motion correction in horizontal, vertical, and rotating directions and is capable of removing rolling shutter distortion.
Overall, this app provides accurate control as well as previewing capabilities. It offers time-editing capabilities as well as live comparison capabilities. Finally, you may send altered films by email or social media. However, if you want to remove the watermark, you need to pay.
Using Emulsio to stabilize video on iPhone is easy, all you need to do is importing the video to analyse, and the app will analyse the video for you automatically. After analysing, the video will be stabilized accordingly, and you can then modify it based on your needs.
Emulsio also provides some additional settings, such as stabilization profile, rolling shutter, avoid black borders, and discontinuity handling to improve the stabilization result.
2. Shaky Video Stabilizer
The second one on our list is the Shaky Video Stabilizer app for Android phones, which is simple to use and straightforwardly transforms your video into a much more stabilized one. You can now transform a shaky video into a smooth and motion-stabilized one. Watch the results, which seems like it was shot with a gimbal. There are no watermarks! It’s possible to share it right from your phone. A steady video is more enjoyable to view and post on social media.
It’s easy to use Shaky Video Stabilizer app to remove the shakiness. Choose a video from your library. Begin the process of stabilization, and use the Background or wait. After the video is stabilized, save the result. And now you can examine the video’s Before and After result.
3. VideoStabilizer for KineMaster
KineMaster is a common choice amongst expert YouTubers and social networking experts who want to incorporate more sophisticated editing tools into their films. The VideoStabilizer for KineMaster app is for iPhone and Android both, which makes your videos smoother! This app offers all of the essentials and a large selection of professional editing tools and effects not seen in other apps.
At KineMaster, you can change the color of your movies and improve their visual quality with the press of a button. Its loudness tools take your audio to a professional level, allowing you to easily add voice-overs, background music, and other sound effects.
Advanced capabilities include keyframe animation tools for adding movement to your layers and speed control and quality blending options. Your videos may be exported in 4K or 2160p and directly uploaded to social networking sites.
How to use KineMaster to stabilize video? Well, it is easy as well. Tap the Add button to add a video and then tap Next to continue. And this app will analyse the video automatically. After analysed, you will see the original and the stabilized result in the screen. Tap the Save button and set the quality to High from Medium or Low to Medium, depending on your preference.
4. PowerDirector
The PowerDirector app has many options that allow you to create the ideal film from beginning to end—all on your Android hone or tablet.
Speed adjustment, keyframe controls for transparency and placement, animated text and titles, and video stabilization are just a few of the easy-to-use editing capabilities included in PowerDirector.
You can create fantastic effects with filters, overlays, and blending modes, and the app’s green screen chroma-key editor allows altering your background very simple. This program also includes several fine-tuning tools for splicing sequences, rotating films, and adjusting brightness, color, and saturation. However, if you want to unlocks more complex templates and editing tools, you may need to pay for the premium plan.
Stabilizing videos with PowerDirector on Android phone is not complex. Follow the steps below to find out how.
Step 1: Install the PowerDirector app on your smartphone
Step 2: Launch the app, create a new project, then upload the video you wish to stabilize to it.
Step 3: Select the video from the Timeline and then hit the edit (pencil) icon in the upper-left corner.
Step 4: Simply click the Stabilizer button to discover an option to stabilize the video.
5. Deshake
Deshake offers desktop-quality video stabilization to your iPhone, iPad, and iPod touch, so you can fix all those shaky-hand movies of your favorite moments.
Choose a film from your picture gallery and tweak the parameters while seeing the results in real-time on your phone! It’s super-fast due to a next-generation stabilization technology that surpasses most pro programs and has been thoroughly tested on genuine home movies like yours.
6. LumaFusion
LumaFusion is among the “pro” iPad apps that people frequently request. The sophisticated video editor uses the Apple Pencil and touch screen for people who wish to edit on the move. At the same time, Apple has yet to confirm whether or not Final Cut will be released for iPadOS.
LumaFusion is so beautifully built that you can film and edit on an iPhone while on location and make professional-looking shows without having to transfer all of your clips to an iPad or Mac.
You would save a huge amount of time and work by filming and editing on the same device instead of transferring large video files to another place.
To stabilize video footage with LumaFusion, double tap on the footage in the timeline, and in the Clip Editor pane, tap on the Stabilize button to start stabilizing the video.
Part 3: What Features Should I Look for in a Video Stabilizer App?
There are a lot of features to look for when choosing a video stabilizer for your videos. The application for your iPhone or Android should be easy-to-use. It should also allow the stabilization strength adjustment. Further, never compromise on video quality. Choose one that produces high-quality video results.
The stabilizer app should offer a large variety of format support. Plus, it should have many other editing tools to enhance photos or videos for your future projects.
If you are editing videos on Windows and Mac computers, you can try Wondershare Filmora , which is an easy to use and powerful video editing software for all video content creators. Stabilize video in Filmora video editor is easy. All you need to do is import videos to timeline, enable the Video Stabilization tool, and the video is stabilized automatically.
For Win 7 or later (64-bit)
For macOS 10.12 or later
Conclusion
Well, there you have it – your ideal Video Stabilizer App. Oftentimes, your shaky videos kill the entertaining side of the video. If the video is too shaky, the viewer would lose interest soon and not watch the full video. But that’s not the case anymore. With the advanced technology and so many apps on the market, stabilizing a video has never been easier!
Also read:
- Updated In 2024, Want to Make an Invitation Video Online without Downloading Any Software? In This Article, I Will Share some Online Video Invitation Makers that You Can Try on the Market Right Now
- In 2024, The Mini Moviemaker A Fun Guide for Kids to Make Their Own Movies
- New 2024 Approved Get Vertical Expert Tips for Smartphone Video Production
- Get Rid of TikTok Watermarks The Best Online Removal Methods
- New The Ultimate Guide to Converting Text to Voice Recordings for 2024
- Updated 2024 Approved Top 10 Free Online Video Loopers
- 2024 Approved From Cluttered to Clear A Beginners Guide to Freeing Up Space for FCPX
- 2024 Approved Flip, Rotate, and Enhance Top 10 Video Editing Software
- New 2024 Approved Best Video Editing Software for Movie Trailers on Mac and PC
- Updated The Quest for Quality How to Choose the Best FLAC Converter for 2024
- Updated Background Blur Made Easy Top Free Online Photo Editing Resources for 2024
- New In 2024, 28 Essential Video to GIF Converters for Social Media Enthusiasts
- New In 2024, Auto-Reframe Video Editing Tools Top Picks
- Updated Ditch the Hassle 10 User-Friendly Video Joiner Alternatives
- Updated Bring Back the 80S Top VHS-Style Filter Apps for Mobile Devices
- In 2024, Animate Your World 8 Must-Try Video Animation Apps for Mobile
- Updated 2024 Approved Expert Picks Top MKV Trimmers for Mac This Year
- In 2024, The Best Video Reverse Editors Online
- Updated Selecting the Best YouTube to MP4 Converter A Quick Guide
- Updated In 2024, Top 10 Free Whiteboard Animation Tools for Windows and Mac
- Updated 2024 Approved Top 3D Animation Tools Free and Premium Options Compared
- Updated The Cloud Stop Motion Handbook Tips, Tricks, and Top Picks for 2024
- 2024 Approved TikTok Visuals 101 Understanding Aspect Ratios and Dimensions for Maximum Impact
- Updated The Ultimate List 12 Best Animation Software for Online Video Creation for 2024
- New 2024 Approved Bring Your Ideas to Life Top 5 Online Stop Motion Animation Tools
- Updated Top Video Editing Tools for Newbies Free and Paid Options for 2024
- New Top Video Merger Options Easy and Efficient Solutions for 2024
- 2024 Approved Unlock the Power of Animation Converting Digital Videos Into Cartoons Made Easy
- New In 2024, Kapwing Online Video Trimmer Tips and Tricks for Perfect Edits
- Top 8 Facebook MP3 Converter Online
- New The Ultimate List Top Websites for Downloading PC Games
- Updated In 2024, Best Music Video Makers From Photos (Top 14)
- New Level Up Your Recording 3 Simple and Effective Methods for 2024
- Transform Your Audio Into Visual Masterpieces Online
- Updated In 2024, From Forward to Reverse The Ultimate TikTok Video Tutorial
- Updated In 2024, Transform Your Photos The Best Vignette Editing Apps for Mobile
- In 2024, Best Free Green Screen Video Editing Apps for Android and iOS Users
- Create Engaging Videos on Mac Top Video Making Software for 2024
- New 2024 Approved Get Professional Results for Free Top 10 WebM Video Editors
- New 2024 Approved Webs Finest Vertical Video Editors for Online Creators
- New In 2024, Video Editing on a Mac? Here Are the Best Software Choices
- Updated 2024 Approved Is Final Cut Express Enough, or Do You Need the Power of Pro?
- In 2024, Learn and Save Final Cut Pro Education Pricing You Wont Want to Miss
- 2024 Approved Wax 101 How to Edit Videos Like a Pro with This Free Editor
- New Unlocking the Secrets of MP3 to MP4 Conversion Tips and Tricks for 2024
- 10 Essential Android Video Editor Apps for Chromebook
- Updated AVS Video Editor What You Need to Know Before Buying for 2024
- New 2024 Approved Video Cropping 101 A Beginners Guide to Using Avidemux
- 2024 Approved Mastering Facebook Live Your Complete Guide to Successful Streaming
- In 2024, Forgot Locked Apple iPhone XS Max Password? Learn the Best Methods To Unlock | Dr.fone
- In 2024, Easy Ways to Manage Your Oppo Reno 8T 5G Location Settings | Dr.fone
- In 2024, Is pgsharp legal when you are playing pokemon On Xiaomi Redmi A2? | Dr.fone
- In 2024, Is pgsharp legal when you are playing pokemon On Xiaomi Redmi Note 13 Pro 5G? | Dr.fone
- Best Anti Tracker Software For Oppo F25 Pro 5G | Dr.fone
- How to Rescue Lost Videos from Samsung Galaxy S23 FE
- In 2024, How To Unlock Apple iPhone 6 Plus Without Swiping Up? 6 Ways
- In 2024, Troubleshooting Error Connecting to the Apple ID Server From iPhone XR
- New In 2024, 7 Best Explainer Video Makers You May Like
- How to use iSpoofer on Huawei Nova Y71? | Dr.fone
- 8 Safe and Effective Methods to Unlock Your Apple iPhone 14 Plus Without a Passcode | Dr.fone
- How To Do OnePlus Nord 3 5G Screen Sharing | Dr.fone
- Demystifying AI Game Generators From Definition to Distinction
- Latest Guide on iPad 2/3 and Apple iPhone X iCloud Activation Lock Bypass
- Best Android Data Recovery - Retrieve Lost Contacts from Honor .
- Sim Unlock Samsung Galaxy XCover 6 Pro Tactical Edition Phones without Code 2 Ways to Remove Android Sim Lock
- In 2024, How To Change Honor Magic 6 Pro Lock Screen Clock in Seconds
- In 2024, 3 Ways to Track Oppo Reno 9A without Them Knowing | Dr.fone
- In 2024, Remove the Lock Screen Fingerprint Of Your Realme 12 Pro 5G
- In 2024, Full Guide on Mirroring Your Tecno Pova 6 Pro 5G to Your PC/Mac | Dr.fone
- In 2024, Forgot Your Apple ID Password and Email From Apple iPhone 11? Heres the Best Fixes
- Gif to Svg, Svg to Gif, Convert Gif to Svg, Animated Svg to Gif, Convert Svg to Gif, Svg to Gif Converter, Svg to Gif Animation, Svg Animation to Gif, Gif to Svg Converter for 2024
- Updated Create Lip Sync TikTok Videos Without Installing Any App for 2024
- How to Fix Error 495 While Download/Updating Android Apps On Xiaomi Redmi Note 12 Pro 4G | Dr.fone
- In 2024, 4 solution to get rid of pokemon fail to detect location On Tecno Spark 20 | Dr.fone
- New In 2024, How to Enable the Text to Speech Function on iPhone
- In 2024, Full Guide to Bypass Motorola Moto G14 FRP
- Easily Unlock Your Gionee Device SIM
- In 2024, Detailed guide of ispoofer for pogo installation On Lava Yuva 3 | Dr.fone
- How To Remove the Two Factor Authentication From iPhone SE
- In 2024, How to use Snapchat Location Spoofer to Protect Your Privacy On Apple iPhone 14 Plus? | Dr.fone
- In 2024, 3 Effective Ways to Unlock iCloud Account Without Password On Apple iPhone 11
- How can I get more stardust in pokemon go On Tecno Spark Go (2023)? | Dr.fone
- Best Samsung Galaxy A14 4G Pattern Lock Removal Tools Remove Android Pattern Lock Without Losing Data
- Can I recover permanently deleted photos from Samsung Galaxy A05
- In 2024, How to Unlock ZTE Axon 40 Lite Phone Password Without Factory Reset?
- In 2024, Apple iPhone XS Backup Password Never Set But Still Asking? Heres the Fix
- Updated From Script to Screen Easy Movie Production in No Time for 2024
- CatchEmAll Celebrate National Pokémon Day with Virtual Location On Apple iPhone 6 | Dr.fone
- In 2024, A Guide Infinix Smart 8 HD Wireless and Wired Screen Mirroring | Dr.fone
- How to Intercept Text Messages on Apple iPhone 13 | Dr.fone
- In 2024, Is Fake GPS Location Spoofer a Good Choice On Honor V Purse? | Dr.fone
- Fixing Foneazy MockGo Not Working On Huawei Nova Y71 | Dr.fone
- In 2024, Reasons why Pokémon GPS does not Work On Vivo X100 Pro? | Dr.fone
- How to Track WhatsApp Messages on Samsung Galaxy M14 5G Without Them Knowing? | Dr.fone
- Title: Updated In 2024, Top-Rated Mac MP3 Conversion Tools A Comprehensive Guide
- Author: Amelia
- Created at : 2024-04-29 19:56:20
- Updated at : 2024-04-30 19:56:20
- Link: https://ai-driven-video-production.techidaily.com/updated-in-2024-top-rated-mac-mp3-conversion-tools-a-comprehensive-guide/
- License: This work is licensed under CC BY-NC-SA 4.0.
